Showing posts with label Canvas. Show all posts

Tuesday, March 3, 2015

Growing Up Too Fast - Mixed Media Painting


For the longest time I have been wanting to paint a mixed media painting. After spending many hours watching how to You Tube videos, and much encouragement from my friend and artist Kathy Helton, I finally got the courage to try it out!  I can already tell you that I am addicted and can't wait to create my next painting! 

What started off as a blank canvas and scrap pieces of paper, eventually morphed into a painting of my daughter, well her futuristic self I would say. The face I drew to use on my painting reminded me of her and so I let it guide the rest of my painting. My daughter Maia is 8 years old but sometimes she acts like shes 18, where has my baby gone?... this is happening way too fast for me! I guess this painting became a reflection of my feelings. 

Well what do you think?!?
 I'll tell you what I think.... I'm in LOVE with it and so is my daughter! I am SO happy with how the painting turned out :)

Hidden in the painting are the letters of my daughter's name. She hasn't found them yet and I'm not going to tell her either... one day she will realize that they are there and hopefully feel surprised.


Take a look at how the painting came together.


For those interested in the supplies I used, here is my list:
1, 9x9 canvas, scrap paper, modge podge, paint brushes, acrylic paints, scissors, stamps, ink pads, copic markers, gel pens, buttons, rhinestones, sequins, blow dryer (if you're impatient like me). Oh, and really dirty hands!

The picture below shows you what the finished painting looks like up on the wall.
I love how a really inexpensive IKEA frame completes the painting! Want to know how to do the same? Here is my secret... Take the glass off the front of the shadow box frame and place the glass behind the mat, this way you can keep the glass together with the frame if you ever what to change the picture out. Then all I did was hot glue the painting to the center of the mat. Voila, now you have a gallery like painting!


Thanks for stopping by!
Happy Crafting  :)


Monday, August 13, 2012

Maia's Room Make Over - DIY Desk Station - Part 4

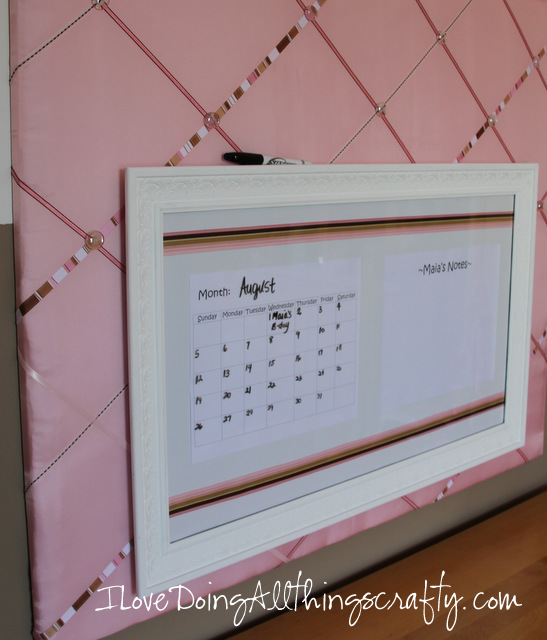
Today I'm going to share with you a project I made for my daughter's room. Above her desk, all there was, was a bare wall. You all know what happens when there is a bare wall behind a desk? Yes, you guessed it... scratches, dents, crayons, holes in the wall. Well, that was my fear of having a 6-year-old next to a freshly painted wall, lol! 

At first, I thought I would just hang up an eraser or corkboard up, but then I thought I would like to see something a bit prettier than I could coordinate with her room.  So this is what I created!  Pretty, right? The best thing is that it's so functional!

Maia's Room Make Over - DIY Desk Station - Part 4

Here is how I did it!


Supplies I used - Art canvas, picture frame (bought a while ago in Micheal's clearance bin, knew it would come in handy one day!), acrylic paint, hot glue, batting, fabric, glass beads, and ribbon.


I moved the hooks from the frame to where I needed them to be.


I needed to hang this picture frame on the wood pieces of the canvas so I had to figure out how to center it on the canvas.


Pretty easy to feel where the wood was through the canvas so I found my center and placed nails on each side, for where the picture frame would hang.


It would have been way easier if I had just spray painted my frame, but I didn't have any on hand so acrylic paint it was! It took 3 coats. Thank goodness it was a hot day, so it dried up pretty fast!


Then I laid the batting down on the canvas and just cut around it.


Did the same with the pink fabric.


I used hot glue to secured the edges to the frame. My staple gun just broke, this worked just as well!


Poke the nails through the fabric, so I knew where to hang my frame.


Put the picture frame back together, I used some ribbon to embellish it and just printed out a basic calendar and another piece of paper that read Maia's Notes. The glass from picture frames makes perfect dry-erase boards!


Decorated the canvas with crisscrossing some ribbon, and then added some glass beads as buttons where the ribbon intersected. They look so cute!

Maia's Room Make Over - DIY Desk Station - Part 4

And here it is again! My daughter loves this idea! She is always drawing on it and soon it will be filled up with her pictures and artwork! 

Hope you liked this post! 
Happy crafting :)

Friday, June 15, 2012

Our Family Tree | DIY Mixed Media Canvas Art Piece

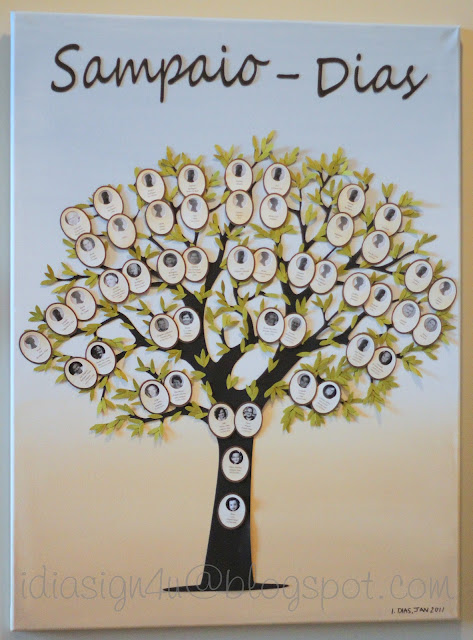
For a while now, well I guess ever since I started the blog I've been wanting to share one of the first crafts I made using my Cricut! It hangs as a piece of art in our hallway, it is such a unique piece. I always love to stop and stare at it!

For those that don't know I am of Portuguese descent. My parents immigrated to Canada from Portugal when I was 2 in 1978. My husband's family is also Portuguese, so for my children, I thought it would be interesting to create this so that they could see their roots.

I guess this project was many years in the making,  every time we had gone back to visit our grandparents I would gather more data for the family tree.  So here is how it turned out!  (I did not include any siblings, because as you can imagine there would not be enough room on the canvas!) 

WARNING... this is a LONG WINDED POST! LOL!!!

Our Family Tree | DIY Mixed Media Canvas Art Piece by ilovedoingallthingscrafty.com

Since I made this piece a while ago and had no blog at the time, I didn't take pictures of the steps it took to make this. I will try my best to explain what I did though. 

The first thing I did was paint my canvas, this one measures 32X24. I really wanted a washed out antique look, so I sprayed water all over the canvas and applied my acrylic paints to it. Light blue for the sky and a light brown for the ground. Once I had both the colors on the canvas I blended the two colors where they met in the middle to create the horizon.

Next came the fun stuff! I found the image of this tree on Google (sorry don't remember exactly where). I then traced the image with the SCAL program. Then I enlarged it to the size I wanted. Since the canvas was way larger than the cutting mat, the tree was made by cutting 4 pieces and overlapping them in some areas. I adhered all the pieces of the tree to the canvas using hot glue. Once my tree was all assembled and glued down I cut out the leaves. The leaves I created from the basic shapes library. When I glued down my leaves I strategically placed them to cover up the paper joints of the tree. 

Our Family Tree | DIY Mixed Media Canvas Art Piece by ilovedoingallthingscrafty.com

The next part was the hardest... Since both sides of our families have the name "Oliveira", I wanted to make the tree look like an olive tree since Oliveira means olive in English. So I thought it would look cute if the frame of the picture looked like an olive, well kinda, sort of maybe not really!! ;) 

To do this I cut out two ovals, one larger than the other. In SCAL I  created a template for the top part of the frame which turned out to be 5 olives/line and 4 rows of them for a total of 20 frames per sheet. Then in using Microsoft Word, I did my best to place the names at the bottom of the frames. (Took a few tries to line it all up... I would place the template on top of the sheet I printed to make sure it all lined up.) Once everything was in line I cut out the paper I had just printed on... 

***This would of all just been so much easier if the Silhouette Cameo had been invented...  I guess I was just ahead of my time, LOL! ;)***

Our Family Tree | DIY Mixed Media Canvas Art Piece by ilovedoingallthingscrafty.com
Once all the frames were cut out, I glued the top of the olive to the bottom brown oval. I only applied glue to the bottom part of the olive frame. 

Our Family Tree | DIY Mixed Media Canvas Art Piece by ilovedoingallthingscrafty.com

This left the top part accessible to change pictures... especially of the kids as they get older, I can stay this age for a while, cause I never age! Muhahaaa!!!

Our Family Tree | DIY Mixed Media Canvas Art Piece by ilovedoingallthingscrafty.com

For those family members that I had no picture for I just used a silhouette. The gentleman with thick sideburns would be my Great, Great, Grand Father, and my Great, Great, Grand Mother just below him. So cool that I had found a picture of them! 

Hope the instructions weren't too confusing for you...
I hope I've inspired you to create your own Family Tree Canvas Art Piece! I would love to see it if you did make one!

Have a great weekend and Happy Father's Day to all the Dad's in your lives!

Sharing this project with Scrap it Girls - November "Tree" Challenge