Friday, February 2, 2024

Lovely Layers Anniversary Card | Honey Bee Stamps

Lovely Layers, Anniversary Card, Honey Bee Stamps, how to, handmade card,Stamps,ilovedoingallthingscrafty,stamping, diecutting,cardmaking,Vintage Love,hearts,

Hello Friends, 

I hope you can join me today on Instagram as the Honey Bee Stamps DT celebrates the Vintage Love Release with an Instagram Hop. Whenever there is a Hop there are prizes, so make sure you don't miss out!

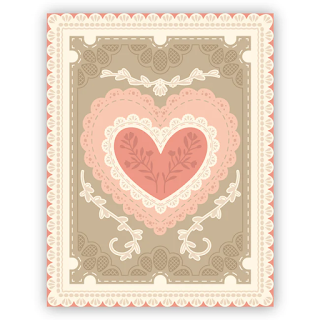
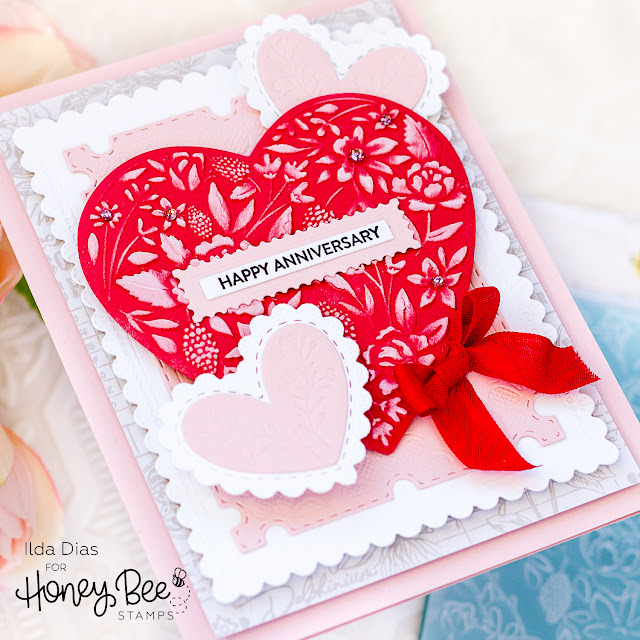
This Anniversary card is all about the Layers! Absolutely love how easy it was and how it all came together. The finished card measures 6.5x5 inches. This release is not only great for Valentine's but all year round as the pieces are timeless.

CARD RECIPE

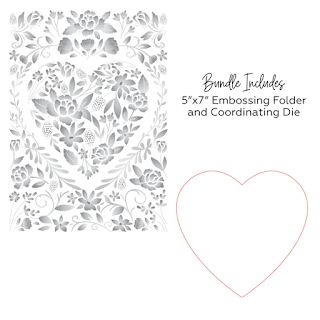
Embossed Heart - Floral Heart 3D Embossing Folder and Die Set

Frames - Lace Heart Layering Frames Dies

Sentiment base Die - Lovely Layouts: Posted - Dies

Patter Paper - Textiles and Texture Vintage Paper Pad

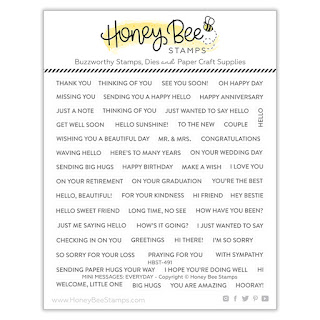
Sentiment - Mini Messages Stamps 

White Sentiment layer - Mini Messages Dies

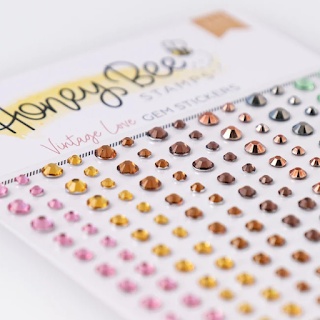
Embellishments - Vintage Love Gem Stickers

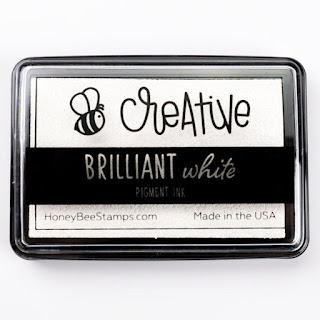
White Ink - Bee Creative Brilliant White Pigment Ink

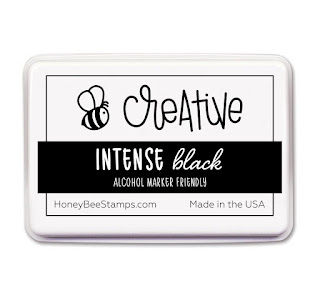
Black Ink - Bee Creative Intense Black Ink Pad


Besides, die cutting and stamping the sentiment this card is not complicated at all. Like I said earlier, it is all about the layers.

Lovely Layers, Anniversary Card, Honey Bee Stamps, how to, handmade card,Stamps,ilovedoingallthingscrafty,stamping, diecutting,cardmaking,Vintage Love,hearts,

The hardest part was embossing the large heart using the Floral Heart 3D Embossing Folder and then Die-cutting it with the coordinating heart. I then used the Bee Creative Brilliant White Pigment Ink and rubbed it over the embossed raised areas.

Lovely Layers, Anniversary Card, Honey Bee Stamps, how to, handmade card,Stamps,ilovedoingallthingscrafty,stamping, diecutting,cardmaking,Vintage Love,hearts,

Let me know if you have any questions. Feel free to ask in the comments below! Hope to see you all over on Instagram and until then, t
hank you for stopping by ... Happy Crafting!
Ilda 💖

SUPPLIES
Floral Heart 3D Embossing Folder and Die Set
Shop at:
HBS
Lace Heart Layering Frames Dies
Shop at:
HBS
Lovely Layouts: Posted - Dies
Shop at:
HBS
Textiles and Texture Vintage Paper Pad
Shop at:
HBS
Mini Messages Stamps
Shop at:
SSS | SB | HBS
Mini Messages Dies
Mini Messages Dies
Shop at:
SSS | SB | HBS
Vintage Love Gem Stickers
Shop at:
HBS
Bee Creative Intense Black Ink Pad
Shop at:
SSS | SB | HBS
Bee Creative Brilliant White Pigment Ink
Shop at:
SSS | SB | HBS
Stamping Pressure Tool
Shop at:
HBS
Bee Creative Bitty Buzz Cutter
Shop at:
HBS
White Foam Dots
White Foam Dots
Shop at:
HBS
Bee Creative Glue
Bee Creative Glue
Shop at:
SSS | SB | HBS
Neenah Solar White 110lbs
Shop at:
SSS | AMZ | HBS
Platinum 6 Die Cutting Platform
Shop at:
SSS | SB | SB
New Mini Misti
New Mini Misti
Shop at:
SSS | SB | HBS
To make supplies easy for you to find, I have linked them above. If something is no longer available I will link to a similar product. Affiliate links may be used depending on the product linked. Please help support my blog by using these links while shopping at no additional cost to you. For more information about the affiliates I use, please visit my disclaimer here. Thanks so much for all your support!

Enjoyed this post? Never miss out on future posts by Following this Blog

Tuesday, January 30, 2024

Bold Backgrounds: Vintage Roses See Through Card | Honey Bee Stamps | Vintage Love Sneak Peeks

Bold Backgrounds: Vintage Roses, See Through Card, Honey Bee Stamps, Vintage Love, how to, handmade card, Stamps, ilovedoingallthingscrafty, stamping, die cutting, card making

Welcome Back to Day 2 Sneak Peeks for the Honey Bee Stamps Vintage Love Release. The Vintage Love Release will go live on 1/31 after the Live Release Party on YouTube at 8 pm EST. So if you are wondering why the links do not work it is because they have not gone live yet!


My see-through Card today features the new Bold Backgrounds: Vintage Roses Dies. How gorgeous is this Die set! I absolutely love the texture and all the details!

Bold Backgrounds: Vintage Roses, See Through Card, Honey Bee Stamps, Vintage Love, how to, handmade card, Stamps, ilovedoingallthingscrafty, stamping, die cutting, card making

To add somewhere to write on the card I used a couple of the Sweet Stacks Ovals. The smaller oval on the inside was stamped with a sentiment from the Lean On Each Other Stamps set, which also comes with coordinating dies. The larger oval was glued to the backside of the panel to cover up the glue marks.

Bold Backgrounds: Vintage Roses, See Through Card, Honey Bee Stamps, Vintage Love, how to, handmade card, Stamps, ilovedoingallthingscrafty, stamping, die cutting, card making

To add some dimension to the flowers I ink-blended part of the petals of the flowers.

Bold Backgrounds: Vintage Roses, See Through Card, Honey Bee Stamps, Vintage Love, how to, handmade card, Stamps, ilovedoingallthingscrafty, stamping, die cutting, card making

Well, the wait isn't much longer as tomorrow is release day! I hope you have enjoyed my Vintage Love sneak peeks.

Thank you for stopping by and until next time... Happy Crafting!
Ilda 🌹

To make supplies easy for you to find, I have linked them above. If something is no longer available I will link to a similar product. Affiliate links may be used depending on the product linked. Please help support my blog by using these links while shopping at no additional cost to you. For more information about the affiliates I use, please visit my disclaimer here. Thanks so much for all your support!

Enjoyed this post? Never miss out on future posts by Following this Blog

Monday, January 29, 2024

Love Birds Valentines Card | Honey Bee Stamps | Vintage Love Sneak Peeks

Love Birds Valentines Card,Honey Bee Stamps, Vintage Love, how to,handmade card,Stamps,ilovedoingallthingscrafty,stamping, diecutting,cardmaking

Happy Wednesday Crafty Friends and welcome to Day 1 Sneak Peeks for the Honey Bee Stamps Vintage Love Release. The Vintage Love Release will go live on 1/31 after the Live Release Party on YouTube at 8 pm EST. So if you are wondering why the links do not work it is because they have not gone live yet!


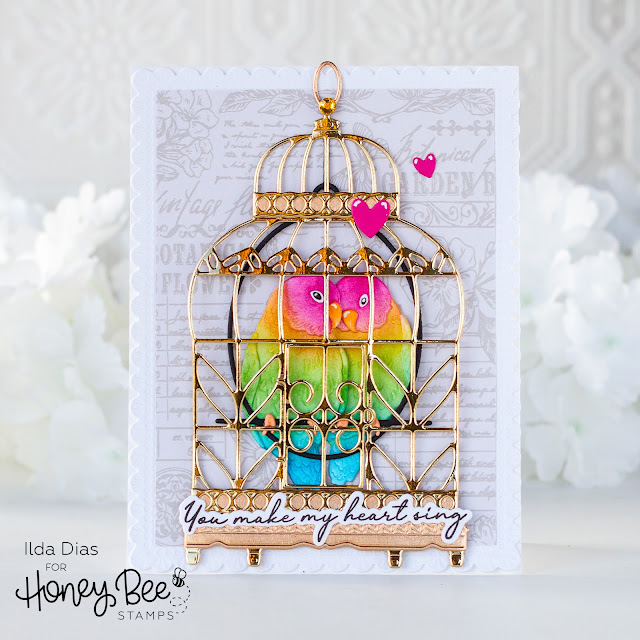
For this card, I am featuring a couple of new Lovely Layer Dies. Lovely Layers: Birdcage Dies and the Lovely Layers: Love Birds Dies. I am also using a new By Your Side Sentiment Stamp and Die set

Love Birds Valentines Card,Honey Bee Stamps, Vintage Love, how to,handmade card,Stamps,ilovedoingallthingscrafty,stamping, diecutting,cardmaking

How pretty is the pattern paper I used? This one comes from the new Textiles and Texture Vintage Paper Pad. I also ended up using a frame that is actually a Day 2 Sneak Peak, shhhhh don't say anything, lol! This frame set is gorgeous, and it is the new Lace Heart Layering Frames Dies.


If you want to see this card come together, make sure you check out my Instagram Reel coming later today! Thank you for stopping by and I will see you back here tomorrow for day 2 sneak peeks... Happy Crafting!


Ilda 🦜

To make supplies easy for you to find, I have linked them above. If something is no longer available I will link to a similar product. Affiliate links may be used depending on the product linked. Please help support my blog by using these links while shopping at no additional cost to you. For more information about the affiliates I use, please visit my disclaimer here. Thanks so much for all your support!

Enjoyed this post? Never miss out on future posts by Following this Blog

Monday, January 22, 2024

Bee Mine Valentine Card - with Felt Fridge Magnet | Honey Bee Stamps

Bee Mine, Valentine Card, Felt Fridge Magnet, Honey Bee Stamps, felt craft, stitching, how to,handmade card,lovedoingallthingscrafty,diecutting,cardmaking,Valentine's Day,
Hello Friends!

I am back today with the cutest Valentine's Card I have ever made, IMO😆 If you love this bee as much as I do and need to have it, hurry and make sure to grab it now as it is RETIRING forever from the Honey Bee Stamp Shop as supplies are limited and for a great price too! 👉Honey Bee Stitching Die 

CARD RECIPE

Felt Bee - Honey Bee Stitching Die - retiring soon!
Sentiment - Slimline Sentiments: Stitched Dies - retiring soon!
Embellishment - Sweethearts - Clay Hearts

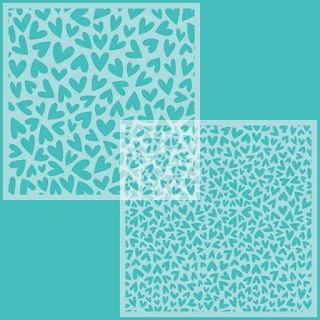
As you can see the card is pretty basic. To create it I used one of the Stencils from the Fluttering Hearts Background Stencils and used pink ink to blend out the hearts. The sentiment is cut from black shiny cardstock using the Bee Mine Slimline Sentiments: Stitched Dies 👈also RETIRING! For the dot of the "i", I used a clay heart.

Bee Mine, Valentine Card, Felt Fridge Magnet, Honey Bee Stamps, felt craft, stitching, how to,handmade card,lovedoingallthingscrafty,diecutting,cardmaking,Valentine's Day,

To make the felt bee, I wanted it to have 2 wings and be finished on both sides. To do that I die-cut each piece x2 from felt. I then first stitched the yellow body layers and the white wing layers together leaving a tiny hole for stuffing later. I used yellow embroidery floss to create a Backstitch all the way around the body. (I ended up using the back side of the bee as I like how the backside of the backstitch looked. Usually, the back side is the messy stitched side). Before completing the Backstitch I added some stuffing between the middle layers. I then finished stitching the body using black embroidery floss to attach the black pieces. For the wings, I used white embroidery floss but used a Blanket Stitch

Bee Mine, Valentine Card, Felt Fridge Magnet, Honey Bee Stamps, felt craft, stitching, how to,handmade card,lovedoingallthingscrafty,diecutting,cardmaking,Valentine's Day,

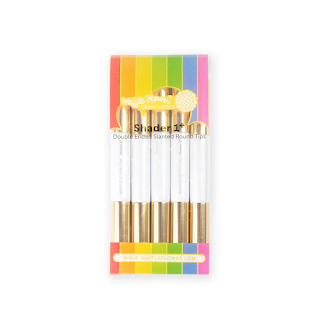
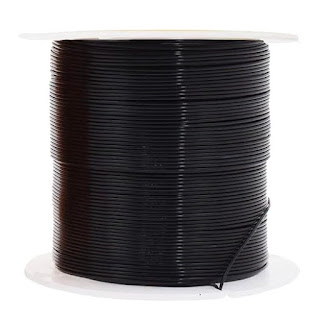
Next, I stitched some eyelashes in place before gluing on some black enamel dots for the eyes. For the antennae, I used a thin wire that I threaded through the top and just twisted it to stay in place. I then snipped the excess length and curled ends. Now for the cheeks, I applied some pink ink using a shader brush, then added a white dot to the center using a gel pen.

To the backside of the bee, I used hot glue to attach a magnet to it. Once it is completely dry,  attach it to the card base by using another magnet to secure it in place on the inside of the card. For fun and a little magic, watch the bee move by sliding around the inside magnet!

Bee Mine, Valentine Card, Felt Fridge Magnet, Honey Bee Stamps, felt craft, stitching, how to,handmade card,lovedoingallthingscrafty,diecutting,cardmaking,Valentine's Day,

Obviously, this card will not fit into an envelope. To solve this problem and keep the felt clean, I will store it and gift it in an A7 cello bag.


I hope this darling Felt Bee has inspired you to think out of the box when it comes to cardmaking! I love how this Bee Mine Valentine - Felt Fridge Magnet Card turned out and I hope my Valentine will too 😉For those of you following me on Instagram, stay tuned for a Reel coming soon!


Thank you for stopping by and until next time... Happy Crafting!
Ilda🐝

SUPPLIES
Honey Bee Stitching Die
Shop at:
SB | HBS
Slimline Sentiments: Stitched Dies
Shop at:
SB | HBS
Fluttering Hearts Background Stencils
Shop at:
HBS
Essential Enamel Stickers
Shop at:
SSS | SB | HBS
Sweethearts - Clay Hearts
Shop at:
HBS
Background Blender Brushes
Shop at:
SSS | HBS
A7+ Cello Bags
A7+ Cello Bags
Shop at:
HBS
Honey Bee Reverse Tweezers
Shop at:
HBS
Platinum 6 Die Cutting Platform
Shop at:
SSS | SB | SB
Bearly Art Precision Glue
Shop at:
SSS | AMZ | HBS
Shader Brush 1+ - 5/pk
Shop at:
SSS | WF
Atelier Ink Sweet Petunia
Shop at:
SSS | IO3
White Gelly Roller Pen
Shop at:
SSS | AMZ | SB | HBS
embroidery floss
embroidery floss
Shop at:
AMZ
Aluminum Wire
Aluminum Wire
Shop at:
AMZ
Adhesive Technologies 0449M Precision Pro Glue Gun
Shop at:
AMZ
Craft Magnet
Craft Magnet
Shop at:
AMZ
To make supplies easy for you to find, I have linked them above. If something is no longer available I will link to a similar product. Affiliate links may be used depending on the product linked. Please help support my blog by using these links while shopping at no additional cost to you. For more information about the affiliates I use, please visit my disclaimer here. Thanks so much for all your support!

Enjoyed this post? Never miss out on future posts by Following this Blog

Watch this cutie come together👇

Sunday, January 14, 2024

Hooray Sprinkle Cards | Picket Fence Studios

how to,handmade card,Stamps,ilovedoingallthingscrafty,stamping,Diecutting,Cardmaking,Picket Fence Studios,Hooray Sprinkle Cards,

Hello friends and happy Sunday.

It's official, I have joined the Picket Fence Studios Reels Team! And, although I do not have a Reel to share with you today, I have two fun Hooray Sprinkle Cards that are part of the January Release Instagram Hop

CARD RECIPE

Inks - Atelier Inks 

For this first shaker card, I used the negative from the Hooray Word Die. To the back of the panel, I added an acetated sheet cut down to size and a thin foam strip along the edge to house the shaker bits. I then glued the extra pieces to complete the letters on the front. A super simple card, perfect for any celebration!

how to,handmade card,Stamps,ilovedoingallthingscrafty,stamping,Diecutting,Cardmaking,Picket Fence Studios,Hooray Sprinkle Cards,

This next card was even simpler to make. The most work involved was the ink blending required for the background using the Sprinkles Layering Stencil Set

how to,handmade card,Stamps,ilovedoingallthingscrafty,stamping,Diecutting,Cardmaking,Picket Fence Studios,Hooray Sprinkle Cards,

I then just added some foam tape to pop up the Hooray Word Die and there you have another simple awesome celebration card! I just love when I can get two for one cards!

how to,handmade card,Stamps,ilovedoingallthingscrafty,stamping,Diecutting,Cardmaking,Picket Fence Studios,Hooray Sprinkle Cards,

Don't forget to join me on Instagram for the January Release IG Hop as there are many chances to win some amazing prizes! 


Thank you for stopping by and until next time... Happy Hoping!
Ilda 💖

To make supplies easy for you to find, I have linked them above. Affiliate links may be used depending on the product linked. Please help support my blog by using these links while shopping at no additional cost to you. For more information about the affiliates I use, please visit my disclaimer here. Thanks so much for all your support!

Enjoyed this post? Never miss out on future posts by Following this Blog