Showing posts with label party planning. Show all posts

Sunday, March 11, 2012

Simple Communion Cake for a Boy

Well, the day has arrived... It's my son Tomas' First Communion today!!!
All the work is finally done and its time to party... So today's post was prescheduled, of course!

Last time I showed you my cake pops, today I will show you the cake I made for the Communion. It is a 4 layer marble cake with a buttercream and Nutella filling, covered with fondant... can you say yummy!!!

Simple Communion Cake for a Boy by ilovedoingallthingscrafty.com

Here a few more pictures of the cake close up. Love how the bow turned out!

Simple Communion Cake for a Boy by ilovedoingallthingscrafty.com

The rosary made with little balls of rolled fondant then strung them all together with a stretchy elastic wire. 

Simple Communion Cake for a Boy by ilovedoingallthingscrafty.com

Simple and sweet :)


I'll be posting more pics of the First Communion Day as soon as I have more time.

Thanks for visiting again,
Ilda :)

Thursday, March 8, 2012

First Communion Cake Pops | Plus Tips I Learned From the Process


And the baking begins... 

So the first time I made cake pops it was kind of a disaster, I had watched you-tube videos but still, it was a mess. They kept falling apart because they were so heavy and dense and it was really frustrating! This time was much better, like anything else you learn from your mistakes!


First Communion Cake Pops | Plus Tips I Learned From the Process by ilovedoingallthingscrafty.com


I ended up using a cake pop maker this go around. So much easier and the cake balls were not as heavy so they didn't fall off the sticks. (I do have to admit that the baked cake pops don't taste as good as the dense cake pops that are made with cake batter and icing)

First Communion Cake Pops | Plus Tips I Learned From the Process by ilovedoingallthingscrafty.com

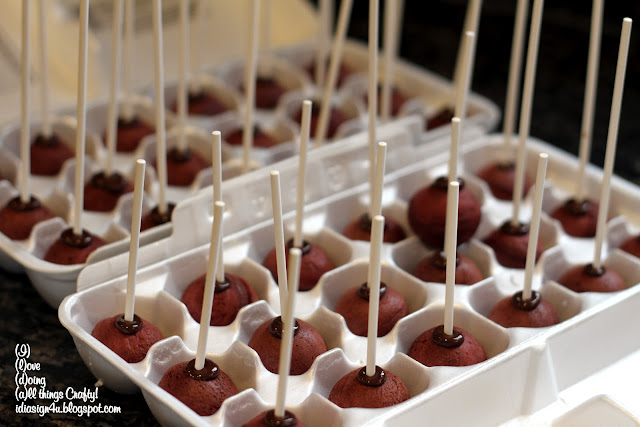
Something else I learned from last time was that the balls kept rolling around and staining the sticks with wet chocolate. This time I used an old Styrofoam egg carton. It worked wonderfully and made it easy to transport to the fridge as well!

First Communion Cake Pops | Plus Tips I Learned From the Process by ilovedoingallthingscrafty.com

I don't have a fancy cake pop stand, so I used floral foam to support the cake pops while they dried. All I did was take a sharp knife and poke holes all around the foam, piercing the plastic wrap that the foam came in. That way it kept all the foam flakes inside the plastic and made it easy to wipe off so I can reuse next time (you could also use cling wrap or tin foil to wrap up the foam)

First Communion Cake Pops | Plus Tips I Learned From the Process by ilovedoingallthingscrafty.com

Having the cake pop on the foam also made it easy to pick up and rotate the position of the pops as I decorated the top!

More tips... 

  • when melting your chocolate if you find the consistency too thick, add a tiny bit of shortening until you find it easy enough to coat the pops. (Thanks to my sister In-law Rozana for that one, made a huge difference!)
  • The other thing I did was melt my chocolate in microwave in a deep bowl.  Placed a smaller bowl underneath the chocolate bowl with boiling water, this kept the chocolate from solidifying once I started dipping the cold cake pops.


Hope these tips help future cake pop makers... if you have any more tips I would love to hear from you as well!

Well gotta run and get ready for an evening shift at the Hospital. Thanks for stopping by!

Ilda :)

Up next the Communion Cake!

Thursday, March 1, 2012

DIY Tissue Paper Rosettes | First Communion Decor


And my party decor continues.... two posts in one day! Only because the kiddos aren't home, LOL! Thank God for Grand Parents! :)

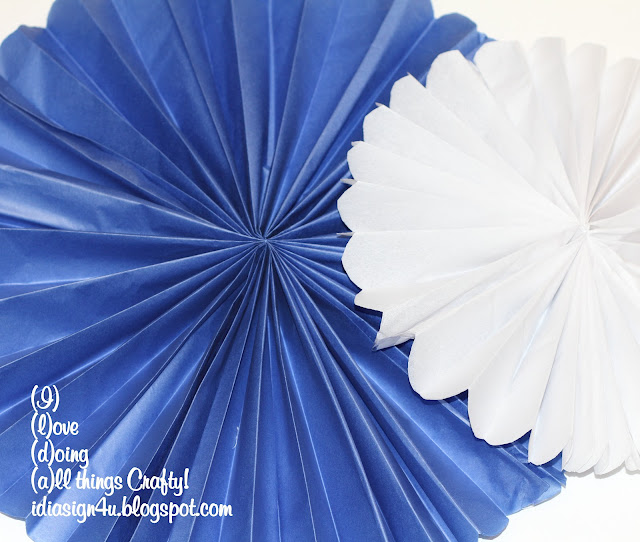
DIY Tissue Paper Rosettes | First Communion Decor by ilovedoingallthingscrafty.com

Rosettes are pretty trendy right now so I thought I would try and figure them out. It actually was pretty simple after making all the pom-poms! 

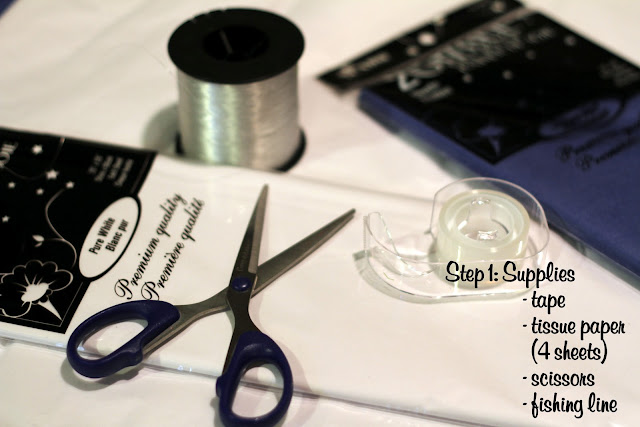
Here is a step by step tutorial on how I made my tissue paper rosettes...Sorry! Not too happy with my pictures though, bad lighting! I need to work on my photography skills... oh well, lesson learned!


DIY Tissue Paper Rosettes | First Communion Decor by ilovedoingallthingscrafty.com

DIY Tissue Paper Rosettes | First Communion Decor by ilovedoingallthingscrafty.com

DIY Tissue Paper Rosettes | First Communion Decor by ilovedoingallthingscrafty.com

DIY Tissue Paper Rosettes | First Communion Decor by ilovedoingallthingscrafty.com

DIY Tissue Paper Rosettes | First Communion Decor by ilovedoingallthingscrafty.com

DIY Tissue Paper Rosettes | First Communion Decor by ilovedoingallthingscrafty.com

DIY Tissue Paper Rosettes | First Communion Decor by ilovedoingallthingscrafty.com

DIY Tissue Paper Rosettes | First Communion Decor by ilovedoingallthingscrafty.com

DIY Tissue Paper Rosettes | First Communion Decor by ilovedoingallthingscrafty.com

DIY Tissue Paper Rosettes | First Communion Decor by ilovedoingallthingscrafty.com


I hope you enjoyed this step by step tutorial... next up paper cake party favor treat boxes!

Ilda :)