Showing posts with label Shaker. Show all posts

Monday, July 24, 2023

Hooked on You Interactive Shaker/Slider Card | Honey Bee Stamps

Hooked on You, Interactive, Shaker,Slider, Card,Honey Bee Stamps, Fishing, lures, how to,handmade card,Stamps,ilovedoingallthingscrafty,stamping, diecutting,cardmaking

In the world of crafting, there's always something new and exciting to try. If you're a fan of creating interactive and eye-catching cards, then you're in for a treat! Not only is this card a shaker, but it also is a slider.

CARD RECIPE

Let's explore the features of this card, along with the new products from Honey Bee Stamps that will take your card-making game to new heights!


1. Start by die-cutting and piecing one of the Lovely Layers Lures

2. To the end of the lure, I attached the cute little earthworm from the Spring Meadow and Dies.

3. Next, attach a clear thread and secure it to the back of the lure. Also (I wished I had done this, hindsight is 20/20) glue a penny or a button to the back of the lure and set it aside to work on the flat shaker.


Hooked on You, Interactive, Shaker,Slider, Card,Honey Bee Stamps, Fishing, lures, how to,handmade card,Stamps,ilovedoingallthingscrafty,stamping, diecutting,cardmaking

4. Cut a piece of pattern paper for the background of the shaker. This paper comes from the Vitamin Sea Paper Pad and create the shaker pocket. Before attaching the plastic to the panel, pierce a tiny hole near the top center of the front of the plastic pocket. Thread the end of the clear thread you attached to the lure earlier,  from inside the pocket leaving excess line outside the pocket for later use. 

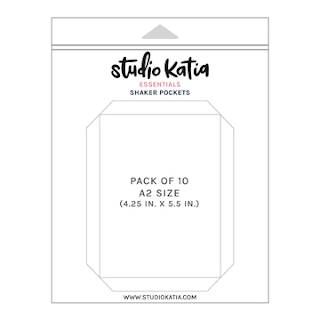
(You can create the pocket either by using scrap plastic and wrapping it around the panel or using a premade shaker pocket (yes, the same ones I developed 😉) Click HERE if you need further instruction on this). 


Hooked on You, Interactive, Shaker,Slider, Card,Honey Bee Stamps, Fishing, lures, how to,handmade card,Stamps,ilovedoingallthingscrafty,stamping, diecutting,cardmaking

5. Once the pocket is made, fill it with your shaker bits. I used AURORA LIGHTS Confetti Mix and close up the pocket. Attach the pocket to a card base.

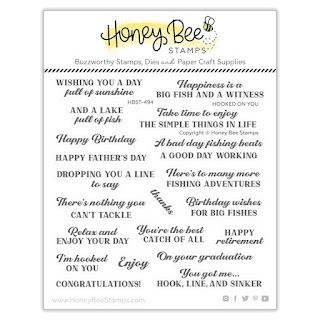
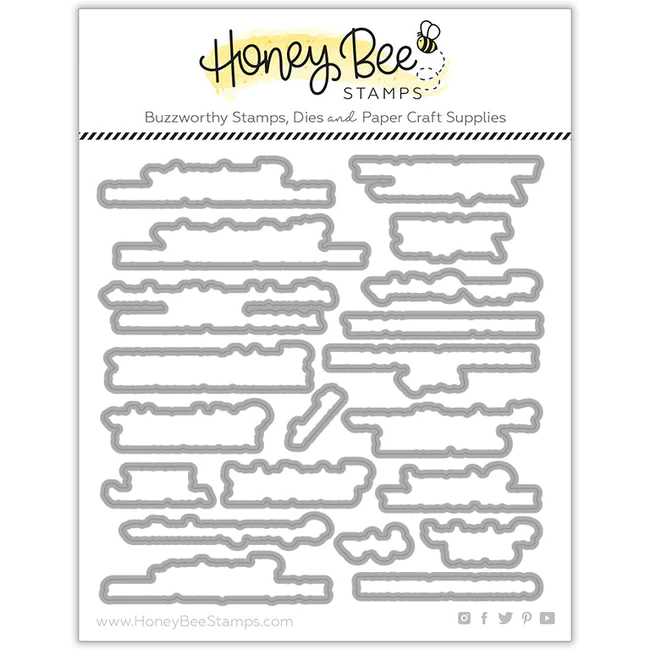
6. Stamp out and heat emboss in white your sentiment strip using the Hooked On You Stamps and Dies.

7. Shorten the thread that is dangling outside the pocket and attach the sentiment to the clear thread by sandwiching the thread between a few layers of the die-cuts. If done correctly the weight of the lure will pull the sentiment to snug up against the pierced hole you created. (My lure didn't have enough weight and so it didn't work as smoothly as I would have liked it to, but this is how you learn right!?)


Hooked on You, Interactive, Shaker,Slider, Card,Honey Bee Stamps, Fishing, lures, how to,handmade card,Stamps,ilovedoingallthingscrafty,stamping, diecutting,cardmaking

8. Finish the outside of the shaker panel by adding some seagrasses. I used some from the Ocean Deep Scene Builder Dies.

9. To embellish a little more I added some fun "water bubbles" using Ombre Pearls- Pearl Stickers.


By following these steps, you can create a unique and interactive flat shaker hooked on your slider lure card that will amaze and delight the recipient. Experiment with different color combinations, patterns, and shaker fillings to customize the card to your liking.


Remember, crafting is all about learning and trying new techniques, so don't worry if everything doesn't go perfectly the first time. Embrace the process and have fun with it! Thank you for stopping by and until next time... Happy Crafting!


Ilda 🎣🐟

SUPPLIES
Lovely Layers Lures
Lovely Layers Lures
Shop at:
SSS | SB | HBS
Spring Meadow
Spring Meadow
Shop at:
SSS | SB | HBS
Spring Meadow Dies
Spring Meadow Dies
Shop at:
SSS | SB | HBS
Hooked On You Stamps
Shop at:
SSS | SB | HBS
Hooked On You Dies
Hooked On You Dies
Shop at:
SSS | SB | HBS
Ocean Deep Scene Builder Dies
Shop at:
SSS | SB | HBS
Vitamin Sea Paper Pad
Shop at:
SSS | SB | HBS
AURORA LIGHTS Confetti Mix
Shop at:
HBS
Intense Black Ink Pad
Shop at:
SSS | SB | HBS
Bee Creative Brilliant White Pigment Ink
Shop at:
SSS | SB | HBS
Stamping Pressure Tool
Shop at:
HBS
Bee Creative Bitty Buzz Cutter
Shop at:
HBS
Die Release Tool
Die Release Tool
Shop at:
SSS | HBS
Honey Bee Reverse Tweezers
Shop at:
SSS | HBS
A2 Shaker Pockets
A2 Shaker Pockets
Shop at:
SSS | SK
Magic Powder Bag
Magic Powder Bag
Shop at:
SSS
New Mini Misti
New Mini Misti
Shop at:
SSS | SB | HBS
Platinum 6 Die Cutting Platform
Shop at:
SSS | SB | SB
Arctic White Emb.Pwd.
Shop at:
SSS | IO3
Heat Gun
Heat Gun
Shop at:
AMZ
Clear Nylon Invisible Thread
Shop at:
AMZ
To make supplies easy for you to find, I have linked them above. If something is no longer available I will link to a similar product. Affiliate links may be used depending on the product linked. Please help support my blog by using these links while shopping at no additional cost to you. For more information about the affiliates I use, please visit my disclaimer here. Thanks so much for all your support!

Enjoyed this post? Never miss out on future posts by Following this Blog

Wednesday, March 8, 2023

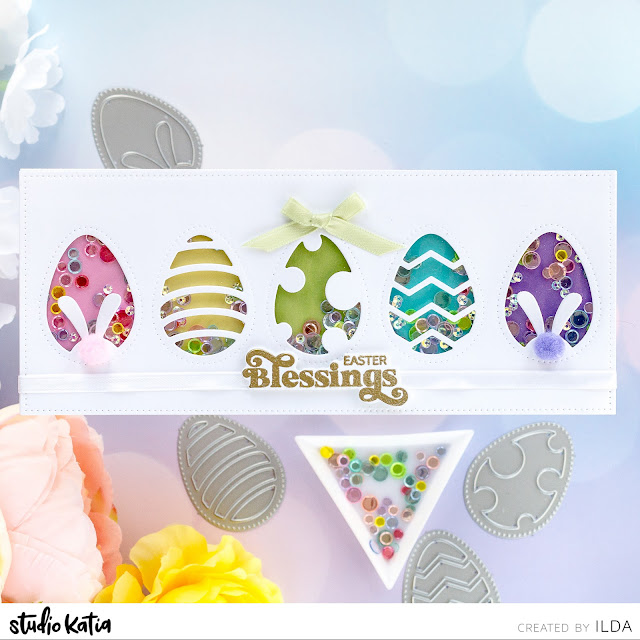
Easter Egg Slimline Shaker Card | Studio Katia

Easter,Egg, Slimline, Shaker, Card,Studio Katia,how to,handmade card,Stamps,ilovedoingallthingscrafty,stamping, diecutting,cardmaking

Hello friends and happy Wednesday!

I am back again today to share with you another Easter-themed card. This time it is a traditional Slimline Shaker featuring Easter Shaker Eggs. I initially was going to make it a pocket shaker and then switched gears halfway through. Does anyone else have that happen?
 
CARD RECIPE
  • To begin, I die-cut the top panel using the large dotted frame from Dotted Slimline Set 2.
  • I then die-cut the window openings of the shakers using the Easter Shaker Eggs. I repeated the bunny ear one twice and placed them on the ends.
  • Behind the front panel, I then glued a piece of acetate and added foam tape around the outer edges.
Easter,Egg, Slimline, Shaker, Card,Studio Katia,how to,handmade card,Stamps,ilovedoingallthingscrafty,stamping, diecutting,cardmaking
  • On the card front of the slimline card base, I added scrap pieces of paper to add a rainbow of colors behind each egg and glued them down. 
  • I then added the shaker bits (Icy Rainbow Confetti and Crystal Clear 3M Sequins) to the center of the card and then added the top panel to create the shaker.
Easter,Egg, Slimline, Shaker, Card,Studio Katia,how to,handmade card,Stamps,ilovedoingallthingscrafty,stamping, diecutting,cardmaking
  • For some added fun and details, I used some satin ribbon to make a bow and added interest. To the bunny eggs, I added some coordinating pompoms to create the illusion of their furry bunny butts!
Easter,Egg, Slimline, Shaker, Card,Studio Katia,how to,handmade card,Stamps,ilovedoingallthingscrafty,stamping, diecutting,cardmaking

Other than the die cutting (aligning the eggs and spacing them out) this card was quite simple and quick to make. After I had finished, I thought I should have made an Easter card set instead, using one egg shaker per card in rainbow colors. Well, I might still do that... we shall see how much time I have, lol!

Anyways, I hope you have enjoyed today's Easter Egg Slimline Shaker Card post. Thank you for stopping by and until next time... Happy Crafting!

Wednesday, October 12, 2022

Rainbow Shaker Birthday Cards | Studio Katia

Rainbow, Shaker, Birthday Cards,Studio Katia,Infinity,Frameless Shaker,Edge to Edge Shaker,flat shaker,Card Making, Stamping, Die Cutting, handmade card, ilovedoingallthingscrafty, Stamps, how to, Shaker Pockets

Hello Friends!

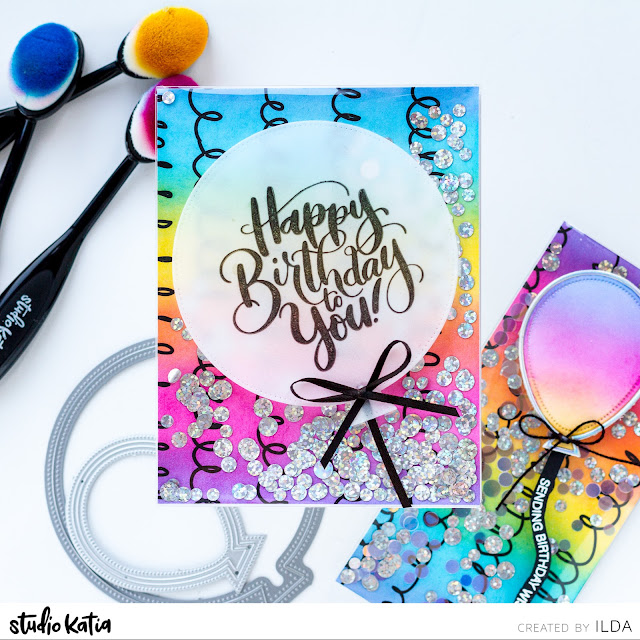
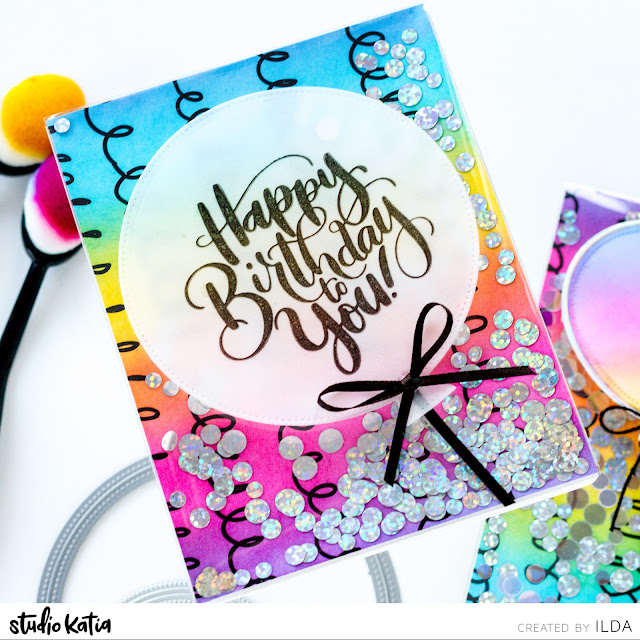
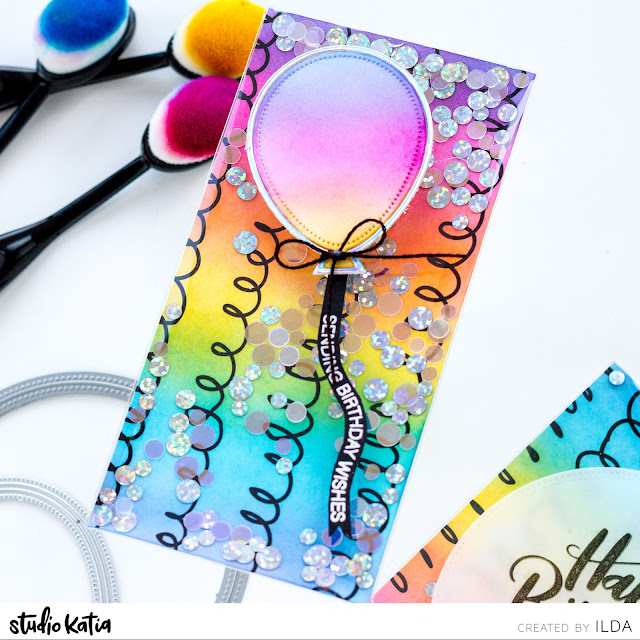
I am back again today to share these two fun Rainbow Shaker Birthday Cards featuring the NEW Shaker Pockets! If you are following me or Studio Katia on Instagram, you may have seen these already in a Reel that was shared this past weekend. But for those that missed it here are all the details!

Fun fact: Did you know that these pockets were developed as a direct result of my DIY Frameless Shaker Cards, no kidding! In fact, Katia was the first person I approached to turn the DIY version into a product to make life easier for anyone who hated messing with foam tape to create shaker cards. 

Since then various other companies jumped onto this idea and have created them too (I must admit I couldn't contain my excitement about these and did share this idea with others at Creativation). Even still, I am so happy to see Studio Katia finally releasing these as they truly are a game changer when it comes to making shakers.

CARD RECIPE

  • Begin by creating the background. For both these cards, I used a piece of pattern paper from the Black on White Paper Set. I then Ink Blended the rainbow starting with yellow ink in the center and then ink blending with pink and blue to create the rainbow blends.
  • Trim the piece of paper to create a background for a mini slimline shaker and an A2 shaker.
  • Remove the protective layer from the Shaker Pocket.
  • I added strong adhesive tape to the back of the card panel, but you could also apply it to the side tabs of the pockets.
  • Next, I wrapped the tabs around the panel and secured three sides to the card panel, to create a pocket. 
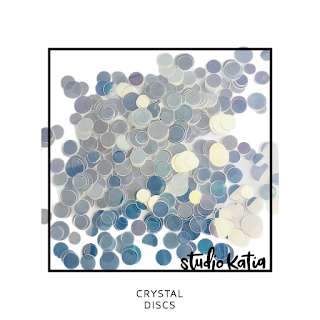
  • I filled this first shaker card with Silver Foil Discs, then sealed the last pocket tab.
  • I then attached the panel to an A2 Card Base.
For the front of the card:
  • Stamp out the Birthday Sentiment from the It's Your Birthday stamp set. Use ink that sets quickly or you can heat emboss it too.  
  • Die cut the sentiment done on vellum, using one of the Dotted Balloons Dies.
  • Apply small dots of glue to the balloon behind the stamped image to hide the glue dots.
  • Finish by adding a bow.


Rainbow, Shaker, Birthday Cards,Studio Katia,Infinity,Frameless Shaker,Edge to Edge Shaker,flat shaker,Card Making, Stamping, Die Cutting, handmade card, ilovedoingallthingscrafty, Stamps, how to, Shaker Pockets

This next card was done the exact same way with a few differences that I will point out next.

Rainbow, Shaker, Birthday Cards,Studio Katia,Infinity,Frameless Shaker,Edge to Edge Shaker,flat shaker,Card Making, Stamping, Die Cutting, handmade card, ilovedoingallthingscrafty, Stamps, how to, Shaker Pockets

If you have never made a shaker because they look complicated, or you hate messing with foam tape, like I did, I promise you this is the easiest way to make them and the results speak for themselves. Just look, aren't they magical! Give these a try, I think you will love them! 

Thank you for stopping by and until next time... Happy Crafting!
Ilda 🌈🧂

SUPPLIES
A2 Shaker Pockets
A2 Shaker Pockets
Shop at:
SSS | SK
Mini Slimline Shaker Pockets
Shop at:
SSS | SK
Silver Fever Foil Discs
Shop at:
SSS | SK
Crystal Discs
Crystal Discs
Shop at:
SSS | SK
Black on White 6x8.5
Black on White 6x8.5" Paper Set
Shop at:
SSS | SK
Dotted Balloons Dies
Shop at:
SSS | SK
Shaker Balloon Die
Shaker Balloon Die
Shop at:
SSS | SK
It's Your Birthday
It's Your Birthday
Shop at:
SSS | SK
Mini Sending Greetings
Shop at:
SK
Ink Blender Brushes
Ink Blender Brushes
Shop at:
SSS | SK
Black Triangle Tray
Black Triangle Tray
Shop at:
SSS | SK
SK Glue
SK Glue
Shop at:
SSS | SK
New Mini Misti
New Mini Misti
Shop at:
SSS | SB | HBS
Vellum Value Pack
Vellum Value Pack
Shop at:
SSS | AMZ
Arctic White Emb.Pwd.
Shop at:
SSS | IO3
Black and Decker  Heat Gun
Black and Decker Heat Gun
Shop at:
AMZ
Platinum 6 Die Cutting Platform
Shop at:
SSS | SB | SB
Atelier Ink Bee Sting Yellow
Shop at:
SSS | IO3
Atelier Ink Sweet Petunia
Shop at:
SSS | IO3
Atelier Ink Peacock Blue
Shop at:
SSS | IO3
Blackout Ink
Blackout Ink
Shop at:
SSS | HBS | IO3
Shark Tooth White Atelier Ink
Shop at:
SSS | IO3
Holographic Cardstock
Shop at:
ELC
Red Line Tape 1/4
Red Line Tape 1/4"
Shop at:
SSS | HBS
To make supplies easy for you to find, I have linked them above. If something is no longer available I will link to a similar product. Affiliate links may be used depending on the product linked. Please help support my blog by using these links while shopping at no additional cost to you. For more information about the affiliates I use, please visit my disclaimer here. Thanks so much for all your support!

Watch these being made!