Wednesday, April 12, 2023

Double-sided Interactive See-Through Birthday Shaker Card | Studio Katia

Double-sided, Interactive, See-Through, Shaker Card, Studio Katia, how to,handmade card,Stamps,ilovedoingallthingscrafty,stamping, diecutting,cardmaking, infinity card, frameless shaker, shaker pocket card,

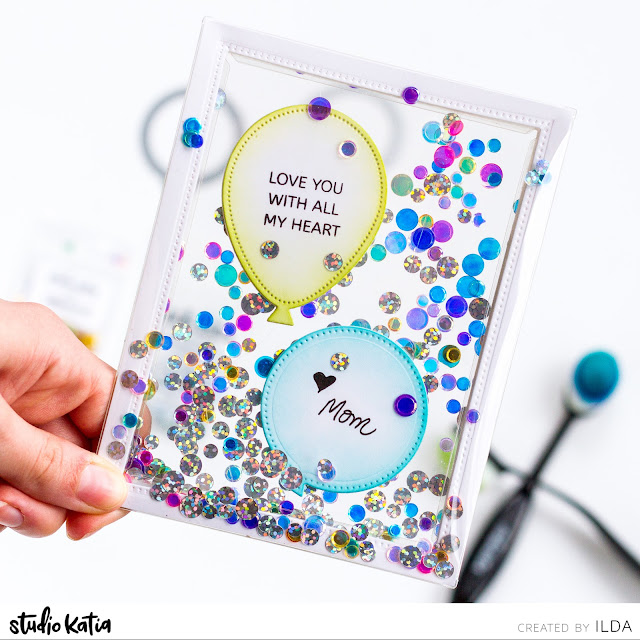
Do you want to create a card that will blow your friends and family away? Look no further than this see-through double-sided interactive shaker card featuring the A2 Shaker Pockets from Studio Katia. As the creator of these pockets, I thought it would be fun to try something new and different. Plus I thought this design would make a stunning creation for my son's 19th birthday, and which I'm thrilled to share it with you today in hopes of inspiring your own card-making adventures.

Double-sided, Interactive, See-Through, Shaker Card, Studio Katia, how to,handmade card,Stamps,ilovedoingallthingscrafty,stamping, diecutting,cardmaking, infinity card, frameless shaker, shaker pocket card,

To start, you'll need to double up on the Dotted Balloons Dies and the Shaker Balloon Die to create both the front and back of the balloons. Then, add a personal touch by stamping the Birthday Greetings and Mini Love Greetings Stamp set onto the balloons. I even wrote 💗mom, one of them!

Double-sided, Interactive, See-Through, Shaker Card, Studio Katia, how to,handmade card,Stamps,ilovedoingallthingscrafty,stamping, diecutting,cardmaking, infinity card, frameless shaker, shaker pocket card,

To create the shaker pocket, I adhered two A2 Shaker Pockets together using double-sided tape and added a frame from the Dotted Pattern Set 1 to both sides. Then, I secured a clear thread between the balloons before attaching them together. The final step is to fill the pocket with dazzling Crystal Rainbow Confetti and Silver Fever Foil Discs before sealing the pocket shut.

Double-sided, Interactive, See-Through, Shaker Card, Studio Katia, how to,handmade card,Stamps,ilovedoingallthingscrafty,stamping, diecutting,cardmaking, infinity card, frameless shaker, shaker pocket card,

If you look close enough you will see that some of the acetate from the tabs are still visible. To solve for this you can trim them first, or just use a wider frame. Nevertheless, the result is a stunning card that is sure to impress anyone who receives it.

Double-sided, Interactive, See-Through, Shaker Card, Studio Katia, how to,handmade card,Stamps,ilovedoingallthingscrafty,stamping, diecutting,cardmaking, infinity card, frameless shaker, shaker pocket card,

With a little creativity and the right tools, you too can create a show-stopping card that will be treasured for years to come. So, let your imagination run wild and make your own Double-sided Interactive See-Through Shaker Card!

Don't forget to follow along on my Instagram account as I will also share the how-to Reels so you can see it all come together.

Thank you for stopping by and until next time... Happy Crafting!
Ilda 🎈

SUPPLIES
A2 Shaker Pockets
A2 Shaker Pockets
Shop at:
SSS | SK
Dotted Pattern Set 1
Shop at:
SSS | SK
Dotted Balloons Dies
Shop at:
SSS | SK
Shaker Balloon Die
Shaker Balloon Die
Shop at:
SSS | SK
Birthday Greetings
Birthday Greetings
Shop at:
SSS | SK
Mini Love Greetings Stamp
Shop at:
SSS | SK
SK Glue
SK Glue
Shop at:
SSS | SK
Ink Blender Brushes
Ink Blender Brushes
Shop at:
SSS | SK
Crystal Rainbow Confetti
Shop at:
SSS | SK
Silver Fever Foil Discs
Shop at:
SSS | SK
Black Triangle Tray
Black Triangle Tray
Shop at:
SSS | SK
Bone Folder
Bone Folder
Shop at:
SSS | SK
Platinum 6 Die Cutting Platform
Shop at:
SSS | SB | SB
Neenah Solar White 110lbs
Shop at:
SSS | AMZ | HBS
Bee Creative Intense Black Ink
Shop at:
SSS | SB | HBS
New Mini Misti
New Mini Misti
Shop at:
SSS | SB | HBS
Oxide Ink Pad TWISTED CITRON
Shop at:
SSS | SB | HBS
Oxide Ink Pad PEACOCK FEATHERS
Shop at:
SSS | SB | HBS
Clear Nylon Invisible Thread
Shop at:
AMZ
Scor-Pal Tape
Scor-Pal Tape
Shop at:
SSS | AMZ | HBS
To make supplies easy for you to find, I have linked them above. If something is no longer available I will link to a similar product. Affiliate links may be used depending on the product linked. Please help support my blog by using these links while shopping at no additional cost to you. For more information about the affiliates I use, please visit my disclaimer here. Thanks so much for all your support!

Monday, April 3, 2023

Ink-Blended Rainbow Carrots for a Vibrant Easter Card | Honey Bee Stamps

Ink-Blended, Rainbow, Carrots, Easter Card, Honey Bee Stamps, how to,handmade card,Stamps,ilovedoingallthingscrafty,stamping, diecutting,cardmaking

Easter is a time for new beginnings, fresh starts, and the celebration of the beauty of nature. What better way to capture the essence of this season than by creating a colorful and vibrant Easter card that features the Honey Bee Stamps Lovely Layers: Carrots done in Rainbow colors! This card is perfect for sending well wishes and joy to your loved ones this Easter season.

CARD RECIPE

To get started, you will need the Lovely Layers: Carrots Dies, the Daisy Field - 3D Embossing Folder, the Bee Narrow Upper Case Alpha Dies, and the Simply Spring Paper Pad. You will also need a few additional supplies, including cardstock, blending tools, and ink pads in a rainbow of colors.

Ink-Blended, Rainbow, Carrots, Easter Card, Honey Bee Stamps, how to,handmade card,Stamps,ilovedoingallthingscrafty,stamping, diecutting,cardmaking

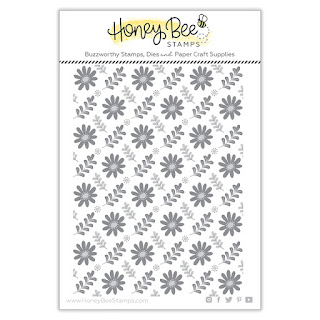
First, take the Daisy Field - 3D Embossing Folder and run a piece of white cardstock through your embossing machine to create a beautiful 3D background. Then, take the Lovely Layers: Carrots Dies and die-cut several carrots out of white cardstock.

Next, use your blending brushes and ink pads to create a rainbow of colors on each of the carrot die-cuts. Using blending brushes and ink pads in rainbow colors, blend each carrot from one color to the next, making sure to blend the colors together smoothly. Leave the stems green for contrast.

Once you have finished blending all of your carrot die-cuts, arrange them together in a bunch and glue them onto the embossed background. Use the Bee Narrow Upper Case Alpha Dies to cut out the word "Happy Easter" from black cardstock. For a thicker look, die-cut four of each letter and stack them together. Use a T-square to help straighten and space out the letters, then use tape to keep them in place before adhering them with glue.

Ink-Blended, Rainbow, Carrots, Easter Card, Honey Bee Stamps, how to,handmade card,Stamps,ilovedoingallthingscrafty,stamping, diecutting,cardmaking

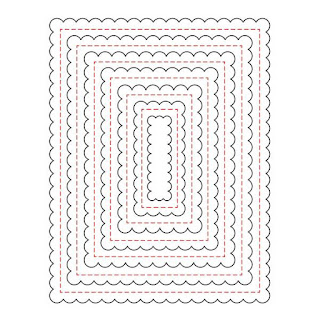
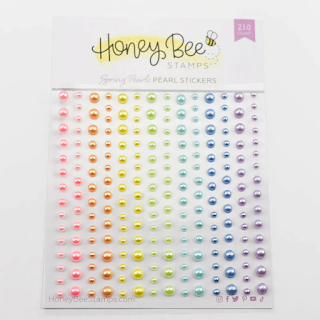
Finally, mat your embossed background onto a coordinating piece of cardstock from the Simply Spring Paper Pad, die-cut first with the largest Scallop A2 Frame Die. Mount the entire piece onto a blank card base using adhesive. For a touch of sparkle, tie a bow with a copper-colored fine glitter thread and add a pearl from the Spring Pearl set.

With a little creativity and the right tools, you can create a beautiful and unique Easter card that will bring a smile to anyone's face. So get crafting and have fun making something special for your loved ones this Easter season.

Happy crafting, and Happy Easter!

Ilda 🌈🐰🥕

SUPPLIES

Lovely Layers: Carrots Dies
Shop at:
SSS | SB | HBS
Daisy Field - 3D Embossing Folder
Shop at:
SSS | SB | HBS
Scallop A2 Frame Dies
Shop at:
SSS | SB | HBS
Bee Narrow Upper Case Alpha Dies
Shop at:
SSS | SB | HBS
Simply Spring Paper Pad
Shop at:
SSS | SB | HBS
Spring Pearls Pearl Stickers
Shop at:
SSS | SB | HBS
Background Blender Brushes
Shop at:
SSS | HBS
Detail Blender Brushes
Shop at:
SSS | HBS
Bee Creative Bitty Buzz Cutter
Shop at:
HBS
Honey Bee Reverse Tweezers
Shop at:
SSS | HBS
Neenah Solar White 110lbs
Shop at:
SSS | AMZ | HBS
Platinum 6 Die Cutting Platform
Shop at:
SSS | SB | SB
Oxide Ink Pad PICKED RASPBERRY
Shop at:
SSS | SB | HBS
Squeezed Lemonade Distress Oxide Ink
Shop at:
SSS | SB | HBS
Oxide Ink Pad TWISTED CITRON
Shop at:
SSS | SB | HBS
Oxide Ink Pad PEACOCK FEATHERS
Shop at:
SSS | AMZ | SB | HBS
Bearly Art Precision Glue
Shop at:
SSS | AMZ
Acme Junior T-Square
Shop at:
SSS | AMZ
To make supplies easy for you to find, I have linked them above. If something is no longer available I will link to a similar product. Affiliate links may be used depending on the product linked. Please help support my blog by using these links while shopping at no additional cost to you. For more information about the affiliates I use, please visit my disclaimer here. Thanks so much for all your support!

Monday, March 20, 2023

Cottage Pop Up Scene Card | Honey Bee Stamps

Simply Spring Release, Cottage, Pop Up, Scene Card, Honey Bee Stamps,how to,handmade card,Stamps,ilovedoingallthingscrafty,stamping, diecutting,cardmaking

Hello Friends and Happy Monday!

Have you all seen the Simply Spring Release from Honey Bee Stamps? If you haven't check it out! So many beautiful Spring inspired products. Usually, you would have seen a bunch of sneak peeks from me but this time my DT package decided to take its sweet time. Oh well better late than never, right!? 

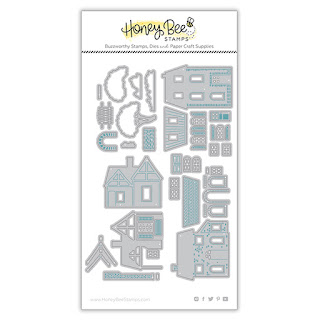
For my project today I wanted to play with the Spring Cottage Village Dies and create a Spring Scene. If you saw my last Honey Bee project, I also made a pop-up card. I guess I loved it so much I just had to do it again, lol!

CARD RECIPE

  • Die-cut the pieces for the cottage and glue them together. Also die-cut the tree, and the bushes and set them aside.
  • Use the Cottage Countryside Dies to die-cut the background pieces. For the grass area, I separated the pieces and added a cobblestone road using Copic Markers. Set the die-cuts aside as well.

Simply Spring Release, Cottage, Pop Up, Scene Card, Honey Bee Stamps,how to,handmade card,Stamps,ilovedoingallthingscrafty,stamping, diecutting,cardmaking
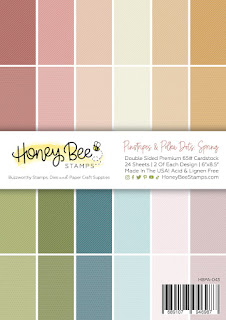
  • For the front panel, die-cut the frame using the two largest dies of the Spring Vine Layering Frames from a white piece of cardstock first, and then the for the background I used blue paper from the Pinstripes & Polka Dots: Spring Paper Pad only cutting out the inside opening. Glue these pieces together to form the front.
  • Next, I created 2 pop-up springs that I scored from a 1-inch wide piece of pattern paper Paper Pad at every 1/4"inch until it folded into an "M".
  • I then glued the springs to the back of the frame. 
  • To make the scene pop, I glued the Cottage Countryside layers to the "springs". I did have to trim off a little of the sides to make the width of the scene match the width between the "springs".
  • At this point, I glued on the cottage and tree.
Simply Spring Release, Cottage, Pop Up, Scene Card, Honey Bee Stamps,how to,handmade card,Stamps,ilovedoingallthingscrafty,stamping, diecutting,cardmaking
  • For the background of the card, I used the opposite side of the paper, trimmed it to A2 size, and added it to the card base.
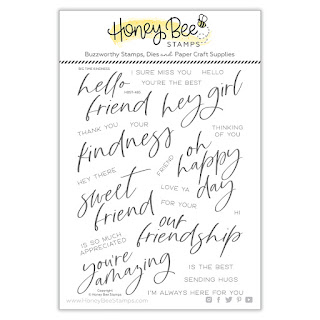
  • Before gluing the card front to the card base I figured out where to add the sentiment. I used a sentiment from Big Time Kindness and stamped it using Bee Creative Intense Black Ink.
  • Then I glued the springs to the card base. 
  • Next, I added some glue to the clouds and slipped them into place.
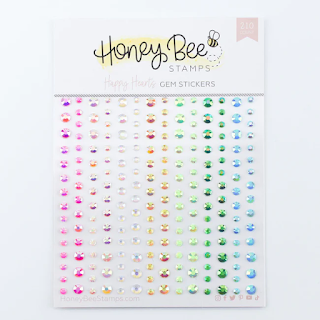
  • For a final touch and a little bit of sparkle, I added some gem stickers to the corners of the frame.
Simply Spring Release, Cottage, Pop Up, Scene Card, Honey Bee Stamps,how to,handmade card,Stamps,ilovedoingallthingscrafty,stamping, diecutting,cardmaking

The cool thing about these pop-up cards is that they have so much dimension but without too much bulk!

I absolutely love how this card turned out and I hope you all do too. I really wish I had a pink cottage like this. I would make it my craft cottage and you all could come to visit and craft with me!

Thank you for stopping by and until next time... Happy Crafting!
Ilda 🏡

SUPPLIES
Spring Cottage Village Dies
Shop at:
SSS | SB | HBS
Cottage Countryside Dies
Shop at:
SSS | SB | HBS
Spring Vine Layering Frames
Shop at:
SSS | SB | HBS
Big Time Kindness
Big Time Kindness
Shop at:
SSS | SB | HBS
Pinstripes & Polka Dots: Spring Paper Pad
Shop at:
SSS | SB | HBS
Happy Hearts Gem Stickers
Shop at:
SSS | SB | HBS
Tear Tape XL Roll | 1/8
Tear Tape XL Roll | 1/8"
Shop at:
HBS
Bee Creative Intense Black Ink
Shop at:
SSS | SB | HBS
Stamping Pressure Tool
Shop at:
HBS
Bee Creative Bitty Buzz Cutter
Shop at:
HBS
Honey Bee Reverse Tweezers
Shop at:
SSS | HBS
Bee Creative Glue
Bee Creative Glue
Shop at:
SSS | SB | HBS
Neenah Solar White 110lbs
Shop at:
SSS | AMZ | HBS
New Mini Misti
New Mini Misti
Shop at:
SSS | SB | HBS
Platinum 6 Die Cutting Platform
Shop at:
SSS | SB | SB
Copic Sketch Markers
Shop at:
SSS | AMZ
Scor-Pal Mini Scor-Buddy
Shop at:
SSS | HBS
White Gelly Roller Pen
Shop at:
SSS | AMZ | SB | HBS
To make supplies easy for you to find, I have linked them above. If something is no longer available I will link to a similar product. Affiliate links may be used depending on the product linked. Please help support my blog by using these links while shopping at no additional cost to you. For more information about the affiliates I use, please visit my disclaimer here. Thanks so much for all your support!