Friday, January 31, 2020

Crafty Rainbow Birthday Wishes Card | Artsy Trimmings | Studio Katia


Crafty Rainbow Birthday Wishes Card | Artsy Trimmings | Studio Katia by ilovedoingallthingscrafty.com

Hello Friends and Happy Friday!

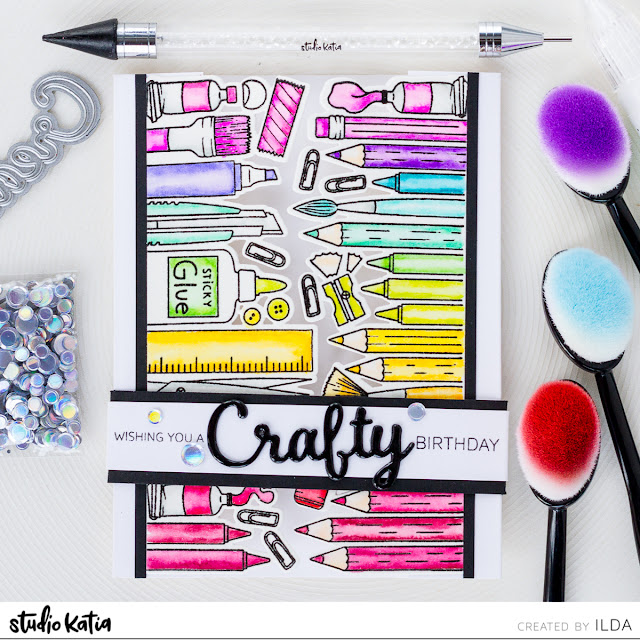
Hopefully, by now you all know how much I love all things crafty, well I love all things rainbow too! So for today's card, I combined my two loves to create this Crafty Birthday Wishes Card using the new ARSTY TRIMMINGS stamp set and the coordinating ARTSY TRIMMINGS die set from the latest Studio Katia Release.

  CARD DETAILS

To begin I stamped out the crafty images from the ARSTY TRIMMINGS set using VersaFine Onyx ink and heat set it with clear embossing powder. I then colored in the crafty images in using Arteza Brush Pens in Rainbow order. Once the paper was dry, I die cut the pieces out using the coordinating ARTSY TRIMMINGS DIES. I then attached each piece to the sides of a Gatefold Card base that I had trimmed the top flaps to allow for the cut details to peek through. I then cut a thin black strip to finish off the edge of the die-cut pieces.

Crafty Rainbow Birthday Wishes Card | Artsy Trimmings | Studio Katia by ilovedoingallthingscrafty.com

The next thing I did was die cut the Crafty out 3 times (which comes included in the ARTSY TRIMMINGS DIES set), stacked and glued them together. I then cut a strip of white paper about 1- inch in diameter and long enough to wrap around the card to create the belly band. I then wrapped the paper around the card front to figure out where to create the scorelines. I left a bit of a wiggle room on the sides because I will attach the white strip to a wider black strip of paper later on.

Crafty Rainbow Birthday Wishes Card | Artsy Trimmings | Studio Katia by ilovedoingallthingscrafty.com

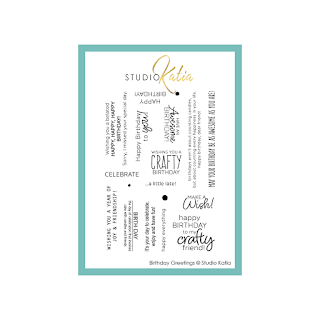
Once the band was measured and scored and before I glued the top white strip to the bottom strip I stamped out the sentiments on to the front of what will be the belly band. I used a stamp from the BIRTHDAY GREETINGS set and masked out the crafty while stamping out the sentiment, ensuring I left enough room for the crafty word die that I then glued in place and topped off with Glossy Accents.

Crafty Rainbow Birthday Wishes Card | Artsy Trimmings | Studio Katia by ilovedoingallthingscrafty.com

To finish off this card I glued down a few of the SILVER FEVER CONFETTI using my favorite new tool the EMBELLISHMENT WAND! Oh, BTW, I didn't use the blending brushes on the card, they were just crafty props for the photos this time 😁

I hope you think of this Crafty Rainbow Birthday Wishes Card the next time you need to mail out a  crafty friends' birthday card this year ✀🌈🎂

Thank you for stopping by 😊
Until next time... Happy Crafting 👋


SUPPLIES
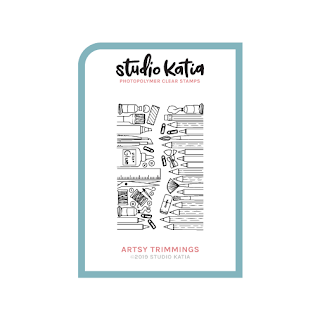
ARSTY TRIMMINGS
ARSTY TRIMMINGS
Shop at:
SSS | SK
ARTSY TRIMMINGS DIES
Shop at:
SSS | SK
BIRTHDAY GREETINGS
BIRTHDAY GREETINGS
Shop at:
SSS | SK
EMBELLISHMENT WAND
EMBELLISHMENT WAND
Shop at:
SSS | SK
SILVER FEVER CONFETTI
Shop at:
SSS | SK
STUDIO KATIA GLUE
STUDIO KATIA GLUE
Shop at:
SSS | SK
Strathmore 400 Series Watercolor Pad
Shop at:
AMZ
MINI MISTI
MINI MISTI
Shop at:
SSS | AMZ | SBC | SK | HBS
VersaFine ONYX BLACK Ink
Shop at:
SSS | AMZ | SBC | HBS
CRYSTAL CLEAR Emb Pwd
Shop at:
SSS | IO3
ARTEZA BRUSH PENS
ARTEZA BRUSH PENS
Shop at:
AMZ
GEMINI JR. DIE CUTTER
Shop at:
SSS | AMZ | SBC
GLOSSY ACCENTS
GLOSSY ACCENTS
Shop at:
SSS | AMZ | SBC | HBS

To make supplies easy for you to find, I have linked them above. If something is no longer available I will link to a similar product. Affiliate links may be used depending on the product linked. 
Please help support my blog by using these links while shopping at no additional cost to you. For more information about the affiliates I use, please visit my disclaimer here. Thanks so much for all your support!

Tuesday, January 28, 2020

Studio Katia January 2020 Release Blog Hop | Valentine's Day Cards


Hello friends and welcome to Studio Katia's January 2020 Release Blog Hop.

This release includes 5 New Clear Stamp Sets and 3 sets of Coordinating Dies, 8 New Stand Alone Creative Dies, 4 New Stencils, 5 New Glitter Jars, and 12 New Embellishments, as well as New Clear Acetate Sheets! So lots of new goodies for you all to play with 😁

If you have already joined the hop you will have arrived from my friend Kaja's Blog. Once you scroll all the way through the post I will tell you where your next stop is. So let's get started! For my cards today I thought I would create Valentine's Themed cards since Valentine's Day is right around the corner, but as you will see these could also be made for other occasions all year round.

#1 CARD DETAILS
For my first Valentine's Card, I started by stamping out the bees from the new HONEY BEES stamp set, colored them in using Copic Markers and then die-cut them with the coordinating HONEY BEES DIES.

Studio Katia January 2020 Release Blog Hop | Valentine's Day Cards by ilovedoingallthingscrafty.com

Next, I blended out the rainbow background using a combination of Distress Oxide Inks (see supply list below) and then misted the paper to distress the background. I then die cut the MICRO HEXAGON COVER and glued it onto the background. While the ink was still wet I poured on some of the SPARKLE GLITTER, surprisingly I didn't have to use any glue to bond the sparkle but I did shake off ass much of the sparkle that I could.

Studio Katia January 2020 Release Blog Hop | Valentine's Day Cards by ilovedoingallthingscrafty.com

I then popped up the bees using some FOAM TAPE and glued on to them the heart and envelope. To the bees, I also added some Liquid Pixie Dust, white gel pen detailing and glossy accents to their antennas.

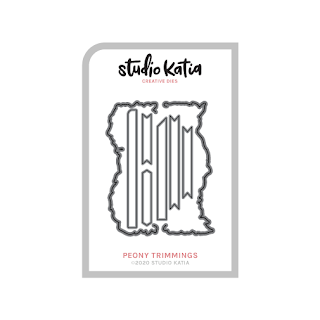
The sentiment banner I used comes from the new PEONY TRIMMINGS + BANNER DIES set, love the variety of sizes and banners that come in the set.

Studio Katia January 2020 Release Blog Hop | Valentine's Day Cards by ilovedoingallthingscrafty.com

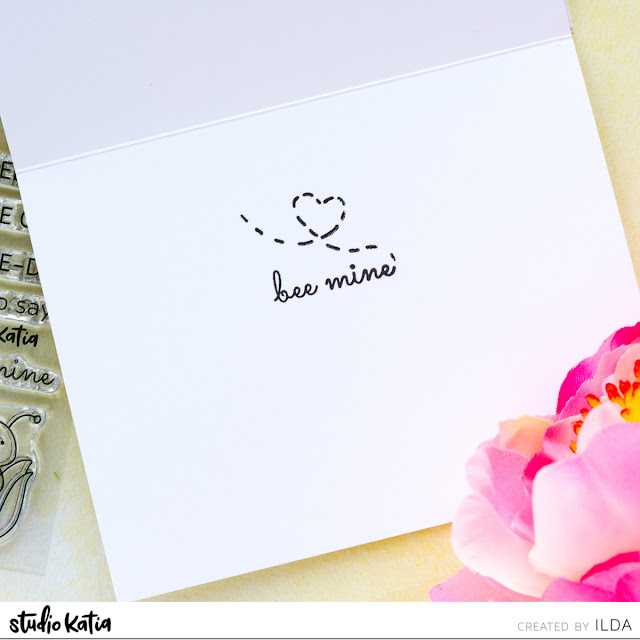
On the inside of the card, I added the bee mine stamp from the HONEY BEES set.

Studio Katia January 2020 Release Blog Hop | Valentine's Day Cards by ilovedoingallthingscrafty.com

And that is how this first card was created, I hope it inspires you. See the supplies below for all the products I used.

SUPPLIES
HONEY BEES
HONEY BEES
Shop at:
SK
HONEY BEES DIES
HONEY BEES DIES
Shop at:
SK
MICRO HEXAGON COVER
MICRO HEXAGON COVER
Shop at:
SK
PEONY TRIMMINGS + BANNER DIES
Shop at:
SK
SPARKLE GLITTER
SPARKLE GLITTER
Shop at:
SSS | SK
STUDIO KATIA GLUE
STUDIO KATIA GLUE
Shop at:
SSS | SK
INK BLENDER BRUSHES
INK BLENDER BRUSHES
Shop at:
SSS | SK
NEENAH SOLAR WHITE 110
Shop at:
SSS | AMZ | HBS
PICKED RASPBERRY Oxide Ink
Shop at:
SSS | SBC | HBS
SQUEEZED LEMONADE Oxide Ink
Shop at:
SSS | SBC | HBS
MERMAID LAGOON Oxide Ink
Shop at:
SSS | AMZ | SBC | HBS
GEMINI JR. DIE CUTTER
Shop at:
SSS | AMZ | SBC
BLACKOUT INK
BLACKOUT INK
Shop at:
SSS | IO3
MINI MISTI
MINI MISTI
Shop at:
SSS | AMZ | SBC | SK | HBS
LIQUID PIXIE DUST
LIQUID PIXIE DUST
Shop at:
SSS | IO3
GLOSSY ACCENTS
GLOSSY ACCENTS
Shop at:
SSS | AMZ | SBC | HBS
WHITE GELLY ROLLER PEN SET
Shop at:
SSS | AMZ | SBC

#2 CARD DETAILS

For my second Valentine's Card, I created a shaker combining a few of the new dies from the release.

I began by creating the shaker heart for the center of the card. To do this I die cut a few layers of the two larger FANCY SCALLOP HEARTS dies together to create the shaker frame. Next, I stacked and glued the frames together then added a piece of acetate to the back of the heart.

I then cut the base for the shaker using the larger scallop heart. Onto the heart, I added my shaker bits which included the new MAJESTIC GLITTERSPARKLING HEARTS CONFETTI GLITTER and IRIDESCENT CRYSTALS. I then added a thin piece of FOAM TAPE along the heart frame and closed up the shaker by aligning it with the bottom heart of the shaker.

Studio Katia January 2020 Release Blog Hop | Valentine's Day Cards by ilovedoingallthingscrafty.com

The next thing I did was die cut the outside scallop frame for the card using the dies from the DOTTED PATTERNS SET 4. To add another touch of pink to the card I used the HEART- FETTI Stencil and applied a pink Glimmer Paste to a piece of white cardstock that I had cut down to size to fit behind the frame.

Studio Katia January 2020 Release Blog Hop | Valentine's Day Cards by ilovedoingallthingscrafty.com

I then mounted the background frame onto the card base to which I first glued a red card front onto. I then popped the shaker heart in the center of the card and added the layered "love you" onto the center of the heart and off to the side I added the die-cut "xoxo" that come from the new LOVELY WORDS DIES.

Studio Katia January 2020 Release Blog Hop | Valentine's Day Cards by ilovedoingallthingscrafty.com

To finish off the card I added a layer of Liquid Pixie Dust to the white die-cut letters.

Studio Katia January 2020 Release Blog Hop | Valentine's Day Cards by ilovedoingallthingscrafty.com

SUPPLIES
FANCY SCALLOP HEARTS
Shop at:
SK
DOTTED PATTERNS SET 4
Shop at:
SK
LOVELY WORDS DIES
LOVELY WORDS 
DIES
Shop at:
SK
HEART- FETTI
HEART- FETTI
Shop at:
SSS | SK
CLEAR ACETATE SHEETS
Shop at:
SK
IRIDESCENT CRYSTALS
IRIDESCENT CRYSTALS
Shop at:
SK
MAJESTIC GLITTER
MAJESTIC GLITTER
Shop at:
SK
SPARKLING HEARTS CONF. GLITTER
Shop at:
SSS | SK
STUDIO KATIA GLUE
STUDIO KATIA GLUE
Shop at:
SSS | SK
FOAM TAPE - WHITE
FOAM TAPE - WHITE
Shop at:
SSS | SK
NEENAH SOLAR WHITE 110
Shop at:
SSS | AMZ | HBS
GEMINI JR. DIE CUTTER
Shop at:
SSS | AMZ | SBC
STRAWBERRY CHAMPAGNE GLIMMER PASTE
Shop at:
SSS | SBC | SK
LIQUID PIXIE DUST
LIQUID PIXIE DUST
Shop at:
SSS | IO3

To make supplies easy for you to find, I have linked them above. If something is no longer available I will link to a similar product. Affiliate links may be used depending on the product linked. Please help support my blog by using these links while shopping at no additional cost to you. For more information about the affiliates I use, please visit my disclaimer here. Thanks so much for all your support!


Blog Hop Giveaway
Studio Katia is giving away a $50 Gift Certificate on their Blog. So make sure you hop back to the start and leave a comment over there if you haven't already! All comments must be left by Friday, February 7th, 2020, at 23:59 PM EST. All winners will be announced on Sunday, February 9th, 2020 on SK Blog.

Personal Giveaway
One lucky person will be selected from comments left here on my Blog to win a $25 Gift Certificate to the Studio Katia Shop. Good Luck!
Shop the New Release HERE

Up Next →the lovely and oh so sweet Kelly Martin or start at the beginning HERE

Thank you all for stopping by, I hope you were inspired by my projects using the New Release Products and until next time... Happy Hopping 👋