Monday, March 18, 2019

Honey Bee Spring Scene | Pop-Up Shadow Box Card | Honey Bee Stamps


Hello friends and Happy Monday!

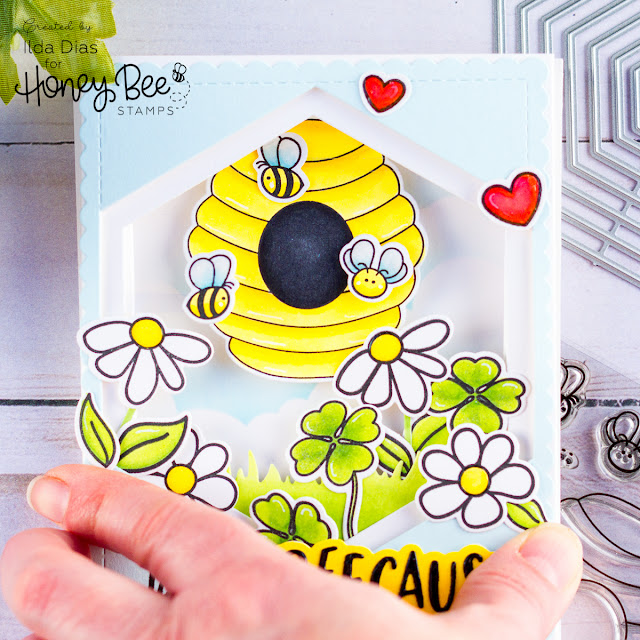
Today I have a Spring-inspired Pop-Up Shadow Box Card mixing and matching a bunch of Honey Bee Stamp products that I am also sharing over on the Honey Bee Stamps Blog. If you are a Jennifer McGuire fan, you may have seen her share how to create these amazing pop-up cards on a recent tutorial of hers. So, of course, I was dying to try this card technique out!

Honey Bee Spring Scene Pop-Up Shadow Box Card for Honey Bee Stamps by ilovedoingallthingscrafty.com
CARD DETAILS

I began this card by cutting out the top and bottom panels at 6 1/4" x 5 1/2".  To create the pop-up mechanism you will need to score both panels, on each side at 1/2" and at the 1" mark. Then fold the pieces in to create a zig-zag fold on each side on the panels. 

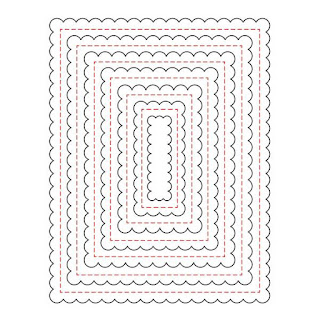
To the top panel, I die cut a hexagon window. I also die cut the same window using the same hexagon die onto a piece of blue cardstock that I had previously die cut using the Scalloped Frame die.
To add another layer of dimension I used the next smaller Stacked Hexagon die to die cut another window to add beneath the card front. 

Now that all the pieces for the card were made I then set them aside to plan out the scene.

Honey Bee Spring Scene Pop-Up Shadow Box Card for Honey Bee Stamps by ilovedoingallthingscrafty.com

I began by creating a background for the card. On a piece of Bristol paper, I blended out some clouds using the Outdoor Scene Builder Stencils

Next, I stamped out all the images I was planning on using on to Neenah cardstock and colored them in using Copic Markers. I then die cut each image using their coordinating dies. 
Below is a list of the stamps and coordinating dies I used.

Flowers and Hearts - Busy Bee Stamp Set | Busy Bee Honey Cuts

To the back piece of the card that I had initially scored, I glued down the background cloud piece. Next, I glued the hive down by popping it up with foam tape. I also added the floating bees by gluing them to thin strips of acetate and attaching them to the side flaps on the bottom panel. 

To the top piece, I began by gluing the top blue scalloped piece to the card front. I then attached the smaller hexagon panel to the inside of the card using foam tape. Before gluing down the colored images, I die cut a grass border piece colored it with Copics and glued it along the bottom of the hexagon to build the scene from. Once I was happy with the arrangement of the flowers I glued them in place. To finish the card, I added glue to the side zigzag tabs and adhered them together. 

The card when finished will measure 4 1/4″ x 5 1/2″ when flattened and will fit nicely into an envelope.


Honey Bee Spring Scene Pop-Up Shadow Box Card for Honey Bee Stamps by ilovedoingallthingscrafty.com

Here is a top view of the card as it stands up without any problems. Check out all those layers of dimension!

Honey Bee Spring Scene Pop-Up Shadow Box Card for Honey Bee Stamps by ilovedoingallthingscrafty.com


For sparkle, I added some Liquid Pixie Dust and a layer of glossy accents. The sentiment was created by stamping out the just from the Hi Honey stamp set and then I pieced together the Beecause from the Hi Honey Cuts set.

Honey Bee Spring Scene Pop-Up Shadow Box Card for Honey Bee Stamps by ilovedoingallthingscrafty.com
SUPPLIES
To make supplies easy to find, I have linked them below. If something I used is no longer available I will link to a similar product.
Affiliate links may be used depending on the product. Your purchases help keep my blog running at no extra cost to you, so thanks in advance for the support!
HEXAGON SOLID STACK CUTS
Shop at:
SSS | SB | HBS
SCALLOP A2 FRAME HONEY CUTS
Shop at:
SSS | SB | HBS
Bee Hive
Bee Hive
Shop at:
SSS | SB | HBS
Bee Hive Dies
Bee Hive Dies
Shop at:
SSS | SB | HBS
Busy Bee Stamp Set
Busy Bee Stamp Set
Shop at:
SSS | SB | HBS
Busy Bees | Honey Cuts
Shop at:
SSS | SB | HBS
MAE THE MOUSE
MAE THE MOUSE
Shop at:
SSS | SB | HBS
MAE THE MOUSE HONEY CUTS
Shop at:
SSS | SB | HBS
HI HONEY
HI HONEY
Shop at:
SSS | SB | HBS
 Hi Honey Dies
Hi Honey Dies
Shop at:
SSS | SB | HBS
Outdoor Scene Builder Stencils
Shop at:
SSS | SB | HBS
Grass Border Dies
Grass Border Dies
Shop at:
SSS | SB | HBS
Neenah  80 LB SOLAR WHITE
Neenah 80 LB SOLAR WHITE
Shop at:
SSS | AMZ
Sizzix Big Shot
Sizzix Big Shot
Shop at:
SSS | AMZ | SB
Magnetic Platform
Magnetic Platform
Shop at:
SSS | AMZ
STANDARD CUTTING PADS
Shop at:
SSS | AMZ
Strathmore Bristol Pad
Shop at:
SSS | AMZ
Oxide Ink Pad BROKEN CHINA
Shop at:
SSS | SB
Tumbled Glass Oxide Ink
Shop at:
SSS | SB
BLENDER BRUSH Set
BLENDER BRUSH Set
Shop at:
SSS | AMZ | IO3
Grafix Acetate 9x12-Inch, 25 Sheets, 003 Clear
Shop at:
AMZ
SSS Card Stock 24 Colors
Shop at:
SSS
Mini Misti Tool
Mini Misti Tool
Shop at:
SSS | AMZ | SB | SK
Blackout Ink
Blackout Ink
Shop at:
SSS | IO3
Liquid Pixie Dust
Liquid Pixie Dust
Shop at:
SSS | IO3
Glossy Accents
Glossy Accents
Shop at:
SSS | AMZ | SB
Sakura 6 WHITE Gelly Roll Classic Medium Point Pens Set
WHITE Gelly Roll Pens Set
Shop at:
SSS | AMZ
Double-Sided Foam Tape
Shop at:
SSS | AMZ


I hope you were inspired by this creation. I had so much fun making this Honey Bee Spring Scene Pop-Up Shadow Box Card. It may look and sound complicated to do but it is actually super easy to make and the dimension you get is pretty amazing! 

Thank you for stopping by 😊
Until next time... Happy Crafting 👋


Friday, March 15, 2019

Studio Katia New Release Blog Hop | GIVEAWAYS (CLOSED and Winner Announced)


Update Carol Hintermeier you are the lucky winner from my Blog Giveaway! Please email studiokatiagiveaway@gmail.com
Hello and welcome to Studio Katia New Release Blog Hop!

This release includes 7 new clear stamp sets, 6 sets of coordinating dies, 5 new stand-alone Creative Dies, 6 new Stencils and a new embellishment! If you have already started on the Hop you would have arrived from the Studio Katia Blog so you are on the right track.

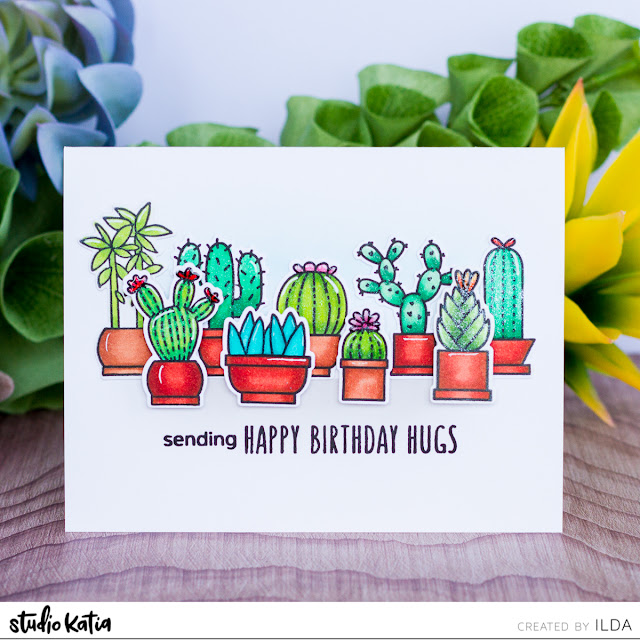
Today I have a few cards to share with you featuring a couple of the new Stamp Sets Potted Plants and Cactus Hugs. Succulents happen to be some of my favorite plants so I was super excited to play with these sets.

Cactus Hugs Card for Studio Katia Blog Hop by ilovedoingallthingscrafty.com

CARD DETAILS
For this first card, I began by blending out Broken China and Hickory Smoke onto the background of the card, but as you can see it is barely noticeable in the photo (but believe me its there, I was obviously very light handed with my blending 😏). Next, I lined up the taller plant images along the middle of the card where the Hickory line was created. I then used the other plants to fill in the gaps in front, also popping them up with foam tape.  I had previously colored these images in using Copic Markers for the Kathy Racoosin's 30-day Coloring Challenge which made this card super quick to put together.

For some sparkle to the plants, I added a layer of Liquid Pixie Dust and then added some white gel pen highlights.  To finish off the card I stamped the sentiment from the Cactus Hugs set.

Cactus Hugs Card for Studio Katia Blog Hop by ilovedoingallthingscrafty.com

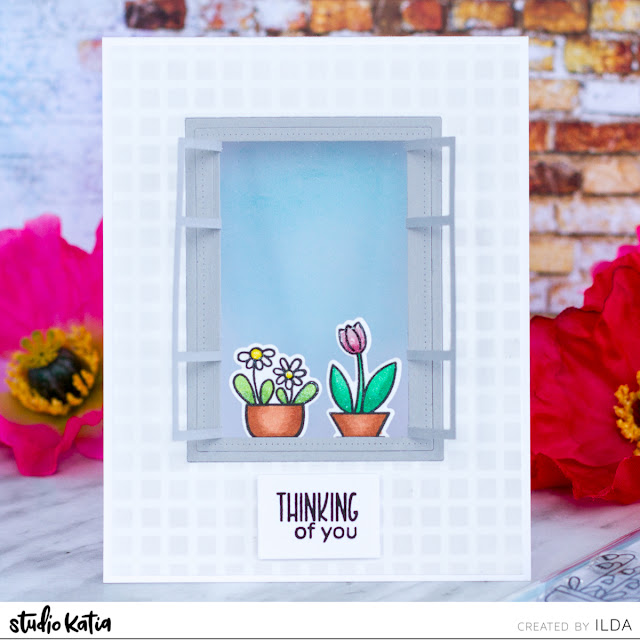
For this next card, I began by blending out Hickory Smoke onto a piece of Bristol Paper using the Square Brick Stencil. I then took the stenciled paper and centered it onto the card front of the card base and ran them together through the die cutting machine with the European Window die. I also die cut the window using grey cardstock. Now that all the pieces were cut out, all I did was glue an acetate piece directly onto the card base and covered it up with the stenciled panel. Next, I glued on the outer frame of the window and just before I glued the shutter piece on I glued the plants to the acetate first and then added the shutter piece to make it look like the plants were on the inside.

Here is a view of the shutters partially opened.

Thinking of you Window Card for Studio Katia Blog Hop by ilovedoingallthingscrafty.com

In the picture below I have just bent back the shutters to open up the window. I also lightly blended out Broken China Oxide ink onto the inside of the card as you can see through the opening of the window.

Thinking of you Window Card for Studio Katia Blog Hop by ilovedoingallthingscrafty.com

The sentiment comes from the Potted Plants set and the little rectangle I stamped it onto is actually a die cut scrap piece from the European Window Die.

Thinking of you Window Card for Studio Katia Blog Hop by ilovedoingallthingscrafty.com
Again these images were colored in using Copic Markers and the sparkle was painted on using Liquid Pixie Dust. To the tulip and the centers of the flowers, I added some glossy accents.

I hope you were inspired by my cards today and hope you get inspired by all the creations you find along the hop today.

BLOG HOP 
BLOG HOP GIVEAWAY
Studio Katia is giving away TWO $50 CAD gift certificates on their Blog. Winners will be chosen randomly from comments left on Studio Katia Blog.
To enter:
  • Leave a comment on Studio Katia blog post
  • Follow us on Instagram
  • Like us on Facebook
  • Make sure to leave all the comments by Friday, March 22nd, 2019 11:59 PM EST. All winners will be announced on Sunday, March 24th, 2019 on the Studio Katia Blog.
PERSONAL BLOG GIVEAWAY
I will also be giving away a $25 Gift card to the Studio Katia Shop. All you need to do is leave a comment below.
Good luck to you all and Happy Hopping!

Wednesday, March 13, 2019

Under the Sea Window Shaker | Studio Katia


Hello my friends today I am up on the Studio Katia Blog with this fun card.

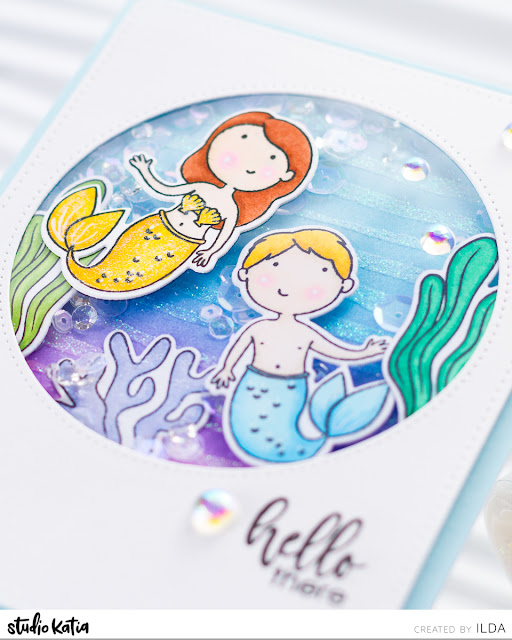
It's is finally looking like the snow is melting and Spring weather is on its way! I just can't wait for it to warm up as you maybe can tell by this Under the Sea Shaker card.  Interactive cards are definitely one of my favorite kinds of cards to make and to give away.

Under the Sea Window Shaker for Studio Katia by ilovedoingallthingscrafty.com

CARD DETAILS
To begin this card I stamped out images from the Mermaid For Each Other and the Under the Sea sets and then die cut them with their coordinating dies. They were colored in using Copic markers.

Under the Sea Window Shaker for Studio Katia by ilovedoingallthingscrafty.com

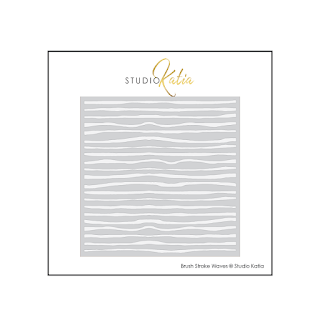
Next, I blended out some Distress Oxide Inks (tumbled glass, mermaid lagoon and wilted violet) onto a piece of Bristol paper.  Then I used the Brush Stroke Waves stencil to add a layer of Glimmer Paste onto the background.

Under the Sea Window Shaker for Studio Katia by ilovedoingallthingscrafty.com

For the top panel, I used the Fancy Circle Dies to die cut the circle window and then used the frame from the Dotted Patterns Set 3 to cut out the panel. Next, I adhered a piece of acetate to the window opening and glued the water plants along the edge of the window. To the background, I glued the coral piece and the merman I popped up with a piece of foam tape. Not sure if you can tell from the photos but the mermaid was the only image I glued on the top of the acetate.

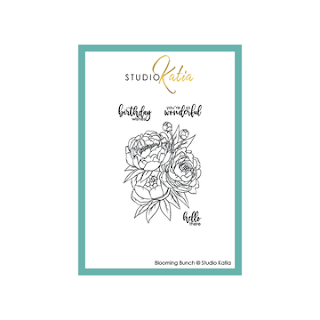
To create the shaker portion of the card I used foam tape and added it to the outside edge under the card front panel. Before attaching it to the background I added my sequin bits that consisted of Shimmering Ice Fusion Sequins and Sparkling Crystals to the center of where the window would be. I then removed the protective adhesive from the foam and lined it up with the background. I then attached that to a card base that I had glued a piece of light blue cardstock to. The sentiment I used on the card front comes from the Blooming Bunch Stamp set.

Under the Sea Window Shaker for Studio Katia by ilovedoingallthingscrafty.com

For a bit of sparkle on the images, I used Liquid Pixie Dust on the mermaid tails and the coral.
I hope you got some inspiration from this fun Under the Sea Shaker card. Oh, how I would love to be swimming in that magical ocean right now!

SUPPLIES
To make supplies easy to find, I have linked them below. If something I used is no longer available I will link to a similar product.
Affiliate links may be used depending on the product. Your purchases help keep my blog running at no extra cost to you, so thanks in advance for the support!


MERMAID FOR EACH OTHER
Shop at:
SSS | SK
UNDER THE SEA
UNDER THE SEA
Shop at:
SSS | SK
BLOOMING BUNCH STAMP SET
Shop at:
SSS | SK
MERMAID FOR EACH OTHER DIES
Shop at:
SSS | SK
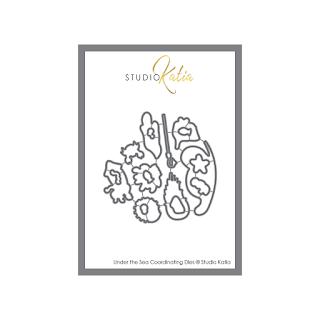
UNDER THE SEA DIES
UNDER THE SEA DIES
Shop at:
SSS | SK
FANCY CIRCLE DIES
FANCY CIRCLE DIES
Shop at:
SSS | SK
DOTTED PATTERNS SET 3 DIES
Shop at:
SSS | SK
BRUSH STROKE WAVES STENCIL
Shop at:
SSS | SK
SHIMMERING ICE FUSION
Shop at:
SSS | SK
SPARKLING CRYSTALS MIX
Shop at:
SSS | SK
IRIDESCENT BUBBLES
IRIDESCENT BUBBLES
Shop at:
SSS | SK
TRIANGLE TRAY
TRIANGLE TRAY
Shop at:
SSS | SK
STUDIO KATIA GLUE
STUDIO KATIA GLUE
Shop at:
SSS | SK
Sizzix Big Shot
Sizzix Big Shot
Shop at:
SSS | AMZ | SB
Magnetic Platform
Magnetic Platform
Shop at:
SSS | AMZ
STANDARD CUTTING PADS
Shop at:
SSS | AMZ
Strathmore Bristol Pad
Shop at:
SSS | AMZ
Grafix Acetate 9x12-Inch, 25 Sheets, 003 Clear
Shop at:
AMZ
Mini Misti Tool
Mini Misti Tool
Shop at:
SSS | AMZ | SB | SK
Blackout Ink
Blackout Ink
Shop at:
SSS | IO3
Tumbled Glass Oxide Ink
Shop at:
SSS
Oxide Ink Pad MERMAID LAGOON
Shop at:
SSS | AMZ
Oxide Ink Pad WILTED VIOLET
Shop at:
SSS
Liquid Pixie Dust
Liquid Pixie Dust
Shop at:
SSS | IO3
Glimmer Paste | Moonstone
Shop at:
SSS | AMZ | HBS
SSS Card Stock 24 Colors
Shop at:
SSS
Sakura 6 WHITE Gelly Roll Classic Medium Point Pens Set
Shop at:
SSS | AMZ
Double-Sided Foam Tape
Shop at:
SSS | AMZ


Thank you for stopping by 😊
Until next time... Happy Crafting 👋