Monday, April 15, 2019

Hello Beautiful | Honey Bee Stamps Happy BEE Day Release Preview


Hello Beautiful for Honey Bee Stamps Happy BEE Day Release Preview by ilovedoingallthingscrafty.com

Happy Monday!!!

If you haven't been able to tell by now, I fill you in... I love rainbows! The rainbow palette has always been a favorite of mine and is why I love using it so much in my cards. Yesterday, I shared a rainbow card and today is a new day so here is some more rainbow inspiration for Day 2 of Sneak Previews.


CARD DETAILS

For this card, I began by blending out the rainbow arches from the RAINBOW WISHES STENCIL onto Bristol paper using distress oxide inks. I also lightly blended tumbled glass towards the bottom of the paper. I then used a DECKLE EDGE FRAME to die cut the panel.

Onto the card base and the bottom of the rainbow, I added a few glimmer paste clouds using the clouds from the RAINBOW WISHES STENCILS.

Hello Beautiful for Honey Bee Stamps Happy BEE Day Release Preview by ilovedoingallthingscrafty.com

The Hello Beautiful sentiment comes from the THANKS A BUNCH stamp set and then I used coordinating DIES to cut the sentiment out.

Hello Beautiful for Honey Bee Stamps Happy BEE Day Release Preview by ilovedoingallthingscrafty.com

To finish off the card I added a few AURORA LIGHTS Confetti sequins to look like drops of rain beneath the clouds.

GIVEAWAY
Honey Bee Stamps will be doing Daily Giveaways on their BLOG, so I strongly encourage you to stop by daily this week 😉 Plus, you'll get to see more inspiration and Sneak Previews from the rest of the Design Team.

PROMO FOR CUSTOMERS
Purchases of $35 get a free bee stamp.  Purchases of $75 get the free bee stamp and die.  Purchases of $100 or more get the free bee stamp, die AND the bee enamel pin. The enamel pins are not available for sale. Only a gift with purchase!

New Release Products will be available for Purchase this Thursday at midnight CST.

Thank you for stopping by and see you all tomorrow for Day 3 Sneaks!
Happy Crafting 👋

Sunday, April 14, 2019

Rainbow After the Storm | Honey Bee Stamps Happy BEE Day Release Preview


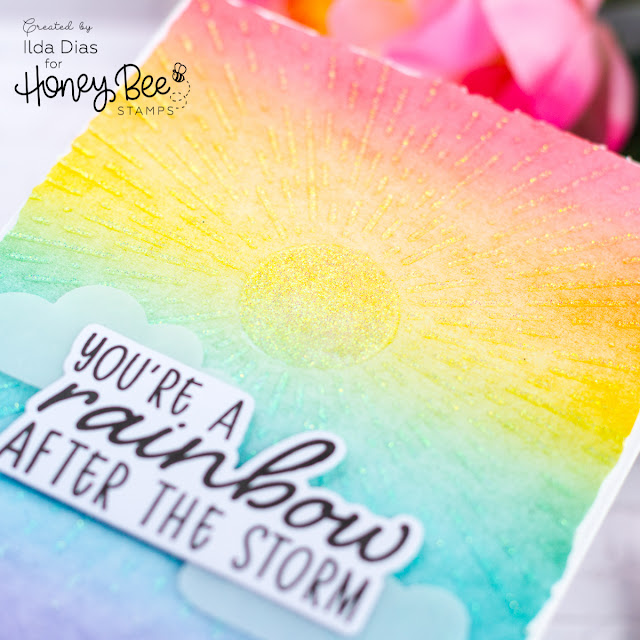
Rainbow After the Storm for Honey Bee Stamps Happy BEE Day Release Preview by ilovedoingallthingscrafty.com

Happy Sunday friends!

Well, today starts Preview Week for Honey Bee Stamps Happy BEE Day Release. Honey Bee Stamps is celebrating 4 years in business! How AWESOME is that!?!  Hopefully, you will be following along as I will be sharing lots of inspiration this week featuring all new goodies that will be available very soon in their SHOP. So let's get started with today's card.


CARD DETAILS

I began this card by blending out distress oxide inks onto a piece of Bristol paper. Then die cut the panel using the largest DECKLE EDGE FRAME. Once the ink was completely dry I used the RADIANT STENCIL to add the glittery sun using glimmer paste.

Rainbow After the Storm for Honey Bee Stamps Happy BEE Day Release Preview by ilovedoingallthingscrafty.com

I then stamped out the sentiment "You're a Rainbow After the Storm" from the RAINBOW WISHES stamp set and then used the coordinating DIES to die cut the sentiment and also a few clouds from vellum.

I love how simple it was to create this card and how beautiful it turned out!

Rainbow After the Storm for Honey Bee Stamps Happy BEE Day Release Preview by ilovedoingallthingscrafty.com

GIVEAWAY
Honey Bee Stamps will be doing Daily Giveaways on their BLOG, so I strongly encourage you to stop by daily this week 😉 Plus, you'll get to see more inspiration and Sneak Previews from the rest of the Design Team.

PROMO FOR CUSTOMERS
Purchases of $35 get a free bee stamp.  Purchases of $75 get the free bee stamp and die.  Purchases of $100 or more get the free bee stamp, die AND the bee enamel pin. The enamel pins are not available for sale. Only a gift with purchase!

New Release Products will be available for Purchase this Thursday at midnight CST.

Thank you for stopping by and see you all tomorrow for Day 2 Sneaks!
Happy Crafting 👋

Thursday, April 11, 2019

Clean and Simple Cards | Simon Says Stamp Blossoms and Butterflies Release | Dahlia Frame Die


Hey Friends, I am back again today with a couple of clean and simple cards featuring the Dahlia Frame Die from the latest Simon Says Stamp Blossoms and Butterflies Release. I find clean and simple the hardest card design to pull off, but I am happy with my results and hopefully, they inspire you!

Clean and Simple Cards for Simon Says Stamp Blossoms and Butterflies Release ft. Dahlia Frame Die by ilovedoingallthingscrafty.com

CARD DETAILS

With this first card, I had an idea of making the Dahlias represent two friends leaning on each other for support. So I began by using the Dahlia Frame Die to die cut a few flowers from watercolor paper. As you can see I just snipped the flower out of the frame. I also used really old cutting plates so that the pieces from the center weren't die cut all the way through.
Tip →For intricate dies like this one, I like to use a metal shim if I want to get a great cut the first time around.

Then I watercolored my flowers and background using distress inks adding layers of color and allowing the ink to dry in between to add texture and deepen the color. I then die cut the background using a SSS Frame and used one of the sentiments from the SSS Sentiment Strips to add my greeting.

I finished off the card by adding a few clear drops and coloring in the center of the flower petals with Liquid Pixie Dust.

Clean and Simple Cards for Simon Says Stamp Blossoms and Butterflies Release ft. Dahlia Frame Die by ilovedoingallthingscrafty.com

For this next card, I die cut the Dahlia Frame from a piece of white card stock. Then on a piece of Bristol paper, I did some controlled ink smooching by adding distress inks to an acrylic block, misting it with water and pressing it on to the paper. Next, I glued the die cut dahlia frame to the colored background and trimmed that to the size of the frame. I then glued that onto the center of my card base. The thin frame I used comes from the SSS Frames and the sentiment I used I cut from the SSS Sentiment Strips.

Clean and Simple Cards for Simon Says Stamp Blossoms and Butterflies Release ft. Dahlia Frame Die by ilovedoingallthingscrafty.com

To finish I added glossy accents into the wells of the flower cuts and glue some sparkling sequins.

Clean and Simple Cards for Simon Says Stamp Blossoms and Butterflies Release ft. Dahlia Frame Die by ilovedoingallthingscrafty.com
SUPPLIES
To make supplies easy for you to find, I have linked them here below. If something is no longer available I will link to a similar product. Affiliate links may be used depending on the product linked. By shopping through my links you help keep my blog running at no extra cost to you. So thank you in advance for supporting my creations! Supplies marked with an asterisk (*) were generously sent to me by Simon Says Stamp.

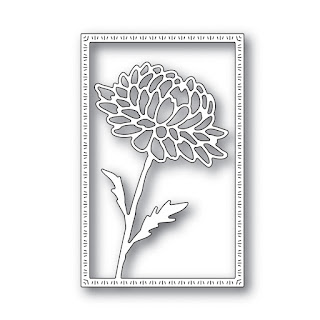
DAHLIA FRAME DIE
*DAHLIA FRAME DIE
Shop at:
SSS
SENTIMENT STRIPS
SENTIMENT STRIPS
Shop at:
SSS
SSS FRAMES Craft Dies
Shop at:
SSS
The Official Anti-Anxiety 360 Spinner
Clear Round Drops
Shop at:
SSS | SK
MAJESTIC FUSION
MAJESTIC FUSION
Shop at:
SSS | SK
Liquid Pixie Dust
Liquid Pixie Dust
Shop at:
SSS | IO3
Glossy Accents
Glossy Accents
Shop at:
SSS | AMZ | SB

Click HERE if you want to check out the rest of this amazing release!  

I hope these CAS cards inspired you today. Have an amazing weekend!

Until next time... Happy Crafting 👋

Wednesday, April 10, 2019

Heels To You Release | Friendship Card | Ink On 3


It's Release Day for Ink On 3 with the very HOT - Heels To You Stamp Set and Coordinating Dies. 

I think this has to be my favorite set to date form Ink On 3 😍

Heels To You Release Friendship Card for Ink On 3 by ilovedoingallthingscrafty.com

CARD DETAILS

I stamped out the heel images using Blackout Ink, then colored them in using Copic markers. Next die cut the sentiment dies from the coordinating set and inked them up with Juicy Ink and then heat set them using Gold Rush Embossing Powder. I then die cut the panel using a scalloped frame and mounted the panel onto an A2 sized blue piece of cardstock to match the heels, and glued it to the card base.

Heels To You Release Friendship Card for Ink On 3 by ilovedoingallthingscrafty.com

To add some sparkle I painted the magnolias in using Liquid Pixie Dust, and to the centers of the flowers, I added some Glossy Accents.

Heels To You Release Friendship Card for Ink On 3 by ilovedoingallthingscrafty.com

SUPPLIES
To make supplies easy for you to find, I have linked them here below. If something is no longer available I will link to a similar product. Affiliate links may be used depending on the product linked. By shopping through my links you help keep my blog running at no extra cost to you. So thank you in advance for supporting my creations!

Heels To You
Heels To You
Shop at:
IO3
Heels To You Coordinating Dies
Shop at:
IO3
Blackout Ink
Blackout Ink
Shop at:
SSS | IO3
Juicy  Ink
Juicy Ink
Shop at:
SSS | IO3
Gold Rush Embossing Powder
Shop at:
SSS | IO3
Liquid Pixie Dust
Liquid Pixie Dust
Shop at:
SSS | IO3
Medium Water Brush Pen
Shop at:
IO3


For a limited time get FREE SHIPPING on orders of $35.00 or more until April 17th, 2019

Continental US only, use COUPON → USfreeship35

International will get a shipping discount, use COUPON → int410inkon3


Hope you were inspired by my Heels To You Friendship Card. For more inspiration, visit the Ink On 3  Blog

Thank you for stopping by 😊
Until next time... Happy Crafting 👋

Friday, April 5, 2019

Shark-Tastic Birthday Wobbler Card | Studio Katia


Shark-Tastic Birthday Wobbler Card for Studio Katia by ilovedoingallthingscrafty.com

Happy Friday my "Jawsome" friends!

Yah,  I really can't help it, I am going to be a bit punny with my card today. This Jawsome stamp set is filled with so many punnies perfect for so many occasions. But today I'm using it to share a fun birthday card I made for my little cousin. I'm kinda kicking myself because the shark on the surfboard is on a wobbler and I didn't get a clip of it in action😭. So you will have to take my word for it it is SO Sharktastic, lol!

Shark-Tastic Birthday Wobbler Card for Studio Katia by ilovedoingallthingscrafty.com

CARD DETAILS

To begin, I stamped out the sharks and the surfboard from the JAWSOME set. Colored them in with Copic markers and then die cut them with the JAWESOME coordinating dies

Next, I created the pieces for the background. On Bristol paper, I blended out the sun rays for the sky using the UNDERWATER SUN RAYS using mustard seed distress oxide ink, then die cut the panel with the dotted frame from the DOTTED PATTERNS SET 3 DIES

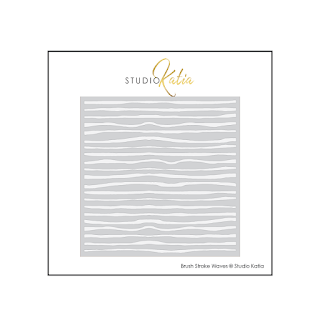
For the ocean background, I blended out salty ocean oxide ink onto Bristol paper and once a base of color was applied I added the waves in by blending out another layer of color using the BRUSH STROKE WAVES STENCIL. To add a little more interest to the water I spritzed the piece with some water drops and picked them up with a paper towel. I then die cut waves into the ocean by using the TRIMMINGS BORDERS CREATIVE DIE and then die cut the dotted bottom edge and the sides to line up with the Sun Rays panel using the same DOTTED PATTERNS SET 3 DIES

Shark-Tastic Birthday Wobbler Card for Studio Katia by ilovedoingallthingscrafty.com

Now that all the pieces were done, I assembled the card onto a top folding A2 sized card front. I started by gluing on the sun rays piece first, and then the middle wave piece and lastly, the bottom wave popped up using foam tape. At this point, I stamped on the sentiment to the top of the card front using a stamp positioner. Finally, I glued the sharks as shown in the water, but for the shark on the right I first glued him to the surfboard (don't look to closely or you will see that he is actually on the bottom of it, I was trying to cover up the bite mark from the board, haha) and then I attached the glued surfing shark to an action wobbler to add an interactive element for the recipient. I then finished the card by adding some clear CLEAR ROUND DROPS MIX.

On the inside, I had stamped the sentiment "have a JAWSOME birthday" but forgot to photograph it
😣

SUPPLIES
To make supplies easy for you to find, I have linked them here below. If something is no longer available I will link to a similar product. Affiliate links may be used depending on the product linked. By shopping through my links you help keep my blog running at no extra cost to you. So thank you in advance for supporting my creations!

JAWSOME
JAWSOME
Shop at:
SSS | SK
JAWSOME DIES
JAWSOME DIES
Shop at:
SSS | SK
TRIMMINGS BORDERS CREATIVE DIES
Shop at:
SSS | SK
DOTTED PATTERNS SET 3 CREATIVE DIES
Shop at:
SSS | SK
UNDERWATER SUN RAYS
UNDERWATER SUN RAYS
Shop at:
SSS | SK
BRUSH STROKE WAVES STENCIL
Shop at:
SSS | SK
The Official Anti-Anxiety 360 Spinner
Shop at:
SSS | SK
TRIANGLE TRAY
TRIANGLE TRAY
Shop at:
SSS | SK
STUDIO KATIA GLUE
STUDIO KATIA GLUE
Shop at:
SSS | SK
Mini Misti Tool
Mini Misti Tool
Shop at:
SSS | AMZ | SB | SK
Neenah  80 LB SOLAR WHITE
Neenah 80 LB SOLAR WHITE
Shop at:
SSS | AMZ
Blackout Ink
Blackout Ink
Shop at:
SSS | IO3
Strathmore Bristol Pad
Shop at:
SSS | AMZ
Oxide Ink Pad SALTY OCEAN
Shop at:
SSS | AMZ
Oxide Ink Pad MUSTARD SEED
Shop at:
SSS | HBS
BLENDER BRUSH Set
BLENDER BRUSH Set
Shop at:
SSS | AMZ | PF
DISTRESS SPRAYER Ranger
Shop at:
SSS
Mini Action WOBBLES
Mini Action WOBBLES
Shop at:
SSS
WHITE Gelly Roll Pens Set
Shop at:
SSS | AMZ
Double-Sided Foam Tape
Shop at:
SSS | AMZ

Thanks so much for stopping by and checking out this SHARK-TASTIC card today. For more inspiration using Studio Katia products stop by their BLOG.

Until next time stay JAWSOME my friends 🙊👋