This one is for all the shoppers out there!!! I think your just going to love this idea!
If you are anything like me you have a ton of cards taking up precious space in your already crowded wallet! NOT anymore!!!!
About 2 years ago now I had an idea to make a credit card wallet after working on some pockets that I had created for a mini album. I actually sold them on Etsy, but since I closed the shop down I thought I would share the idea with everybody!
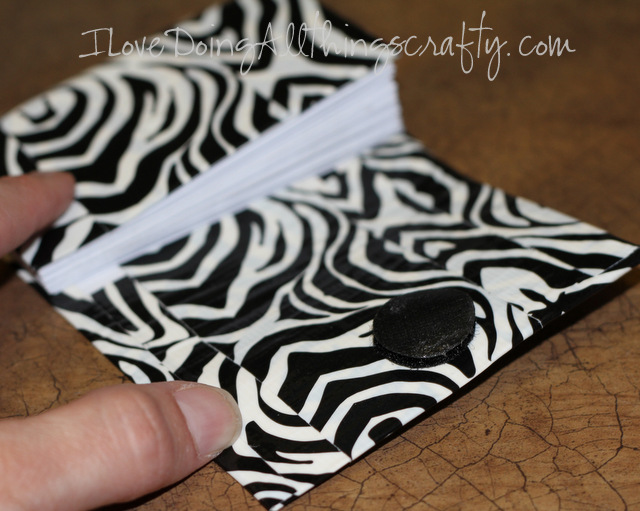
Here is my original card wallet... was getting pretty worn out! Even though it was made out of paper, I'm surprised it lasted this long! You would not believe how many compliments and inquiries I've had on it!!!
While I was shopping at Home Depot on the weekend with my DH, I saw decorative duct tape... I had seen it many times before but it wasn't until then that I had my light bulb moment! Why not line my card stock with duct tape! Brilliant... It would now last forever! Or until I get sick of the pattern, lol!
So here is how to make your own...
Supplies:
- double-sided tape
- duct tape (I guess if your a guy you might like the regular kind, hehe)
- envelopes (I bought mine at the dollar store, but you could probably use recycled ones)
- a piece of scrap card stock
- First I cut my envelope ends to 4.5 x 9.2 cm or for my US friends, 1 3/4 x 3 5/8 inches ( I used 25 pockets for this wallet)
- I then applied my double-sided tape around the outer edges of the pocket (make sure to go as close to the top and bottom edge as possible, but not the sides... come in about 3mm or 1/8 of an inch from the outer edge)
- Line it up with the next pocket and adhere them together, ensure it is all lined up and that the opening of the pockets is in the same direction!
Repeat until all pockets are glued together.
Next, take the scrap card stock, and cut it to 20 x 9.5 cm or 8 x 3 3/4 inches, then place the edge of the paper or the sticky side of the duct tape.
Next cut a little slit on the duct tape where the paper ends and fold the duct over on to itself.
Then take that same piece of duct tape and adhere it to the paper. Bend over the edge of the duct tape that remains and this will create a nice clean outer edge... (Confused yet??? I would be! lol! Hopefully, the pics are self-explanatory!)
Repeat the last step for the other side.
Continue by cover the remaining paper down the middle (ensure you cut a piece long enough to cover the other side as well)
Next glue the pockets to the inside bottom of the duct tape layer, making sure to align the top edges.
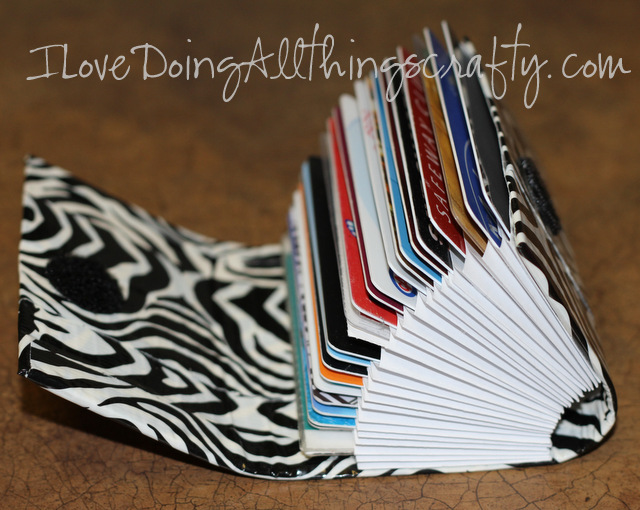
Then wrap the duct layer all the way around the pockets until it overlaps on the front of the wallet leave enough room for the wallet to expand and for the credit cards to stick out at the top. Then adhere the back of the pockets to the inside of the duct tape layer.
To secure it closed I used a Velcro dot. The easiest way to ensure that the dots line up is to take both top and bottom pieces of Velcro and center it on the inner lid of the wallet, then fold it closed.
Once you open it the dot will be left on the other side of the wallet! EASY right?!
Finally, fill with all your plastic! (I use this for the cards I don't use every day, the important ones are kept in my main wallet!)
There you go... just pull it out when you need to!
Fits perfectly in a side pocket of my purse ;)
I hope you like this tutorial and if you make one I would love to see it!
Happy crafting!
UPDATE
February 10, 2017


