Showing posts with label miss you. Show all posts

Monday, February 8, 2021

Miss You A Latte Friendship Card | Honey Bee Stamps

Miss You,Latte, Friendship Card,Honey Bee Stamps,Coffee,Love you S'more, Card Making, Stamping, Die Cutting, handmade card, ilovedoingallthingscrafty, Stamps, how to,Copic Markers,Ink Blending,Stencil

Good Day my friends!

I have been missing my friends so much lately, and I am sure many of you are as well. So I thought I would make a Missing You Friendship Card to share with you all today.

CARD DETAILS

Here is my recipe for creating this card.
Miss You,Latte, Friendship Card,Honey Bee Stamps,Coffee,Love you S'more, Card Making, Stamping, Die Cutting, handmade card, ilovedoingallthingscrafty, Stamps, how to,Copic Markers,Ink Blending,Stencil
  • Die-cut all the layers of the LATTE Script dies and piece together. (I die cut 3 of the top layers for more dimentsion.)
  • Stamp out the sentiments from the LATTE Stamp set. (I used ATELIER TWIGGY BROWN Ink on a little brown cardstock scrap.)
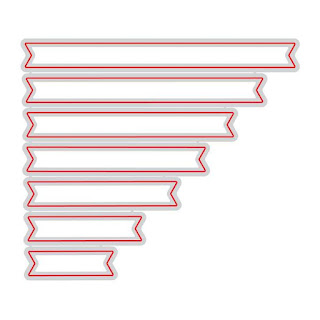
  • Use the SENTIMENT BANNER DIES to die cut the stamped sentiments.
Miss You,Latte, Friendship Card,Honey Bee Stamps,Coffee,Love you S'more, Card Making, Stamping, Die Cutting, handmade card, ilovedoingallthingscrafty, Stamps, how to,Copic Markers,Ink Blending,Stencil

Miss You,Latte, Friendship Card,Honey Bee Stamps,Coffee,Love you S'more, Card Making, Stamping, Die Cutting, handmade card, ilovedoingallthingscrafty, Stamps, how to,Copic Markers,Ink Blending,Stencil
  • Arrange and adhere all the elements to the background.
  • Trim the panel.
  • Use foam tape to glue the background horizontally onto a side folding A2 card base.
  • Add white gel highlights where desired.
  • Send to a friend!

Thank you for stopping by and until next time... Happy Crafting!

SUPPLIES
LOVE YOU S'MORE
LOVE YOU S'MORE
Shop at:
SSS | HBS
LOVE YOU S'MORE DIES
LOVE YOU
S'MORE DIES

Shop at:
SSS | HBS
LATTE
LATTE
Shop at:
SSS | SB | HBS
LATTE DIES
LATTE DIES
Shop at:
SSS | SB | HBS
SENTIMENT BANNER DIES
Shop at:
SSS | SB | HBS
COFFEE BEAN STENCIL
COFFEE BEAN STENCIL
Shop at:
SSS | SB | HBS
BACKGROUND BLENDER BRUSHES
Shop at:
SSS | HBS
BEE CREATIVE GLUE
BEE CREATIVE GLUE
Shop at:
SSS | SB | HBS
MINI MISTI
MINI MISTI
Shop at:
SSS | SB | HBS
FADEOUT INK
FADEOUT INK
Shop at:
SSS | HBS | IO3
COPIC SKETCH
COPIC SKETCH
Shop at:
SSS | AMZ
ATELIER TWIGGY BROWN
Shop at:
SSS | HBS | IO3
GEMINI JR. DIE CUTTER
Shop at:
SSS | SB
MOONSTONE GLIMMER PASTE
Shop at:
SSS | HBS | TS US
MEDIA SPATULAS
MEDIA SPATULAS
Shop at:
SSSHBS | TS US 
CHUNKY SPARKLE GLITTER
Shop at:
SK
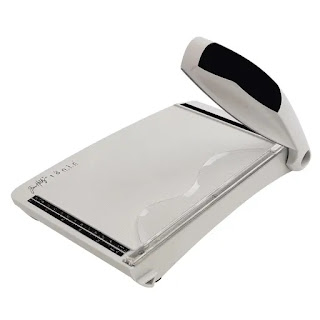
Tim Holtz 8.5 Inch Trimmer
Shop at:
TS UK
FOAM TAPE - WHITE
FOAM TAPE - WHITE
Shop at:
SSS | SK
WHITE GELLY ROLLER PEN SET
WHITE GELLY
ROLLER PEN SET

Shop at:
SSS | AMZ | SB
To make supplies easy for you to find, I have linked them above. If something is no longer available I will link to a similar product. Affiliate links may be used depending on the product linked. Please help support my blog by using these links while shopping at no additional cost to you. For more information about the affiliates I use, please visit my disclaimer here. Thanks so much for all your support!

Friday, January 29, 2021

Backgrounds & Borders Release Blog Hop | Tonic Studios

January 2021, Backgrounds & Borders, Stamp Club, Blog Hop, Tonic Studios, Metallic Papers, Card Making, Stamping, Die Cutting, handmade card, ilovedoingallthingscrafty, Stamps, how to, friendship cards, Miss you

Happy Friday Friends!

Welcome to the Tonic Studios January 2021 Backgrounds & Borders Stamp Club Blog Hop. If you have arrived from my friend Erica's Blog you are on the right track. I will link the complete hop list and giveaway details near the end of this post, so stay tuned!


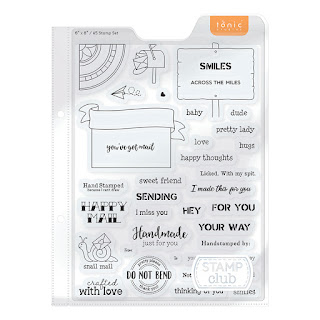
For the Hop, I have created three cards featuring the new Backgrounds & Borders Stamp and Die Bundle US|UK. Take a look at these sets.


Both these sets come in high-quality plastic sleeves, that are compatible to work with A5 ring binders. They come in an Orange US|UK or Blue binder US|UK.

CARD DETAILS

I kept all 3 cards fairly simple, which was easy to do with the size of these fonts and designs. 

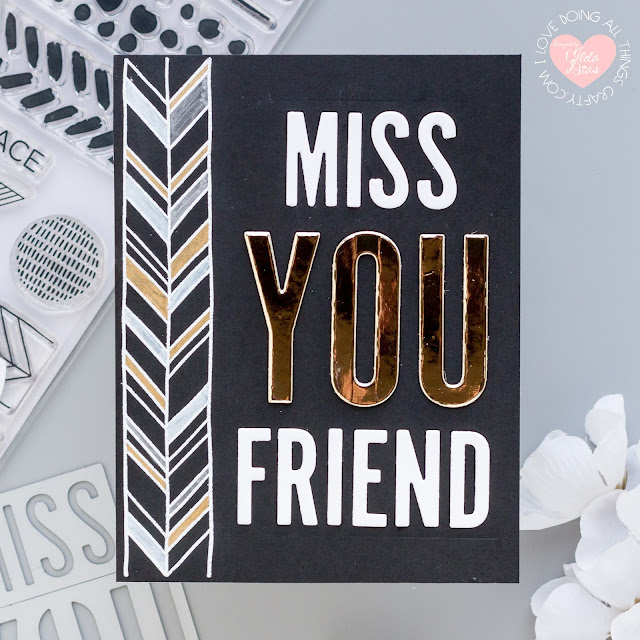
For this first friendship card, I began by stamping the tribal herringbone pattern stamp from the Backgrounds & Borders Stamp Set US|UK vertically down the left side of a piece of black cardstock cut to A2 size. I used white pigment ink and then heat embossed it with white EP.

January 2021, Backgrounds & Borders, Stamp Club, Blog Hop, Tonic Studios, Metallic Papers, Card Making, Stamping, Die Cutting, handmade card, ilovedoingallthingscrafty, Stamps, how to,

To add some color I used chalk markers and metallic gel pens to color in some of the spaces of the pattern.

January 2021, Backgrounds & Borders, Stamp Club, Blog Hop, Tonic Studios, Metallic Papers, Card Making, Stamping, Die Cutting, handmade card, ilovedoingallthingscrafty, Stamps, how to,

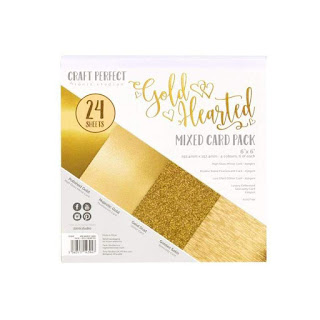
I then lined up the dies from the Backgrounds & Borders Stamp Die Set and die cut all three words from the panel. At this point, I glued the panel to the card base. This then made it easy to see the negative spaces and line up all the letters. For each word, I then stacked 3 die-cut layers together and glued each letter back into the corresponding place. I used the gold cardstock from the Gold Hearted Paper Pad US|UK.

January 2021, Backgrounds & Borders, Stamp Club, Blog Hop, Tonic Studios, Metallic Papers, Card Making, Stamping, Die Cutting, handmade card, ilovedoingallthingscrafty, Stamps, how to,

This next card turned out to be my favorite and it was super simple to make. To add the embossing detail to the center of the hexagons I lined up and taped the circle embossing plates to the linked hexagon die openings and then ran it through the die-cut machine. I repeated this using 3 types of cardstocks, three times. Gold cardstock comes from the Gold Hearted Pad US|UK and the silver glitter comes from the Silver Service Pad US|UK.

January 2021, Backgrounds & Borders, Stamp Club, Blog Hop, Tonic Studios, Metallic Papers, Card Making, Stamping, Die Cutting, handmade card, ilovedoingallthingscrafty, Stamps, how to,

I then started by gluing the gold hexagon strip along the bottom edge, followed by the glitter one and then the black one. Even though these all nest together, I liked the look of the white peeking through the background. The space in between was all eyeballed. As you can see I then finished off the top by slicing the top edge off of the hexagon strip. With the piece that was cut off, I then used it to finish off the bottom and cut off any excess.

January 2021, Backgrounds & Borders, Stamp Club, Blog Hop, Tonic Studios, Metallic Papers, Card Making, Stamping, Die Cutting, handmade card, ilovedoingallthingscrafty, Stamps, how to,

For this sentiment, I used the Hey You stamp from the stamp set that was stamped and heat set in white on black cardstock and then used the circle die to cut it out. I then just popped it up with foam tape and added it to one of the black hexagons.

January 2021, Backgrounds & Borders, Stamp Club, Blog Hop, Tonic Studios, Metallic Papers, Card Making, Stamping, Die Cutting, handmade card, ilovedoingallthingscrafty, Stamps, how to,

This last card was also fun to make, I love how these stamps and dies work together so effortlessly. 

For this card, I die cut the top and the bottom using the same arrow die-cut design. I then cut the center area using the irregular dot design die. 

January 2021, Backgrounds & Borders, Stamp Club, Blog Hop, Tonic Studios, Metallic Papers, Card Making, Stamping, Die Cutting, handmade card, ilovedoingallthingscrafty, Stamps, how to,

Moving along, I stamped the in-between spaces using multiple stamps to create stamped borders. Here again, I used metallic gel pens to add some color to the card. 

I then glued silver glitter and gold cardstock strips in behind the openings and then glued the panel to the card base.

January 2021, Backgrounds & Borders, Stamp Club, Blog Hop, Tonic Studios, Metallic Papers, Card Making, Stamping, Die Cutting, handmade card, ilovedoingallthingscrafty, Stamps, how to,

Next, I die cut, stacked, and glued together the letters using the MISS die and glued them onto the center-right of the card panel. To finish off the greeting I stamped the YOUR FACE from the stamp set onto a black strip of paper that I trimmed and then popped up just below it.

January 2021, Backgrounds & Borders, Stamp Club, Blog Hop, Tonic Studios, Metallic Papers, Card Making, Stamping, Die Cutting, handmade card, ilovedoingallthingscrafty, Stamps, how to, friendship cards, Miss you

You know which one of these cards was my favorite, but I would love to know which one you liked the most? Make sure you let me know in the comments below 😉

STAMP CLUB INFO
  • Monthly stamp release to be launched on the last Friday of every month (with exceptions made for holidays).
  • Not a club or subscription-based program but a small monthly stamp release.
  • The Backgrounds & Borders stamp and die will only be sold as a bundle.
  • Limited Stock available (once we sell out that's it)
  • 6x8" stamp and die set contains 18 stamps and 18 dies
  • STAMPS: The four larger stamp strips can be easily used to create a background by stamping once, moving the paper over exactly 1", and stamping again. Repeat to fill your background.
  • The thinner stamp strips (stripes and ladder) can be stamped, move the cardstock 1/4", stamp and repeat... or, combine stamps to make unique backgrounds.
  • DIES: Combine the word dies with the stamp sentiments to make bold sentiments for your backgrounds. Use the strip dies to create patterned die cut background and shaker cards.
  • These products are exclusive to Tonic Studios (not sold elsewhere)
  • Inspired by Maria Willis
  • Tonic dies cut well and come precut/separated with no burs!
  • Stamps & dies come in high-quality plastic envelopes with a tab for labeling and binder holes on the side. Compatible with A5 ring binders.

GIVEAWAY
One lucky winner will win a $50/£50 Giftcard Giftcard to Tonic Studios (depending on which market you live in) and the Backgrounds & Borders Bundle! To enter, comment on every blog in the hop by 11:59pm PST on February 3, 2021/ 7:59am GST on Feb. 4, 2021 The winner will be announced on February 5th, 2021 on IG and FB so make sure you're following all Tonic accounts!

SHOP Now - these club stamps sell out quickly, so don't miss out! 

BLOG HOP

I hope you were inspired by my Metallic Inspired Backgrounds & Borders cards. 
Thank you for stopping by and until next time... Happy Hopping!

SUPPLIES
Backgrounds & Borders Bundle
Shop at:
TS US | TS UK
SILVER SERVICE
SILVER SERVICE
Shop at:
 TS US | TS UK
Gold Hearted Paper Pad
Shop at:
TS US | TS UK
A5 Ringbinder Die case: Blue
Shop at:
TS US | TS UK
A5 Ringbinder Die case: Orange
Shop at:
TS US | TS UK
Tim Holtz 8.5 Inch Trimmer
Shop at:
TS UK
Happy Mail Envelop Stamp Set
Shop at:
TS US | TS UK
MINI MISTI
MINI MISTI
Shop at:
SSS | SB | HBS
GEMINI JR. DIE CUTTER
Shop at:
SSS | SB
VersaFine ONYX BLACK Ink
Shop at:
SSS | SB | HBS
ATELIER SHARK TOOTH
ATELIER SHARK TOOTH
Shop at:
SSS | IO3
ARCTIC WHITE POWDER
ARCTIC WHITE POWDER
Shop at:
SSS | IO3
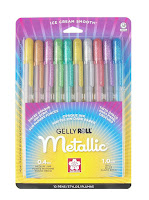
Gelly Roll Metallic Gel Ink Pen Set
Shop at:
AMZ
CHALK MARKERS
CHALK MARKERS
Shop at:
AMZ | SB
FOAM TAPE - WHITE
FOAM TAPE - WHITE
Shop at:
SSS | SK
To make supplies easy for you to find, I have linked them above. If something is no longer available I will link to a similar product. Affiliate links may be used depending on the product linked. Please help support my blog by using these links while shopping at no additional cost to you. For more information about the affiliates I use, please visit my disclaimer here. Thanks so much for all your support!

Tuesday, September 15, 2020

Hey BOO! | Halloween Light Up Interactive Card | Studio Katia

Halloween, Light Up, EZ-Light Pack, Interactive Card, miss you, pumpkin,Studio Katia,Chunky Alphabet, Card Making, Stamping, Die Cutting, handmade card, ilovedoingallthingscrafty, Stamps, how to, card

Well Hey, Boo! 

Today I have a special little card for you! Not only is this little pumpkin adorable, it is also interactive and lights up for the recipient. How fun is that?! I am so addicted to these new to me EZ-lights that I'm sure you will be seeing a lot more of these light-up cards in the future!

  CARD DETAILS

Here is how I made this card:
  • Die-cut 2 HALF STRIPED COVER frames, one orange, and one purple.
  • Rotate one Striped Cover over the other 90 degrees and glue together onto a white card panel.
  • Die-cut the top, bottom, and frame pieces for the pumpkin using the SHAKER PUMPKIN DIES
  • Glue the bottom of the pumpkin onto the center of the card panel.
  • Punch a hole through both the card panel and the pumpkin base (somewhere where it won't be seen from the face openings.
  • Add vellum behind the pumpkin face and add foam tape to the outer edges of the pumpkin's face.
Halloween, Light Up, EZ-Light Pack, Interactive Card, miss you, pumpkin,Studio Katia,Chunky Alphabet, Card Making, Stamping, Die Cutting, handmade card, ilovedoingallthingscrafty, Stamps, how to,
  • Thread the EZ-Light wire from behind the panel through the hole you punched through the panel. 
  • Tape down each EZ-Light so that the light is able to shine through the vellum areas of the pumpkin's face. ( I taped them behind the top orange pumpkin layer)  
  • Line up the pumpkin's face with the back layer and adhere them together with the foam tape.
  • Glue down the pumpkin's frame around the pumpkin.
  • Insert the battery and tape down the EZ-Light push button behind the area you want the recipient to push down on. Test the push area.
  • Tape the excess wires to the pack of the card panel, leaving room along with the edges to add foam around the border. 
Halloween, Light Up, EZ-Light Pack, Interactive Card, miss you, pumpkin,Studio Katia,Chunky Alphabet, Card Making, Stamping, Die Cutting, handmade card, ilovedoingallthingscrafty, Stamps, how to,
Now let's see how cool it looks when you light it up!

Halloween, Light Up, EZ-Light Pack, Interactive Card, miss you, pumpkin,Studio Katia,Chunky Alphabet, Card Making, Stamping, Die Cutting, handmade card, ilovedoingallthingscrafty, Stamps, how to, card

How cool is that right?

I hope you were inspired by this fun Halloween Light Up Card. I'm already planning my next one, lol! Make sure you are following me on Instagram, I will post a quick video of the card coming together.

Thank you for stopping and until next time... Happy Crafting 👋


SUPPLIES
HALF STRIPED COVER
HALF STRIPED COVER
Shop at:
SSS | SK
CHUNKY ALPHABET
CHUNKY ALPHABET
Shop at:
SSS | SK
SHAKER PUMPKIN DIES
SHAKER PUMPKIN DIES
Shop at:
SSS | SK
SWEET HEART CANDY
SWEET HEART CANDY
Shop at:
SK
RIPE PERSIMMON PEARLS
Shop at:
SSS | SK
AMETHYST PEARLS
AMETHYST PEARLS
Shop at:
SSS | SK
EMBELLISHMENT WAND
EMBELLISHMENT WAND
Shop at:
SSS | SK
WHITE - EMBELLISHMENT WAND TIP
Shop at:
SSS | SK
TRIANGLE TRAY
TRIANGLE TRAY
Shop at:
SSS | SK
GEMINI JR. DIE CUTTER
Shop at:
SSS | AMZ | SB
NEENAH SOLAR WHITE 110
Shop at:
SSS | AMZ | HBS
Foamies Sticky-Back Glitter Sheet
Shop at:
AMZ
FOAM TAPE - BLACK
FOAM TAPE - BLACK
Shop at:
SSS | SK
STUDIO KATIA GLUE
STUDIO KATIA GLUE
Shop at:
SSS | SK
EZ-LIGHT (5) PACK
EZ-LIGHT (5) PACK
Shop at:
PBP
To make supplies easy for you to find, I have linked them above. If something is no longer available I will link to a similar product. Affiliate links may be used depending on the product linked. Please help support my blog by using these links while shopping at no additional cost to you. For more information about the affiliates I use, please visit my disclaimer here. Thanks so much for all your support!