Showing posts with label Shaker Card. Show all posts

Wednesday, April 17, 2024

Hidden Inlaid Find Me By the Sea Shaker Card | Picket Fence Studios

Hidden Inlaid, Find Me By the Sea, Shaker Card, Picket Fence Studios, DIY,Frameless Shaker Card, how to, hand made card, Stamps, stamping, die cutting, card making, ilovedoingallthingscrafty, more space, A Sea Turtle's Journey

Hello friends, 

I am back again today with this Hidden Inlaid Find Me By the Sea Shaker Card featuring new Picket Fence Ocean Odyssey April Release products. I will also share how to create extra shaker space in your DIY shaker pockets.

CARD RECIPE

Background Pattern Paper - A2 Card Fronts - Beachcombing

Turtle - A Sea Turtle's Journey Stamps & Coordinating Dies

Sentiments - Find Me by the Sea Word Die

DIY Shaker Pocket - Shaker Sheets

Shaker Bits - Sequin Mix Island Blues

Glaze on black cardstock - Sea Glass Blue Paper Glaze 


Hidden Inlaid, Find Me By the Sea, Shaker Card, Picket Fence Studios, DIY,Frameless Shaker Card, how to, hand made card, Stamps, stamping, die cutting, card making, ilovedoingallthingscrafty, more space, A Sea Turtle's Journey
  • Start by stamping the turtle onto one of the Beachcombing A2 Card Fronts using black pigment ink and heat set it with clear embossing powder.
  • Die cut the turtle using the A Sea Turtle's Journey Dies.
  • Glue the die-cut card background to a black paper panel. 
  • Die cut the "Find Me by the" from the Find Me by the Sea Word Die and glue the sentiment onto the Beachcombing pattern paper.
  • Add two thicker foam dots where the turtle body outline is. Place them far enough from each other to support the turtle die cut. 
  • Remove the adhesive liner from the foam dots, center a cut piece of the Shaker Sheets, and create the shaker pocket. 
  • Fill the pocket with the Sequin Mix Island Blues. NOTE: some of the sequins will get caught on the foam dots as it doesn't allow unrestricted movement in the pocket. Allow enough space between foam dots to allow the shaker bits to flow through. NOTE: Using foam dots will allow more space in the pocket, and the ability to use thicker shaker bits. This sequin mix has chunky iridescent bubbles, which normally would not fit well in a flat shaker pocket. 
  • Seal the last flap of the pocket and adhere it to an A2-sized card base.
Hidden Inlaid, Find Me By the Sea, Shaker Card, Picket Fence Studios, DIY,Frameless Shaker Card, how to, hand made card, Stamps, stamping, die cutting, card making, ilovedoingallthingscrafty, more space, A Sea Turtle's Journey
  • Glue the turtle onto the die-cut opening, on top of the plastic sheet. If using a liquid glue, set aside to dry.
  • Apply a thin layer of the Sea Glass Blue Paper Glaze onto black cardstock and allow it to dry. 
  • Once dry, die-cut the "Sea" from the Find Me by the Sea Word Die and glue it onto the shaker front.
  • For some sparkle and to create wave-like foam on the letters, I added some glue to the Sea Word Die and sprinkled some chunky glitter while the glue was still wet.
  • Finally, I added an enamel dot on the turtle's eye to give it extra life.
Hidden Inlaid, Find Me By the Sea, Shaker Card, Picket Fence Studios, DIY,Frameless Shaker Card, how to, hand made card, Stamps, stamping, die cutting, card making, ilovedoingallthingscrafty, more space, A Sea Turtle's Journey

And that my friends is how to create a Hidden Inlaid Shaker Card with a little extra shaker space. Hope you found this helpful!

Thank you for stopping by and until next time... Happy Crafting!
Ilda 🐢

SUPPLIES
A2 Card Fronts - Beachcombing
Shop at:
SSS | PFS
A Sea Turtle's Journey
Shop at:
SSS | SB | PFS
A Sea Turtle's Journey Dies
Shop at:
SSS | SB | PFS
Shaker Sheets
Shaker Sheets
Shop at:
SSS | SB | PFS
Find Me by the Sea Word Die
Shop at:
SSS | PFS
Sequin Mix Island Blues
Shop at:
SB | PFS
Sea Glass Blue Paper Glaze
Shop at:
SSS | SB | PFS
Mixed Media Spatulas
Shop at:
PFS
Stamp Pressure Tool
Stamp Pressure Tool
Shop at:
SSS | SB | PFS
The Stamp Scrubber
The Stamp Scrubber
Shop at:
SSS | SB | PFS
Black Foam Dots 1/4
Black Foam Dots 1/4"
Shop at:
HBS
New Mini Misti
New Mini Misti
Shop at:
SSS | SB | HBS
VersaFine ONYX BLACK Ink
Shop at:
SSS | AMZ | SB | HBS
CRYSTAL CLEAR Emb Pwd
Shop at:
SSS | IO3
Heat Gun
Heat Gun
Shop at:
AMZ
Platinum 6 Die Cutting Platform
Shop at:
SSS | SB | HBS
Bearly Art Precision Glue
Shop at:
SSS | AMZ | HBS
Lawn Fawn Chunky Glitter
Shop at:
SSS | SB
To make supplies easy for you to find, I have linked them above. If something is no longer available I will link to a similar product. Affiliate links may be used depending on the product linked. Please help support my blog by using these links while shopping at no additional cost to you. For more information about the affiliates I use, please visit my disclaimer here. Thanks so much for all your support!

Enjoyed this post? Never miss out on future posts by Following this Blog

Tuesday, April 9, 2024

Pretty Pawsome Shaker Card - Heffy Doodle

Paws, Shaker Card, Heffy Doodle, how to, hand made card, Stamps, stamping, die cutting, card making, ilovedoingallthingscrafty, pets, sympathy,

Hello Crafty Friends! 

I am super excited to be a guest designer this month for Heffy Doodle. I love their adorable designs and am always happy to collaborate with them.

Ever since we got our puppy, Ruby (our COVID baby), I have become more aware of what pets mean to us humans. Sadly, I wasn't raised with animals and I must admit I had no clue about the bond we share with them. So today, I thought it would be fun to make some generic pawsome cards that could be used for any occasion celebrating a pet in your life. I purposely have left the inside blank to customize the card in the future.

CARD RECIPE


I wanted to make this shaker card as clean and simple as possible and still give it an interactive element.


Paws, Shaker Card, Heffy Doodle, how to, hand made card, Stamps, stamping, die cutting, card making, ilovedoingallthingscrafty, pets, sympathy,
  • Die-cut the paw die from the Pretty Pawsome Dies from a card panel.
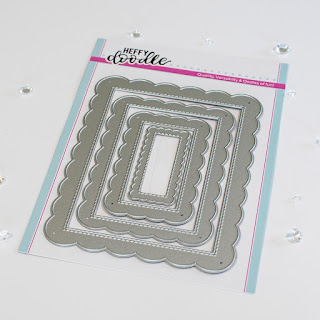
  • Die-cut the panel now using the largest frame from the Scalloped Imperial Frames Dies you will use the negative of the die, not the scallop piece. 
  • On another piece of paper, ink blend a yellow, pink, and blue ink to result in a rainbow blend. 
  • Die cut the paw die from the Pretty Pawsome Dies again, this time using black card stock.
  • Line up the die-cut paw pieces and glue them to the rainbow background.
  • To the top layer, attach acetate to the back of the panel, and line the edges with foam tape to create space for the shaker pieces.
  • Die cut the bone strip from the Pretty Pawsome Dies using white paper. Place the little bones and any other shaker bits in the center of the paw. 
  • Remove the protective tape layer and secure the shaker window to the background that has been trimmed to the same size. 
  • Glue the shaker frame to an A2 card base.
  • Die cut the woof sentiment from the Pretty Pawsome Dies a few times and stack them. Line up the letters on the panel and glue them in place.
  • Finish the card by adding a die-cut heart from the Happily Ever Crafter Dies to the shaker window.
Paws, Shaker Card, Heffy Doodle, how to, hand made card, Stamps, stamping, die cutting, card making, ilovedoingallthingscrafty, pets, sympathy,

Thank you for stopping by and joining me here for this pretty pawesome card, and until next time... Happy Crafting!
Ilda 🐾

SUPPLIES
Pretty Pawsome Dies
Pretty Pawsome Dies
Shop at:
SB | HD
Scalloped Imperial Frames Dies
Shop at:
SSS | HD
Happily Ever Crafter Dies
Shop at:
SSS | SB | HD
Acetate Card Panels
Acetate Card Panels
Shop at:
SSS | SB | HA
Foam Tape 1/2 inch
Foam Tape 1/2 inch
Shop at:
AMZ
Assorted Moonshine Sequins
Shop at:
SSS
Atelier Ink Sweet Petunia
Shop at:
IO3
Atelier Ink Bee Sting Yellow
Shop at:
IO3
Atelier Ink Peacock Blue
Shop at:
IO3
To make supplies easy for you to find, I have linked them above. If something is no longer available I will link to a similar product. Affiliate links may be used depending on the product linked. Please help support my blog by using these links while shopping at no additional cost to you. For more information about the affiliates I use, please visit my disclaimer here. Thanks so much for all your support!

Enjoyed this post? Never miss out on future posts by Following this Blog

Monday, August 28, 2023

Coffee Gift Card/Shaker Card | Honey Bee Stamps

how to,handmade card,Stamps,ilovedoingallthingscrafty,stamping, diecutting,cardmaking, coffee, gift card, shaker card, creative,Honey Bee Stamps,heartfelt harvest,

Is it a shaker card or a gift card? Well, it's actually both!

Hello friends and happy Monday! I am back today with more inspiration for the Heartfelt Harvest Release from Honey Bee Stamps. The gift card holder part was actually an afterthought. I initially was just going to glue the coffee tag to the acetate but then I had the idea to pop it up using foam on each side, the width of a gift card. I then added a floating heart beneath it to act as a stopper for the gift card, and voila... a two-for-one card design was born!

On the inside of the shaker pocket, I used die-cut coffee beans and some gingerbread shaker bits that I had. 

how to,handmade card,Stamps,ilovedoingallthingscrafty,stamping, diecutting,cardmaking, coffee, gift card, shaker card, creative,Honey Bee Stamps,heartfelt harvest,

CARD SUPPLIES
I hope this Coffee Card Shaker inspired you for the next time you are looking for a creative way to include a gift card in your card. 

Thank you for stopping by and until next time... Happy Crafting!
Ilda ⛾

To make supplies easy for you to find, I have linked them above. If something is no longer available I will link to a similar product. Affiliate links may be used depending on the product linked. Please help support my blog by using these links while shopping at no additional cost to you. For more information about the affiliates I use, please visit my disclaimer here. Thanks so much for all your support!

Enjoyed this post? Never miss out on future posts by Following this Blog

Monday, August 21, 2023

Sand Castle Retirement Shaker Card | Honey Bee Stamps

Sand Castle, Retirement, Shaker Card, Honey Bee Stamps, how to,handmade card,Stamps,ilovedoingallthingscrafty,stamping, diecutting,cardmaking,Frameless Shaker Card,

Hello Friends. If you have been following me on Instagram you would know that we have just returned from our 6-week long, summer vacation! And, as happy as I am to be home a little part of me wishes I was still on a beach building sandcastles instead of making them from paper. Oh well, it was amazing while it lasted and now it's time for reality. For those of you that want to see more about our travels, I have all the highlights saved in my Stories over on Instagram

So anyways, lately our hospital has witnessed a wave of retirements among people I've known for over 25 years. Although saying farewell fills me with a tinge of sadness, there's an undeniable thrill and perhaps even a twinge of envy, considering the long path that lies ahead before my own retirement years arrive.

Today's post is dedicated to my esteemed nursing colleagues. I am well aware that many of them are eagerly anticipating well-deserved travels and the pursuit of a leisurely life, perhaps lounging on a sun-kissed beach!

CARD RECIPE
 
Now, let's dive into the details of this card.

1. Begin by crafting the backdrop for the shaker pocket. For the background, I used a piece of paper from the Vitamin Sea Paper Pad. To give the card some dimension, I trimmed the sandy part of the paper and set it aside, and then just glued the top part of the paper to an A2 card panel. 
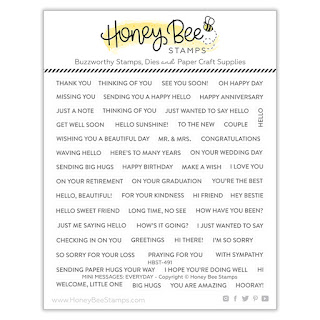
2. Next, I stamped out the sentiment onto the top part of the panel using stamps from the Mini Messages Stamp set. 
3. Wrap the panel to create the shaker pocket. For shaker bits, I used AURORA LIGHTS Confetti Mix, seal the top flap to close the pocket, and attach it to a card base.
4. To the front of the panel, glue the sand layer that was trimmed earlier using foam tape to add some dimension. This will hide the shaker bits until the card is shaken. 
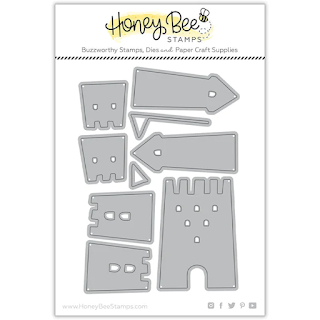
5. Die-cut the Sand Castle using the Sand Castle Builder Dies. I first added some ink splatters then inked up the edges to give it a sand-like texture.
6. Add the castle to the card front using foam to create dimension.
7. For an extra touch of realism, I added some beach grasses from the Lovely Layers: Seashore Dies. For balance, I just cut the grass in half and added it to each side of the scene with a little glue.
8. Finally, for a touch of sparkle I added some red gems to the castle flags.

Here is a photo, of what it looks like when the shaker bits nestled beneath the inviting sand layer.

Sand Castle, Retirement, Shaker Card, Honey Bee Stamps, how to,handmade card,Stamps,ilovedoingallthingscrafty,stamping, diecutting,cardmaking,Frameless Shaker Card,

And here it is again, with the shaker bits in motion. Almost like it comes alive, dancing with the fervor of water bubbles frothing in the mighty ocean.

Sand Castle, Retirement, Shaker Card, Honey Bee Stamps, how to,handmade card,Stamps,ilovedoingallthingscrafty,stamping, diecutting,cardmaking,Frameless Shaker Card,

I hope this fun retirement shaker has inspired you today. Of course, this card could be used for any summer/beach purpose by simply changing the sentiment.


Thank you for stopping by and until next time... Happy Crafting and relaxing!
Ilda 🏖

SUPPLIES
Vitamin Sea Paper Pad
Shop at:
SSS | SB | HBS
Sand Castle Builder Dies
Shop at:
HBS
Lovely Layers: Seashore Dies
Shop at:
SSS | SB | HBS
Mini Messages Stamps
Shop at:
SSS | SB | HBS
Detail Blender Brushes
Shop at:
SSS | HBS
AURORA LIGHTS Confetti Mix
Shop at:
HBS
Tear Tape XL Roll | 1/4
Tear Tape XL Roll | 1/4"
Shop at:
HBS
Bee Creative Glue
Bee Creative Glue
Shop at:
SSS | SB | HBS
Intense Black Ink Pad
Shop at:
SSS | SB | HBS
Black Foam Dots 1/2
Black Foam Dots 1/2"
Shop at:
HBS
Make it Merry Gems
Make it Merry Gems
Shop at:
SSS | SB | HBS
Honey Bee Reverse Tweezers
Shop at:
SSS | HBS
Bee Creative Bitty Buzz Cutter
Shop at:
HBS
Stamping Pressure Tool
Shop at:
HBS
Copic Opaque White Pigment
Shop at:
SSS | AMZ
GATHERED TWIGS Oxide Ink
Shop at:
SSS | SB | HBS
New Mini Misti
New Mini Misti
Shop at:
SSS | SB | HBS
To make supplies easy for you to find, I have linked them above. If something is no longer available I will link to a similar product. Affiliate links may be used depending on the product linked. Please help support my blog by using these links while shopping at no additional cost to you. For more information about the affiliates I use, please visit my disclaimer here. Thanks so much for all your support!

Enjoyed this post? Never miss out on future posts by Following this Blog

Monday, July 10, 2023

Christmas Tree Shaker Card | Honey Bee Stamps

Christmas Tree, Shaker Card,Honey Bee Stamps,Frameless Shaker Card,how to,handmade card,Stamps,ilovedoingallthingscrafty,stamping, diecutting,cardmaking

Hello friends! 

At this moment, I am vacationing in Europe... but lucky for you I have pre-scheduled a few posts just in case you were missing me!

I couldn't let July go by without sharing a delightful Christmas in July card because it's never too early to start spreading holiday cheer! Today's creation showcases some fabulous new products from the Adventure Awaits Release, combined with timeless festive elements.

CARD RECIPE

Here's the step-by-step guide to re-create this beautiful card:


1. Begin by creating a shaker pocket using plastic from a cello bag or similar and a beautiful pattern paper from the brand-new Adventure Awaits Paper Pad. Fill the shaker with the enchanting Blizzard Confetti Mix.

2. Next I added some foam dots to the Oval die cut and attached it to the front of the card.

3. The layered tree comes from the Lovely Layers Trees set. To make it look more Christmasy, I added a top white layer, and then to it, I added some Liquid Applique and heat set it to make snow-like clumps. For a touch of sparkle, I then added glue and sprinkled on Prisma Glitter.

4. To finish the tree, I added the sentiment. The joy comes from the Bitty Buzzwords: Holidays Dies and the rest of the sentiment comes from the Bitty Buzzwords: Holidays stamp set. The strip was then die-cut using one of the banners from the Mini Messages Dies.

5. For a pop of color I used the red gems from the Make it Merry Sticker set.

6. Finally, I finished the front panel with a few large snowflakes and also added Crystal Glimmer Enamel Stickers to their centers.


Christmas Tree, Shaker Card,Honey Bee Stamps,Frameless Shaker Card,how to,handmade card,Stamps,ilovedoingallthingscrafty,stamping, diecutting,cardmaking

7. To the inside, I stamped out the sentiment also from the Bitty Buzzwords: Holidays stamp set using Intense Black Ink.

Christmas Tree, Shaker Card,Honey Bee Stamps,Frameless Shaker Card,how to,handmade card,Stamps,ilovedoingallthingscrafty,stamping, diecutting,cardmaking

May this Christmas in July card inspire you to get an early start on your Christmas cardmaking or at least see how you can incorporate non-holiday products into your Holiday cards.

Thank you for stopping by and until next time... Happy Crafting!
Ilda 🎄

SUPPLIES
Lovely Layers Trees
Lovely Layers Trees
Shop at:
SSS | SB | HBS
Sweet Stacks Ovals
Sweet Stacks Ovals
Shop at:
SSS | SB | HBS
Mini Messages Dies
Mini Messages Dies
Shop at:
SSS | SB | HBS
Bitty Buzzwords: Holidays Dies
Shop at:
SSS | SB | HBS
Bitty Buzzwords: Holidays
Shop at:
SSS | SB | HBS
Layering Snowflake Dies
Shop at:
SSS | SB | HBS
Adventure Awaits Paper Pad
Shop at:
SSS | SB | HBS
Bee Creative Brilliant White Pigment Ink
Shop at:
SSS | SB | HBS
Intense Black Ink Pad
Shop at:
SSS | SB | HBS
Blizzard Confetti Mix
Shop at:
HBS
Make it Merry Gems
Make it Merry Gems
Shop at:
SSS | SB | HBS
Crystal Glimmer Enamel Stickers
Shop at:
SSS | SB | HBS
Black Foam Dots 1/2
Black Foam Dots 1/2"
Shop at:
HBS
Sticky Red Tape 1/4
Sticky Red Tape 1/4"
Shop at:
HBS
Honey Bee Reverse Tweezers
Shop at:
SSS | HBS
Bee Creative Bitty Buzz Cutter
Shop at:
HBS
Stamping Pressure Tool
Shop at:
HBS
New Mini Misti
New Mini Misti
Shop at:
SSS | SB | HBS
Platinum 6 Die Cutting Platform
Shop at:
SSS | SB | SB
Magic Powder Bag
Magic Powder Bag
Shop at:
SSS
Arctic White Emb.Pwd.
Shop at:
SSS | IO3
LIQUID APPLIQUE
LIQUID APPLIQUE
Shop at:
SSS | AMZ
Heat Gun
Heat Gun
Shop at:
AMZ
PRISMA GLITTER
PRISMA GLITTER
Shop at:
SSS
To make supplies easy for you to find, I have linked them above. If something is no longer available I will link to a similar product. Affiliate links may be used depending on the product linked. Please help support my blog by using these links while shopping at no additional cost to you. For more information about the affiliates I use, please visit my disclaimer here. Thanks so much for all your support!


Enjoyed this post? Never miss out on future posts by Following this Blog