Showing posts with label See Through. Show all posts

Wednesday, April 27, 2022

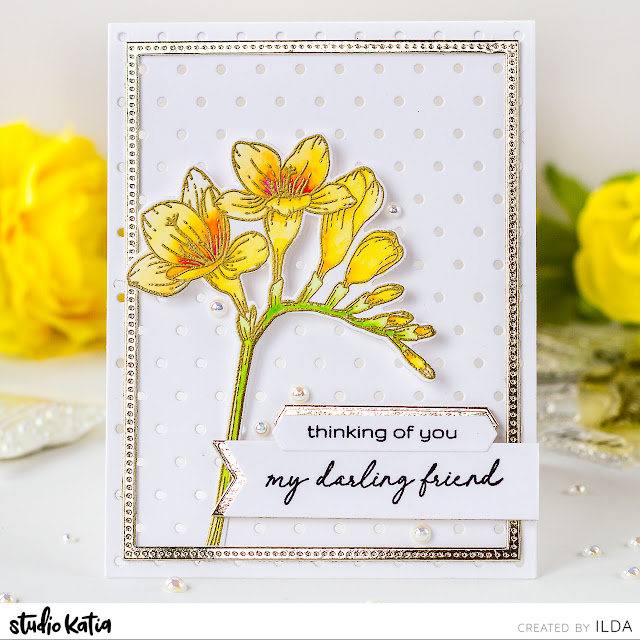
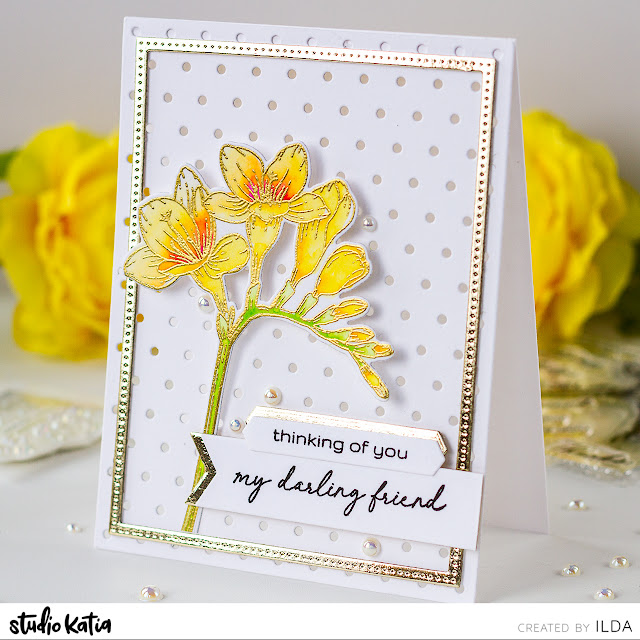
Thinking of You Freesia Floral Card | Studio Katia

Thinking of You, Freesia Floral Card,Studio Katia, Card Making, Stamping, Die Cutting, handmade card, ilovedoingallthingscrafty, Stamps, how to,  Spring, Friendship card, See through,Mini Polka Dots Cover Die,

Hello friends and Happy Wednesday!

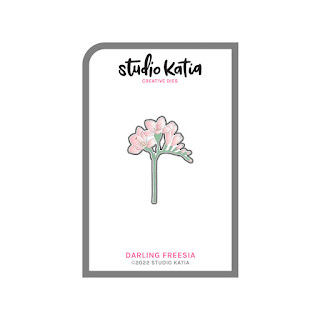
Today I have a Spring inspired friendship card to share with you all featuring one of the newer stamp sets from Studio Katia called Darling Freesia.

CARD RECIPE

  • Stamp out the Darling Freesia using watermark ink and heat set the gold embossing powder onto watercolor safe paper. I used Bristol paper.
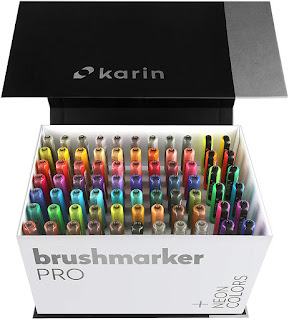
  • Watercolor the flower. I used Karin Brush Pro Markers.
  • Die-cut using the coordinating Freesia Dies.
  • Stamp sentiments onto Banners.
  • Die-cut banners and create an offset using the same dies and gold foil cardstock.
  • Create the card base by die-cutting the Mini Polka Dots Cover and gluing it to a card base with a small hinge at the top to attach the front panel.
  • To the front panel add the gold pierced frame from the Darling Ribbons and Frames.
  • Add foam tape to the back of the card elements ad attach them to the card front.
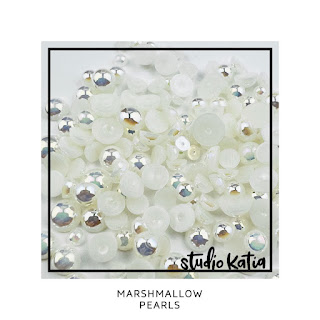
  • Finish by adding some Marshmallow Pearls.

Thinking of You, Freesia Floral Card,Studio Katia, Card Making, Stamping, Die Cutting, handmade card, ilovedoingallthingscrafty, Stamps, how to,  Spring, Friendship card, See through,Mini Polka Dots Cover Die,

I hope you were inspired by this cute peekaboo card front design. 


Wishing you all a wonderful week my darling friends. Thank you for stopping by and until next time... Happy Crafting!


Ilda 💖

SUPPLIES
DARLING FREESIA
DARLING FREESIA
Shop at:
SSS | SK
DARLING FREESIA DIES
Shop at:
SSS | SK
MINI POLKA DOTS COVER DIE
Shop at:
SSS | SK
Darling Ribbons and Frames
Shop at:
SK
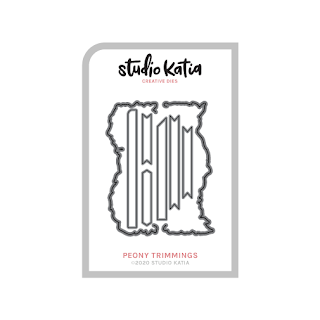
PEONY TRIMMINGS DIES
Shop at:
SK
MED. WATER BRUSH
MED. WATER BRUSH
Shop at:
IO3
MARSHMALLOW PEARLS
MARSHMALLOW PEARLS
Shop at:
SSS | SK
Embellishment Wand
Embellishment Wand
Shop at:
SSS | SK
Black Triangle Tray
Black Triangle Tray
Shop at:
SSS | SK
SK Glue
SK Glue
Shop at:
SSS | SK
SK Foam Tape
SK Foam Tape
Shop at:
SSS | SK
New Mini Misti
New Mini Misti
Shop at:
SSS | SB
BRISTOL PAPER
BRISTOL PAPER
Shop at:
SSS | AMZ
Juicy Ink
Juicy Ink
Shop at:
SSS | HBS | IO3
Gold Rush Emb. Pwd.
Gold Rush Emb. Pwd.
Shop at:
SSS | IO3
KARIN BRUSHMARKER PRO
Shop at:
SSS | AMZ | HBS
Blackout Ink
Blackout Ink
Shop at:
SSS | HBS | IO3
Neenah Solar White 110lbs
Shop at:
SSS | AMZ | HBS
Gemini Jr. Die-Cutter
Shop at:
SSS | SB
To make supplies easy for you to find, I have linked them above. If something is no longer available I will link to a similar product. Affiliate links may be used depending on the product linked. Please help support my blog by using these links while shopping at no additional cost to you. For more information about the affiliates I use, please visit my disclaimer here. Thanks so much for all your support!

Friday, December 17, 2021

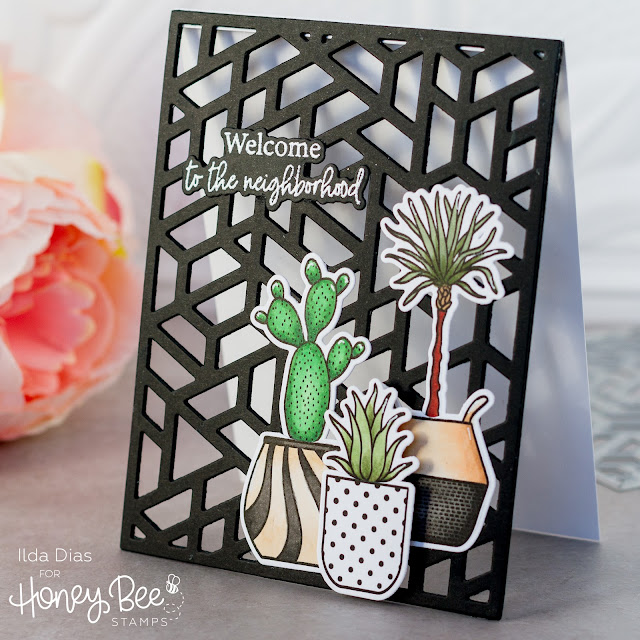
Modern Feature Wall Welcome to the Neighborhood Card | Honey Bee Stamps

Card Making, Stamping, Die Cutting, handmade card, ilovedoingallthingscrafty, Stamps, how to,  Happy Plants,Rooting For You,Mod A2 Cover Plate,Modern Wall, Welcome to the Neighborhood,See Through,Honey Bee Stamps

Hello, and Happy Friday Crafty Friends!

Today's post is part of an Instagram Hop to celebrate the Sealed with Love release from Honey Bee Stamps. Make sure to join me over on IG for lots of inspiration from the Design Team and to qualify for two $25 Gift Cards.

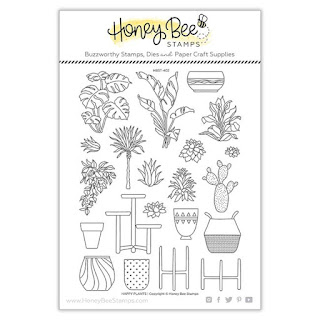
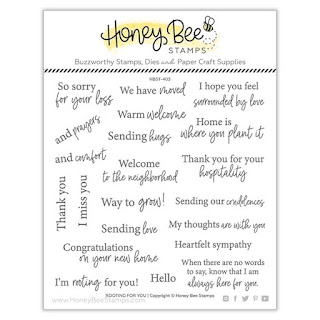
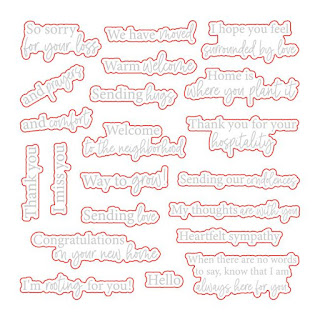
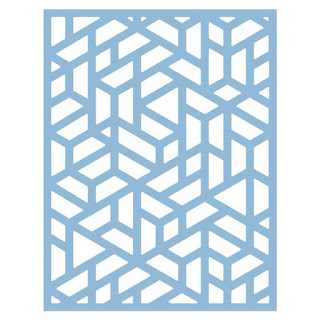
This card features the Happy Plants Stamps and Dies, and the Rooting For You Sentiments Stamps and Dies that I paired with the Mod A2 Cover Plate.

Doesn't this totally look like a gorgeous feature wall you would see in a modern-designed home? It looks so aesthetic that it's totally giving me the Reno itch! 

To create the see-through card front, I die-cut the Mod A2 Cover Plate four times from black heavyweight cardstock. I then stacked and glued the layers together. Before gluing on the fourth layer I attached the back panel of the card, where I created a tiny hinged by scoring the card base across the top. If you look closely you can see the hinge peek through. I could have cut it a hair shorter, but was being lazy, lol!

The Happy Plants were colored using Copic Markers and then die cut using the coordinating dies.

Card Making, Stamping, Die Cutting, handmade card, ilovedoingallthingscrafty, Stamps, how to,  Happy Plants,Rooting For You,Mod A2 Cover Plate,Modern Wall, Welcome to the Neighborhood,See Through,Honey Bee Stamps

To finish this card I just popped the plants in place using glue and the foam tape to the front polka-dotted plant and then added some white gel pen highlights.


Hope this Modern Feature Wall Welcome to the Neighborhood Card inspired you for the next time you need a New Home Congrats Card. 

Thank you for stopping by and until next time... Happy Crafting!
Ilda 💚🌵

SUPPLIES
Happy Plants
Happy Plants
Shop at:
SSS | HBS
Happy Plants Dies
Happy Plants Dies
Shop at:
SSS | HBS
Rooting For You
Rooting For You
Shop at:
SSS | HBS
Rooting For You Dies
Shop at:
SSS | HBS
Mod A2 Cover Plate
Mod A2 Cover Plate
Shop at:
SSS | HBS
Intense Black Ink
Intense Black Ink
Shop at:
SSS | SB | HBS
Bee Creative Glue
Bee Creative Glue
Shop at:
SSS | SB | HBS
Black Foam Dots 1/4
Black Foam Dots 1/4"
Shop at:
HBS
Gemini Jr. Die-Cutter
Shop at:
SSS | SB
Magic Powder Bag
Magic Powder Bag
Shop at:
SSS
Pitch Black Cardstock
Shop at:
SSS | HA
Unicorn Pigment Ink
Unicorn Pigment Ink
Shop at:
SSS | HBS | HA
Arctic White Emb.Pwd.
Shop at:
SSS | IO3
Original Misti
Original Misti
Shop at:
SSS | AMZ | SB | HBS
Copic Sketch Markers
Shop at:
SSS | AMZ
White Gelly Roller Pen
Shop at:
SSS | AMZ | SB | HBS
Scor-Pal Mini Scor-Buddy
Shop at:
SSS | HBS
To make supplies easy for you to find, I have linked them above. If something is no longer available I will link to a similar product. Affiliate links may be used depending on the product linked. Please help support my blog by using these links while shopping at no additional cost to you. For more information about the affiliates I use, please visit my disclaimer here. Thanks so much for all your support!

Monday, November 29, 2021

Trifold See Through Shaker Cards | Honey Bee Stamps

Card Making, Stamping, Die Cutting, handmade card, ilovedoingallthingscrafty, Stamps, how to,

Happy Cyber Monday Crafty Friends! Hope you found some great deals this weekend.

I am back again today with a couple more Trifold See Trough Shaker Cards featuring goodies from Honey Bee Stamps. I told you I had a shaker addiction and I wasn't kidding, lol!

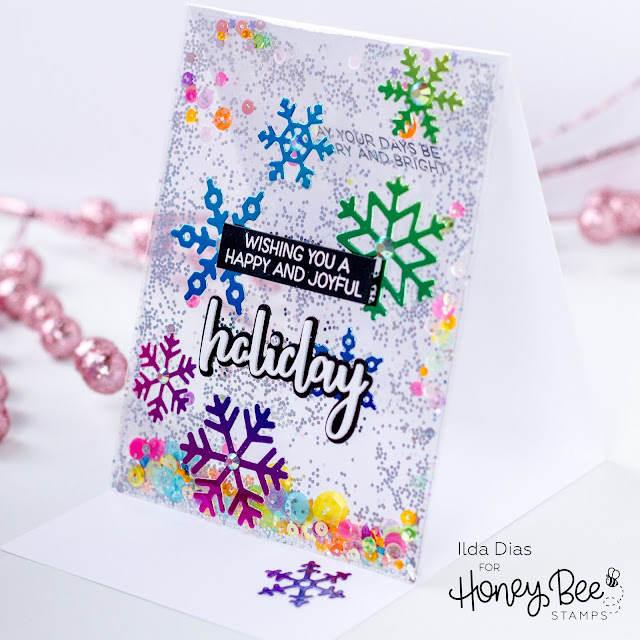
So let me tell you all about this first Rainbow Trifold See Through Card. Isn't she so pretty!?!

Card Making, Stamping, Die Cutting, handmade card, ilovedoingallthingscrafty, Stamps, how to,

Here is how this colorful creation came together.
  • Cut a Slimline Cello Bag to 4 5/16 x 6 1/2" for a vertical A2 size card. 
  • Slide a piece of acetate inside the clear bag cut to A2 size.
  • Fill the clear bag with glitter and rainbow-colored confetti, sorry the mix I used had been discontinued. But I just used a few sequins from each color of the rainbow.
  • Cut a small sliver from the bottom of the front of the card base panel. This will make it easier for the card to close once it is all assembled.
  • Flip the card base upside down so that the fold is on the bottom and the opening is on the top. Like a “V”. Face the panel that is shorter towards you (see the previous step).
  • Place the filled clear bag in front of the upside-down card base and align the sides and the bottoms together. 
  • Fold the overhang of the bag (1 Inch) over the top of the upside-down card base and crease the Cello Bag fold with your fingernails. This will create the flap that you will glue to the back of the card base.
  • Cut the corners of the bag above the crease mark.
  • To the back of the upside-down card, base add 2 strips of double-sided tape. One just under the edge of the card base and one ½’ below that one. Remove the protective piece from the double-sided tape.
  • Center and align the bag in front of the upside-down card base and press the cello flap down onto the double-sided tape.
  • Lay the card flat so that you can still access the opening of the shaker pocket. 
  • Slide a piece along the entire width of the card using double-sided tape. Place the tape strip just above the creased edge of the cello bag flap. 
  • Remove the protective layer and press the bag shut. This will seal the shaker pocket and keep glitter and shaker bits from flowing into the top opening. 
  • Add an extra piece of clear tape along the edge of the cello flap for extra insurance.
  • To finish the back of the card base, glue an A2 panel cut to the same size as the card base. This covers up the bag's flap and becomes the backside of the middle panel of the tri-fold.
  • Finish the front of the panel by adding the holographic rainbow layering snowflakes dies
  • Stamp out the sentiment from the Bitty Buzzwords: Holiday in white and heat set it using white emb. pwd. Cut the strip and add it to the front of the panel.
  • Next, die-cut the holiday from the Bitty Buzzwords: Holiday Dies. Stack and glue three layers of white and then glue it to a black shadow layer. I used a white pearl to dot the "i". Glue the Holiday to the front of the card front to finish off the sentiment.
  • Glue rhinestones to the centers of the snowflakes.
Card Making, Stamping, Die Cutting, handmade card, ilovedoingallthingscrafty, Stamps, how to,

To create a stopper, and keep the front panel propped up and displayed, I glued another snowflake to the bottom panel of the trifold.

Card Making, Stamping, Die Cutting, handmade card, ilovedoingallthingscrafty, Stamps, how to,

On the inside of the card, I stamped the sentiment from the Bitty Buzzwords: Holidays The Merry and Bright sentiment just ties the whole card together.

Card Making, Stamping, Die Cutting, handmade card, ilovedoingallthingscrafty, Stamps, how to,

I shared this card on Instagram a couple of days ago, but if you missed the Reel of it coming together watch the clip below👇


SUPPLIES:
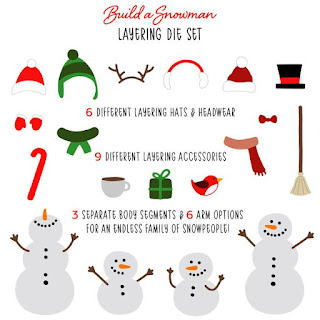
Build A Snowman Dies
Shop at:
SSS | SB | HBS
Bitty Buzzwords: Holidays Dies
Shop at:
SSS | SB | HBS
Bitty Buzzwords: Holidays
Shop at:
SSS | SB | HBS
Layering Snowflake Dies
Shop at:
SSS | SB | HBS
Slimline Cello Bags
Slimline Cello Bags
Shop at:
HBS
Cupcake Rhinestone Mix
Shop at:
HBS
Black Foam Dots 1/4
Black Foam Dots 1/4"
Shop at:
HBS
Tear Tape XL Roll | 1/4
Tear Tape XL Roll | 1/4"
Shop at:
HBS
Bee Creative Glue
Bee Creative Glue
Shop at:
SSS | SB | HBS
Neenah Solar White 110lbs
Shop at:
SSS | AMZ | HBS
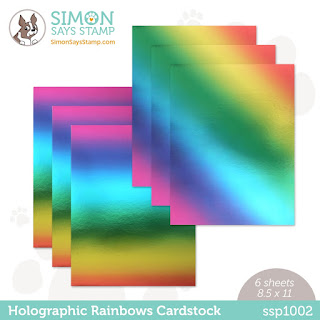
HOLOGRAPHIC RAINBOWS
Shop at:
SSS
Gemini Jr. Die-Cutter
Shop at:
SSS | SB
Original Misti
Original Misti
Shop at:
SSS | AMZ | SB | HBS
Pitch Black Cardstock
Shop at:
HA
Magic Powder Bag
Magic Powder Bag
Shop at:
SSS
Unicorn Pigment Ink
Unicorn Pigment Ink
Shop at:
SSS | HBS | HA
Arctic White Emb.Pwd.
Shop at:
SSS | IO3
SILVER FEVER GLITTER
Shop at:
SK
ARCTIC BREEZE PEARLS
Shop at:
SSS | SK
Trimmer
Trimmer
Shop at:
SSS | AMZ | SB
Black Triangle Tray
Black Triangle Tray
Shop at:
SSS | SK

This next Snowman Trifold See Trough Shaker Card was done the exact same way as the previous card. I used silver chunky glitter from Martha Stewart that was not included in the list below, but I bet many of you already have this in your stash!

Card Making, Stamping, Die Cutting, handmade card, ilovedoingallthingscrafty, Stamps, how to,

To the front of this see-through panel, I added the cutest snowman from the Build A Snowman Dies. To the snowman's hat and scarf, I added some white gel dots and a frosting of glitter.

Card Making, Stamping, Die Cutting, handmade card, ilovedoingallthingscrafty, Stamps, how to,

In the image below, you can see the clear see-through front. Behind the snowman, I added a couple of trees from the Pine Tree Dies. To add snow to the trees, I added glue across the tree and the tips that were then covered in glitter. The Season's Greeting Sentiment comes from the Bitty Buzzwords: Holidays stamp set heat embossed in white.

Card Making, Stamping, Die Cutting, handmade card, ilovedoingallthingscrafty, Stamps, how to,

Since I had some snowflakes left from the previous card, I added another snowflake to the front of the card panel that I then finished with a large sequin and a crystal in the center. 

Card Making, Stamping, Die Cutting, handmade card, ilovedoingallthingscrafty, Stamps, how to,

To the bottom panel of the trifold, I added the surprise element of a gift card holder made from the Gift Card Pocket Die, die-cut from vellum, and stamped with a sentiment from the Snow Family Like Ours stamp set.

Card Making, Stamping, Die Cutting, handmade card, ilovedoingallthingscrafty, Stamps, how to,

SUPPLIES
Build A Snowman Dies
Shop at:
SSS | SB | HBS
Bitty Buzzwords: Holidays
Shop at:
SSS | SB | HBS
Layering Snowflake Dies
Shop at:
SSS | SB | HBS
Pine Trees Dies
Pine Trees Dies
Shop at:
SSS | SB | HBS
Snow Family Like Ours
Shop at:
HBS
BOKEH LIGHTS Confetti
Shop at:
HBS
Slimline Cello Bags
Slimline Cello Bags
Shop at:
HBS
Black Foam Dots 1/4
Black Foam Dots 1/4"
Shop at:
HBS
Tear Tape XL Roll | 1/4
Tear Tape XL Roll | 1/4"
Shop at:
HBS
Bee Creative Glue
Bee Creative Glue
Shop at:
SSS | SB | HBS
Gift Card Pocket Dies
Shop at:
HBS
Neenah Solar White 110lbs
Shop at:
SSS | AMZ | HBS
HOLOGRAPHIC RAINBOWS
Shop at:
SSS
Gemini Jr. Die-Cutter
Shop at:
SSS | SB
Original Misti
Original Misti
Shop at:
SSS | AMZ | SB | HBS
Pitch Black Cardstock
Shop at:
HA
Magic Powder Bag
Magic Powder Bag
Shop at:
SSS
Unicorn Pigment Ink
Unicorn Pigment Ink
Shop at:
SSS | HBS | HA
Arctic White Emb.Pwd.
Shop at:
SSS | IO3
PRISMA GLITTER
PRISMA GLITTER
Shop at:
SSS
White Gelly Roller Pen
Shop at:
SSS | AMZ | SB | HBS
Trimmer
Trimmer
Shop at:
SSS | AMZ | SB
Black Triangle Tray
Black Triangle Tray
Shop at:
SSS | SK
Majestic Fusion
Majestic Fusion
Shop at:
SSS | SK
Iridescent Crystals
Iridescent Crystals
Shop at:
SSS | SK
 To make supplies easy for you to find, I have linked them above. If something is no longer available I will link to a similar product. Affiliate links may be used depending on the product linked. Please help support my blog by using these links while shopping at no additional cost to you. For more information about the affiliates I use, please visit my disclaimer here. Thanks so much for all your support!


Don't forget to check out today's Cyber Monday deals
Take an additional 25% off retiring and clearance items!

I hope these fun Trifold See Through Shaker Cards inspired you to try this clear bag technique. If you do make sure to share them with me I would love to see them. Also if you have any questions about making these leave me a comment here or message me. I am happy to help 😊

Thank you for stopping by and until next time... Happy Crafting!
Ilda💖