Hello, my Honey Bee Friends!
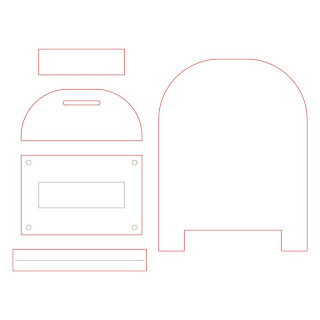
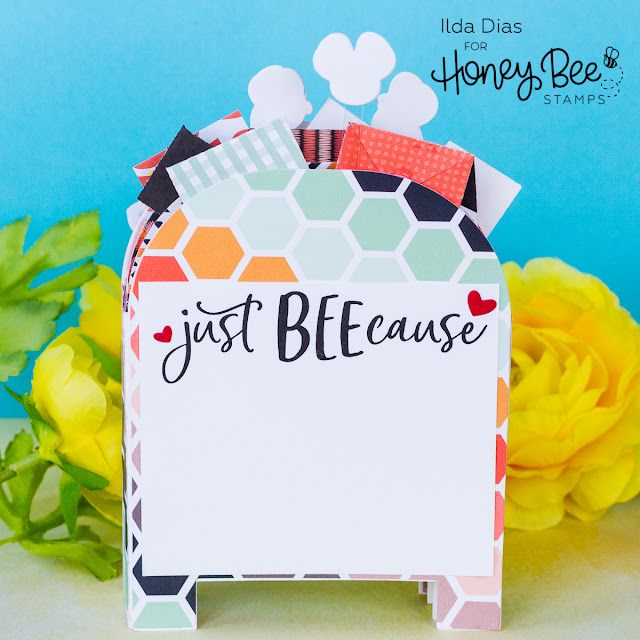
Today I have a super cute Box Card to share with you, in fact, it is a 3D Post Box Card using the new POST BOX CARD BASE DIES from the latest BEE MINE Release. I am not going to lie and tell you this was a quick and easy card because it took about 3 hours to make and probably could have been made faster but I was figuring things out as I created it. So I will share with you my process and what I would do differently to make it easier for you if you wanted to create something like this 😉
Here I have compiled some images of my process to make things more visual for you.
1. Die-cut 4 of the Post Box Panels.
2. To create the side panel for the box card I die cut 2 pieces of the connector die (12 total)
3. Bend the die-cut pieces at the scoreline.
4. Glue the 2 pieces together to create one side panel connector for each layer of the box card.
1. Die-cut 4 of the Post Box Panels.
2. To create the side panel for the box card I die cut 2 pieces of the connector die (12 total)
3. Bend the die-cut pieces at the scoreline.
4. Glue the 2 pieces together to create one side panel connector for each layer of the box card.
5. You will need to create 6 connectors pieces.
6. Line up the connector with the outer edge of the post box panel and glue in place.
7. Push flat the connector piece and add glue to the flap.
8. Attach the next panel in place lining it up with the scored edge and repeat steps 6-8 for the remainder of panels.
9. Glue connectors onto the other side of the box and connect the coordinating panel.
10. Repeat until all panels are connected. As you build the box, before the glue completely dries, bend the panels from side to side to ensure they fold flat each way.
11. Die-cut your decorative papers to cover up the panels. For the middle pieces, you do not need to cut the full Post Box panel. I just did the tops as that is what is visible.
Not Pictured
12. Glue the patterned papers in place. For the inside pieces, I had to trim a tiny sliver on each side of the panels to make it easier to glue in place.
13. Glue on the outer and inner pieces of patterned paper. This paper comes from the SWEET ON YOU PAPER PAD.
14. Cut a strip of paper to the size of the side panels to cover up the connector pieces and glue in place.
15. Embellish the Post Box Card as desired.
MORE CARD DETAILS
To decorate and complete this card I stamped out, colored and die cut the bees from the BUSY BEE stamps set and Coordinating BUSY BEE dies.
I then used thin strips of acetate to connect a few of them in the air. To cover up the ink bleed from the coloring on the backside of the bees, I used a blank die-cut to sandwich the acetate piece.
The greeting stamp I used on the back of the Box card comes from the HI HONEY Stamp Set.
The little hearts I used to decorate the letters and the backside of the card come from POCKET FULL OF LOVE HONEY CUTS.
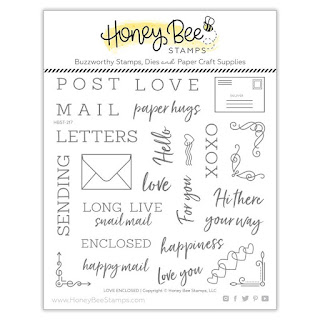
For the letters, I used the LOVE ENCLOSED HONEY CUTS to create both the postcard type letters and the envelopes. I then also stamped a few using the stamps from theLOVE ENCLOSED Stamp Set.
As you can see from this next photo this card will fold flat to fit into a 5x7 envelope. Keep in mind it is quite thick and will require extra postage for shipping.
WHAT I WOULD DO DIFFERENTLY
If I was to recreate this project again I would have used a lighter weight paper. I used Neenah 110lbs for this, which made it too bulky. Instead, I would have used a 65lbs paper because it will be reinforced with the patterned paper making it strong enough and less bulky for mailing.
Also, I would have adhered all the patterned paper first onto the white panels then glued the pieces together. I did it the way I did to hide some of the white connections inside, but honestly, they wouldn't have been that noticeable.
I hope you have been inspired by this fun 3D Happy Mail Just Beecause Post Box Card. I also think would also make a great mini-album too simply by using the single connector pieces and layering as many post box panels as you desire!
Thank you for stopping by 😊
Until next time... Happy Crafting 👋

SUPPLIES
 POST BOX CARD BASE | CUTS Shop at: SSS | HBS |
 LOVE ENCLOSED | CUTS Shop at: SSS | HBS |
 LOVE ENCLOSED Shop at: SSS | HBS |
 BUSY BEE Shop at: SSS | SBC | HBS |
 BUSY BEE | CUTS Shop at: SSS | SBC | HBS |
 POCKET FULL OF LOVE | CUTS Shop at: SSS | HBS |
 HI HONEY Shop at: SSS | SBC | HBS |
 SWEET ON YOU PAPER PAD Shop at: SSS | HBS |
 RAW HONEY GEM STICKERS Shop at: SSS | SBC | HBS |
 GEMINI JR. DIE CUTTER Shop at: SSS | AMZ | SBC |
 NEENAH SOLAR WHITE 110 Shop at: SSS | AMZ | HBS |
 MINI MISTI Shop at: SSS | AMZ | SBC | SK | HBS |
 BLACKOUT INK Shop at: SSS | IO3 |
 CLEAR ACETATE SHEETS Shop at: SK |
 STUDIO KATIA GLUE Shop at: SSS | SK |
 FOAM TAPE - WHITE Shop at: SSS | SK |
 LIQUID PIXIE DUST Shop at: SSS | IO3 |
 GLOSSY ACCENTS Shop at: SSS | AMZ | SBC | HBS |
 WHITE GELLY ROLLER PEN SET Shop at: SSS | AMZ | SBC |
To make supplies easy for you to find, I have linked them above. If something is no longer available I will link to a similar product. Affiliate links may be used depending on the product linked. Please help support my blog by using these links while shopping at no additional cost to you. For more information about the affiliates I use, please visit my disclaimer here. Thanks so much for all your support!


