Hello friends,
This post is long overdue, but I felt it was still worthwhile sharing for anyone interested in ideas for a nurse's retirement party. Recently a dear friend, colleague, and mentor of mine retired from Nursing after 42 years of service. Since I began my nursing career up until a few months ago Barb had been there. She has always been someone we all looked up to and learned so much from. So since this legend was about to retire we knew we had to throw her a party she would never forget. Lucky for her, but not so lucky for me I had time to plan and organize the event, since I was at home recovering from a broken ankle. Thankfully I have since recovered.
THEME
Barb's last name is Curry. Anyone who knows Barb knows the calm she brings when she's around even when under pressure. Over the years we had adapted the British phrase Keep Calm and Carry On to Keep Calm and "Curry" On, so the theme was not a hard one to come up with. Last year I made her a shirt just for fun that she actually wore on her last day to work and it was her wish for us all that she left behind.
NURSE'S CAP
Nowadays, nurses don't wear the Nursing Cap which is designed to recognize the expertise and excellence of a bedside registered nurse. But, when Bar was a new nurse she definitely did wear one and her's had a black stripe across the top of it. So of course I had to make her a "Retirement" Nurse's Cap.
Made using
Silhouette Cameo and
Glitter HTV.
Nurses Cap (similar but not the same one I used)
CARD
Knowing that many people would want to sign the Farwell card, I decided to create an extra large one. For this, I again used the Silhouette Design Edition software to create the XL card. Finished it measured approximately 9.5x12 inches. For the card base, I used a white Posterboard and also added a couple extra inserts for people to write messages on. On a black piece of cardstock, I die-cut the nurse's cap and bottom letters. I then die-cut the same letters and cap to create 3 layers, which I then glued together and pieced back into the openings on the black piece of cardstock. For the top wording on the card I die-cut the letters using white vinyl and then used transfer tape to add them to the top half of the card. To the cap, I added a layer of glue and then sprinkled it with glitter just for a little sparkle.
On the inside, I printed the personalized greeting.
NAPKINS
I thought it would be fun to incorporate the theme by stamping it on Napkins. I had never done this before or seen it done, but I was determined to figure out to make my very own customized napkins. With no budget for ordering them online, DIY was the way to go.
To create my own customized stamp first once again used the same design I had previously and shrunk it down to fit onto a 3-inch acrylic block. I reversed (mirrored) the image so that the letters would stamp correctly and then die-cut the letters from thin craft foam. Once the letters were cut out I weeded the excess material. Next, I added double-sided adhesive to the acrylic block and picked up the letters from the cutting mat. It probably helped that my mat was not very sticky and for the most part, the transfer was easy. The "A" was crooked (see next stamped image) and I later repositioned it.
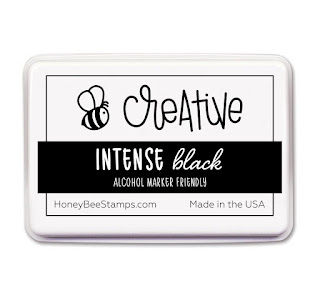
Here is an image of my first stamped impression. I then had to test out all my black inks and see which one gave me the best impression. Some bled quite a bit, and some weren't dark enough. Because I was using a stamp block I only had one chance for stamping so I needed to find the best ink for the job. Also to make sure no one ended up with black ink all over their face I did test them by spraying water on them to see if the ink transferred. The inks that I got the best results with were
Blackout Ink and
Bee Creative Intense Black Ink.
VersaFine ONYX BLACK Ink gave me the nicest black impression but after a few minutes it bled into the fibers which I only found out after stamping a bunch. Good thing I used napkins from the Dollar store so not a big loss 😆
BUTTONS
As a keepsake for the guests, thought it would be fun to make something that nurses love and could remember Barb by. We all or most of us wear lanyards at work and many of us decorate them with buttons, pins, and stickers that are given to us throughout the years. So I thought creating a button with the theme was a must.
To make these I needed to find a button maker, which I ordered from Amazon and figured I could probably use in the future for other projects. So I looked at this as an investment. I then added the design to a circular background that I sized specifically for this 1-inch button and printed them and then used my ScanNCut Machine to cut them all out in minutes. There are punch tools you can get but this was so much easier especially since I already had the equipment.
Once I was done making the buttons, I packaged them all up as shown above. On the back of the card, I did have my handmade logo also printed.
CAKE
For the Cake is used both my papercraft skills and cake decorating skills to create this beauty. The cake itself was 2, 9-inch vanilla and chocolate round cakes and 2, 10-inch vanilla and chocolate round cakes so that everyone got a little taste of both. I then used buttercream icing to cover the entire cake. It would have been a lot easier if I had just covered the entire cake in fondant but I guess it is no longer as popular to do as many people dislike the taste and peel it off anyway. I did however use
Fondant to create all the details on the cake (stethoscope, nurse's cap, pill bottle, pills, bandages). On the big heart in the center, I used an old woodblock letter set I had which resulted in some cooked letters but I was totally OK with that as it added a playful look to it. I used black food coloring to ink up the letters.
I did also use paper pieces on the cake. The pill label and "of service" were printed and cut out. The ECG was also paper, which I cut using the
Silhouette, and also made the cake topper for the cake using paper that I cut 3 layers, stacked and glued together, and added them to a couple of wooden dowels.
Here is a closer look at the label. When wet fondant is sticky so it is very easy to glue things to it. Just make sure no one eats these pieces, lol!
Here is a photo of Barb and me with the cake, before I cut it all up!
And here is a photo of the cake table and backdrop using a
Balloon Kit I ordered to match the theme colors.
Thank you for stopping by and until next time... Happy Crafting!