Monday, October 12, 2020

I'm Nuts About You Fall Scene Card | Honey Bee Stamps


Nuts About You, Fall Scene Card, circle spotlight stencil, Card Making, Stamping, Die Cutting, handmade card, ilovedoingallthingscrafty, Stamps, how to,Ink Blending,distress oxide inks,Autumn Afternoon Release,

Happy Monday Crafty Friends, and to my Canadian ones, Happy Thanksgiving!

I'm totally nuts about today's card. The NUTS ABOUT YOU set is in my top 3 sets from the latest AUTUMN AFTERNOON Release. The squirrel images are so cute that I could wait to play with them again.

CARD DETAILS

To begin, I stamped out the images using BLACKOUT INK onto Neenah paper, this ink dries quickly and is perfect for Copic coloring. After the images were colored, I used the coordinating NUTS ABOUT YOU DIES to die cut them. All the stamps used come from the NUTS ABOUT YOU set. 

Nuts About You, Fall Scene Card, circle spotlight stencil, Card Making, Stamping, Die Cutting, handmade card, ilovedoingallthingscrafty, Stamps, how to,Ink Blending,distress oxide inks,Autumn Afternoon Release,

The next thing I did was to use mask a piece of Bristol paper using the largest CIRCLE SPOTLIGHT STENCIL. I then used MUSTARD SEED, PICKED RASPBERRY, WILTED VIOLET, and BLUEPRINT SKETCH DISTRESS OXIDE inks to blend out the sunset sky for the scene using the BACKGROUND BLENDER BRUSHES

Nuts About You, Fall Scene Card, circle spotlight stencil, Card Making, Stamping, Die Cutting, handmade card, ilovedoingallthingscrafty, Stamps, how to,Ink Blending,distress oxide inks,Autumn Afternoon Release,

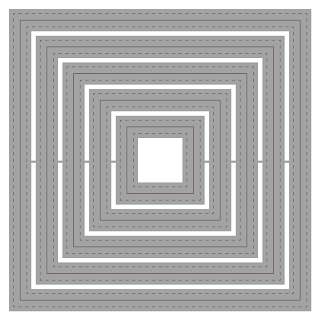
Next, I die cut the panel using the largest DOUBLE STITCHED SQUARE DIES. To add the curved sentiment on the top, I placed the card panel in the MISTI and used the same CIRCLE SPOTLIGHT STENCIL to position the sentiment in the correct curved position, picking up the stamp with the Misti door, removing the stencil and stamping it directly in the right spot.

I then die cut the BRANCH AND LEAVES DIES. For the branch, I used a dark brown cardstock scrap, the leaves I die cut using white paper that I then used Copic markers to create some Fall leaf blends. 

I'm Nuts About You Fall Scene Card | Honey Bee Stamps

Now, all that is left to do is assemble the card with all the pieces. First I glued the Branch in place and then I added the leaves in place using foam tape. Next, I positioned the Squirrels on the Branch and also popped them up with foam tape. I then finished it off by gluing the hearts, leaves, and acorn.

Nuts About You, Fall Scene Card, circle spotlight stencil, Card Making, Stamping, Die Cutting, handmade card, ilovedoingallthingscrafty, Stamps, how to,Ink Blending,distress oxide inks,Autumn Afternoon Release,

As final finishing touches, I added GLOSSY ACCENTS and white gel pen details. 

And there you have it, the cutest Nuts About You Fall Scene Card. This cutie would make a great Valentine's, Anniversary or just an I love you card to someone you love. 

Thank you for stopping by and until next time... Happy Crafting!


SUPPLIES
NUTS ABOUT YOU
NUTS ABOUT YOU
Shop at:
SSS | HBS
NUTS ABOUT YOU DIES
NUTS ABOUT YOU DIES
Shop at:
SSS | HBS
Branch and Leaves Dies
Branch and
Leaves Dies

Shop at:
SSS | SB | HBS
DOUBLE STITCHED SQUARE DIES
Shop at:
SSS | SB | HBS
CIRCLE SPOTLIGHT STENCIL
Shop at:
SSS | SB | HBS
BACKGROUND BLENDER BRUSHES
Shop at:
SSS | HBS
BEE CREATIVE GLUE
BEE CREATIVE GLUE
Shop at:
SSS | SB | HBS
Neenah  80 LB SOLAR WHITE
Neenah 80 LB SOLAR WHITE
Shop at:
SSS | AMZ
MINI MISTI
MINI MISTI
Shop at:
SSS | AMZ | SB | SK | HBS
COPIC SKETCH
COPIC SKETCH
Shop at:
AMZ
GEMINI JR. DIE CUTTER
Shop at:
SSS | AMZ | SB
BRISTOL PAPER
BRISTOL PAPER
Shop at:
SSS | AMZ
BLACKOUT INK
BLACKOUT INK
Shop at:
SSS | HBS | IO3
MUSTARD SEED DISTRESS OXIDE
Shop at:
SSS | SB | HBS
PICKED RASPBERRY DISTRESS OXIDE
Shop at:
SSS | SB | HBS
WILTED VIOLET DISTRESS OXIDE
Shop at:
SSS | SB | HBS
BLUEPRINT SKETCH DISTRESS OXIDE
Shop at:
SSS | SB | HBS
Neenah 100 LB SMOOTH DESERT STORM
Shop at:
SSS
WHITE GELLY ROLLER PEN SET
Shop at:
SSS | AMZ | SB
GLOSSY ACCENTS
GLOSSY ACCENTS
Shop at:
SSS | SB | HBS

To make supplies easy for you to find, I have linked them above. If something is no longer available I will link to a similar product. Affiliate links may be used depending on the product linked. 
Please help support my blog by using these links while shopping at no additional cost to you. For more information about the affiliates I use, please visit my disclaimer here. Thanks so much for all your support!

Wednesday, September 30, 2020

Thanksgiving Inspiration Cards | Studio Katia

Thanksgiving, Studio Katia, Autumn Borders, Mini Arcs Stencil, Pearls,Karin Brush Marker Pro,Card Making, Stamping, Die Cutting, handmade card, ilovedoingallthingscrafty, Stamps, how to,  card

Happy Wednesday Friends!

I am back today with a few Thanksgiving Inspiration Cards for Studio Katia. Even though 2020 has been such a terrible year for all of us around the world, there is still so much to be thankful for. 

CARD DETAILS

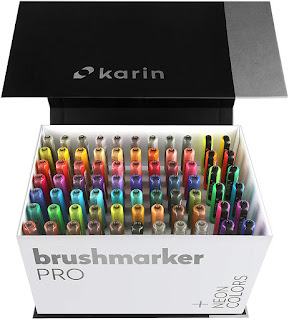
I began these cards by stamping out the images from the AUTUMN BORDERS stamp set (which by the way is currently on sale if you are interested). I used VersaFine Onyx Ink and then heat set it with a clear embossing powder so that I could do some really easy water coloring using Karin Brushmarkers. 

Thanksgiving, Studio Katia, Autumn Borders, Mini Arcs Stencil, Pearls,Karin Brush Marker Pro,Card Making, Stamping, Die Cutting, handmade card, ilovedoingallthingscrafty, Stamps, how to,  card

Once the images where dry I die cut them out using the coordinating AUTUMN BORDERS DIES. Under each die-cut, I left enough room to add a sentiment from the AUTUMN BORDERS set and then trimmed excess paper underneath.

Thanksgiving, Studio Katia, Autumn Borders, Mini Arcs Stencil, Pearls,Karin Brush Marker Pro,Card Making, Stamping, Die Cutting, handmade card, ilovedoingallthingscrafty, Stamps, how to,  card

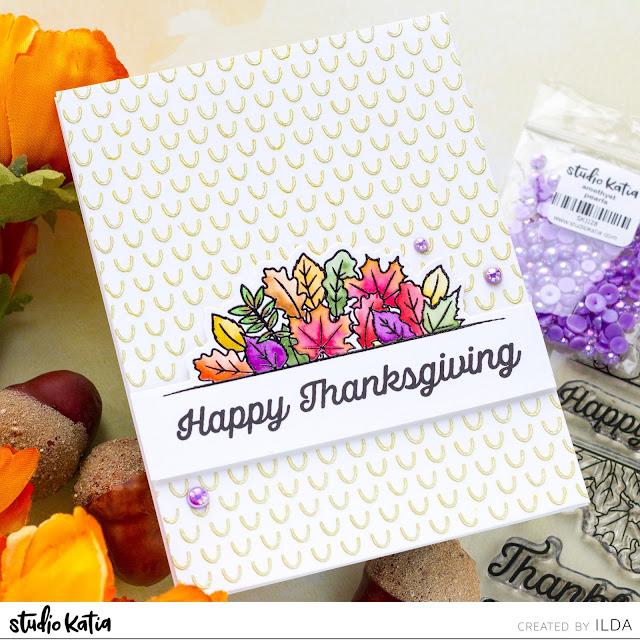
I then popped up the strips using foam tape and attached them to these beautiful backgrounds and finished them off by adding some pearls. On this card, I used the AMETHYST PEARLS.

Thanksgiving, Studio Katia, Autumn Borders, Mini Arcs Stencil, Pearls,Karin Brush Marker Pro,Card Making, Stamping, Die Cutting, handmade card, ilovedoingallthingscrafty, Stamps, how to,  card

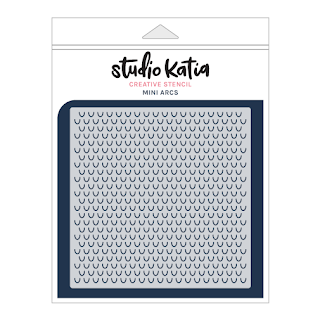
To create these beautiful backgrounds, I used the MINI ARCS STENCIL, and I created my own gold paste (because I didn't have any) by mixing Platinum Embellishment Mousse with a little bit of Solar Flare Shimmer Powder. 

Thanksgiving, Studio Katia, Autumn Borders, Mini Arcs Stencil, Pearls,Karin Brush Marker Pro,Card Making, Stamping, Die Cutting, handmade card, ilovedoingallthingscrafty, Stamps, how to,  card

Doesn't the pattern remind you of acorn tops? Such a pretty design and I just love the texture this paste created.

Thanksgiving, Studio Katia, Autumn Borders, Mini Arcs Stencil, Pearls,Karin Brush Marker Pro,Card Making, Stamping, Die Cutting, handmade card, ilovedoingallthingscrafty, Stamps, how to,  card

To finish off this card I added WINE BERRY PEARLS.  Love how these cards turned out!

Thanksgiving, Studio Katia, Autumn Borders, Mini Arcs Stencil, Pearls,Karin Brush Marker Pro,Card Making, Stamping, Die Cutting, handmade card, ilovedoingallthingscrafty, Stamps, how to,  card

I hope these Thanksgiving cards inspired you today. Thank you for stopping by and until next time... Happy Crafting!


SUPPLIES
AUTUMN BORDERS
AUTUMN BORDERS
Shop at:
SSS | SK
AUTUMN BORDERS DIES
AUTUMN
BORDERS DIES

Shop at:
SSS | SK
MINI ARCS STENCIL
MINI ARCS
STENCIL

Shop at:
SSS | SK
EMBELLISHMENT WAND
EMBELLISHMENT WAND
Shop at:
SSS | SK
WINE BERRY PEARLS
WINE BERRY PEARLS
Shop at:
SSS | SK
AMETHYST PEARLS
AMETHYST PEARLS
Shop at:
SSS | SK
STUDIO KATIA GLUE
STUDIO
KATIA GLUE

Shop at:
SSS | SK
MINI MISTI
MINI MISTI
Shop at:
SSS | AMZ | SK | HBS
BRISTOL PAPER
BRISTOL PAPER
Shop at:
SSS | AMZ
VersaFine ONYX BLACK Ink
Shop at:
SSS | AMZ | SB | HBS
CRYSTAL CLEAR Emb Pwd
CRYSTAL CLEAR
Emb Pwd

Shop at:
SSS | IO3
KARIN BRUSHMARKER PRO
KARIN BRUSH
MARKER PRO

Shop at:
SSS | AMZ
MED. WATER BRUSH
MED. WATER BRUSH
Shop at:
IO3
MEDIA SPATULAS
MEDIA SPATULAS
Shop at:
SSS |HBS | TS US | TS UK
Pure Platinum Embellishment Mousse
Pure Platinum Emb. Mousse
Shop at:
TS US | TS UK
Shimmer Powder - Solar Flare
Shimmer Powder
Solar Flare

Shop at:
TS US | TS UK
To make supplies easy for you to find, I have linked them above. If something is no longer available I will link to a similar product. Affiliate links may be used depending on the product linked. Please help support my blog by using these links while shopping at no additional cost to you. For more information about the affiliates I use, please visit my disclaimer here. Thanks so much for all your support!

Saturday, September 26, 2020

You're So FabOOlous Halloween Light Up/Wobbles Card | Ink On 3/Pear Blossom Press Collab


You're So FabOOlous, Halloween, Light Up,Wobbles, Card,Ink On 3,Pear Blossom Press, Card Making, Stamping, Die Cutting, handmade, ilovedoingallthingscrafty, Stamps,how to,Atelier Inks,EZ-Light,interactive

Hello Friends and Happy Saturday!

I hope you can join me over on Instagram for a fun IG Hop. Just in case you can't though, I still wanted to share this cute Interactive Halloween card here with you today featuring products from Inkon3 and Pear Blossom Press.


CARD DETAILS

This cute card wobbles and lights up. I began this card by stamping out the cute ghost images from the PUMPKIN FRIENDS set (which at the moment is sold out, sorry) using BLACKOUT INK. I then colored it in with a few Copic markers and fussy cut the images.

To create the background I used Atelier Inks, (see colors used below in the thumbnails) as well as the WAVY STENCIL. I then punched a few holes for the wire of the EZ-Lights to fit through. I also punched out the eyes of the larger ghost and attached one light behind each eye using tape to secure it in place. Behind the ghost, I also added an Action Wobbles Spring, then pull the excess wiring behind the panel. 

To make the ghost's eyes look cute and not scary, I first drew in some lashes and then added a couple of black sparkly transparent crystals.


You're So FabOOlous, Halloween, Light Up,Wobbles, Card,Ink On 3,Pear Blossom Press, Card Making, Stamping, Die Cutting, handmade, ilovedoingallthingscrafty, Stamps,how to,Atelier Inks,EZ-Light,interactive

Next, I stamped out the You're so sentiment from BAD AND BOUJEE onto my card panel before going any further. (forgot to stamp it prior to wiring). I then stamped out the fabOOlous onto black cardstock using JUICY INK and heat embossed it with ARCTIC WHITE E. POWDER. The FabOOlous was created by combining two sets, 1. DOGWOOD FLOWER and 2. PHAT ALPHANUMERIC. Using a piercing tool I poked holes through the centers of the O's.

Behind the sentiment, I used the last EZ-Light and attached it between the two O's to add a glow in behind them. I then added foam to the strip and attached it to the card front.

Finally, I taped down the EZ-Light push button behind the sentiment strip, where the recipient will push down on. Taped the excess wires to the pack of the card panel, leaving room along with the edges to add foam around the border and attached it to the card base.

You're So FabOOlous, Halloween, Light Up,Wobbles, Card,Ink On 3,Pear Blossom Press, Card Making, Stamping, Die Cutting, handmade, ilovedoingallthingscrafty, Stamps,how to,Atelier Inks,EZ-Light,interactive

And there you have it, a Halloween Light Up/Wobbles Card. SO cool right!? 

You're So FabOOlous, Halloween, Light Up,Wobbles, Card,Ink On 3,Pear Blossom Press, Card Making, Stamping, Die Cutting, handmade, ilovedoingallthingscrafty, Stamps,how to,Atelier Inks,EZ-Light,interactive

I hope you can catch the Instagram hop, I will post a quick video of the card coming together. Plus, both companies will be giving away some great prizes.

Thank you for stopping by and until next time... Happy Crafting!


SUPPLIES
EZ-LIGHT (5) PACK
EZ-LIGHT (5) PACK
Shop at:
PBP
PUMPKIN FRIENDS
PUMPKIN FRIENDS
Shop at:
IO3
BAD AND BOUJEE
BAD AND BOUJEE
Shop at:
SSS | IO3
DOGWOOD FLOWER
DOGWOOD FLOWER
Shop at:
SSS | IO3
PHAT ALPHANUMERIC
PHAT ALPHANUMERIC
Shop at:
SSS | IO3
BLACKOUT INK
BLACKOUT INK
Shop at:
SSS | HBS | IO3
JUICY INK
JUICY INK
Shop at:
SSS | HBS | IO3
ARCTIC WHITE POWDER
ARCTIC WHITE POWDER
Shop at:
SSS | IO3
WAVY STENCIL
WAVY STENCIL
Shop at:
SSS | IO3
ATELIER MARIGOLD ORANGE
Shop at:
SSS | HBS | IO3
ATELIER GODDESS GREEN
Shop at:
SSS | HBS | IO3
ATELIER MY PURPLE JAM
Shop at:
SSS | IO3
ATELIER PAINT IT BLACK
Shop at:
SSS | IO3
ORIGINAL MISTI
ORIGINAL MISTI
Shop at:
SSS | AMZ | SB | HBS
BRISTOL PAPER
BRISTOL PAPER
Shop at:
SSS | AMZ
INK BLENDER BRUSHES
INK BLENDER BRUSHES
Shop at:
SSS | SK
FOAM TAPE - BLACK
FOAM TAPE - BLACK
Shop at:
SSS | SK
Mini Action WOBBLES
Mini Action WOBBLES
Shop at:
SSS
WHITE GELLY ROLLER PEN SET
Shop at:
SSS | AMZ | SB
DARK SPARKLE CRYSTALS
Shop at:
SSS | SK
To make supplies easy for you to find, I have linked them above. If something is no longer available I will link to a similar product. Affiliate links may be used depending on the product linked. Please help support my blog by using these links while shopping at no additional cost to you. For more information about the affiliates I use, please visit my disclaimer here. Thanks so much for all your support!