Saturday, September 22, 2018

Seasons Greetings Poinsettia Trimmings Card | Studio Katia Release Blog Hop and GIVEAWAY

Hello Friends and welcome to the Studio Katia Fall 2018 Release Blog Hop! This is a 2 day Hop and today is Day 2.


If you have already started on the Hop you must have arrived from the very talented Svetlana's Blog. I'll have more details and where to Hop next at the end of this post, plus details on all the Giveaways going on! 

Today I’m sharing my first Christmas card of the season using the new Poinsettia Trimmings stamp set. Isn’t it pretty?!

Seasons Greetings Poinsettia Trimmings Card | by ilovedoingallthingscrafty.com

To make this card I began by stamping out the poinsettias on the outer edges of a card panel using a  Versamark ink and then used a gold embossing powder to heat set it. I then used Copic markers to color the florals in. Next, I fussy cut around the flowers and then using a Versamark pen inked the fussy cut edge and added the same gold embossing. I also added some tiny drops of glossy accents to the berries and set the trimmings aside while it dried. If you aren't into fussy cutting, Studio Katia just released the Trimming Borders Die that will cut along all of the Studio Katia Trimming Stamp Sets.

Seasons Greetings Poinsettia Trimmings Card | by ilovedoingallthingscrafty.com

To create the back panel, I layed the confetti stencil onto the card panel and used Versamark ink to stamp into all the openings. Next, I removed the stencil and sprinkled the same gold embossing powder and heat set it. I then ran the panel and the floral trimmings with the largest die from the new Dotted Pattern Set 3 Dies. For the sentiment, I used the banner from the Dotted Patterns Set 2 Dies. Now, all that I did was piece it all together on to the card base popping up the sentiment and the trimmings onto the confetti stencil background.

To finish the card, I added a sprinkle of the Classic Christmas Confetti


BLOG HOP: To celebrate Katia is generously giving away TWO $50 CAD Gift Certificates every day of the Blog Hop! That’s FOUR chances to win. The winners will be chosen randomly from comments left on ALL blogs of our Blog Hop.

PERSONAL BLOG GIVEAWAY: I will also be giving away a $25 GC to Studio Katia Store! All you need to do is follow me on Instagram and leave me a comment over there. If you don't do Instagram that's cool, leave me a comment here on my blog and I will enter them into the draw 😊

*Comments must be left before 11:59 PM EST on Friday, September 28th and winners will be announced on September 30th, 2018.

Here is the Day 2 line up... Ready to get hopping?
Thank you for stopping by 😊
Until next time... Happy Hopping!

SUPPLIES
To make supplies easy to find, I have linked them below. If something I used is no longer available I will link to a similar product.
Affiliate links may be used depending on the product. Your purchases help keep my blog running, so thanks in advance for the support!

Supplies:

Friday, September 21, 2018

Life Is Sweeter with Y'All In It | Fall Mason Jar Friendship Card

Hey dear friends!

Not sure how the weather is in your part of the world, but here in Edmonton it sure has cooled off. All our leaves are turning colors and falling off the trees, it feels like Fall has arrived here.

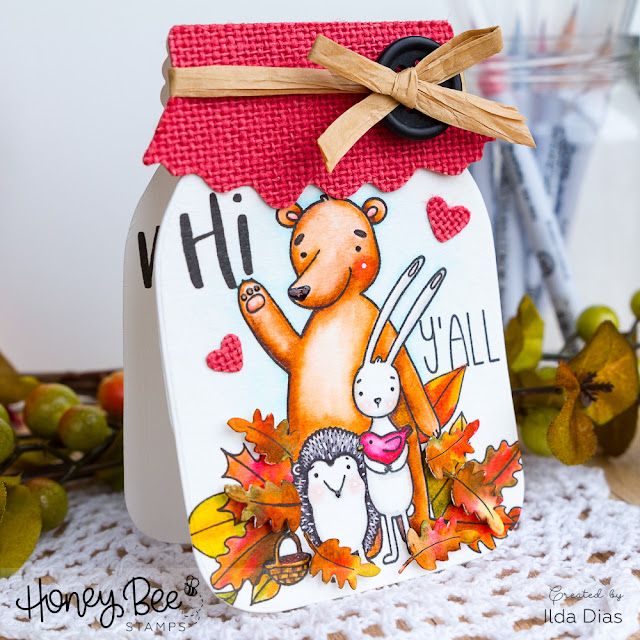
So for my card today I created a Fall themed mason jar card with our fun Forest Friends from Honey Bee Stamps.

Life Is Sweeter with Y'All In It | Fall Mason Jar Friendship Card by ilovedoingallthingscrafty.com

To make this card, I started off by stamping the Forest Friends onto a large sheet of watercolor paper, I then masked off the friends and added leaves from the Bushel and A Peck Set. Next, I used Zig Clean color pens to color in the images. I then die cut the leaves from the Bunch of Bouquet Dies, colored them and set everything aside to dry.

Life Is Sweeter with Y'All In It | Fall Mason Jar Friendship Card by ilovedoingallthingscrafty.com

Once the images were completely dry, I die cut it out using the mason jar die. I then die cut the top fabric piece for the mason jar out of a red piece of burlap paper and then glued that to the mason jar card front. Before I glued on that piece on, I did use a piece of raffia ribbon to wrap around it and tied a bow into a large button. Next, I stamped out the Hi from the Hi Honey set and the Y’All from the Happy Fall Y’All set. To finish off the card front, I added a couple of burlap die cut hearts, added some die cut leaves to the colored leaf pile and glossy accents to some areas.

Life Is Sweeter with Y'All In It | Fall Mason Jar Friendship Card by ilovedoingallthingscrafty.com

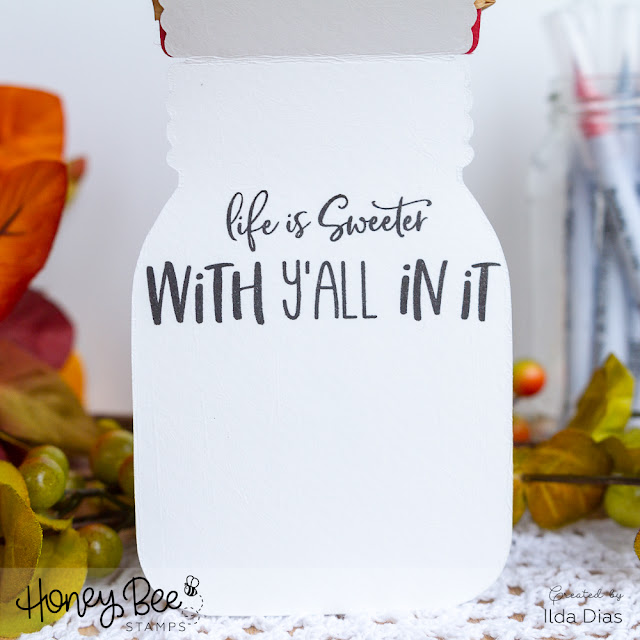
To the inside, I combined a few sentiments from different sets to say life is sweeter with Y'all it.

Life Is Sweeter with Y'All In It | Fall Mason Jar Friendship Card by ilovedoingallthingscrafty.com


Hope this fun Fall Mason Jar shaped card inspired you today. Remember that a mason jar in card making isn’t just for jam and honey images… cards don’t have to be realistic, use your artistic freedom to create a unique card like this Forest Friend Mason Jar Card. The world is a better place with your friends in a mason jar πŸ˜‰

Thank you for stopping by 😊
Until next time... Happy Crafting πŸ‘‹

SUPPLIES
To make supplies easy to find, I have linked them below. If something I used is no longer available I will link to a similar product.
Affiliate links may be used depending on the product. Your purchases help keep my blog running, so thanks in advance for the support!
Mason Jar Card Dies
Mason Jar Card Dies
Shop at:
HBS
Honey Bee FOREST FRIENDS
FOREST FRIENDS
Shop at:
SSS | HBS
BUSHEL AND A PECK | 4X6 STAMP SET
BUSHEL AND A PECK 
Shop at:
HBS
Hi Honey
Hi Honey
Shop at:
HBS
HAPPY FALL Y'ALL
HAPPY FALL Y'ALL
Shop at:
SSS | HBS
Bunch of Bouquets Dies
Shop at:
HBS

Thursday, September 20, 2018

Studio Katia's & Simon Says Stamp STAMPtember Collaboration | Fresh Bunch


Yippee! 

The new Studio Katia's and Simon Says Stamp STAMPtember Collaboration | Fresh Bunch Stamp and Die Set is LIVE and NOW for sale at SSS while supplies last people! Run and get it, I have a feeling this set is going to fly off the shelves!!!

Just look how beautiful this arrangement is 😍

Studio Katia's & Simon Says Stamp STAMPtember Collaboration | Fresh Bunch by ilovedoingallthingscrafty.com
Here's a closer look at all the gorgeousness!

Studio Katia's & Simon Says Stamp STAMPtember Collaboration | Fresh Bunch by ilovedoingallthingscrafty.com

To make this card I began by stamping out the image using fadeout ink onto Bristol Paper. I then used Zig Clean color Brushes to color the bouquet in. I then stamped out the sentiment off to the side and die cut the panel and popped it onto a grey card base I then finished the card by adding glitter and crystals to the card front.

Hope this card has inspired you, don't forget this set is only available while supplies last!

Thank you for stopping by 😊
Until next time... Happy Crafting πŸ‘‹

SUPPLIES
To make supplies easy to find, I have linked them below. If something I used is no longer available I will link to a similar product.
Affiliate links may be used depending on the product. Your purchases help keep my blog running, so thanks in advance for the support!
Supplies marked with an asterisk (*) were generously sent to me.

Wednesday, September 19, 2018

Kobi Bear Goes Skating | Slider Card | Day 2 Previews Studio Katia Release

Hey friends!

Today is Day 2 of Studio Katia’s September 2018 Release Preview. Lots of fun new products from Studio Katia coming your way! Click → HERE for Day 1 Inspirations!

For my card today I created a fun slider card, that has Kobi Bear Sliding Back and forth on the frozen pond using stamps and dies from the new Kobi's Ice Day Set.

Kobi Bear Goes Skating | Slider Card | by ilovedoingallthingscrafty.com

To make the starry sky background I used the large oblong window die from the Dotted Patterns Set 3 to cut out a mask and then used distress oxide inks to blend out the night sky.

Kobi Bear Goes Skating | Slider Card | by ilovedoingallthingscrafty.com

I also added these gorgeous crystal Iridescent Ice Flakes gems to make the night sky sparkle. The trees in the background come from the Winter Kobi Die Set.

Kobi Bear Goes Skating | Slider Card | by ilovedoingallthingscrafty.com

Here is a peek at Kobi in action!


GIVEAWAY:
Studio Katia will be doing giveaways on throughout the release this week so don't miss your chance at winning some awesome prizes. Stop by the SK Blog for details!

Thank you for stopping by 😊
Until next time... Happy Crafting πŸ‘‹

SUPPLIES
To make supplies easy to find, I have linked them below. If something I used is no longer available I will link to a similar product.
Affiliate links may be used depending on the product. Your purchases help keep my blog running, so thanks in advance for the support!

Supplies:
Irridescent Iceflake Gems

Tuesday, September 18, 2018

Simon Says & Honey Bee Stamps STAMPtember Collaboration


 Woohoo!

The Simon Says Stamp and Honey Bee Stamp Collaboration set is LIVE, so GO check it out if you already haven't! It will be available while supplies last πŸ˜‰

I had so much FUN making this card, and it was super easy to do! This Tie One On Stamp and Die set is perfect for making any celebration card.

To make this card I used a variety of Distress Oxide inks. I first stamped out the outline of the balloon, heat set it with a clear embossing powder and then colored them using a water brush. Next, I stamped out the sentiments onto black cardstock and heat set it with a white embossing powder. Added my confetti sprinkles and Voila a finished card, perfect for any Party!

Simon Says & Honey Bee Stamps STAMPtember Collaboration by ilovedoingallthingscrafty.com

This next card was even easier to make! 

I apologize ahead of time for the earworm about to enter your head.
 "Celebrate good times come on... It's a celebration!" A classic 80's hit by Kool and the Gang, I'm sure you've all heard it πŸ˜† and yes, it's stuck in my head too!


To make this card, I first stamped out the sentiments in a white pigment ink and heat set it with a white powder. Next, I stamped the confetti all around the card and heat set it with some gold glitter embossing powder. Trimmed the card panel and glued it to the card front. Finished it off by adding some twilight Rhinestones sprinkles.

I hope these cards inspired you today. If you have lots of birthday/party cards to make this set is a great one to get. Don't forget it is only available while supplies last!

Thank you for stopping by 😊
Until next time... Happy Crafting πŸ‘‹

SUPPLIES
To make supplies easy to find, I have linked them below. If something I used is no longer available I will link to a similar product.
Affiliate links may be used depending on the product. Your purchases help keep my blog running, so thanks in advance for the support!
Supplies marked with an asterisk (*) were generously sent to me.

Saturday, September 15, 2018

Stitched Quilt Inspired Card

Hello dear friends! 
My card today is dedicated to all of you that inspire me on a daily basis. I am so thankful for all the crafty friends I have made and met because of this crazy Card Making/Papercrafting Community! YOU are all so amazing! I am inspired daily by all that I see from you on Facebook, Instagram, everywhere I look, there is SO much talent and inspiration.

So with that said, today I am sharing with you this stitched quilt card. This was definitely a labor of love to create as it took me most of the Summer to complete. The card was hugely inspired by the one and only Jennifer McGuire, the cardmaking Goddess!!! I have always loved her stitched cards but have never found time to try them. I now know why she does these types of cards while on vacation. Well, this Summer I spent 4 weeks in Portugal visiting my family. So to keep from having any crafty withdrawals, I took along with me some card panels that I had die cut with various patterns, embroidery needles, and a variety of colorful thread. The kids and I were so busy that I was only able to complete a couple of the panels as the only downtime I had was when we were at the beach.

I just LOVE how this card turned out, and it was definitely worth all those beach hours!

Stitched Quilt Inspired Card by ilovedoingallthingscrafty.com

To make this card:
  • I ran the small square stitch die from the Stitch Border Die set through the die cut machine 20 times!!! 
  • Four times along the top and five rows down.
  • I used masking tape to hold the square in place while running it each time through the machine.
  • I eyeballed the spacing, so my squares aren't perfect. If you want perfect, use a ruler to divide the card panel first.
  • Next, find yourself a beach, LOL... or a somewhere where you have plenty of time. Start stitching away! 
  • I worked on one square at a time. I began with one color along the outer square and then switched colors for the middle square. To the inside, I used a flower like a stitch by always stitching from the center. (Sorry, not sure what these stitches are actually called, haha!) I also had all my needles threaded with different colors to save on threading them each time.
  • Once all my colorful squares were completed, I then used a white thread to connect the squares together. Looks like some fancy stitching but it was stitched the same way as the smaller squares I promise. The spacing just makes it look that way!
  • Once the inside was all done I then stitched along the outside of the panel, finishing off the edges.
  • To the bottom, I created a little fringed trimmed edge by looping doubled up thread and tying it in knots. To keep the knots from unraveling I added a small amount of multi-medium matt glue to each of them.
  • On a scrap piece of black cardstock, I stamped out the "you inspire me" sentiment from Japanese Peony set and heat set it with a white embossing powder. 
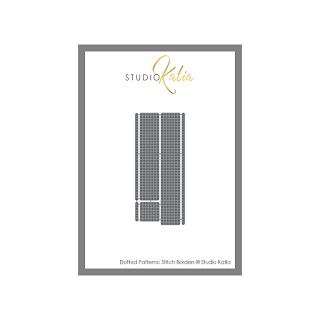
  • I then used the long stitched border strip to die cut the holes along the top and the bottom of the sentiment strip.
  • Next, I attached the sentiment strip to the card, trying to line up the holes as best as possible as I stitched it into place.
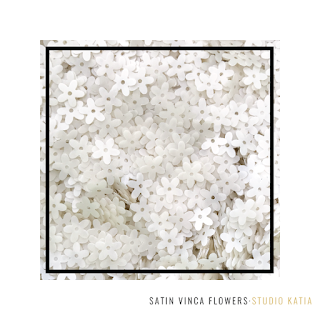
  • To attach the Satin Vinca flowers I used a clear thread and a sewing needle, I also used a Silver Dust Seed Bead in the center of each flower. Since I placed the flowers where no holes were pierced I made new holes with the needle as they would not be seen and covered up by the flowers.
  • Now that the panel was complete, I added multi-medium glue to the entire threaded back and glued that to another piece of cardstock that I had trimmed a little smaller than the panel. I then placed it under a heavy book and set it aside to dry completely flat.
  • Once it was dry I adhered the panel to a black card base.
Stitched Quilt Inspired Card by ilovedoingallthingscrafty.com

  • To the inside I finished it with the Thank You stamp from the Thank You So Much stamp set.

Stitched Quilt Inspired Card by ilovedoingallthingscrafty.com

I hope this card has inspired you today just as Jennifer McGuire has inspired me with this creation.

Thank you for stopping by 😊
Until next time... Happy Crafting πŸ‘‹

SUPPLIES
To make supplies easy to find, I have linked them below. If something I used is no longer available I will link to a similar product.
Affiliate links may be used depending on the product. Your purchases help keep my blog running, so thanks in advance for the support!
Stitch Borders
Stitch Borders
Shop at:
SSS | SK
Japanese Peony Stamp
Shop at:
SSS | SK
Studio Katia THANK YOU SO MUCH Clear Stamps
Shop at:
SSS | SK
Satin Vinca Flowers
Satin Vinca Flowers
Shop at:
SK
SILVER DUST | SEED BEADS
Shop at:
SK
Neenah 110 LB SOLAR WHITE Paper
Shop at:
SSS | AMZ | HBS
Sizzix Big Shot
Sizzix Big Shot
Shop at:
SSS | AMZ
Sizzix Big Shot Magnetic Platform
Shop at:
SSS | AMZ
STANDARD CUTTING PADS
Shop at:
SSS | AMZ
Embroidery Hand Needles, Size 1-5
Shop at:
AMZ
Inkadinkado Embossing Magic
Shop at:
SSS | AMZ
Juicy Clear Embossing and Watermark Ink
Shop at:
SSS | IO3
Tonic Studios Tim Holtz Stamp Platform
Shop at:
SSS | AMZ
Recollections Black Heavyweight Cardstock 110bs
Shop at:
AMZ
Arctic White Ultra Fine Embossing Powder
Shop at:
IO3
Black & Decker HG1300 Dual Temperature Heat Gun
Shop at:
AMZ
Blackout Hybrid Detail Ink
Shop at:
SSS | IO3
Ranger .5 Oz. MINI MULTI MEDIUM MATTE Glue
Shop at:
SSS | AMZ