Wednesday, September 19, 2012

Happy 30th Birthday Cupcake Treat box | SVGCuts

It's my Sister In law's 30th birthday today! Happy Birthday, Rozana! 

So I wanted to share with you the little cupcake I made for her :)
Happy 30th Birthday Cupcake,birthday gift,treat box,Silhouette Cameo,ilovedoingallthingscrafty,SVGCuts,SVG file,3D paper Cupcakes, Cricut

 Isn't it adorable! I love how yummy it looks ;)

Happy 30th Birthday Cupcake,birthday gift,treat box,Silhouette Cameo,ilovedoingallthingscrafty,SVGCuts,SVG file,3D paper Cupcakes, Cricut


Happy 30th Birthday Cupcake Treat box | SVGCuts

The files I used come from here. The paper stack I used is from K and C Company, the Blossom Designer Paper Pad. Cut on the Silhouette Cameo.

Thanks for stopping by!
Happy crafting  :)


Tuesday, September 18, 2012

40 Year Ruby Anniversary Explosion Box Keepsake | SVGCuts

Happy Tuesday!

So today I want to share the beautiful explosion box I made for my In-law's 40th Ruby Anniversary that they celebrated yesterday! It was the first time I ever made one of these and I love how it turned out :)  To make this did have some inspiration from one of my favorite crafty ladies, Thienly! Check out her family explosion box! Here is mine!

3D,ilovedoingallthingscrafty,Ruby Anniversary,Explosion Box,Keepsake,SVGCuts,SVG file,40th Anniversary gift,Cricut, DIY, handmade, photos

The file for the box comes from here, and the rose file from here.

3D,ilovedoingallthingscrafty,Ruby Anniversary,Explosion Box,Keepsake,SVGCuts,SVG file,40th Anniversary gift,Cricut, DIY, handmade, photos

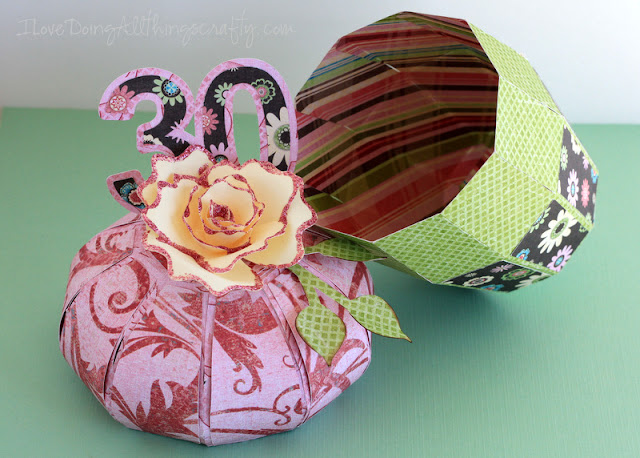
I have made many of these roses, but I absolutely love how this one turned out with the glitter glue on the edge of the petals.

3D,ilovedoingallthingscrafty,Ruby Anniversary,Explosion Box,Keepsake,SVGCuts,SVG file,40th Anniversary gift,Cricut, DIY, handmade, photos

This is what the box looks like when it's all opened up! I printed the pictures in sepia to coordinate with the papers. Since it was a Ruby Anniversary I thought these papers from Recollections, Love Letters pad were perfect for the occasion. 

3D,ilovedoingallthingscrafty,Ruby Anniversary,Explosion Box,Keepsake,SVGCuts,SVG file,40th Anniversary gift,Cricut, DIY, handmade, photos

The file for the numbers comes from here. I was so excited to use my new epiphany shape studio tool that I recently picked up at Michaels! To create my Anniversary button, I simply just printed the wording out on white card stock and then used the Round 25 epoxy shape tool and punched it out! It was that easy! Love how that turned out!

3D,ilovedoingallthingscrafty,Ruby Anniversary,Explosion Box,Keepsake,SVGCuts,SVG file,40th Anniversary gift,Cricut, DIY, handmade, photos

I used 15 pictures to create this box. I'm sure if you wanted to, you could use so many more by putting them on the outside of the box as well. For this box, I used recent pictures of our vacation this summer and included a few of the kids with the grandparents! The kids also wrote in the notes in the pockets pictured above. 

3D,ilovedoingallthingscrafty,Ruby Anniversary,Explosion Box,Keepsake,SVGCuts,SVG file,40th Anniversary gift,Cricut, DIY, handmade, photos

Well, hope you like this little explosion box! I sure enjoyed creating and gifting it!
Happy 40th Anniversary to my wonderful Inlaws!


Thursday, September 13, 2012

Crafty Souvenirs | Crafty Finds from our Summer Vacation


Hey everybody!

Still feeling like I'm on vacation mode... having a hard time getting back to reality! Today I want to share with all of you some crafts I found from our travels... there are so many more that I saw but sometimes I had no camera with me :(

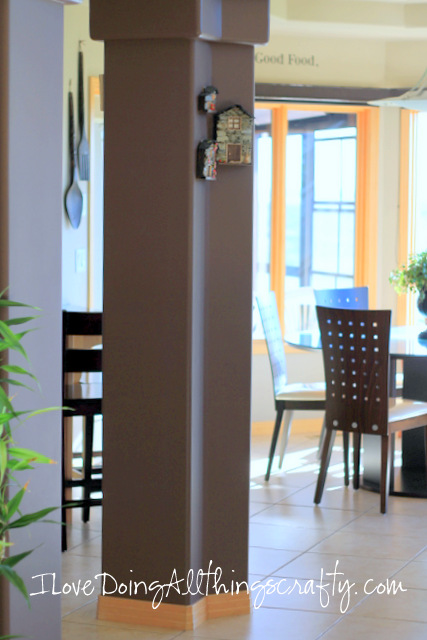
 So to begin today's post I want to share with you the cutest little craft houses I found in Portugal. These I bought in a souvenir shop on top of Serra da Estrela, translated (Mountain of the Star), the highest point in Portugal... and the only place you can ski there. Not far from where my husband's family lives!   

Crafty Souvenirs | Crafty Finds from our Summer Vacation

Aren't they soooo cute! They are made from the slate stone found on the mountain and are very good replicas of old houses built in the area. 

Crafty Souvenirs | Crafty Finds from our Summer Vacation

Love all the little detail that the crafters used! There is even glass in the window! (hard to see from the picture)

Crafty Souvenirs | Crafty Finds from our Summer Vacation

Signed by the Artists! Pictured below is there new home... LOVE them!

Crafty Souvenirs | Crafty Finds from our Summer Vacation

Below is another craft I found from the same region. I actually met the gentleman who crafted this piece. It is meant to be used to hang up your keys... but since I already had a place for my keys... I figured it would make a great place for my daughter's bracelets and other jewelry to hang! 

Crafty Souvenirs | Crafty Finds from our Summer Vacation

 Also signed by the Artist!


Crafty Souvenirs | Crafty Finds from our Summer Vacation

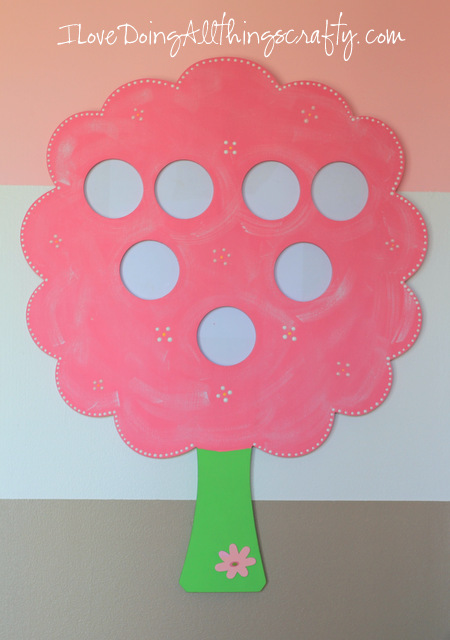
 And here is a gift from a creative friend of the family, Magda Soares! She and her husband create these beautiful wood crafts. She made a family tree for each of my kids, so thoughtful! Thank-you Magda! Now I have to find some pretty pics of us! 


Crafty Souvenirs | Crafty Finds from our Summer Vacation

Here is my son's tree in his room! Super cute!

Crafty Souvenirs | Crafty Finds from our Summer Vacation


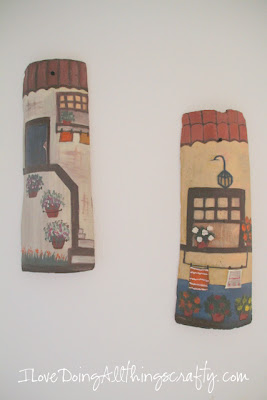
 And finally the last craft I will share today... old terracotta roof tiles turned into art! Aren't they amazing! Whoever thought of that first was super creative!


Crafty Souvenirs | Crafty Finds from our Summer VacationCrafty Souvenirs | Crafty Finds from our Summer Vacation

When I first saw these in 2005 I was inspired to create my own!  So with limited supplies there, I painted these two terracotta tiles below. They now hang outside my Mother In Laws house in Portugal! The one on the left was inspired by a house across the street from my In-laws house and the one on the right was inspired by a picture of their house prior to renovations.

Crafty Souvenirs | Crafty Finds from our Summer VacationCrafty Souvenirs | Crafty Finds from our Summer Vacation
Here is a picture of the old house across the street! See any similarities? So much history... these houses are hundreds of years old!


Signed by moi in 2005! Wow, so long ago it seems already!

Crafty Souvenirs | Crafty Finds from our Summer Vacation

Here are some old lanterns that I drew for my husband's cousin Fernanda, on some smaller tiles. I didn't have time to paint them for her but she did a great job! 


Crafty Souvenirs | Crafty Finds from our Summer VacationCrafty Souvenirs | Crafty Finds from our Summer Vacation


Hope you've enjoyed today's post!
Happy crafting to everyone all over the world!

Wednesday, September 5, 2012

3D Apple Treat Box | Back to School Gift For Teacher | SVGCuts

HELLO! I'm finally back from our European travels! Yay! The trip was amazing, but I am glad to be home :) I know you all must have been going through a bit of withdrawal from my blog, lol! No worries I already have the crafting itch... so I've already started crafting away! Yes, it's back to REALITY... and as you might have already noticed I have made some changes to the appearance of the blog... I guess that will always be changing and under construction! But what do you think so far...better right?

So yesterday was the first day of school for the kids... Their school actually started last week, but we were still away. I don't think they minded at all missing a few days! So here they are just before leaving for school. Maia is in grade 1 and Tomas is in grade 3. I can't believe that they are this big already! Time just keeps flying!


So here are the treats I made for the teachers this year. What teacher doesn't like apples? Especially when they're filled with chocolates?! I hope they like them... I love how they turned out!

teacher gifts,3D apple,treat box,Silhouette Cameo,Cricut, ilovedoingallthingscrafty,SVGCuts,Back to School,

Here is a closer look, aren't they adorable?!

teacher gifts,3D apple,treat box,Silhouette Cameo,Cricut, ilovedoingallthingscrafty,SVGCuts,Back to School,

The files for the 3D Apple come from SVG Cuts MISS BAKER'S CLASSROOM SVG KIT. I can't say enough good things about their files. Mary is amazing at what she does! The paper I used is from Fancy Pants Designs, their Off to School collection.

I hope you liked them too!
Happy crafting :)


Monday, August 27, 2012

Maia's Room Make Over - Room Reveal!

It's all finally come together! My daughter's room is all done... she now has a little girly room, no longer "baby" room!

Here is the "before" picture of her room...

And here is the now...

Maia's Room Make Over - Room Reveal!

I had some room over her closet that was pretty bare so I thought I would cut out her name and do some vinyl lettering. The "M" I found at Micheal's and just painted it white.

Maia's Room Make Over - Room Reveal!


Maia's Room Make Over - Room Reveal!

I hope you have enjoyed these last posts on my daughter's room makeover! Hopefully, it will be a few years until she gets tired of this room, lol!

Happy crafting and redecorating :)

Tuesday, August 21, 2012

Maia's Room Make Over - Lamp Shade - Part 6


I bought this boring lamp at IKEA for my daughter. So I thought I would pretty it up a little... the fastest project ever!


I tied some bows using some wired ribbon.


Then using a pin I placed it through the ribbon and attached it to the lampshade.

Maia's Room Make Over - Lamp Shade - Part 6

Simple, pretty and girly now!

Happy crafting :)

Friday, August 17, 2012

Maia's Room Make Over - DIY Canopy Bed - Part 5

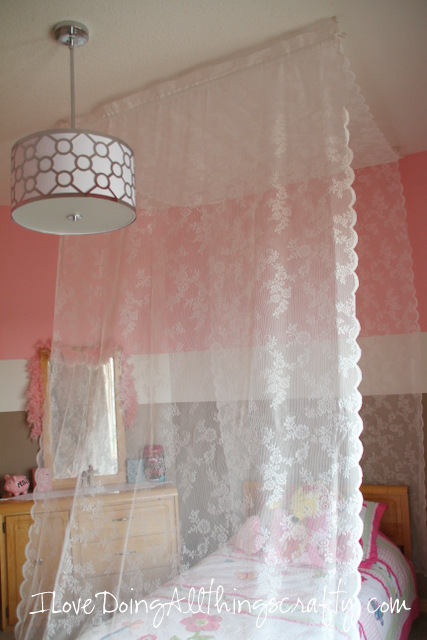
My daughter Maia has always wanted a canopy bed, as I think all little girls like. So I thought I could make one for her, as I wasn't about to buy a whole new set of furniture for her. We will wait until she outgrows her bed for now!

Here is what I did...


TIP: To help me find the right measurements before I drilled holes into the ceiling I used thumbtacks to pin elastic bands to the ceiling so I could see exactly where to hang up my curtain rod!


Here is a closer look! I bought these rods at IKEA for $1.99 on sale, woohoo!


I had gone to the fabric store to look for some shear-type material, but for the amount, I needed it was going to cost me a fortune! So good ol' IKEA had the perfect curtains. All I needed was 3 panels so I had to buy 2 packages.


All I did then was sew the panels to each other, leaving pockets for where the curtain rods would be placed through. 


Since I didn't like the ends that the rods came with, I used my own round crystal beads and just hot glued them in place.

Maia's Room Make Over - DIY Canopy Bed - Part 5

And Voila! Super quick and easy canopy bed! 

I hope you liked this tutorial and maybe even make one for your little princess!

Happy crafting :)