Monday, February 19, 2024

Gatefold Love Filled Card | Honey Bee Stamps

Gatefold, Love, Card, Honey Bee Stamps, how to, hand made card, Stamps, stamping, die cutting, card making, ilovedoingallthingscrafty, Vintage Love, Stencils

Hello friends!

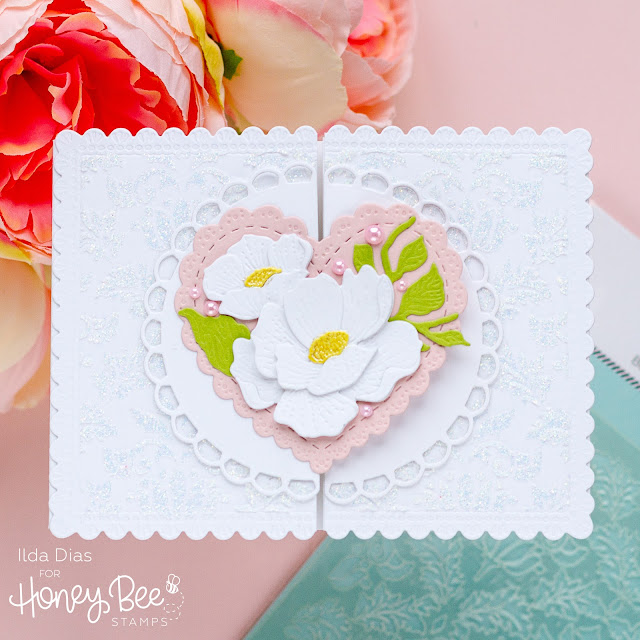
While Valentine's Day may be behind us, there are countless opportunities ahead to celebrate love. The card I'm sharing today is ideal for the upcoming wedding season, serving perfectly as a wedding invitation, bridal shower note, or heartfelt thank-you card.


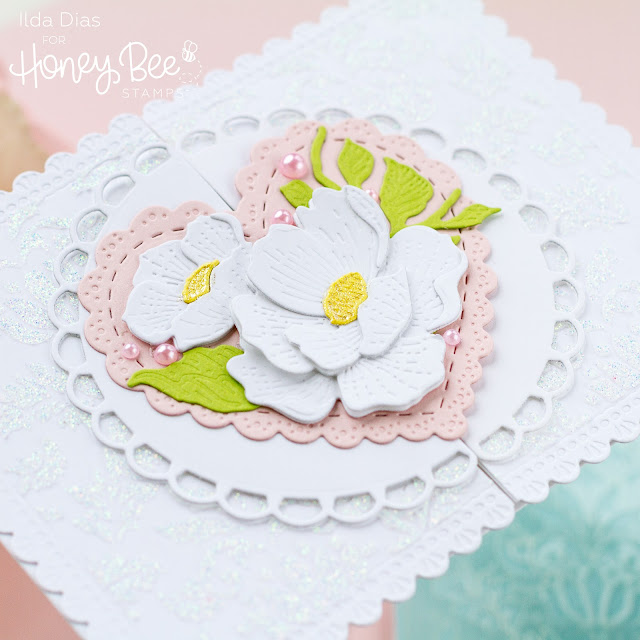
This gatefold card began with die-cutting the scalloped frame from the Lace Heart Layering Frames. I then masked the scalloped edges and added Moonstone Glimmer Paste over the Vintage Flourish Stencil. Once the paste was dry, I sliced the panel down the center and set it aside.

Next, I die-cut two of the half-scalloped circles from the Lovely Layouts: Posted Dies, the scalloped heart from the Lace Heart Layering Frames Dies, a few of the roses and leaves from the Bold Backgrounds: Vintage Roses Dies that I trimmed and pieced together. I then assembled the card front onto a 4 x 11-inch card base, scoring it at 2 3/4 inches from each end, once folded will create a gatefold card base. I trimmed the base slightly smaller than the front so that the scalloped edges would be more visible.

Gatefold, Love, Card, Honey Bee Stamps, how to, hand made card, Stamps, stamping, die cutting, card making, ilovedoingallthingscrafty, Vintage Love, Stencils

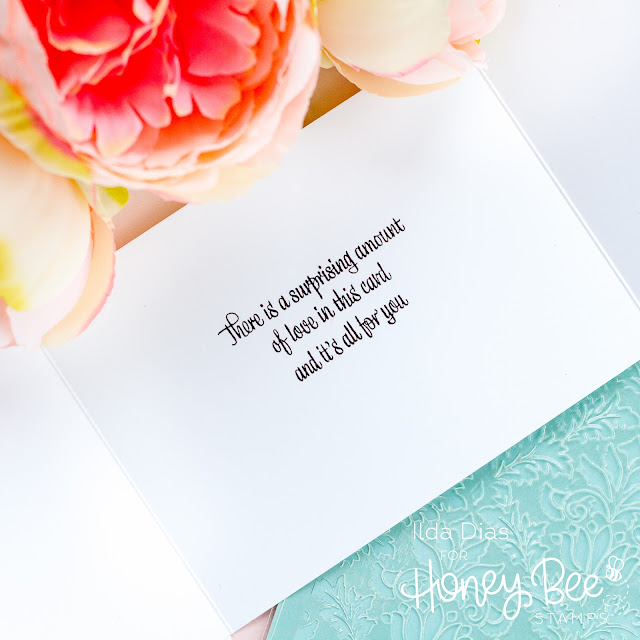
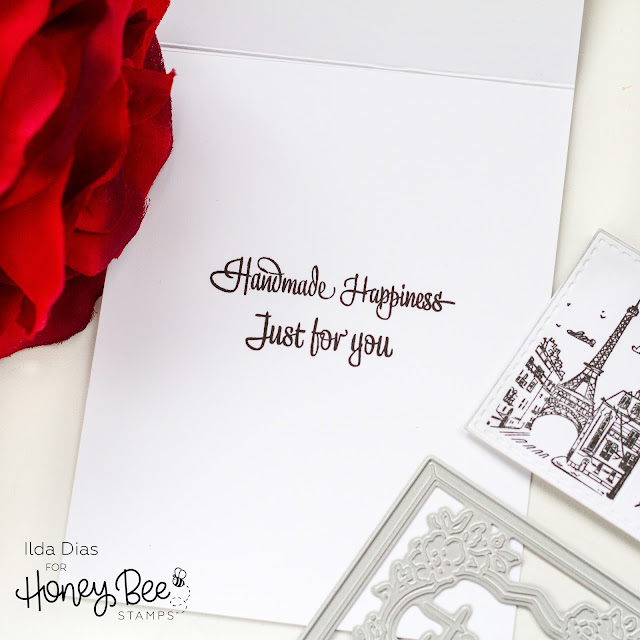
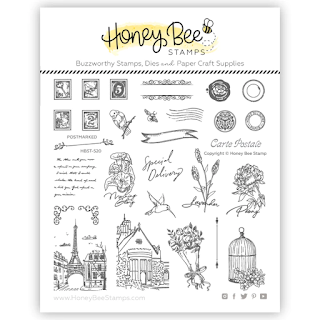
On the inside of the card, I stamped a couple of sentiments from the Mailbox Memos Stamp Set

Gatefold, Love, Card, Honey Bee Stamps, how to, hand made card, Stamps, stamping, die cutting, card making, ilovedoingallthingscrafty, Vintage Love, Stencils

Thank you for stopping by and I hope you enjoyed this Gatefold Love Filled Card. Until next time... Happy Crafting!
Ilda 💗

SUPPLIES
Vintage Flourish - Background Stencil
Shop at:
SSS | HBS
Lace Heart Layering Frames Dies
Shop at:
SSS | HBS
Lovely Layouts: Posted - Dies
Shop at:
SSS | HBS
Bold Backgrounds: Vintage Roses Dies
Shop at:
SSS | HBS
Mailbox Memos Stamp Set
Shop at:
SSS | HBS
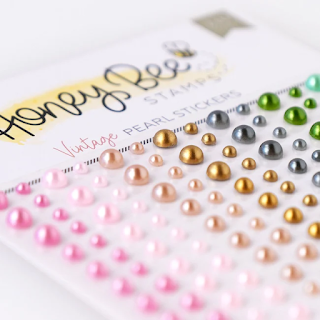
Vintage Pearls- Pearl Stickers
Shop at:
SSS | HBS
Bee Creative Intense Black Ink Pad
Shop at:
SSS | SB | HBS
Stamping Pressure Tool
Shop at:
HBS
Bee Creative Bitty Buzz Cutter
Shop at:
HBS
Bee Creative Glue
Bee Creative Glue
Shop at:
SSS | SB | HBS
Bee Shimmery Liquid
Bee Shimmery Liquid
Shop at:
SSS | SB | HBS
Paper Inking Palette - 4x9
Shop at:
SSS | SB | PFS
Platinum 6 Die Cutting Platform
Shop at:
SSS | SB | SB
New Mini Misti
New Mini Misti
Shop at:
SSS | SB | HBS
Media Spatulas
Media Spatulas
Shop at:
SSS | HBS 
Moonstone Glimmer Paste
Shop at:
SSS | HBS
To make supplies easy for you to find, I have linked them above. If something is no longer available I will link to a similar product. Affiliate links may be used depending on the product linked. Please help support my blog by using these links while shopping at no additional cost to you. For more information about the affiliates I use, please visit my disclaimer here. Thanks so much for all your support!

Enjoyed this post? Never miss out on future posts by Following this Blog

Watch this card come together 👇

Wednesday, February 14, 2024

Taylor Swift Inspired Pop Up / Light Up Card | Ralph Tyndall Designs + Hero Arts

Taylor Swift, Inspired, Pop Up, Light Up, Card, Ralph Tyndall Designs, Hero Arts, how to, hand made card, Stamps, stamping, die cutting, card making, ilovedoingallthingscrafty,

Hello friends and welcome back! 

Today's Taylor Swift-inspired card showcases products from Ralph Tyndall Designs. If you're not already following Ralph, be sure to check him out 👉 Here  His card-making style is truly unique, and his ASMR Reels are captivating, drawing viewers in with every swipe and tap. I was absolutely thrilled when Ralph invited me to create some projects with his new product line, and I'm beyond excited to share the creations I've made with you. 


HOW TOs (card recipe/supplies at the end)


To begin, I first die-cut the curtains for the stage using RT Stage Curtain Fancy Die. Next, using one of the RT Stage Curtain Stencils, I added the shadowing to the curtain. To the back of the curtains for extra strength and reinforcement, I glued a trimmed 1/2 inch strip down each side of the curtain panels. 

Now, die-cut the crowd. I used the same die cut from the RT Center Stage Crowd Fancy Die and die cut it out two times and just flipped one so that the silhouettes would all look different when staked together. Trim the back crowd layer to be shorter than the front of the audience. To that back layer, stamp out the sentiment from the RT Center Stage Bundle using white ink and heat set it in white embossing powder.

To make the stage Pop up, I created a couple of springs. One, made from red cardstock matching the curtains, that will rest behind the curtain cutouts, while the other, made from black cardstock, will be positioned in front of the audience. Each spring was cut from paper measuring 5.5 inches by 2 inches and scored at half-inch intervals. Once folded and glued in place, they will effortlessly spring into action, adding dynamic flair to the stage. Set the springs, the curtain, and the crowd aside until the card is ready to be assembled.

Taylor Swift, Inspired, Pop Up, Light Up, Card, Ralph Tyndall Designs, Hero Arts, how to, hand made card, Stamps, stamping, die cutting, card making, ilovedoingallthingscrafty,

For the background of the stage, I used another stencil RT Stage Curtain Stencils to blend out the flooring, masking off the back wall. To make it look like a smokey stage with a spotlight in the center, I used masking tape to create a spotlight effect using Intens-ified Black Ink.

Once the background was done, I stamped the images from the RT Center Stage Bundle set onto the background panel. I used the curtain to make sure all my elements would be in view. Since this is also a Light Up card I punched out three holes where the spotlight centers are and one in the beam above that would be hidden by the curtain. To the back of the panel, I glued a piece of vellum to cover up the holes. Next, I taped down the lights from an EZ Light Unit to the openings of the panel. I then placed the battery in the Unit and secured it to the panel behind where the curtain will be. I then used foam tape to allow space between the panels for the lights, wire, and push button. Remove the release tape and attach the background to the card base.

On a white piece of cardstock, I stamped out what looked like a silhouette of a singer. In this case my  "Taylor Swift." I then die-cut the image using the coordinating die from the set. To the image, I used a glitter pen to add details and color to a sparkly dress, boots, and highlights in her hair. I also had to bling out the mic and stand. Once you are ready to add the singer to the scene, use foam to glue her in place which will also add some added dimension.

Taylor Swift, Inspired, Pop Up, Light Up, Card, Ralph Tyndall Designs, Hero Arts, how to, hand made card, Stamps, stamping, die cutting, card making, ilovedoingallthingscrafty,

Now that all the elements are done, it is time to assemble the stage. Start by attaching the red spring to the top and the black spring to the bottom. Glue the curtain in place followed by the front layer of the crowd. Next, add some thick foam to the back layer of the crowd and glue it in place. Add Taylor Swift to your stage and for a touch of bling I added some gems to the stage's background. I should have done this step before the assembly, but I added some white gel pen details to add some highlights. In hindsight, it would have been a lot easier to do that before these pieces were glued in place.

Taylor Swift, Inspired, Pop Up, Light Up, Card, Ralph Tyndall Designs, Hero Arts, how to, hand made card, Stamps, stamping, die cutting, card making, ilovedoingallthingscrafty,

To the inside, I stamped another sentiment from the RT Center Stage Bundle I also added a couple of the rub-on transfer designs to complete the card.

Taylor Swift, Inspired, Pop Up, Light Up, Card, Ralph Tyndall Designs, Hero Arts, how to, hand made card, Stamps, stamping, die cutting, card making, ilovedoingallthingscrafty,

CARD RECIPE

Stage - RT Stage Curtain Fancy Die

Stencils - RT Stage Curtain Stencils

Audience - RT Center Stage Crowd Fancy Die

Stamped images - RT Center Stage Bundle

Sentiments - RT Center Stage Bundle

Inside card - RT Notebook Messages Hero Transfers

White ink - Unicorn Pigment Ink

Embossing powder - White Detail Embossing Powder

Black ink for stamping and ink blending- Intens-ified Black Ink Pad

Blending brushes - HA Ink Blending Brushes

Gems - Aurora Borealis Gem Stickers 

DIY Springs - use a scoreboard to score every 1/2 inch, then press with a bone folder

Hole punch - for lights

Lights - EZ Light packs

Sparkly outlines and dress - Gelly Roll Stardust Pen

White highlights - SAKURA Gelly Roll Gel Pens - Bold Tip


UPDATE: If you missed out on these supplies from Hero Arts, try  👉Scrapbook.com or Simon Says Stamp


I hope you are as inspired by Ralph's new release as I am. I absolutely love it and am so excited for him. Let me know in the comments below if you have any questions. I am always happy to help. Also, to watch this stage come together make sure to check out my Instagram Reel. And, stay tuned for more inspiration coming from this release soon. I can't wait to show you my next RT card.


Thank you for stopping by and until next time... Happy Crafting!
Ilda 💖

To make supplies easy for you to find, I have linked them above. If something is no longer available I will link to a similar product. Affiliate links may be used depending on the product linked. Please help support my blog by using these links while shopping at no additional cost to you. For more information about the affiliates I use, please visit my disclaimer here. Thanks so much for all your support!

Enjoyed this post? Never miss out on future posts by Following this Blog

Watch how this stage came to life👇

You and Bee Honey Card | Picket Fence Studios

Bee, Honey, Punny, Card, Picket Fence Studios,how to, hand made card, Stamps, stamping, die cutting, card making, ilovedoingallthingscrafty, Nature's Wonderland Release, Paper Pouncers

Hello, and Happy Valentine's Day my friends!

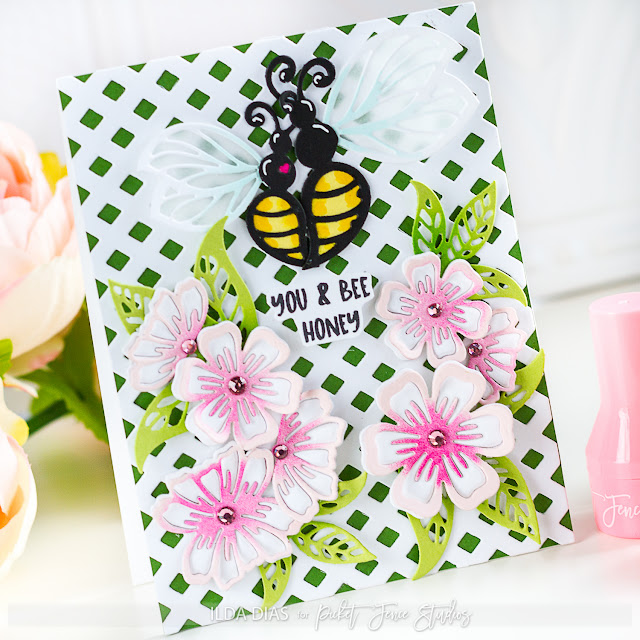
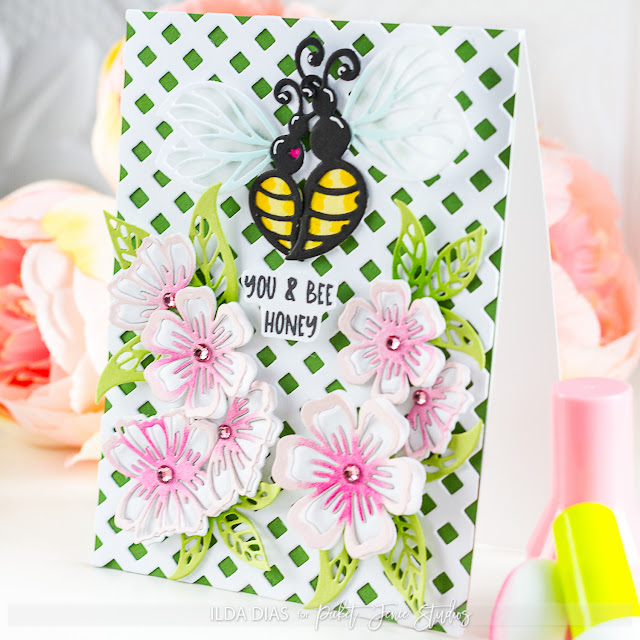
Today's card is part of the new collection from Picket Fence's Nature's Wonderland Release, and I couldn't help but make it love-themed with a punny sentiment to celebrate the day😉 Join me and the design team over on Instagram for a fun Hop and chances to win prizes!


Bee, Honey, Punny, Card, Picket Fence Studios,how to, hand made card, Stamps, stamping, die cutting, card making, ilovedoingallthingscrafty, Nature's Wonderland Release, Paper Pouncers

Besides, a little stamping and ink pouncing, the majority of the card was die-cutting and assembly. So I won't go into much detail.

For the bees, I cut out 3 different layers black, white, and yellow. I trimmed out and pieced what I needed. For the little heart, I just colored the white layer with a pink marker. Before gluing the layers together I added some color to the wings and the bee bellies with markers. Once they were glued together, I then linked the antennas and glued the Bees to the card front. Doesn't it look like their bodies are forming a heart?

Bee, Honey, Punny, Card, Picket Fence Studios,how to, hand made card, Stamps, stamping, die cutting, card making, ilovedoingallthingscrafty, Nature's Wonderland Release, Paper Pouncers

For the cherry blossoms, I used a Paper Pouncer to add pink ink to the center of the flowers. I then cut an additional white layer that I kept together by affixing tape to the back of the die cuts and then glued the pink layer to it. To finish them off I added a pink gem to each center.

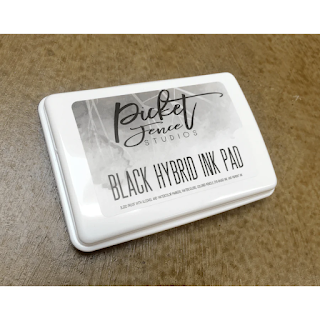
The sentiment was stamped out using the Black Hybrid Ink Pad and then fussy cut.

Bee, Honey, Punny, Card, Picket Fence Studios,how to, hand made card, Stamps, stamping, die cutting, card making, ilovedoingallthingscrafty, Nature's Wonderland Release, Paper Pouncers

If you love to be inspired by Nature, make sure you check out the new Picket Fence's Nature's Wonderland Release


Thank you for stopping by and until next time... Happy Crafting!
Ilda 💗💖👋😊

SUPPLIES

Garden Lattice A2 Cover Plate
Shop at:
PFS
Happy Bumble Bee Dies
Shop at:
PFS
Layering Cherry Blossoms Dies
Shop at:
PFS
Wreath Building Greetings From Our Hive
Shop at:
PFS
Paper Inking Palette - 4x9
Shop at:
SSS | SB | PFS
Pint-sized Paper Pouncers - Bright Rainbow
Shop at:
PFS
Stamp Pressure Tool
Stamp Pressure Tool
Shop at:
SSS | SB | PFS
Black Hybrid Ink Pad
Shop at:
PFS
The Stamp Scrubber
The Stamp Scrubber
Shop at:
SSS | SB | PFS
To make supplies easy for you to find, I have linked them above. If something is no longer available I will link to a similar product. Affiliate links may be used depending on the product linked. Please help support my blog by using these links while shopping at no additional cost to you. For more information about the affiliates I use, please visit my disclaimer here. Thanks so much for all your support!

Enjoyed this post? Never miss out on future posts by Following this Blog

Monday, February 5, 2024

Vintage Mailbox Gift Card, Card | Honey Bee Stamps

Vintage Love, Mailbox, Gift Card, Card , Honey Bee Stamps, Surprise, how to, handmade card, Stamps, ilovedoingallthingscrafty, stamping, die cutting, cardmaking,Valentine's Card,

Hello friends and Happy Monday!

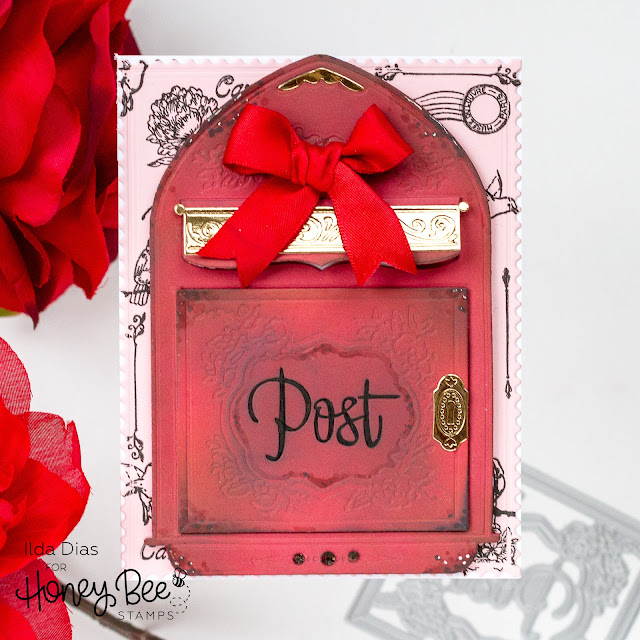
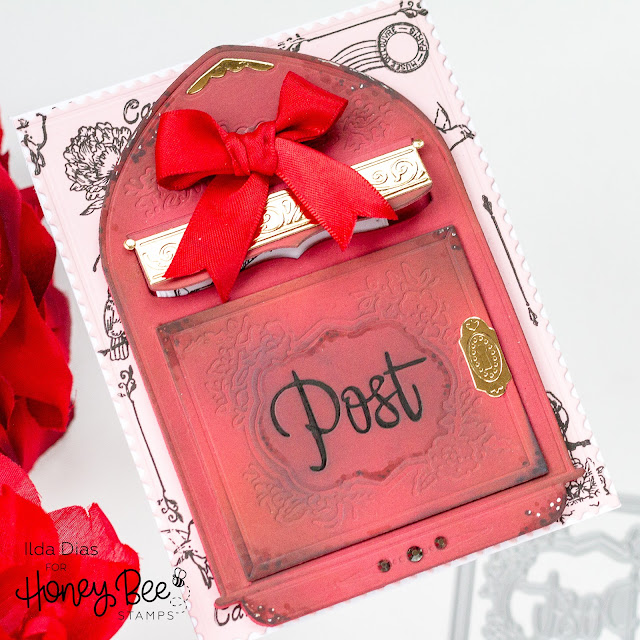
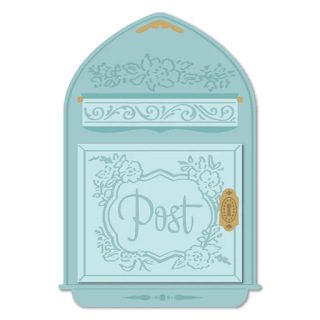
Today's card features the super cool Mailbox Card Base from the Vintage Love Release from Honey Bee Stamps which I magically turned into a mailbox for a Gift card, so keep reading to see how I did that.

CARD RECIPE

Gift Card Post Card- Mini Postcard Die
Inside sentiment - Mailbox Memos Stamp Set
Background Stamps - Postmarked Stamp Set

Vintage Love, Mailbox, Gift Card, Card , Honey Bee Stamps, Surprise, how to, handmade card, Stamps, ilovedoingallthingscrafty, stamping, die cutting, cardmaking,Valentine's Card,

To create the space for the Gift Card, I added a thin piece of foam tape along the edge of the top layer of the mailbox and then glued it to the bottom layer. 

To hold the gift card I simply used a tape runner and applied low tack tape to the back of the gift card I then attached it to the Mini Postcard Die that I had stamped using images from the Postmarked Stamp Set.

To keep the mailbox door closed I cut a thin strip of magnetic material and attached it to the door and the inside of the mailbox.

Vintage Love, Mailbox, Gift Card, Card , Honey Bee Stamps, Surprise, how to, handmade card, Stamps, ilovedoingallthingscrafty, stamping, die cutting, cardmaking,Valentine's Card,

On the inside, I stamped a sentiment from the Mailbox Memos Stamp Set.

Vintage Love, Mailbox, Gift Card, Card , Honey Bee Stamps, Surprise, how to, handmade card, Stamps, ilovedoingallthingscrafty, stamping, die cutting, cardmaking,Valentine's Card,

Once the recipient removes the gift card they will also see another little message that I stamped from the Mailbox Memos Stamp Set.

Vintage Love, Mailbox, Gift Card, Card , Honey Bee Stamps, Surprise, how to, handmade card, Stamps, ilovedoingallthingscrafty, stamping, die cutting, cardmaking,Valentine's Card,

Hope this Vintage Mailbox Gift Card inspired you to use your supplies creatively! Hidden surprises are always fun for the recipient, making this card extra thoughtful!


Thank you for stopping by and until next time... Happy Crafting!
Ilda 📬

SUPPLIES

Mailbox - A2 Vintage Mailbox Card Base Dies
Shop at:
SSS | HBS
Lovely Layouts: Posted - Dies
Shop at:
SSS | HBS
Mini Postcard Die
Mini Postcard Die
Shop at:
SSS | HBS
Postmarked Stamp Set
Shop at:
SSS | HBS
Postmarked Dies
Postmarked Dies
Shop at:
SSS | HBS
Mailbox Memos Stamp Set
Shop at:
SSS | HBS
Mailbox Memos Dies
Mailbox Memos Dies
Shop at:
SSS | HBS
Background Blender Brushes
Shop at:
SSS | HBS
Bee Creative Intense Black Ink Pad
Shop at:
SSS | SB | HBS
Stamping Pressure Tool
Shop at:
HBS
Bee Creative Bitty Buzz Cutter
Shop at:
HBS
Vintage Love Gem Stickers
Shop at:
SSS | HBS
Bee Creative Glue
Bee Creative Glue
Shop at:
SSS | SB | HBS
Platinum 6 Die Cutting Platform
Shop at:
SSS | SB | SB
New Mini Misti
New Mini Misti
Shop at:
SSS | SB | HBS
Oxide Ink Pad VINTAGE PHOTO
Shop at:
SSS | SB 
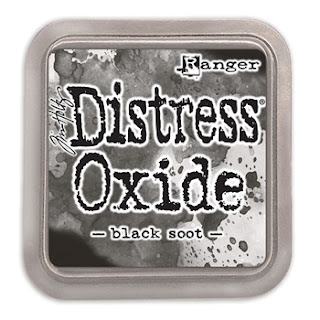
Oxide Ink Pad BLACK SOOT
Shop at:
SSS | SB | HBS
White Gelly Roller Pen
Shop at:
SSS | AMZ | SB | HBS
To make supplies easy for you to find, I have linked them above. If something is no longer available I will link to a similar product. Affiliate links may be used depending on the product linked. Please help support my blog by using these links while shopping at no additional cost to you. For more information about the affiliates I use, please visit my disclaimer here. Thanks so much for all your support!

Enjoyed this post? Never miss out on future posts by Following this Blog