Showing posts with label Valentine Cards. Show all posts

Saturday, February 4, 2023

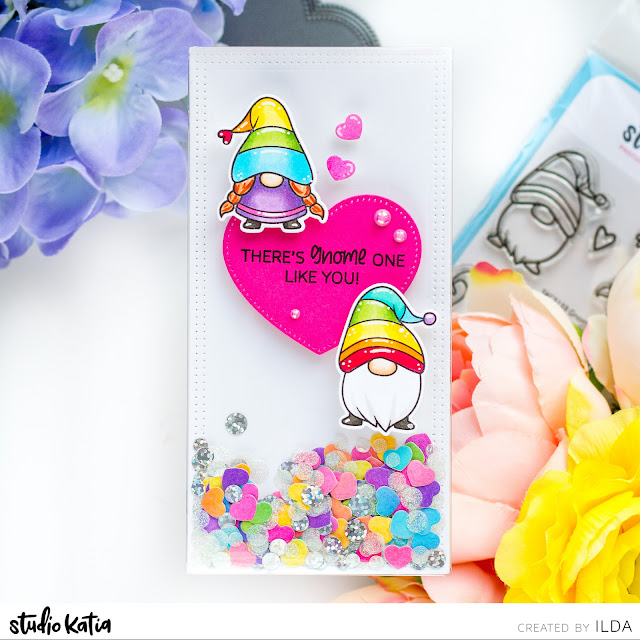
Gnome One Like You Mini Slimline Shaker Card | Studio Katia

Gnome One Like You, Mini Slimline, Shaker Card,Studio Katia,Shaker Pocket,Frameless Shaker,Card Making, Stamping, Die Cutting, handmade card, ilovedoingallthingscrafty, Stamps, how to,Valentine Cards,

Happy Weekend Friends! 

I hope you all have been well. I have been meaning to share this card for a while but hadn't gotten around to it. To be honest, life has been getting in my crafty way, lol 😆. A couple of weeks ago, I broke my ankle when I missed one of my stairs, and although it is way better already, I am still limping around. I have been trying to be a good patient, but when you have ants in your pants it can be quite the blow. So needless to say I was feeling a bit down and blue last week and binge-watched all the shows. Being on social media made me feel worse cause I want to do all the things and can't, plus being on the phone too long strains my eye. But this week I finally made it down to my craft room and found a comfortable way to support my ankle while I create for short periods. Crafting has always been a great distraction and thankfully it has been helping with my winter blues, and these problems I am having! Anyways, let's talk about this cute Mini Slimline Shaker Card featuring the cutest little gnomes from Studio Katia.

CARD RECIPE


I was inspired to make this card from a scrap piece of blended background I had previously made. I thought the new Mini Slimline Small Hearts Cover would make the cutest little rainbow shaker pieces for a shaker card. So that was exactly what I did, and then began the rest of the card.

  • Stamp out the gnomes from the Gnomies Stamp set using copic-friendly ink.
  • Color images using Copics, and add white gel pen details for highlights.
  • Die cut the stamped images using the coordinating Gnomies Dies.
  • Stamp the sentiment from the stamp set onto the smallest Simple Dotted Hearts die cut.

Gnome One Like You, Mini Slimline, Shaker Card,Studio Katia,Shaker Pocket,Frameless Shaker,Card Making, Stamping, Die Cutting, handmade card, ilovedoingallthingscrafty, Stamps, how to,Valentine Cards,
  • To finish I glued the heart onto the front of the pocket and then added the gnomes using foam tape. 
  • I then completed that card by gluing on a few of the Bubblegum Pearls.
On the Studio Katia Blog today they are announcing the current Design Team. I am happy to continue another term with this amazing group of artists. I also love that I am helping to support a local to me small Canadian Stamp Company.  To learn more about the small but mighty team, stop by the SK Blog.


Thank you for stopping by and until next time... Happy Crafting!
Ilda💖

SUPPLIES
Gnomies Stamp
Gnomies Stamp
Shop at:
SSS | SK
Gnomies Die
Gnomies Die
Shop at:
SSS | SK
Simple Dotted Hearts
Shop at:
SSS | SK
Mini Slimline Shaker Pockets
Shop at:
SSS | SK
Sugar Glitz Discs
Sugar Glitz Discs
Shop at:
SSS | SK
Silver Fever Foil Discs
Shop at:
SSS | SK
Bubblegum Pearls
Bubblegum Pearls
Shop at:
SSS | SK
Black Triangle Tray
Black Triangle Tray
Shop at:
SSS | SK
Embellishment Wand
Embellishment Wand
Shop at:
SSS | SK
Crafty Adhesive Tape
Shop at:
SK
SK Foam Tape
SK Foam Tape
Shop at:
SSS | SK
SK Glue
SK Glue
Shop at:
SSS | SK
Blackout Ink
Blackout Ink
Shop at:
SSS | HBS | IO3
Neenah Solar White 110lbs
Shop at:
SSS | AMZ | HBS
New Mini Misti
New Mini Misti
Shop at:
SSS | SB | HBS
Platinum 6 Die Cutting Platform
Shop at:
SSS | SB | SB
Copic Sketch Markers
Shop at:
SSS | AMZ
White Gelly Roller Pen
Shop at:
SSS | AMZ | SB | HBS
To make supplies easy for you to find, I have linked them above. If something is no longer available I will link to a similar product. Affiliate links may be used depending on the product linked. Please help support my blog by using these links while shopping at no additional cost to you. For more information about the affiliates I use, please visit my disclaimer here. Thanks so much for all your support!

Thursday, December 29, 2022

Be My Gnomie Shaker Card | Studio Katia | Blog Hop & Giveaway

Be My Gnomie, Shaker Card, Studio Katia,Blog Hop,Giveaway, Rainbow, gnome,Valentine Cards,Card Making, Stamping, Die Cutting, handmade card, ilovedoingallthingscrafty, Stamps, how to,

 Hello Friends and welcome to the Studio Katia December Release Blog Hop and Giveaway. If you have started hopping you should have arrived from the Studio Katia blog and Galina will be your next Hop. The complete Blog Hop list can be found at the end of this post.


If you love LOVE and love gnomes and love pizza... well then this release is perfect for YOU! For my card today I combined a gnome with lots of rainbow hearts that I eventually turned into a shaker card.

This Release Includes: 
4 stamp sets (3 with coordinating dies) 
3 standalone dies 
1 stencil
And as you can see it's all about Valentine's Day 😍

Be My Gnomie, Shaker Card, Studio Katia,Blog Hop,Giveaway, Rainbow, gnome,Valentine Cards,Card Making, Stamping, Die Cutting, handmade card, ilovedoingallthingscrafty, Stamps, how to,

CARD RECIPE

  • Stamp out the gnome images from the Gnomies Stamp set using a Copic-friendly ink. Color the images in and die-cut them with coordinating dies.
  • For the background, I started by ink-blending the hearts from the Hearts Duo Stencil using yellow ink, followed by pink ink, and then blue ink, each time overlapping the colors to create a rainbow blend.  Repeat the same process with the other stencil. 
  • Next, die-cut the window for the shaker using the largest heart die from the new Simple Dotted Hearts
  • Add the negative piece of the die-cut heart to the front of a card base. 
  • With the background panel, create the window for the shaker by adding a piece of acetate to the back. Build a well around the perimeter of the heart using foam tape.
  • Add the shaker bits (all linked below) to the center of the heart that you previously glued onto the card base.
  • Remove the protective layer from the foam and press the layers together to create the shaker.
  •  Add the colored gnome to the front panel using foam tape.
  • Stamp out the sentiment onto black cardstock using white ink and heat set it with white embossing powder.
  • Trim the sentiment banner and glue it to the card front.
  • Finish by adding a few satin pearls.

I love how this Rainbow Shaker turned out and hope you do too. Now let's talk about the Giveaway!

 
Giveaway:
  • Studio Katia is giving away one $50 CAD gift certificate at every stop. Winners will be chosen randomly from comments left under all the stops. Winners must have commented on all the stops to be eligible to win. 
  • All comments must be left by Monday 2nd Jan 23:59 PM EST.
  • Winners will be announced on Tuesday 3rd Jan on SK Blog.
Blog Hop:
Ilda 👈You are here 👋
Noga (Instagram)
 
Thank you for stopping by and until next time... Happy Hopping!
Ilda 🌈💖

SUPPLIES
Gnomies Stamp
Gnomies Stamp
Shop at:
SK
Gnomies Die
Gnomies Die
Shop at:
SK
Simple Dotted Hearts
Shop at:
SK
Hearts Duo Stencil
Hearts Duo Stencil
Shop at:
SK
Ink Blender Brushes
Ink Blender Brushes
Shop at:
SK
Clear Acetate Sheets
Shop at:
SK
Foam Strips 1/8th
Foam Strips 1/8th
Shop at:
SK
SPARKLING ROUND GEMS
Shop at:
SK
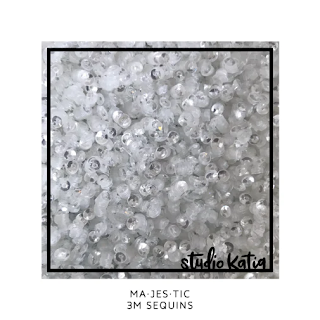
3M Magestic Sequins
3M Majestic Sequins
Shop at:
SK
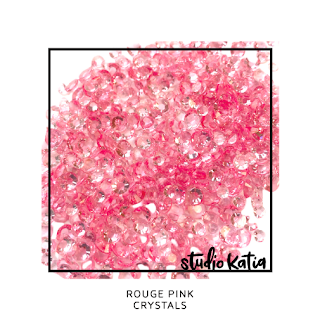
Rouge Pink Crystals
Rouge Pink Crystals
Shop at:
SK
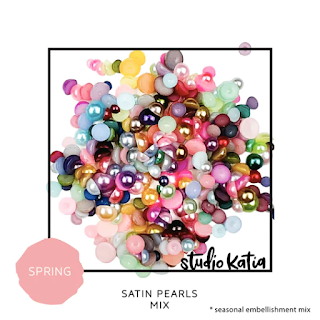
Satin Pearls Mix
Satin Pearls Mix
Shop at:
SK
Black Triangle Tray
Black Triangle Tray
Shop at:
SK
Embellishment Wand
Embellishment Wand
Shop at:
SK
SK Glue
SK Glue
Shop at:
 SK
Copic Sketch Markers
Shop at:
SSS | AMZ
Neenah Solar White 110lbs
Shop at:
SSS | AMZ | HBS
New Mini Misti
New Mini Misti
Shop at:
SSS | SB | HBS
Blackout Ink
Blackout Ink
Shop at:
SSS | HBS | IO3
Platinum 6 Die Cutting Platform
Shop at:
SSS | SB | SB
Atelier Ink Bee Sting Yellow
Shop at:
SSS | IO3
Atelier Ink Sweet Petunia
Shop at:
SSS | IO3
Atelier Ink Peacock Blue
Shop at:
SSS | IO3
Shark Tooth White Atelier Ink
Shop at:
SSS | IO3
Arctic White Emb.Pwd.
Shop at:
SSS | IO3
Heat Gun
Heat Gun
Shop at:
AMZ
White Gelly Roller Pen
Shop at:
SSS | AMZ | SB | HBS
To make supplies easy for you to find, I have linked them above. If something is no longer available I will link to a similar product. Affiliate links may be used depending on the product linked. Please help support my blog by using these links while shopping at no additional cost to you. For more information about the affiliates I use, please visit my disclaimer here. Thanks so much for all your support!

Monday, January 4, 2021

Calligraphy Hearts Valentine Cards | Spellbinders | GOM January 2021


Calligraphy Hearts, Valentine Cards,Spellbinders,Glimmer Hot Foil Kit of the Month,glimmer foil,Card Making, Stamping, Die Cutting, handmade card, ilovedoingallthingscrafty,  how to,  Foil Stamping

Happy Monday my crafty friends.

Today I am sharing with you a trio of Valentine's Day cards featuring Spellbinders January Calligraphy Hearts Glimmer Hot Foil set


CARD DETAILS

I think these cards are very simple and self-explanatory to recreate so I won't go into too many details. Like any other foiled card, these cards require a  GLIMMER HOT FOIL SYSTEM. What I did was RED foil a variety of different colored cardstock using all 3 heart designs, and then used the coordinating heart die to cut them out. I did the same thing with the sentiments and then cut them into strips. The fun part was figuring out the design and layouts.  

Calligraphy Hearts, Valentine Cards,Spellbinders,Glimmer Hot Foil Kit of the Month,glimmer foil,Card Making, Stamping, Die Cutting, handmade card, ilovedoingallthingscrafty,  how to,  Foil Stamping

This first card was super simple. I used foam to pop the hearts up and then trimmed off any excess paper that hung off the edges. I then added a foiled sentiment and a few white pearl embellishments.

Calligraphy Hearts, Valentine Cards,Spellbinders,Glimmer Hot Foil Kit of the Month,glimmer foil,Card Making, Stamping, Die Cutting, handmade card, ilovedoingallthingscrafty,  how to,  Foil Stamping

Again this next card was super simple. It's hard to see in the picture but I added some scorelines to the top white part of the card to add some texture and interest to the card. I then added the two love hearts on the sides and then popped up the one heart in the center. This design hides the transition of the paper. 

Calligraphy Hearts, Valentine Cards,Spellbinders,Glimmer Hot Foil Kit of the Month,glimmer foil,Card Making, Stamping, Die Cutting, handmade card, ilovedoingallthingscrafty,  how to,  Foil Stamping

The foiled sentiment was then added and then once again I used the white pearls as embellishments.

Calligraphy Hearts, Valentine Cards,Spellbinders,Glimmer Hot Foil Kit of the Month,glimmer foil,Card Making, Stamping, Die Cutting, handmade card, ilovedoingallthingscrafty,  how to,  Foil Stamping

For the last card, I used the MODERN LINES GLIMMER PLATE to add SILVER foiled detail to the black cardstock piece. I then embellished the Calligraphy Heart further by adding some red and pink die cut flowers that also come with the set.

Calligraphy Hearts, Valentine Cards,Spellbinders,Glimmer Hot Foil Kit of the Month,glimmer foil,Card Making, Stamping, Die Cutting, handmade card, ilovedoingallthingscrafty,  how to,  Foil Stamping

To the center of each flower, I then glued the same white pearls.

Calligraphy Hearts, Valentine Cards,Spellbinders,Glimmer Hot Foil Kit of the Month,glimmer foil,Card Making, Stamping, Die Cutting, handmade card, ilovedoingallthingscrafty,  how to,  Foil Stamping

Keeping the color palette simple and limiting the supplies you use is a great way to create multiple coordinating card sets. Whenever I turn my HOT FOIL SYSTEM on I find it easier to create if my pieces are all foiled ahead of time. I also foil all the sentiments and cut them into strips. If you have any leftovers just keep them on hand for future projects (I store them in the die sleeve along with the dies). This will save you a little time next time you need a foiled sentiment strip!

I hope that you found these cards inspiring. If you are interested in signing up for the monthly Glimmer Hot Foil Kit of the Month click HERE for all the details. Also, if you join Now you can Save 10% Off the purchase of the Glimmer Hot Foil System! *You may add the system at the time of subscription. For more information on the monthly club, kits click HERE.

Thank you for stopping by and until next time... Happy Crafting!


SUPPLIES
GLIMMER HOT FOIL KIT
Shop at:
SB
HOT FOIL SYSTEM
HOT FOIL SYSTEM
Shop at:
SSS | SB | SB
PLATINUM 6 DIE CUTTING PLATFORM
Shop at:
SSS | SB | SB
MODERN LINES GLIMMER PLATE
Shop at:
SSS | SB
SILVER Glimmer Foil
SILVER Glimmer Foil
Shop at:
SSS | SB | SB
RED Glimmer Foil
RED Glimmer Foil
Shop at:
SSS | SB | SB
NEENAH SOLAR WHITE 110
Shop at:
SSS | AMZ | HBS
Gina K Designs RED VELVET Cardstock
Shop at:
SSS
EMBELLISHMENT WAND
EMBELLISHMENT WAND
Shop at:
SSS | SK
ARCTIC BREEZE PEARLS
Shop at:
SSS | SK
STUDIO KATIA GLUE
STUDIO KATIA GLUE
Shop at:
SSS | SK
FOAM TAPE - WHITE
FOAM TAPE - WHITE
Shop at:
SSS | SK
To make supplies easy for you to find, I have linked them above. If something is no longer available I will link to a similar product. Affiliate links may be used depending on the product linked. Please help support my blog by using these links while shopping at no additional cost to you. For more information about the affiliates I use, please visit my disclaimer here. Thanks so much for all your support!