Showing posts with label Thank you card. Show all posts

Tuesday, June 12, 2018

Hollyhocks Thank You Card - No Line Coloring


Hello friends!

This week the Ink On 3 Design team has been sharing some card previews of the new Hollyhocks Stamp and Die Set that is coming out June 14th!

So here is a peek at my card...
I just LOVE this stamp and think you all will too! 😍

Hollyhocks Thank You Card - No Line Coloring by ilovedoingallthingscrafty

To color in this card, I first stamped the image using Fadeout ink and then loosely colored in the image using Mijello Mission Gold Watercolors.

The Thank you die comes as a stand-alone die along with the coordinating die set. All I did to it was snip the little butterfly that is attached and added glossy accents to finish it off.

Hollyhocks Thank You Card - No Line Coloring by ilovedoingallthingscrafty

To complete the card, I used the "you are amazing" sentiments and stamped them out using Blackout Ink. And there you have it, a beautiful no line Hollyhock thank you card!

I appreciate the time you spent here, so thank you for stopping by 😊
Until next time... Happy Crafting 👋

SUPPLIES
To make supplies easy to find, I have linked them below. If something I used is no longer available I will link to a similar product.
Affiliate links may be used depending on the product. Your purchases help keep my blog running, so thanks in advance for the support!
Hollyhocks
Hollyhocks
Shop at:
IO3 Coming
 Soon!
Hollyhocks coordinating Die
Shop at:
IO3 Coming
Soon!
Fadeout No Line coloring Detail Ink
Shop at:
SSS | IO3
Blackout Hybrid Detail Ink
Shop at:
SSS | IO3
Strathmore WATERCOLOR
Shop at:
SSS
Tonic Studios Tim Holtz Stamp Platform
Shop at:
SSS | AMZ
Mijello Mission Gold Water Color Palette Set
Shop at:
SSS | AMZ
Sizzix Big Shot
Sizzix Big Shot
Shop at:
SSS | AMZ
Sizzix Big Shot Magnetic Platform
Shop at:
AMZ
STANDARD CUTTING PADS
Shop at:
SSS | AMZ

Friday, May 25, 2018

Coffee Lovers Blog Spring and Summer 2018 Blog Hop - Honey Bee Stamps


Hello and welcome to Spring and Summer Coffee Lovers Blog Hop! 
Are you a coffee lover? Well, I have a love/hate relationship with it. If I could I would drink more of it, but sadly I have to limit my intake as I'm too sensitive to caffeine and become an insomniac. So one cup early in the day is all I can handle. Sometimes if I want more, I will drink a decaffeinated coffee, but it's just not the same LOL!

So today I'm joining the Honey Bee Stamps DT as Honey Bee Stamps is a Super Sponsor of the Coffee Lovers Hop and will be giving away a $50 GC as well as 2 - $25 flash prizes. So make sure you join in on the fun as there are many companies participating and lots of great goodies to be given away! Click → HERE to see more inspiration from our team, and Click → HERE to get you started on the HOP. 😁 Also, make sure you leave a comment below to qualify for a prize from Honey Bee Stamps.
My card today is a one layer card with some added dimension. A super quick thank you card that which was really easy make 😉

Coffee Lovers Blog Spring and Summer 2018 Blog Hop - Honey Bee Stamps by ilovedoingallthingscrafy

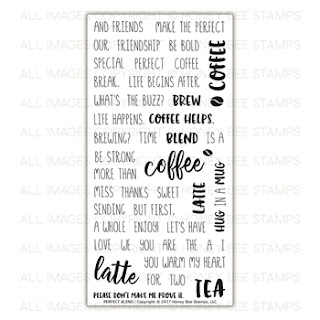
I began by die cutting the Thanks, staking and gluing them together, then placed it on the card front to see where to position the "a latte".  The "A" btw, comes from the Foxy Sentiment Set. Once I had the position figured out, I stamped the words out using Broken China Distress Oxide ink and heat set it with clear embossing powder. Next, I used a watermark ink and stamped the coffee beans all over the card front. I then used a brush to apply the copper perfect pearls to each bean. For added detail, I stamped out the coffee cup from the Penny the Platypus Set and colored it in with a few distress oxide inks, then added it to the card panel with foam to pop it up. As a final touch, I added some pink hearts here and there.

Coffee Lovers Blog Spring and Summer 2018 Blog Hop - Honey Bee Stamps by ilovedoingallthingscrafy

And there you have it, a super quick coffee themed thank you card.
Have fun hopping along the Coffee Lovers Blog Spring and Summer 2018 Blog Hop!
I appreciate the time you spent here, so thank you for stopping by 😊

If you are in a hoping mood, check out my next post as it will take you on another fun Hop happening this weekend! Until next time... Happy Crafting 👋

SUPPLIES
To make supplies easy to find, I have linked them below. If something I used is no longer available I will link to a similar product.
Affiliate links may be used depending on the product. Your purchases help keep my blog running, so thanks in advance for the support!
Large Thanks Dies
Large Thanks Dies
Shop at:
SSS | HBS
Perfect Blend
Perfect Blend
Shop at:
SSS | HBS
Foxy Sentiments Stamp Set
Shop at:
SSS | HBS
Penny The Platypus Stamp Set
Shop at:
SSS | HBS
Recollections Cardstock 110lb BALLERINA
Shop at:
AMZ
Tonic Studios Tim Holtz Stamp Platform
Shop at:
SSS | AMZ
Oxide Ink Pad BROKEN CHINA
Shop at:
SSS
Oxide Ink Pad GATHERED TWIGS
Shop at:
SSS
SSS 3.5 Inch ACRYLIC BLOCK
Shop at:
SSS
Juicy Clear Embossing & Watermark Ink
Shop at:
SSS | IO3
Perfect Pearls Embellishment Pigment Kit
Shop at:
SSS | AMZ | HBS
EMBOSSING POWDER-ICICLE
Shop at:
SSS | AMZ
Inkadinkado Embossing Magic
Shop at:
SSS | AMZ
Black & Decker HG1300 Dual Temperature Heat Gun
Shop at:
AMZ
Sizzix Big Shot
Sizzix Big Shot
Shop at:
SSS | AMZ
Sizzix Big Shot Magnetic Platform
Shop at:
AMZ
STANDARD CUTTING PADS
Shop at:
SSS | AMZ
3M Scotch 1/2-Inch Double-Sided Foam Tape
Shop at:
SSS | AMZ
Ranger .5 Oz. MINI MULTI MEDIUM MATTE Glue
Shop at:
SSS | AMZ
Hug Me Candy Hearts
Hug Me Candy Hearts
Shop at:
HBS

Wednesday, June 22, 2016

Sunshine and Rainbow Thank You Cards


Hello my Crafty Friends!

Today I want to share with you some really simple and fun Thank You cards I made. I only needed one of these cards, but sometimes I find it is easier to make multiples especially when all the same supplies are out.

I LOVE how they turned out and will definitely make some more! 


Here is a list of my supplies:

  • Stamps - Rainbow of Happiness and Coordinating Dies - My Favorite Things
  • Ink - Paintbox Pigment Inks - Colorbox
    • Peacock Feathers - Distress Ink - Tim Holtz 
    • Black Onyx - Versafine 
  • Embossing Powder - Clear Gloss - WOW!
  • Stamp Positioner - my own DIY Stamping tool
  • Dies - Stitched Rainbow - My Favorite Things
    • Puffy Clouds My Favorite Things
    • Sunny SkiesMy Favorite Things
    • Stitched Heart - Gina Marie Designs
    • hearts - Holiday Shapes - Simon Says Stamp Die
    • Stitched Rectangle - Simon Says Stamp Die
  • Sequins - Pretty Pink Posh
  • Die Cutting Machine - Big Shot - Sizzix
  • Cardstock - Neenah Solar White 80lbs


Love this sentiment. 
This stamp set is so versatile, could be used for so many reasons. 


And here is a peak at the inside of the first card.


...and here is the second card.


I just love how you can customize this stamp set to suit your needs.


Hope you enjoyed my Sunshine and Rainbow Thank You Cards today and got inspired!
I would love to hear what you think of them.

Thanks for stopping by!
Happy Crafting  :)


Linking up with: 

Wednesday, May 22, 2013

Lily Pad Shape Card | Ink On 3

HELLO!!! I am so excited to share with you my first Fleurette Bloom Design Team project today!

Here is a very quick card I made using some elements from Fleurette Bloom's latest Swan Lake Element Collection. The coolest part was making the coordinating envelope with the Swan Lake Digital Paper Collection. Love how turned out, so elegant... if a card can be that, lol!


I have owned my Silhouette Cameo for over a year now but had not really been using the machine to it's fullest potential! For some reason, I was always intimidated to use the fill pattern option of the program... well not anymore! All it took was one time and I am hooked! I will be using a lot more digital papers now!!! SO easy, can't believe it took me this long! Just look at how pretty the envelope is! I think it adds so much and, makes the card just that much more special! Don't forget to stop by Fluerette Bloom's Shop and check out all of her beautiful digital coordinating papers!  

Here it is again from a different angle. Isn't it SO pretty? It looks so much like the real thing! 


Take a look inside. I added a white inset layer... this adds a little extra strength and stability to the card... also makes it easier to see what is written when a darker color is used.


Here is a screenshot of how I turned the lily pad element into a shape card. If you are a visual person (like me) you'll appreciate this! It's true... a picture IS worth a thousand words!


To make this simple, I placed all my steps in one screenshot. I'll start of with the top left image of the lily pad and work clockwise.

  1. Import your lily pad base, this will then become the bottom part of the front of your card.
  2. To create the back of my card, first I copied and pasted the lily pad. Next, I drew a straight line down the side of the card and then changed the style of the line to a dash. Group them together. 
  3. Copy and paste image 2. Take your knife tool and cut the piece off just after the dash line you just created. Delete the piece with the dash line. 
  4. To create the piece that lines the inside of the card, click on the image you created in step 3, and select the internal offset option. I set my offset at 0.1 inches.

And that is how easy it is to create a shape card! Now all that is left to do is cut out all your pieces and assemble. 

Dimensions:
  • Envelope - 9.910" H x 6.380" W
  • Lily Pad - 4.425" H x 4.620" W 
  • Lily Pad top layer - 4.355" H x 4.555" W
  • Large Flower layer - 4.080" H x 4.270" W (highlight all flower layers when adjusting the measurements to keep them all proportional)
  • Sentiment Base - 0.940" H x 2.895" W
NOTE:
  • You could stop after step 2,  if you don't want to create the liner for the inside of your card. If you do, simply just cut the pieces out and place glue to the left of the dash line. Line up with the front piece of the card and press together! 
  • Don't forget you can also use the print and cut option to create the lily pad and flower if you decided not to make it 3 dimensional! 

I hope you liked my Lily Pad shape card, and have learned how to make your own... at least the way I do. I'm sure there are so many other ways! Make sure you stop by Fleurette's Blog or Facebook page today because she has got some exciting news to share with her fans!


Thanks for stopping by, leave me a comment... love to hear from you!