Showing posts with label Shadow box. Show all posts

Monday, October 4, 2021

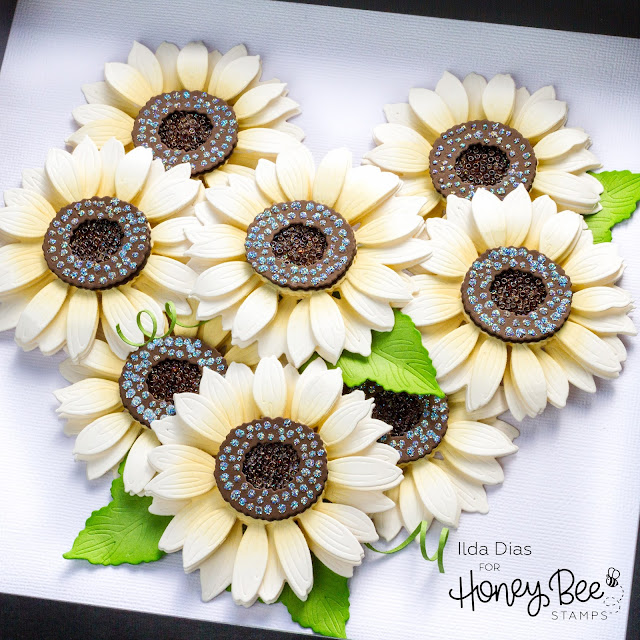
Framed White Sunflower Shadow Box | Honey Bee Stamps

Frame, White Sunflowers, Shadow Box, Honey Bee Stamps,Lovely Layers, how to, gift idea, die cut flowers,ilovedoingallthingscrafty,cardmaker,handmade art

Hello and happy Monday crafty friends!

First of all, I would like to thank all of you that left me the sweetest comments and messages over on my Instagram in regards to the last Framed Lovely Layers Floral Bouquet I made. This beauty is now in Jennifer McGuire's craft room and I could not be happier about that! 

Frame, White Sunflowers, Shadow Box, Honey Bee Stamps,Lovely Layers, how to, gift idea, die cut flowers,ilovedoingallthingscrafty,cardmaker,handmade art

Today's project was made for a friend and colleague of mine (hi Tomina👋) who asked me to make a White Sunflower shadow box for her after she saw the White Sunflower Slimline card I made. 

Here is how this beautiful frame came together.

FRAME RECIPE


Dies:
Paper: 
  • Cream, green and brown heavyweight Colored Cardstock
Frame:
  • Square 9 ¾ " Shadow Frame from IKEA (The frame I used has been discontinued, the one I linked is very similar)
Ink:

Die Cut Machine:

Adhesives:

Embellishments:

Other Tools:

Once you have put one of these flowers together, then the rest is simple. It is just a repetitive process.

Frame, White Sunflowers, Shadow Box, Honey Bee Stamps,Lovely Layers, how to, gift idea, die cut flowers,ilovedoingallthingscrafty,cardmaker,handmade art
  1. The first thing I did was cut all the layers for the 8 sunflowers I needed to form the shape of a heart. 
  2. I then ink blended up the centers of the flowers. 
  3. Curled the flower petals.
  4. Added foam to each layer of the flower to build up the petals and create dimension.
  5. To the centers, add a layer of glue to the bottom layer. 
  6. Drop the seed beads into the glue (I tried having the hole of the beads face up). Once the glue dried, I used a brown Copic Marker to color the center brown.
  7. To the top of the center, add small drops of glossy accents. While still wet sprinkle with Sparkle Glitter and piece the centers together.
  8. Glue centers to the flower petals.
Frame, White Sunflowers, Shadow Box, Honey Bee Stamps,Lovely Layers, how to, gift idea, die cut flowers,ilovedoingallthingscrafty,cardmaker,handmade art

Arrange the flowers how you like. Once you have that figured out, glue it to the paper background of the frame. Use foam to pop up some of the flowers in place. Finish by gluing the leaves in place.

Frame, White Sunflowers, Shadow Box, Honey Bee Stamps,Lovely Layers, how to, gift idea, die cut flowers,ilovedoingallthingscrafty,cardmaker,handmade art

I love how this White Sunflower Shadow Box frame turned out, and I hope you can see from this example that you do not need all the flowers to create something beautiful! 

Want to watch a quick video of how this came together. 
Ilda 🌻

SUPPLIES
Lovely Layers: Sunflower Dies
Shop at:
SSS | SB | HBS
DETAIL BLENDER BRUSHES
Shop at:
SSS | HBS
BEE CREATIVE GLUE
BEE CREATIVE GLUE
Shop at:
SSS | SB | HBS
GEMINI JR. DIE CUTTER
Shop at:
SSS | AMZ | SB
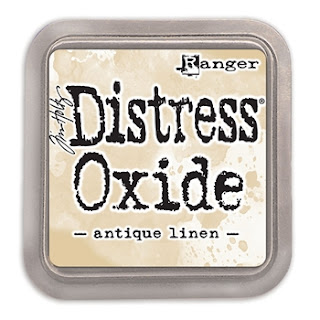
Oxide Ink Pad ANTIQUE LINEN
Shop at:
SSS | SB | HBS
SILVER DUST | SEED BEADS
Shop at:
SSS | SK
EMBELLISHMENT WAND
EMBELLISHMENT WAND
Shop at:
SSS | SK
GLOSSY ACCENTS
GLOSSY ACCENTS
Shop at:
SSS | AMZ | SB | HBS
SPARKLE GLITTER
SPARKLE GLITTER
Shop at:
SSS | SK
Foam Squares
Foam Squares
Shop at:
SSS | HBS
To make supplies easy for you to find, I have linked them above. If something is no longer available I will link to a similar product. Affiliate links may be used depending on the product linked. Please help support my blog by using these links while shopping at no additional cost to you. For more information about the affiliates I use, please visit my disclaimer here. Thanks so much for all your support!

Monday, September 20, 2021

Framed Lovely Layers Floral Bouquet | Honey Bee Stamps

Framed, Lovely Layers, Floral Bouquet, Honey Bee Stamps, shadow box, Die cut flowers, Sunflower, hydrangea,Easter Lily,Coneflower,Die Cutting, handmade, Gift idea, ilovedoingallthingscrafty, how to,

Hello, my friends and Happy Monday!

Today I am super excited to share with you this beautiful Framed Lovely Layers Floral Bouquet featuring many of the lovely layers dies from Honey Bee Stamps. I've had this idea since the sunflower die was released and was dying to make it. I have made many similar frames in the past, which I will share with you at the end of this post, but this time was the first time I used dies to create the flowers. 

If you love die-cutting, this project is for you. I made this over a period of two days. The first day I spent die-cutting and ink blending all the pieces. The second day was pretty much assembling and embellishing it. 

Here is a breakdown of how and what I used to put it all together.

FRAME RECIPE 


Dies:

Frame:
  • Square 9 ¾ " Frame from IKEA 
(The frame I used has been discontinued, the one I linked is very similar) 

Paper: 

  • Heavy Weight 110lbs Colored Cardstock


Ink for blending:

  •  Atelier Inks from Inkon3 (see links below)

Die Cut Machine:

Adhesives:

Embellishments:

Other Tools:

Once all the pieces were die-cut and inked up, I then assembled each flower individually using foam in between each layer. I then played with the arrangement until I came up with one I liked and took a photo of the design to guide me when it came time to glue it all down.

Framed, Lovely Layers, Floral Bouquet, Honey Bee Stamps, shadow box, Die cut flowers, Sunflower, hydrangea,Easter Lily,Coneflower,Die Cutting, handmade, Gift idea, ilovedoingallthingscrafty, how to,

To the centers of the sunflowers, I added a layer of glue and dropped seed beads into the puddle. Once the area was dry I used a brown Copic marker to color the beads. To the top layer of the center, I added tiny drops of glossy accents and then added sparkle glitter over it. This adds some raised dimension and shine. For the coneflower centers, I used a glue pen and added tiny dots of glue, and then used the same glitter. I also used crystal drops to add details to the hydrangea centers and the Easter Lily.

Framed, Lovely Layers, Floral Bouquet, Honey Bee Stamps, shadow box, Die cut flowers, Sunflower, hydrangea,Easter Lily,Coneflower,Die Cutting, handmade, Gift idea, ilovedoingallthingscrafty, how to,

The flowers were then glued to a piece of white cardstock that I had cut to fit the frame. Use foam tape to build up height where you feel it may be needed. I used about 4 layers of foam to raise the center sunflower. To finish off the bouquet I added a couple pieces of twirled cardstock to create some vine-looking greenery.

For additional shine, I painted the edges of some of the hydrangea flowers using liquid pixie dust.

Framed, Lovely Layers, Floral Bouquet, Honey Bee Stamps, shadow box, Die cut flowers, Sunflower, hydrangea,Easter Lily,Coneflower,Die Cutting, handmade, Gift idea, ilovedoingallthingscrafty, how to,

I am in love with this frame and I hope you are too. Maybe it will even inspire you to create something similar for yourself!

Thank you for stopping by and until next time... Happy Crafting!
Ilda 😊

Here are a few other Floral frames Shadow boxes I have made in the past. Please note they were all created with SVGs and cut using a Silhouette Electronic Die Cutting Machine. Click on the image for more details.


SUPPLIES
Lovely Layers: Sunflower Dies
Shop at:
SSS | SB | HBS
Lovely Layers: Coneflower Dies
Shop at:
SSS | SB | HBS
Lovely Layers: Hydrangea Dies
Shop at:
SSS | SB | HBS
Lovely Layers: Easter Lily Dies
Shop at:
SSS | SB | HBS
DETAIL BLENDER BRUSHES
Shop at:
SSS | HBS
BEE CREATIVE GLUE
BEE CREATIVE GLUE
Shop at:
SSS | SB | HBS
GEMINI JR. DIE CUTTER
Shop at:
SSS | AMZ | SB
ATELIER MARILYN RED
ATELIER MARILYN RED
Shop at:
SSS | HBS | IO3
ATELIER MARIGOLD ORANGE
Shop at:
SSS | HBS | IO3
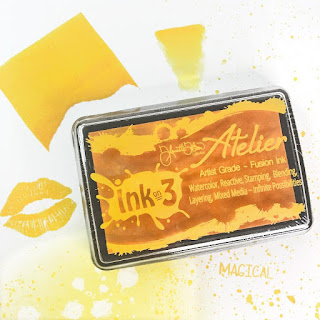
ATELIER BEE STING YELLOW
Shop at:
SSS | HBS | IO3
ATELIER GODDESS GREEN
Shop at:
SSS | HBS | IO3
ATELIER PEACOCK BLUE
Shop at:
SSS | HBS | IO3
ATELIER MY PURPLE JAM
Shop at:
SSS | HBS | IO3
ATELIER TWIGGY BROWN
Shop at:
SSS | HBS | IO3
Apple Green Crystal Drops
Shop at:
SSS | SB | HBS | TS US | TS UK
Dandelion Yellow Crystal Drops
Shop at:
SSS | SB | HBS
Foam Squares
Foam Squares
Shop at:
SSS | HBS
SILVER DUST | SEED BEADS
Shop at:
SSS | SK
TRIANGLE TRAY - BLACK
Shop at:
SSS | SK
EMBELLISHMENT WAND
EMBELLISHMENT WAND
Shop at:
SSS | SK
GLOSSY ACCENTS
GLOSSY ACCENTS
Shop at:
SSS | AMZ | SB | HBS
Sakura Quickie Glue Pen
Shop at:
SSS | AMZ | SK
SPARKLE GLITTER
SPARKLE GLITTER
Shop at:
SSS | SK
LIQUID PIXIE DUST
LIQUID PIXIE DUST
Shop at:
SSS | HBS | IO3
SMALL TIP WATER BRUSH PEN
Shop at:
SSS | IO3
To make supplies easy for you to find, I have linked them above. If something is no longer available I will link to a similar product. Affiliate links may be used depending on the product linked. Please help support my blog by using these links while shopping at no additional cost to you. For more information about the affiliates I use, please visit my disclaimer here. Thanks so much for all your support!

Tuesday, September 9, 2014

Silhouette Tutorial - How to create your own art from a drawing

Hey Everybody!

Today I want to share with you how to create your own art from a drawing! I'll show you how to go from a hand drawn sketch to the beautiful piece of art below step by step using the Silhouette Designer Edition. Super easy once you know how :)


I made this as a gift for our Cousins that travelled from Portugal to join us on a road trip we took this summer!


Here is a close up of the mountain scene, which I had hand drawn while driving through Jasper. So happy with how it turned out!


Here is the HOW TO...
  • Using a sharpie marker create any image you want (pen or pencil lines are too thin). Make sure the lines all connect with each other or it will be difficult to break each piece apart. (Maybe use a ruler, and create straight lines if possible it might save you some work!)
  • Take a picture of the drawing, as straight on top of it as possible. (I just used my cell phone, to make things easier and quicker, then email the picture to myself).
  • Locate the picture on the computer and open it up in the Silhouette's work space (see image below).

  • Next thing you need to do is trace the drawing, by highlighting the trace area (I increased the high pass filter value to 50 and then clicked on the trace function). Refer to next image.


  • Once you have traced the image you will be left with the outline of the drawing. Move the outlines off the drawing.
  • Right click on the image and select Release Compound Path. (This will break up your image in to many different pieces). 
  • Delete any unnecessary pieces. (Just like the little lines on the outside of the drawing below).


  • Next thing I did was remove the outside square of the drawing as it was all crocked, and replaced it with a square I created with the square drawing tool. (This is where using a ruler when creating your drawing may have helped a little!)
  • Now this is where the work really begins. Clean up time! Highlight each piece of the drawing and using the edit point tool (top left hand, image below) simplify and delete any points that make the lines smoother for your machine to cut. Don't worry about deleting the wrong points as you can just use the undo function and start again. Drag outside points of each piece to make the outer lines parallel to the square you created. See image below.


  • Once you are satisfied with the image and your lines all look fairly straight, group all pieces together and resize it to fit the frame you are going to use. 
  • Ungroup the image again.
  • Before sending each piece to be cut out, I like to visualize what it will look like with color. (This will also help you when selecting your cardstock).
  • To add color to your image, I first copied the image and pasted it it next to it. Then simply selected each piece by highlighting it and used the fill color and line function. Group the colored image together and use it refer back to it when assembling the pieces back together.
  • You are now ready to cut!
  • Once you have all the pieces cut out glue them back onto the square, reproducing the color image created below. 
  • Emboss and embellish as desired!


Hope this tutorial has inspired you to create your own art work! Now that you know how and aren't limited to files you have purchased the possibilities are endless! Sometimes the best things in life are FREE, well with a little bit of work and patience that is!

Thanks for stopping by!
Happy Crafting  :)

Sharing this with my Crafty Peeps!