Hello BOOtiful Friends!
Today I have a super cute Haunted Halloween Card featuring the HAUNTED HOUSE ADD-ON | HONEY CUTS for the HOUSE BUILDER CARD BASE. I had so much fun putting it all together and creating this faBOOlous scene.
CARD DETAILS
To begin I started by die cutting all the pieces and elements for the house using both die cuts from the HAUNTED HOUSE ADD-ON | HONEY CUTS for the HOUSE BUILDER CARD BASE. To keep it simple I used only two colors of cardstock.
Before piecing everything and gluing it together I used an embossing folder to add texture to the house panels. I then blended out some Hickory Smoke distress oxide inks on the house panels and Black Soot onto the roof panels.
I also blended the smaller detail elements using black soot to darken the pieces and contrast to them.
Now that all my pieces were cut and colored, I then was ready to begin gluing the pieces for the House base together. Next, I figured out where I wanted the windows to be and die cut those out. Since I wanted the light to be able to shine through the inside of the card I created a template first of where the windows were so that I could cut them out in the exact same spots on the card base and the background panel.
Now I was ready to glue all the pieces onto the house.
I created frames for windows by die cutting the window panels out and then fussy cutting along the creases of the die-cuts. This was just to add some contrast to the windows.
Behind the openings of the windows, I glued pieces of vellum. I also die cut the ghosts out of vellum and added a layer of liquid pixie dust for shimmer.
Along the bottom edge of the pathway, I added the spooky iron fencing, some tombstones, pumpkins and a few skulls from the BOO-TO-YOU | CONFETTI MIX.
For the background I used a circle die to cut out the template for the moon using masking paper. I then used the new BACKGROUND BLENDER BRUSHES to blend out Fossilized Amber, Wilted Violet and Blueprint Sketch Distress Oxide inks on the areas that would peek through behind the house. I then splattered the sky with white pigment ink and removed the mask for the moon.
Next, I used the template I created earlier to die cut the windows from the background and the card base. I then glued the 3 layers together using the window openings as my guide to keep the layers all lined up. Anything that hung off the edge of the card base was then trimmed off.
I then die cut a few creepy trees and incorporated them into the scene. To give them a night sheen, I painted on some liquid pixie dust.
I then finished off the scene by adding some stars in the sky from the BOO-TO-YOU | CONFETTI MIX and some cute little bats.
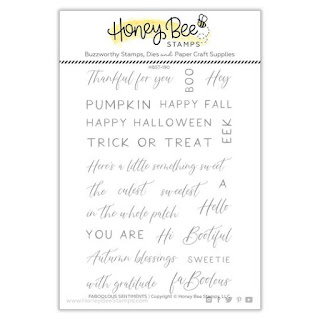
For the sentiment, I used the Hello Bootiful Stamps from the FABOOLOUS SENTIMENTS to stamp directly onto the roof.
Here's what this BOOfiful scene looks like in the dark with a tea light shining through the open windows.
As you can see I used a cobweb on the inside of the attic window to cast a shadow when the light shined through it.
Thank you for stopping by 😊
Until next time... Happy Crafting 👋

SUPPLIES
 HOUSE BUILDER CARD BASE Shop at: SSS | HBS |
 HAUNTED HOUSE ADD-ON | HONEY CUTS Shop at: SSS | HBS |
 FABOOLOUS SENTIMENTS Shop at: SSS | SB | HBS |
 BOO-TO-YOU | CONFETTI MIX Shop at: HBS |
 BACKGROUND BLENDER BRUSHES Shop at: HBS |
 Gemini Jr Die Cutting/Embossing Machine Shop at: SSS | AMZ | SB |
 Oxide Ink Pad HICKORY SMOKE Shop at: SSS |
 Oxide Ink Pad BLACK SOOT Shop at: SSS | SB | HBS |
 FOSSILIZED AMBER Shop at: SSS |
 WILTED VIOLET Shop at: SSS |
 BLUEPRINT SKETCH DISTRESS OXIDE Shop at: SSS | SB | HBS |
 Vellum Value Pack Shop at: SSS | AMZ |
 Mini Misti Tool Shop at: SSS | AMZ | SB | SK |
 Blackout Ink Shop at: SSS | IO3 |
 Copic Opaque White Pigment Shop at: AMZ |
 WHITE Gelly Roll Pens Set Shop at: SSS | AMZ | SB |
 STUDIO KATIA GLUE Shop at: SSS | SK |
 Liquid Pixie Dust Shop at: SSS | IO3 |
 Small Fine Tip Water Brush Pen Shop at: IO3 |
 Double-Sided Foam Tape Shop at: SSS | AMZ |


