Showing posts with label Birthday cake. Show all posts

Saturday, July 25, 2020

Birthday Slider Surprise Card | Studio Katia


birthday, interactive card, Slider, Studio Katia, Surprise, Birthday Cake, Balloons, distress oxide inks, Ink Blending, Card Making, Stamping, Die Cutting, handmade card, ilovedoingallthingscrafty, Stamps, how to,

Hello Friends and Happy Friday!

I have been busy so making Birthday Cards lately. This week started the chain of birthdays happening now until the end of August. Today's card was made for my little niece who celebrated her birthday this past week. I love making interactive cards, especially for children and this one was fun to make.

CARD DETAILS

To begin, I started off by stamping the MINI BIRTHDAY CAKE image and then coloring it with Copic Markers. I then used the MINI BIRTHDAY CAKE DIE to die cut the image.

birthday, interactive card, Slider, Studio Katia, Surprise, Birthday Cake, Balloons, distress oxide inks, Ink Blending, Card Making, Stamping, Die Cutting, handmade card, ilovedoingallthingscrafty, Stamps, how to,

Next, I die cut the pieces for the SLIDER TAG DIES. I then used the BIRTHDAY BALLOONS DUO STENCIL to blend out the balloons to the top and inside pieces using Distress Oxide Inks and the INK BLENDER BRUSHES. I did do my best to line up each layer of the slider tag to make the balloon images appear seamless. Before assembling the slider tag, I added the Happy Birthday sentiment from the HAPPY CELEBRATIONS to the inside of the tag so that when the slider piece is pulled it reveals the birthday sentiment.

birthday, interactive card, Slider, Studio Katia, Surprise, Birthday Cake, Balloons, distress oxide inks, Ink Blending, Card Making, Stamping, Die Cutting, handmade card, ilovedoingallthingscrafty, Stamps, how to,

I then glued the slider tag onto a card panel and stenciled on the other balloons. To the bottom half of the slider panel, I glued the Birthday Cake that I had previously colored.

To finish decorating the cake I used a glue pen to add liquid adhesive to the candles and then sprinkled them with SPARKLE GLITTER to make them sparkly. And then added glossy accents to the flames and the icing on the cake.

birthday, interactive card, Slider, Studio Katia, Surprise, Birthday Cake, Balloons, distress oxide inks, Ink Blending, Card Making, Stamping, Die Cutting, handmade card, ilovedoingallthingscrafty, Stamps, how to,

To embellish the rest of the card I added some 3M CRYSTAL RAINBOW SEQUINS and that pretty much finished off this card.

I hope this Birthday Slider Surprise Card inspired you today and maybe you'll consider trying it out yourself the next time you want to add a little surprise element onto your card.

Thank you for stopping by and until next time... Happy Crafting 👋


SUPPLIES
MINI BIRTHDAY CAKE
MINI BIRTHDAY CAKE
Shop at:
SSS | SK
MINI BIRTHDAY CAKE DIE
Shop at:
SSS | SK
SLIDER TAG Dies
SLIDER TAG Dies
Shop at:
SSS | SK
HAPPY CELEBRATIONS
HAPPY CELEBRATIONS
Shop at:
SSS | SK
BIRTHDAY BALLOONS DUO STENCIL
Shop at:
SSS | SK
SPARKLE GLITTER
SPARKLE GLITTER
Shop at:
SSS | SK
3M CRYSTAL RAINBOW SEQUINS
Shop at:
SSS | SK
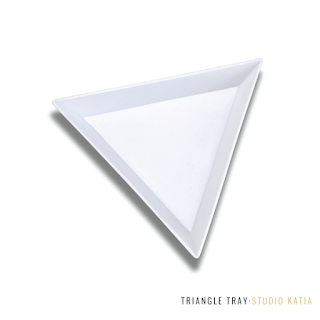
TRIANGLE TRAY
TRIANGLE TRAY
Shop at:
SSS | SK
EMBELLISHMENT WAND
EMBELLISHMENT WAND
Shop at:
SSS | SK
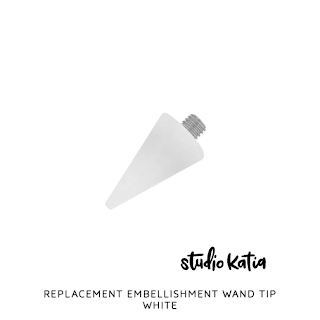
WHITE - EMBELLISHMENT WAND TIP
Shop at:
SSS | SK
INK BLENDER BRUSHES
INK BLENDER BRUSHES
Shop at:
SSS | SK
STUDIO KATIA GLUE
STUDIO KATIA GLUE
Shop at:
SSS | SK
NEENAH SOLAR WHITE 110
Shop at:
SSS | AMZ | HBS
ORIGINAL MISTI
ORIGINAL MISTI
Shop at:
SSS | AMZ | SBC | HBS
BLACKOUT INK
BLACKOUT INK
Shop at:
SSS | HBS
COPIC SKETCH
COPIC SKETCH
Shop at:
AMZ
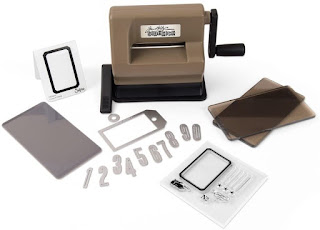
Tim Holtz Sidekick Die Cutting Machine
Shop at:
SSS | AMZ | SBC
PICKED RASPBERRY DISTRESS OXIDE
Shop at:
SSS | SBC | HBS
CARVED PUMPKIN Oxide Ink
Shop at:
SSS | SBC | HBS
SQUEEZED LEMONADE DISTRESS OXIDE
Shop at:
SSS | SBC | HBS
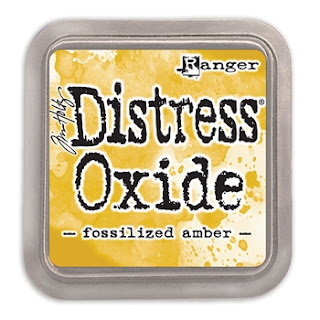
Oxide Ink Pad FOSSILIZED AMBER
Shop at:
SSS | SBC | HBS
Oxide Ink Pad TWISTED CITRON
Shop at:
SSS | SBC | HBS
MERMAID LAGOON DISTRESS OXIDE
Shop at:
SSS | AMZ | SBC | HBS
PEACOCK FEATHERS DISTRESS OXIDE
Shop at:
SSS | AMZ | SBC | HBS
WILTED VIOLET DISTRESS OXIDE
Shop at:
SSS | SBC | HBS
Sakura Quickie Glue Pen
Shop at:
SSS | AMZ | SK
Scor-Tape 0.25 Inch
Scor-Tape 0.25 Inch
Shop at:
SSS | AMZ | HBS
GLOSSY ACCENTS
GLOSSY ACCENTS
Shop at:
SSS | AMZ | SBC | HBS
To make supplies easy for you to find, I have linked them above. If something is no longer available I will link to a similar product. Affiliate links may be used depending on the product linked. Please help support my blog by using these links while shopping at no additional cost to you. For more information about the affiliates I use, please visit my disclaimer here. Thanks so much for all your support!

Tuesday, November 10, 2015

80's Themed Cake + Bonus Timlapse Videos


Hey Everyone ;)

I have a sweet treat for you all today... Literally! 
I was asked by my BOSS a while ago to make an 80's themed Birthday Cake for her BIL's surprise 60th party. How could you say no to your boss, right? Well... she's lucky I really like her, plus she is also my friend and a great Nurse Manager!

So, check out my 80's themed cake. How RAD is that?! 


Wouldn't be the 80's without a Ghetto Blaster! 


Do you remember the rubix cube? I was never able to solve those suckers... I always cheated and pealed off the stickers when I got frustrated, lol!

And of course I had to use my Silhouette to add a little paper to the cake.
Love the look, plus it saved me tons of time from trying to cut out intricate shapes and letters out of fondant!


Oh, and what about Pac Man?
It must have been one of the first video games I had ever played as a little girl!


Well for those interested in what is actually inside the cake 
The rubix cube is made up of rice krispies treats 
Top layers- Vanilla & Chocolate flavored - baked in two 6 inch round pans
Bottom layer - Vanilla & Chocolate flavored - baked in a 10 inch round pans
Entire cake was frosted with vanilla butter cream icing and covered with fondant.

As a BONUS for those of you that want to see how I created the cake, I made a 2 part timelapse video to condense approximately 12 hours into a little over 12 minutes!

(Everybody always wants to know how I do it, so here you go! Enjoy!!!)

80's Cake - Part 1


80's Cake - Part 2


Hope you enjoyed my 80's Themed Cake today, even if you didn't get to eat it! 

Thanks for stopping by!
Happy Crafting  :)


Tuesday, September 1, 2015

DIY Happy Birthday Cake Topper + FREE files


Hey Everyone!

Recently I have been making fancy cake toppers for family and friends. They can give a plain ol' cake the wow factor, without spending lots time or money! Believe me I know how much time it takes to make fondant cakes and this is the perfect alternative when you simply do not have the time! I have seen many expensive metal and wooden toppers out there but when you can make them out of paper for a few dollars, why spend the big bucks!

Here is what I am talking about!
So pretty right?!


So today I want to share with you how to make your very own. Here is a quick video of me making one to show you all. If you haven't yet, I would love for you to subscribe to my channel for future crafty videos :)


Here is what you need to make your own:

Electronic Cutter - I used the Silhouette Cameo
Glitter or foil paper (I used foil paper from Recollections) avoided a glittery mess.
Heavy card stock or light weight chipboard paper.
Glue, hot glue and gun.
Toothpicks or skewers.
Cake of course!  (homemade or store bought... shhh, no one will know!)

For those wanting to make your own using this file, click on the links below the picture!


Before you download...
My free files RULES!!!

  1. If you choose to download all I ask is you become a follower.
  2. Note my files are for personal use only! (Personal use means... only for you to use (no trading, or sharing of my files... let me do that!) 
  3. If you want to share, send your friends over to my blog for the download. 
  4. I'm OK with people sharing my files on their own sites as long as there is a direct link back to this blog...Give credit where credit is due! (a message to me would also be appreciated)
If you would like to donate, (click the 👉DONATE button on the sidebar) I will happily accept any amount you see fit. No pressure at all either :) It will just make my day that someone wants to support my passion.

Click on the links below for your FREE download! 

SVG file
.studio (Silhouette file)

Hope you have learned how to make your own fancy cake toppers and bling up your next birthday cake. And, if you didn't and want to use my files that's COOL too!

Thanks for stopping by!
Happy Crafting  :)


Monday, April 28, 2014

Minecraft "Creeper" Cupcake Cake | DIY Cakes


Hi Everybody!!! 

Sorry I haven't been around much lately! April has been a crazy month for me starting with my son's birthday parties, yes there was more than one! Then there was Easter, and yesterday we celebrated my daughter's First Communion. Needless to say, I will have a lot to share with you all, so stay tuned 😉

Today, I want to share with you the Minecraft "Creeper" Cupcake Cake that I made for my son's (friends) birthday party. I had already made him a Minecraft Cake for the party we had for him with just the family. But this cupcake cake was a whole lot easier and quicker to make :)

Here are a few iPhone pics I took of the process and some tips on how to put one of these cakes together!

Minecraft "Creeper" Cupcake Cake | DIY Cakes

First, you will need to figure out how you want to layout your cupcakes. Then squeeze them as close as possible together. This will prevent you from wasting a bunch of icing. To secure the cupcakes to the board just add a little frosting to the bottom of the cupcakes. This will ensure they do not slide around while you frost them! Then pipe the buttercream around the perimeter of the cupcakes and fill the spaces in between. Cover the remaining exposed areas of the cupcakes with more icing.

Minecraft "Creeper" Cupcake Cake | DIY Cakes

Smooth the top of the cupcakes flat using an icing spatula.

Minecraft "Creeper" Cupcake Cake | DIY Cakes

I used black fondant for the face of my creeper. To do that, I just found an image online and printed it out. I then cut out the face and placed the image over the rolled out black fondant. Next, I used a sharp blade to cut out the shapes from the fondant. Place the face of the Creeper centered onto the cake... Now, wasn't that easy?!

Minecraft "Creeper" Cupcake Cake | DIY Cakes

Hope you liked my little "Creeper" Cupcake Cake, maybe even inspired you to try making your own  :)

Up Next Minecraft Dynamite Party Favors!

Thanks for stopping by!
Happy Crafting  :)

Monday, October 7, 2013

Despicable Me 2 Minion Cake | DIY Cakes

I am super excited to share with you all the Despicable Me 2 Minion Cake I made for a double birthday party this past weekend! My Goddaughter Stella chose the theme for the party. My sister also turned 20 this week so the families got together for their joint party! So of course, I brought the cake ;)

Here is your first look of many pics to follow! Doesn't he look excited?!

Despicable Me 2 Minion Cake | DIY Cakes

My Goddaughter Stella turned 4, I thought it would be cute to have the Yellow Minion hold 4 candles and have the top portion of the cake represent her. While the bottom Minion, was made for my sister Catarina who turned 20 this week!

Really happy about how it all came together!

Despicable Me 2 Minion Cake | DIY Cakes

Top View

Despicable Me 2 Minion Cake | DIY Cakes

Close Up

Despicable Me 2 Minion Cake | DIY Cakes

 The Top Yellow Minion Cake - Chocolate cake frosted with chocolate buttercream icing
baked in a 6 inch round pan (3 layers) - measured around 9 inches tall

Bottom Purple Minion Cake - Vanilla Cake - Vanilla buttercream icing
baked in an 11 inch round pan (2 layers) - measured 4 inches tall

All covered with Fondant

Despicable Me 2 Minion Cake | DIY Cakes

Thanks so much for stopping by! I hope you liked my take on Despicable Me 2's Minion Cake! I had a lot of fun making it and a better time eating it!!! Yummo!

Happy Crafting! :)