Happy Monday Friends!
What do you think of the 5th Anniversary Release!? Isn't it amazing!!! What was your favorite from the release? I want it all 😍
Today I have a card to share with you that I had made a little while ago for the Spring 2020 Issue of Scrapbook and Cards Magazine. If you don't subscribe to it, no worries you can still see it online.
I thought it would be fun to create a Honey Bee Bakery Scene Card. I can almost smell those goodies in the window! I am happy that most bakeries are still open during this pandemic (at least where I live), even if it is just for pick up. I think this card could be used for so many occasions... Mother's Day, Birthday, Thank You, Wedding Shower or just a friendship card.
CARD DETAILS
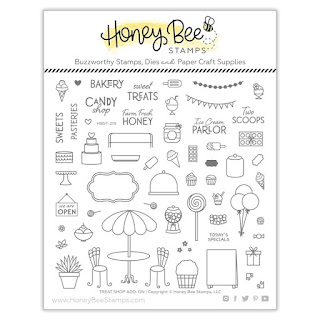
To begin I die cut the window from the COTTAGE WINDOW HONEY CUTS and used it to draw the window frames onto a card panel. I then stamped out the images from the TREAT SHOP ADD-ON stamp set in the frames and colored everything in using Copic markers. I also added a few more images that I had die cut out using the coordinating TREAT SHOP ADD-ON DIES to add some dimension to the and depth to the scene. To finish the inside of the window I added some glossy accents and shimmer to certain areas of the treats.
Next, I began to build the scene by using the window from the COTTAGE WINDOW | HONEY CUTS to die cut the brick paper from the HOME ESSENTIALS Paper Pad and just glued it to the panel. I then built the window frame by stacking and gluing 3 frames together and sandwiching an acetate piece cut to fit below the top frame. I then glued the window onto the card panel and embellished it with the Banners from the TREAT SHOP ADD-ON and some black gems from the RAW HONEY GEM STICKERS.
To create the awning, I die cut the roof piece from the TREAT SHOP ADD-ON DIES, once out of black cardstock and twice using white cardstock. I trimmed off the 2 outer sections as this die was too wide for the A2 vertical card front. On one of the white die cuts, I colored sections using various pink and grey Copic markers. I then cut out each pleat and glued the sections back onto the other white layer I had cut out, alternating the colors. To the pink sections, I added a layer of liquid Pixie Dust.
I then added my sentiments onto the awning using all the layers from the SWEET DIES done in the same colors as the awning. To complete the greeting I added a couple of banners stamped using the HAPPY BIRTHDAY set that I heat set in white.
To finish off the card I had to add the name of the Bakery, so I combined stamps from the ANGEL POLICY and the TREAT SHOP ADD-ON sets to create the BANNER under the window. I did mask off the "stamps" from the "Honey Bee".
I hope you were inspired by this fun Sweet Day Bakery Scene Card. Thank you for stopping by and until next time... Happy Crafting 👋

SUPPLIES
 TREAT SHOP ADD-ON DIES Shop at: SSS | SB | HBS |
 TREAT SHOP ADD-ON Shop at: SSS | SB | HBS |
 COTTAGE WINDOW | HONEY CUTS Shop at: SSS | SB | HBS |
 SWEET DIES Shop at: SSS | SB | HBS |
 HAPPY BIRTHDAY Shop at: SSS | SB | HBS |
 BEST PARENTS Shop at: SSS | SB | HBS |
 BANNER BUILDER HONEY CUTS Shop at: SSS | SB | HBS |
 ANGEL POLICY Shop at: SSS | SB | HBS |
 RAW HONEY GEM STICKERS Shop at: SSS | SB | HBS |
 HOME ESSENTIALS Paper Pad Shop at: SSS | SB | HBS |
 CLEAR ACETATE SHEETS Shop at: SSS | SK |
 NEENAH SOLAR WHITE 110 Shop at: SSS | AMZ | HBS |
 BLACKOUT INK Shop at: SSS | IO3 |
 MISTI TOOL - ORIGINAL SIZE Shop at: SSS | AMZ | SB | HBS |
 GEMINI JR. DIE CUTTER Shop at: SSS | AMZ | SB |
 WHITE UNICORN INK Shop at: SSS | AMZ |
 ARCTIC WHITE POWDER Shop at: SSS | IO3 |
 LIQUID PIXIE DUST Shop at: SSS | IO3 |
 WHITE GELLY ROLLER PEN SET Shop at: SSS | AMZ | SB |
 GLOSSY ACCENTS Shop at: SSS | AMZ | SB | HBS |
To make supplies easy for you to find, I have linked them above. If something is no longer available I will link to a similar product. Affiliate links may be used depending on the product linked. Please help support my blog by using these links while shopping at no additional cost to you. For more information about the affiliates I use, please visit my disclaimer here. Thanks so much for all your support!


No comments:
Post a Comment
Thanks so much for taking the time and leaving me a comment! I always love hearing from you and I appreciate you stopping by! Hugs, Ilda