Showing posts with label Guest Designer. Show all posts

Tuesday, July 13, 2021

Star Shaped Unicorn Dreams Card | Heffy Doodle

Guest Designer,Heffy Doodle Stamps,Star Shaped,rainbow, galaxy, Card, Fluffy Puffy Unicorns, Card Making, Stamping, Die Cutting, handmade card, ilovedoingallthingscrafty, Stamps, how to,Distress Oxide blending,
Hello Crafty Friends! 

I am super excited to announce I will be guest designing this month for Heffy Doodle. I absolutely love their designs and was so excited when they reached out to me for a collaboration.

If you have been following me for a while, you may already know my favorite color is rainbow. I always try to sneak it in somehow in all my cards if possible and today's Star Shaped Unicorn Dreams Card featuring Fluffy Puffy Unicorns was no exception. So let me tell you how this card came together.

CARD RECIPE
  • Die-cut two of the largest star-shaped die from the Stitched Stars Dies set.
    • To one the star that will be the top layer, die-cut the smallest star-shaped die from the Stitched Stars Dies set.
    • To the star that will be the back of the card, score a line across the top point to create the hinge of the card. Set this star aside until it is ready to be glued together to the top panel.
  • Using Distress Oxide Inks, I started by blending Salty Ocean in the center of the star, followed by Blueprint Sketch and finishing the tips of the star with Chipped Sapphire ink. I then spritzed the surface with water and picked up the drops with a paper towel. To add to the galaxy background I also splattered drops of white pigment ink.
  • Once the background was dry I then used the Star Swirl Stencil to add a layer of Glimmer Paste.
  • Glue the top star panel to the back panel above the scoreline to create the hinge for the card base.
  • Line up the sentiment in the star opening and using a stamp positioner stamp the "DREAM BIG!" through the window opening.
Guest Designer,Heffy Doodle Stamps,Star Shaped,rainbow, galaxy, Card, Fluffy Puffy Unicorns, Card Making, Stamping, Die Cutting, handmade card, ilovedoingallthingscrafty, Stamps, how to,Distress Oxide blending,
  • Stamp out the images from the Fluffy Puffy Unicorns Stamps using Copic-friendly ink. 
  • Color in images using Copic Makers or desired medium.
  • Die-cut images using coordinating Fluffy Puffy Unicorns Dies.
  • For additional sparkle and shine, I used a glue pen to add glitter details to the unicorn's mane and tails. To the clouds, I added liquid glue to the bottom and added chunky glitter.
Guest Designer,Heffy Doodle Stamps,Star Shaped,rainbow, galaxy, Card, Fluffy Puffy Unicorns, Card Making, Stamping, Die Cutting, handmade card, ilovedoingallthingscrafty, Stamps, how to,Distress Oxide blending,
  • Use foam tape to pop up the unicorns and other images onto the Star Shaped Card front.
  • Add white gel pen details to the unicorn's cheeks and mane, and add a gold gel pen to the unicorn's horn.
Guest Designer,Heffy Doodle Stamps,Star Shaped,rainbow, galaxy, Card, Fluffy Puffy Unicorns, Card Making, Stamping, Die Cutting, handmade card, ilovedoingallthingscrafty, Stamps, how to,Distress Oxide blending,

I had so much fun creating this card. I really hope you love it as much as I do and are inspired by it. Thank you for sharing your time with me and stopping by today. Until next time... Happy Crafting!

Ilda 👋

SUPPLIES
Fluffy Puffy Unicorns Stamps
Shop at:
SSS | SB | IO3
Fluffy Puffy Unicorns Dies
Shop at:
SSS | SB | IO3
Stitched Stars Dies
Stitched Stars Dies
Shop at:
IO3
Star Swirl Stencil
Star Swirl Stencil
Shop at:
SSS | SB | IO3 | TS UK
NEENAH SOLAR WHITE 110
Shop at:
SSS | AMZ | HBS
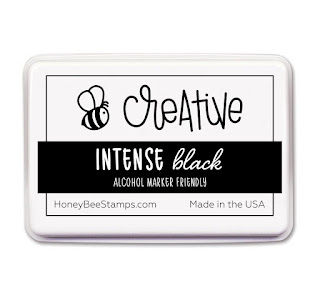
Intense Black Ink
Intense Black Ink
Shop at:
SSS | SB | HBS
New Mini Misti
New Mini Misti
Shop at:
SSS | SB
COPIC SKETCH
COPIC SKETCH
Shop at:
SSS | AMZ
GEMINI JR. DIE CUTTER
Shop at:
SSS | AMZ | SB
INK BLENDER BRUSHES
INK BLENDER BRUSHES
Shop at:
SSS | SK
Oxide Ink Pad SALTY OCEAN
Shop at:
SSS | AMZ | HBS
BLUEPRINT SKETCH DISTRESS OXIDE
Shop at:
SSS | SB | HBS
CHIPPED SAPPHIRE Oxide Ink
Shop at:
SSS | SB | HBS
Copic Opaque White Pigment
Shop at:
SSS | AMZ
MOONSTONE GLIMMER PASTE
Shop at:
SSS | AMZ | SB | HBS | TS US | TS UK
MEDIA SPATULAS
MEDIA SPATULAS
Shop at:
SSS | SB | HBS | TS US | TS UK
BEARLY ART PRECISION GLUE
Shop at:
SSS | AMZ
Sakura Quickie Glue Pen
Shop at:
SSS | AMZ | SK
SPARKLE GLITTER
SPARKLE GLITTER
Shop at:
SSS | SK
CHUNKY SPARKLE GLITTER
Shop at:
SSS | SK
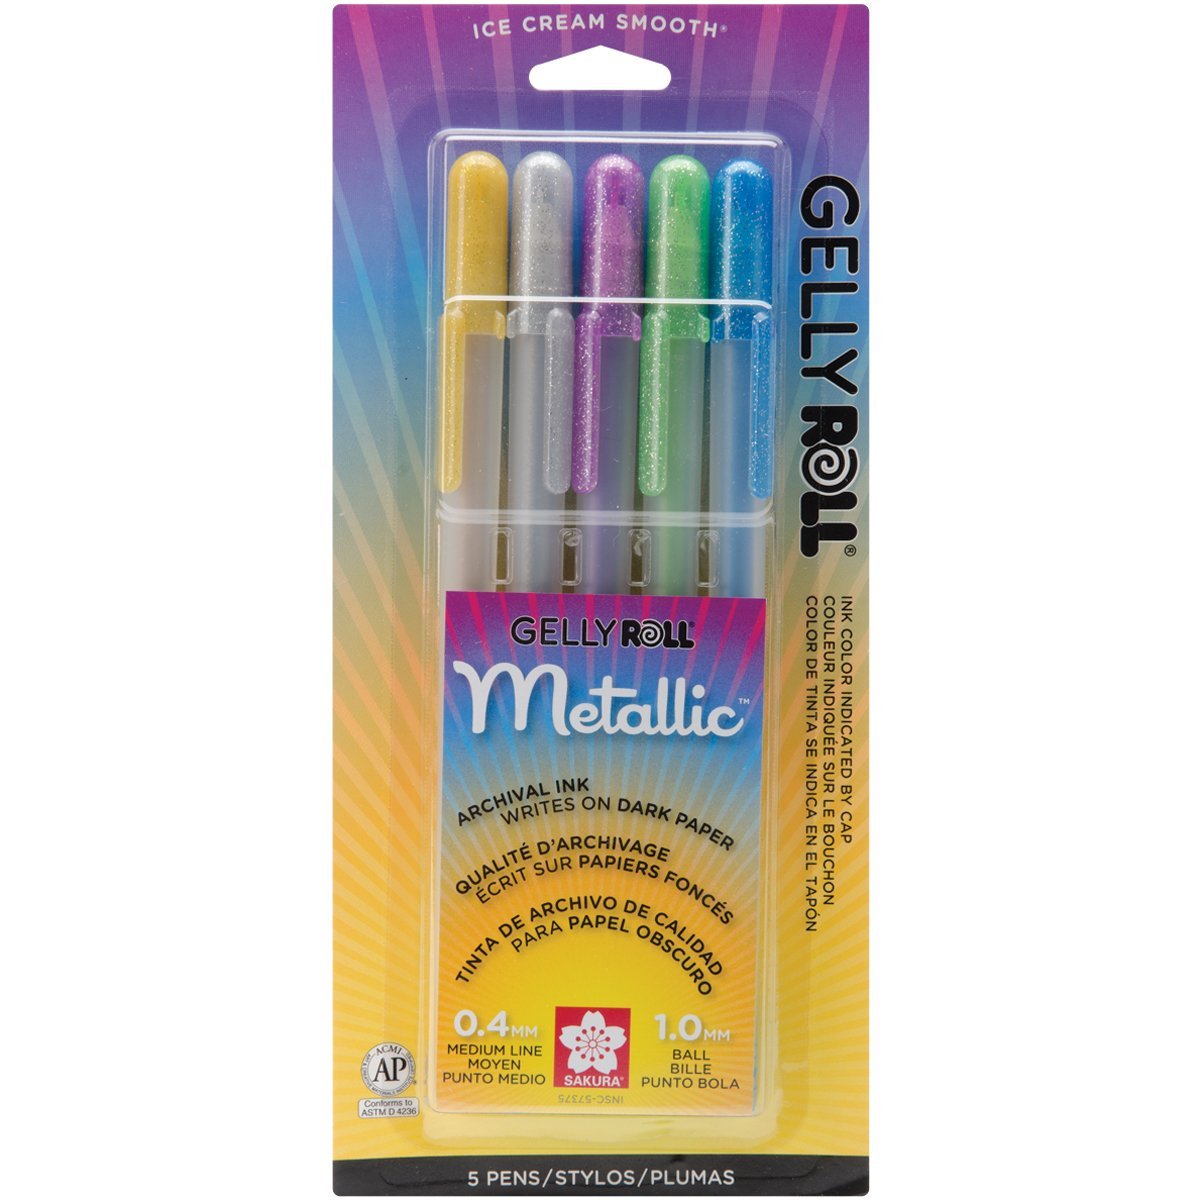
Gelly Roll Metallic Gel Pen Set
Shop at:
SSS | AMZ
WHITE GELLY ROLLER PEN SET
Shop at:
SSS | AMZ | SB | HBS
FOAM SQUARES
FOAM SQUARES
Shop at:
SSS | HBS
To make supplies easy for you to find, I have linked them above. If something is no longer available I will link to a similar product. Affiliate links may be used depending on the product linked. Please help support my blog by using these links while shopping at no additional cost to you. For more information about the affiliates I use, please visit my disclaimer here. Thanks so much for all your support!

Thursday, September 24, 2020

Elegant Foiled Christmas Cards | Christmas Foiled Basics Collection by Yana Smakula | Spellbinders


Hello Friends!

I am so excited to have been a guest over on the Spellbinders Blog last week. In case you missed it over there, I am posting my cards again here today.

My cards feature the Christmas Foiled Basics Collection by Yana Smakula. These Foil Plates and Dies are perfect for creating your own elegant handmade Christmas cards that will wow your friends and family for many years to come.

how to,handmade card,Stamps,Christmas Foiled Basics Collection by Yana Smakula,Guest Designer,ilovedoingallthingscrafty,Elegant Foiled Christmas Cards,stamping,Spellbinders,Die cutting,card making,

CARD DETAILS

This first card I created is a very simple, yet elegant Happy Holiday card.  I began this card by using the Christmas Foliage Background Plate to foil and emboss the red cardstock background with Polished Brass Glimmer Foil.

I then foiled the circle in the center using the circle plate from the Christmas Foliage Circle Border set.

how to,handmade card,Stamps,Christmas Foiled Basics Collection by Yana Smakula,Guest Designer,ilovedoingallthingscrafty,Elegant Foiled Christmas Cards,stamping,Spellbinders,Die cutting,card making,

On white cardstock, I foiled and die-cut pieces from the Christmas Foliage Circle Border, the Christmas Organic Foliage, and Yana's Christmas Sentiments set to create the sentiment in the center and to add the pop of white to the card. To the flowers, I used a Red Copic Marker to color the centers in.

I then finished off this beauty by adding drops of white Nuvo Crystal Drops.

how to,handmade card,Stamps,Christmas Foiled Basics Collection by Yana Smakula,Guest Designer,ilovedoingallthingscrafty,Elegant Foiled Christmas Cards,stamping,Spellbinders,Die cutting,card making,

This next card may be my favorite!

I began this card by creating the background. I used the Polished Brass Glimmer Foil to repeat foil the entire panel using the snowfall plate from the Glimmer Winter Village. To add extra detail, I used a gold foiled washi tape from my stash to create a present-like design.

how to,handmade card,Stamps,Christmas Foiled Basics Collection by Yana Smakula,Guest Designer,ilovedoingallthingscrafty,Elegant Foiled Christmas Cards,stamping,Spellbinders,Die cutting,card making,

For the sentiment on this "present", I first die cut the circle using the Christmas Foliage Circle Border Die. Since the die is not a complete circle I just did some partial die-cutting of the circle stopping before the foliage part, then flipped the die, lined it up with the cut already made by the die, and then ran it through the die-cut machine again to cut the bottom of the circle.

On the circle, I lined up and foiled the "Merry Christmas from all of us" using plates from Yana's Christmas Sentiments. Right behind the circle die, I glued 3 pieces that I had foiled, cut and pieced in the shape of a wreath using plates and dies from the Christmas Foliage Circle Border set.

how to,handmade card,Stamps,Christmas Foiled Basics Collection by Yana Smakula,Guest Designer,ilovedoingallthingscrafty,Elegant Foiled Christmas Cards,stamping,Spellbinders,Die cutting,card making,

Who doesn't love a shaker card!?

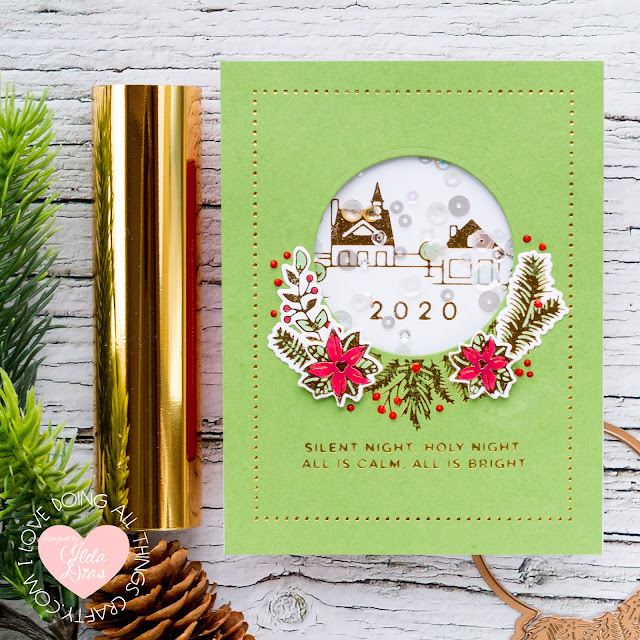
This next card I started by creating die cutting the circle in the center using the partial die cutting technique I mentioned above in the previous card, only this time I am using the negative of the die.

The card front was then foiled with:


how to,handmade card,Stamps,Christmas Foiled Basics Collection by Yana Smakula,Guest Designer,ilovedoingallthingscrafty,Elegant Foiled Christmas Cards,stamping,Spellbinders,Die cutting,card making,

Inside the shaker, I had foiled the scene using a plate from the Glimmer Winter Village and 2020 which comes from Yana's Christmas Sentiment Set.

The shaker elements I used are from Studio Katia and the red details were done in Red Berry Nuvo Drops.

how to,handmade card,Stamps,Christmas Foiled Basics Collection by Yana Smakula,Guest Designer,ilovedoingallthingscrafty,Elegant Foiled Christmas Cards,stamping,Spellbinders,Die cutting,card making,

This last nontraditional card was also fun to create.

I used both the scene plates from the Glimmer Winter Village set that I foiled and embossed onto separate black cardstock panels using the Skybright Glimmer Foil. I then fussy cut the top parts of the scenes off. 

Next, I Silver foiled the Season's Greetings from Yana's Christmas Sentiments onto a light blue piece of cardstock. I then added snow using the falling snow plate from the Glimmer Winter Village on the top half of the blue panel.

how to,handmade card,Stamps,Christmas Foiled Basics Collection by Yana Smakula,Guest Designer,ilovedoingallthingscrafty,Elegant Foiled Christmas Cards,stamping,Spellbinders,Die cutting,card making,

On the bottom of the black scene panel, I also Silver Foiled the sentiment "Our Home to Yours" again from Yana's Christmas Sentiment set.

To assemble this card, I just added foam tape between each layer and then finished it off by adding some more snow details using the White Crystal Nuvo Drops.

how to,handmade card,Stamps,Christmas Foiled Basics Collection by Yana Smakula,Guest Designer,ilovedoingallthingscrafty,Elegant Foiled Christmas Cards,stamping,Spellbinders,Die cutting,card making,

I had so much fun creating these cards for you today and I hope I have inspired you to add some Glimmer Foil Christmas Elements into your Holiday Cards this year.

Thank you for stopping by and until next time... Happy Crafting 👋


SUPPLIES
YANA'S CHRISTMAS SENTIMENTS Glimmer Hot Foil Plate and Dies
Shop at:
SSS | SB
YANA'S CHRISTMAS SENTIMENTS Glimmer Hot Foil Plate and Dies
Shop at:
SSS | SB
CHRISTMAS FOLIAGE BACKGROUND Glimmer Hot Foil Plate
Shop at:
SSS | SB
CHRISTMAS FOLIAGE CIRCLE BORDER Glimmer Hot Foil Plate
Shop at:
SSS | SB
GLIMMER WINTER VILLAGE Glimmer Hot Foil Plate
Shop at:
SSS | SB
GLIMMER RECTANGLE GLIMMER PLATES
Shop at:
SSS | SBC | SB
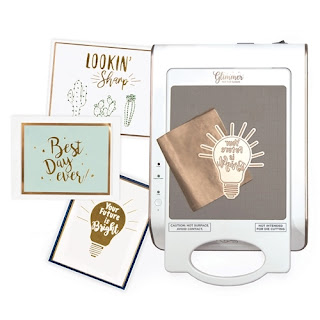
HOT FOIL SYSTEM
HOT FOIL SYSTEM
Shop at:
SSS | SBC | SB
PLATINUM 6 DIE CUTTING PLATFORM
Shop at:
SSS | SBC | SB
SILVER Glimmer Foil
SILVER Glimmer Foil
Shop at:
SSS | SBC | SB
POLISHED BRASS - Glimmer Foil
Shop at:
SSS | SBC | SB
SKYBRIGHT Glimmer Foil
Shop at:
SSS | SBC | SB
FOAM TAPE - WHITE
FOAM TAPE - WHITE
Shop at:
SSS | SK
FOAM TAPE - BLACK
FOAM TAPE - BLACK
Shop at:
SSS | SK
RED BERRY GLOSS Nuvo Crystal Drops
Shop at:
SSS
White Gloss Nuvo Crystal Drops
Shop at:
SSS | AMZ
CLEAR ACETATE SHEETS
Shop at:
SSS | SK
ICY SPARKLE CRYSTALS
Shop at:
SSS | SK
MAJESTIC FUSION
MAJESTIC FUSION
Shop at:
SSS | SK
To make supplies easy for you to find, I have linked them above. If something is no longer available I will link to a similar product. Affiliate links may be used depending on the product linked. Please help support my blog by using these links while shopping at no additional cost to you. For more information about the affiliates I use, please visit my disclaimer here. Thanks so much for all your support!

Thursday, August 15, 2019

Reach for the Stars | Interactive Card | Heffy Doodle Stamps


Reach for the Stars | Interactive Card | Heffy Doodle Stamps by ilovedoingallthingscrafty.com
Hello Friends!

Today I am SUPER excited to be Guest Designing on the Heffy Doodle Blog. I think you will love the card I'm sharing today because it is literally out of this world! I absolutely love how it turned and hope you do too!

CARD DETAILS

To begin I stamped out the cute images from Spaced Out Stamp (SSS | SB | HD) set and colored them in using Copic markers. I then die cut them out using the coordinating Spaced Out Dies (SSS | SB | HD). To add a layer of shine I used glossy accents on the astronaut's helmet, the stars, and the rocket's window and set them aside to dry while I worked on the rest of the card. 

Reach for the Stars | Interactive Card | Heffy Doodle Stamps by ilovedoingallthingscrafty.com
Here is a picture of the Copic Markers I used in case you are interested.


The next thing I did was create a galaxy background using alcohol inks on Yupo paper. To give it a more galaxy like feel I splattered the entire background with white pigment ink. To add some more interest and shine I used a quickie glue pen and traced some of the alcohol edges and then dropped some silver gilding flakes over the areas. I then lightly rubbed off anything that didn't stick to the glue with a soft paintbrush.

Reach for the Stars | Interactive Card | Heffy Doodle Stamps by ilovedoingallthingscrafty.com

The coolest part of this card is that it is interactive. Watch the clip below to see it in action.

To make this card interactive I used a circle die (which actually was one of the dies from the coordinating Spaced Out Dies (SSS | SB | HD)) just make sure the circle you use is smalled that the object you are going to glue on top of it. In this case, I needed it to be smaller than the planet that the little astronaut's foot was glued too. Figure out where you want the planet to be and then use the circle die to cut out a circle in that spot.

Then using some scraps, cut out another circle using a larger circle die (in this case I used the coordinating die for the planet) and in the center of the die-cut circle glue to that a flat button or a spin disc if you have one (The button should be just slightly smaller than the opening on the panel to be able to move freely and not wiggle around too much). Once it's dry pop it through the opening that was previously made on the panel and glue another die cut circle to the top of it.

Add foam tape all along the back and edge of the alcohol background panel ensuring that the spinner mechanism doesn't touch the tape anywhere. Attach the panel to the card base.

Now that the spinner mechanism is done, you can glue the planet onto it. Before I did though, I attached a threat to the back of the astronaut using glue and then covered it with tape to ensure it wasn't going to catch on anything.

Attach the other end of the threat to the rocket and pop the rocket in place with foam tape and you're done! TIP: Leave extra length on the thread until you figure out how much you need to make the partial spin work (the length you leave will determine the range of the movement).

Watch the Astronaut in action!

On the inside, I combined a few stamps to personalize this birthday card and added some stars for fun!

Reach for the Stars | Interactive Card | Heffy Doodle Stamps by ilovedoingallthingscrafty.com

Hope you enjoyed this card fun interactive Spaced Out Birthday card and were inspired to create.

Thank you for stopping by 😊
Until next time... Happy Crafting 👋


SUPPLIES

Spaced Out Stamps
Spaced Out Stamps
Shop at:
SSS | SB | HD
Spaced Out Dies
Spaced Out Dies
Shop at:
SSS | SB | HD
Neenah  80 LB SOLAR WHITE
Neenah 80 LB SOLAR WHITE
Shop at:
SSS | AMZ
Blackout Ink
Blackout Ink
Shop at:
SSS | IO3
Mini Misti Tool
Mini Misti Tool
Shop at:
SSS | AMZ | SB | SK
Gemini Jr Die Cutting/Embossing Machine
Shop at:
SSS | AMZ | SB
Tim Holtz WHITE ALCOHOL INK YUPO PAPER
Shop at:
SSS | AMZ
SLATE ALCOHOL INK
SLATE ALCOHOL INK
Shop at:
SSS | SB
ALCHEMY PEARL ALCOHOL INK
Shop at:
SSS | SB | HBS
ENCHANTED PEARL ALCOHOL INK
Shop at:
SSS | SB | HBS
TRANQUIL PEARL ALCOHOL INK
Shop at:
SSS | SB | HBS
Copic Opaque White Pigment
Shop at:
AMZ
Silver Bullion | Nuvo Gilding Flakes
Shop at:
SSS | AMZ | HBS
Sakura Quickie Glue Pen
Shop at:
SSS | AMZ | SK
Glossy Accents
Glossy Accents
Shop at:
SSS | AMZ | SB | HBS
STUDIO KATIA GLUE
STUDIO KATIA GLUE
Shop at:
SSS | SK
Double-Sided Foam Tape
Shop at:
SSS | AMZ

To make supplies easy for you to find, I have linked them above. If something is no longer available I will link to a similar product. Affiliate links may be used depending on the product linked. By shopping through my links you help keep my blog running at no extra cost to you. So thank you in advance for supporting my creations!