Friday, September 25, 2020

Tonic Studio September 2020 Heartfelt Corsage Stamp Blog Hop

Tonic Studios, September 2020, Heartfelt Corsage, Blog Hop,Giveaway,Happy Mail Envelop,floral cards,Card Making, Stamping, Die Cutting, handmade card, ilovedoingallthingscrafty, Stamps, how to,

Hello, my crafty friends, and welcome to Tonic Studios September 2020 Heartfelt Corsage Stamp Blog Hop! If you have arrived from Jen Kray's Blog you are on the right track. I will link the complete hop list and giveaway details near the end of this post, so stay tuned!

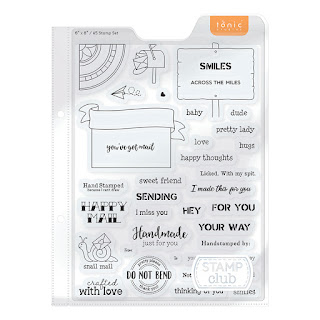
I have created two cards today featuring the new Heartfelt Corsage Stamp and Die Bundle US|UK as well as a couple of coordinating card envelopes using the new Happy Mail Envelop Stamp Set US|UK. Take a look at these sets.


Both these sets come in high-quality plastic sleeves, that are compatible to work with A5 ring binders. How cool is that!? They come in an Orange US|UK or Blue binder US|UK.
 

So now let me show you how I used these sets.

CARD DETAILS

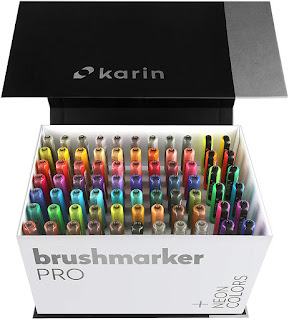
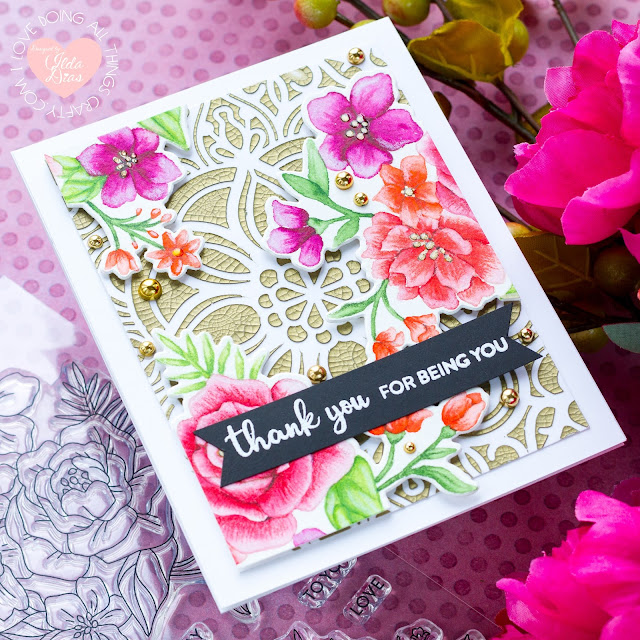
For this first card, I was inspired by the colors of Fall. I began by stamping out the largest floral image from the Heartfelt Corsage Stamp US|UK, using a no line coloring ink onto Bristol paper and then I used Karin Brushmarkers to color the image in. I also used Prismacolor Pencils to add details and shading to the florals.

I then die cut the image using the Heartfelt Coordinating Dies that come included in the bundle US|UK.

Tonic Studios, September 2020, Heartfelt Corsage, Blog Hop,Giveaway,Happy Mail Envelop,floral cards,Card Making, Stamping, Die Cutting, handmade card, ilovedoingallthingscrafty, Stamps, how to,

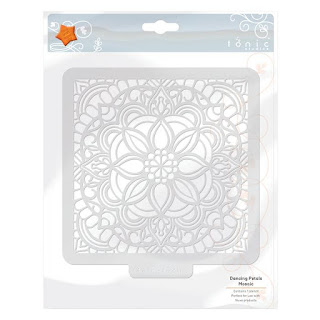
The background was created using the Egyptian Gold Crackle Mousse US|UK along with the Dancing Petals Mosaic Stencil. Once the mousse was all dry and crackly (which is super cool, btw), I trimmed the panel down and then popped on the floral images that I had trimmed into three pieces. 

To finish the card front, I stamped and heat embossed the sentiment onto a piece of black cardstock that turned into a banner.

For extra finishing touches, I used a gold gel pen to add details to the flower centers. I then topped the centers with glossy accents and then completed the card by adding a scattering of gold pearls.

Tonic Studios, September 2020, Heartfelt Corsage, Blog Hop,Giveaway,Happy Mail Envelop,floral cards,Card Making, Stamping, Die Cutting, handmade card, ilovedoingallthingscrafty, Stamps, how to,

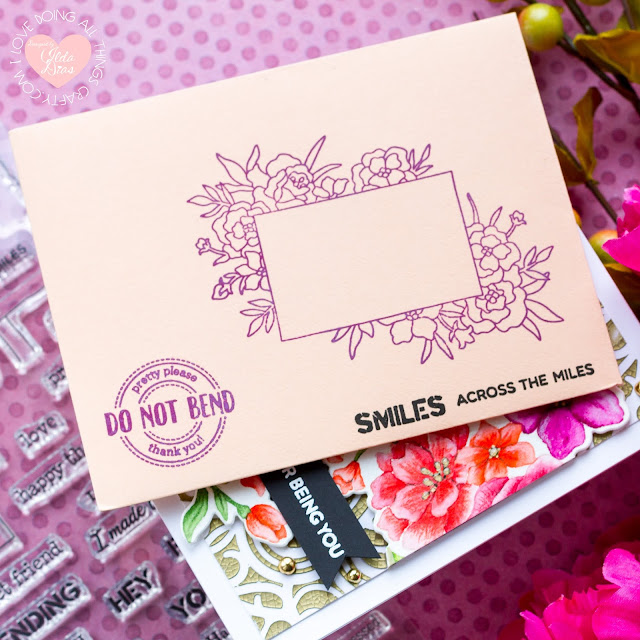
For the coordinating envelope, I used both the stamps from the Heartfelt Corsage Stamp US|UK and the Happy Mail Envelop Stamp Set US|UK.

Tonic Studios, September 2020, Heartfelt Corsage, Blog Hop,Giveaway,Happy Mail Envelop,floral cards,Card Making, Stamping, Die Cutting, handmade card, ilovedoingallthingscrafty, Stamps, how to,

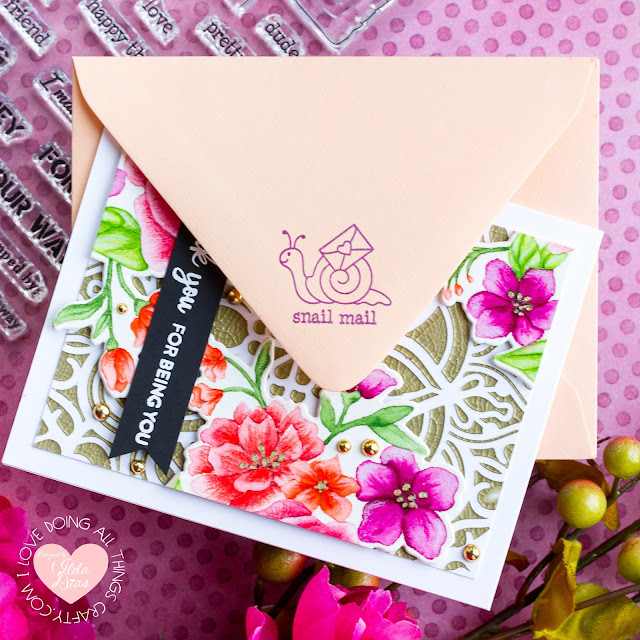
Here is how I finished the back. Love that little snail. So cute!

Tonic Studios, September 2020, Heartfelt Corsage, Blog Hop,Giveaway,Happy Mail Envelop,floral cards,Card Making, Stamping, Die Cutting, handmade card, ilovedoingallthingscrafty, Stamps, how to,

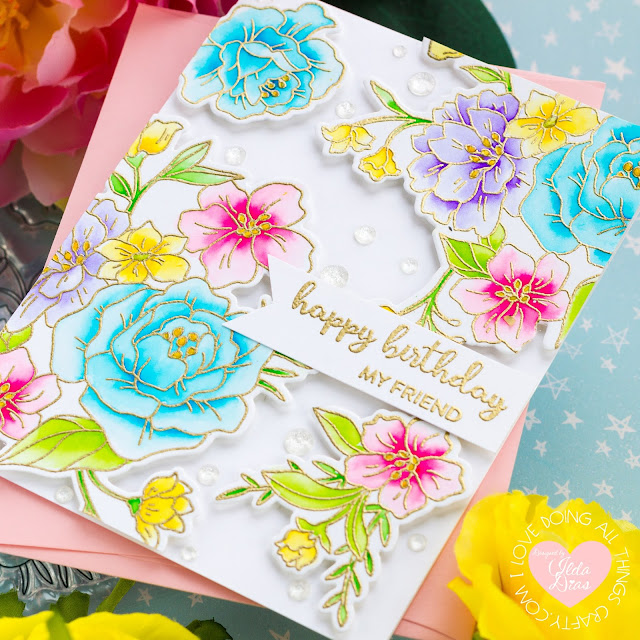
My next card was summer-inspired. As you can see it has more of a soft rainbow palette. This time, I stamped and heat embossed the images using gold embossing powder. 

Tonic Studios, September 2020, Heartfelt Corsage, Blog Hop,Giveaway,Happy Mail Envelop,floral cards,Card Making, Stamping, Die Cutting, handmade card, ilovedoingallthingscrafty, Stamps, how to,

Once again I used Karin Brushmarkers to watercolor the images in. After everything had dried, I used the Heartfelt Coordinating Dies to cut the images.

Tonic Studios, September 2020, Heartfelt Corsage, Blog Hop,Giveaway,Happy Mail Envelop,floral cards,Card Making, Stamping, Die Cutting, handmade card, ilovedoingallthingscrafty, Stamps, how to,

I then added foam tape under all the die cuts and then place the floral onto the card panel, trimming any excess that hung off the edges. This time I cut the larger image into two pieces. The birthday sentiment also comes from the Heartfelt Corsage Stamp set that I stamped and heat embossed using gold embossing powder.

To finish off this beautiful card, I used some sparkly crystals and added glossy accents to the flower centers.

Tonic Studios, September 2020, Heartfelt Corsage, Blog Hop,Giveaway,Happy Mail Envelop,floral cards,Card Making, Stamping, Die Cutting, handmade card, ilovedoingallthingscrafty, Stamps, how to,

Here is how I finished the coordinating envelope using the Happy Mail Envelop Stamp Set US|UK. I really like all of the possibilities and sentiments this set offers.

Tonic Studios, September 2020, Heartfelt Corsage, Blog Hop,Giveaway,Happy Mail Envelop,floral cards,Card Making, Stamping, Die Cutting, handmade card, ilovedoingallthingscrafty, Stamps, how to,

Some of the sentiments just crack me up like this one that I had to use on the back of the envelope... "Not licked," Of course, cause of COVID, duh. But once this Pandemic is over, I will definitely be using "Licked. With my spit" stamp for sure, LOL!

Tonic Studios, September 2020, Heartfelt Corsage, Blog Hop,Giveaway,Happy Mail Envelop,floral cards,Card Making, Stamping, Die Cutting, handmade card, ilovedoingallthingscrafty, Stamps, how to,

Alrighty, let's get down to business.

GIVEAWAY
One lucky winner will win a £100/$100 Giftcard to Tonic Studios|UK!  To enter leave a comment on every blog in the hop by 11:59pm PST on September 30. The winner will be announced on October 2nd on the Tonic Studios Instagram|UK and Facebook Pages|UK so make sure you're following all accounts!


BLOG HOP
STAMP CLUB INFO
The Stamp Club Monthly Releases are launched on the last Friday of every month. It is NOT a club or subscription-based program. 
  • Stock is limited. Once it sells out, that's it! 
  • The retail value of the Bundles is 39.99$/£ so that is a 5$/£ savings! 
  • Tonic dies are amazing and come precut/separated with no burs!
  • These products are exclusive to Tonic Studios. 
  • Stamps & dies come in high-quality plastic sleeves with a tab for labeling and binder holes on the side. Compatible with A5 ring binders.
  • Inspired by Maria Willis
I hope my Summer/Fall Floral cards inspired you today. Thank you for stopping by and until next time... Happy Hopping!


SUPPLIES
Heartfelt Corsage Stamp and Die Bundle
Shop at:
TS US | TS UK
Happy Mail Envelop Stamp Set
Shop at:
TS US | TS UK
A5 Ringbinder Die case: Orange
Shop at:
TS US | TS UK
A5 Ringbinder Die case: Blue
Shop at:
TS US | TS UK
Dancing Petals Mosaic Stencil
Shop at:
TS UK
Crackle Mousse - Egyptian Gold
Shop at:
TS US | TS UK
MEDIA SPATULAS
MEDIA SPATULAS
Shop at:
SSSTS US | TS UK
Aqua Flow Pens
Aqua Flow Pens
Shop at:
TS US | TS UK
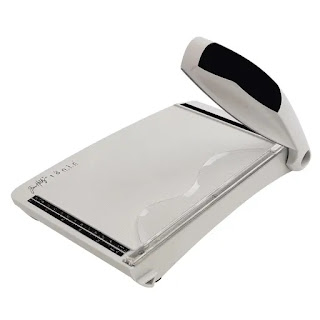
Tim Holtz 8.5 Inch Trimmer
Shop at:
TS UK
Nuvo Glue
Nuvo Glue
Shop at:
TS US | TS UK
ORIGINAL MISTI
ORIGINAL MISTI
Shop at:
SSS | AMZ | HBS
FADEOUT INK
FADEOUT INK
Shop at:
SSS | HBS | IO3
BRISTOL PAPER
BRISTOL PAPER
Shop at:
SSS | AMZ
KARIN BRUSHMARKER PRO
Shop at:
SSS | AMZ
PRISMACOLOR PENCILS
PRISMACOLOR PENCILS
Shop at:
SSS | AMZ
JUICY INK
JUICY INK
Shop at:
SSS | HBS | IO3
ARCTIC WHITE POWDER
ARCTIC WHITE POWDER
Shop at:
SSS | IO3
GOLD RUSH EMB. PWD.
GOLD RUSH EMB. PWD.
Shop at:
SSS | IO3
NEENAH SOLAR WHITE 110
Shop at:
SSS | AMZ | HBS
GEMINI JR. DIE CUTTER
Shop at:
SSS | AMZ | SB
Oxide Ink Pad SEEDLESS PRESERVES
Shop at:
SSS
VersaFine ONYX BLACK Ink
Shop at:
SSS | AMZ | HBS
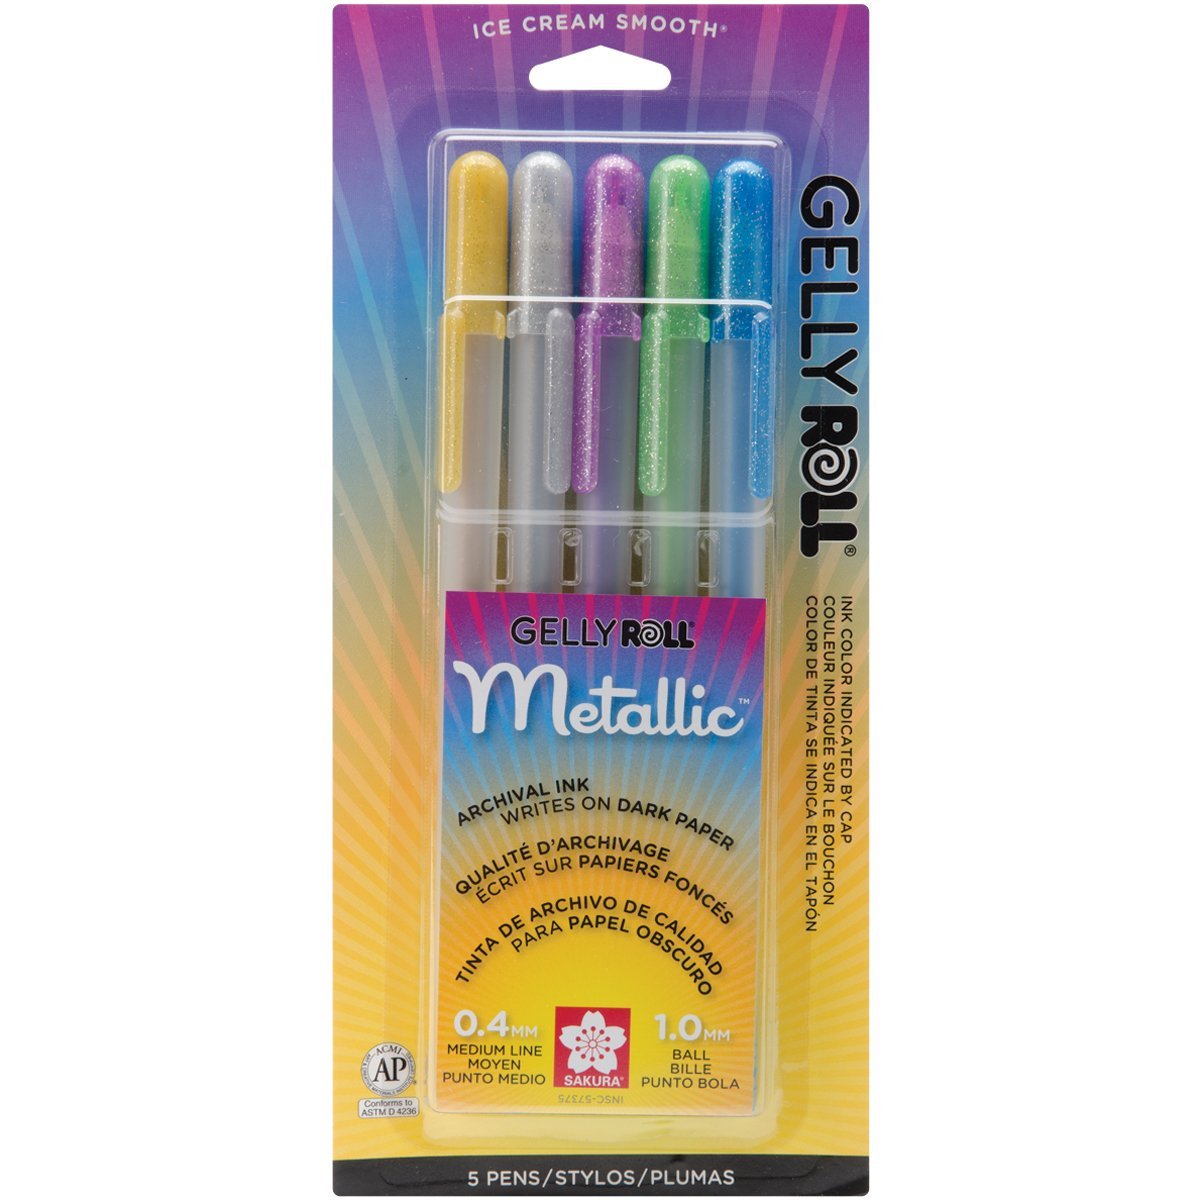
Gelly Roll Metallic Gel Pen Set
Shop at:
SSS | AMZ
GLOSSY ACCENTS
GLOSSY ACCENTS
Shop at:
SSS | AMZ | SB | HBS
FOAM TAPE - WHITE
FOAM TAPE - WHITE
Shop at:
SSS | SK
EMBELLISHMENT WAND
EMBELLISHMENT WAND
Shop at:
SSS | SK
GOLD FOIL PEARLS
GOLD FOIL PEARLS
Shop at:
SSS | SK
ICY SPARKLE CRYSTALS
Shop at:
SSS | SK
To make supplies easy for you to find, I have linked them above. If something is no longer available I will link to a similar product. Affiliate links may be used depending on the product linked. Please help support my blog by using these links while shopping at no additional cost to you. For more information about the affiliates I use, please visit my disclaimer here. Thanks so much for all your support!

Thursday, September 24, 2020

Elegant Foiled Christmas Cards | Christmas Foiled Basics Collection by Yana Smakula | Spellbinders


Hello Friends!

I am so excited to have been a guest over on the Spellbinders Blog last week. In case you missed it over there, I am posting my cards again here today.

My cards feature the Christmas Foiled Basics Collection by Yana Smakula. These Foil Plates and Dies are perfect for creating your own elegant handmade Christmas cards that will wow your friends and family for many years to come.

how to,handmade card,Stamps,Christmas Foiled Basics Collection by Yana Smakula,Guest Designer,ilovedoingallthingscrafty,Elegant Foiled Christmas Cards,stamping,Spellbinders,Die cutting,card making,

CARD DETAILS

This first card I created is a very simple, yet elegant Happy Holiday card.  I began this card by using the Christmas Foliage Background Plate to foil and emboss the red cardstock background with Polished Brass Glimmer Foil.

I then foiled the circle in the center using the circle plate from the Christmas Foliage Circle Border set.

how to,handmade card,Stamps,Christmas Foiled Basics Collection by Yana Smakula,Guest Designer,ilovedoingallthingscrafty,Elegant Foiled Christmas Cards,stamping,Spellbinders,Die cutting,card making,

On white cardstock, I foiled and die-cut pieces from the Christmas Foliage Circle Border, the Christmas Organic Foliage, and Yana's Christmas Sentiments set to create the sentiment in the center and to add the pop of white to the card. To the flowers, I used a Red Copic Marker to color the centers in.

I then finished off this beauty by adding drops of white Nuvo Crystal Drops.

how to,handmade card,Stamps,Christmas Foiled Basics Collection by Yana Smakula,Guest Designer,ilovedoingallthingscrafty,Elegant Foiled Christmas Cards,stamping,Spellbinders,Die cutting,card making,

This next card may be my favorite!

I began this card by creating the background. I used the Polished Brass Glimmer Foil to repeat foil the entire panel using the snowfall plate from the Glimmer Winter Village. To add extra detail, I used a gold foiled washi tape from my stash to create a present-like design.

how to,handmade card,Stamps,Christmas Foiled Basics Collection by Yana Smakula,Guest Designer,ilovedoingallthingscrafty,Elegant Foiled Christmas Cards,stamping,Spellbinders,Die cutting,card making,

For the sentiment on this "present", I first die cut the circle using the Christmas Foliage Circle Border Die. Since the die is not a complete circle I just did some partial die-cutting of the circle stopping before the foliage part, then flipped the die, lined it up with the cut already made by the die, and then ran it through the die-cut machine again to cut the bottom of the circle.

On the circle, I lined up and foiled the "Merry Christmas from all of us" using plates from Yana's Christmas Sentiments. Right behind the circle die, I glued 3 pieces that I had foiled, cut and pieced in the shape of a wreath using plates and dies from the Christmas Foliage Circle Border set.

how to,handmade card,Stamps,Christmas Foiled Basics Collection by Yana Smakula,Guest Designer,ilovedoingallthingscrafty,Elegant Foiled Christmas Cards,stamping,Spellbinders,Die cutting,card making,

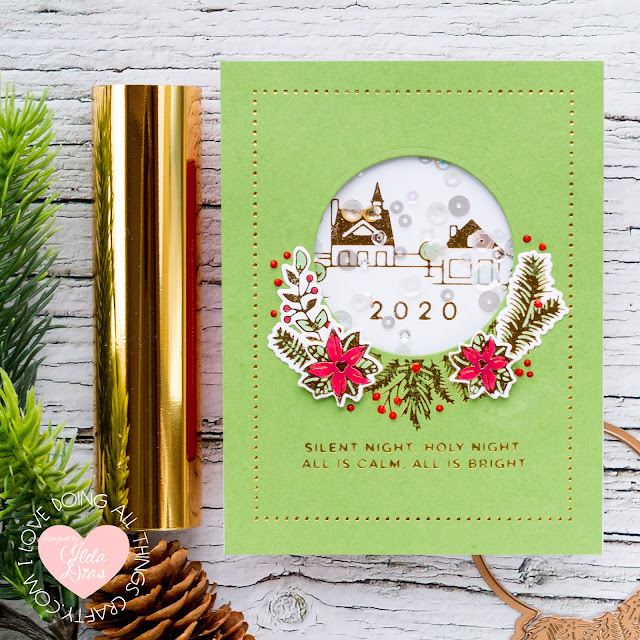
Who doesn't love a shaker card!?

This next card I started by creating die cutting the circle in the center using the partial die cutting technique I mentioned above in the previous card, only this time I am using the negative of the die.

The card front was then foiled with:


how to,handmade card,Stamps,Christmas Foiled Basics Collection by Yana Smakula,Guest Designer,ilovedoingallthingscrafty,Elegant Foiled Christmas Cards,stamping,Spellbinders,Die cutting,card making,

Inside the shaker, I had foiled the scene using a plate from the Glimmer Winter Village and 2020 which comes from Yana's Christmas Sentiment Set.

The shaker elements I used are from Studio Katia and the red details were done in Red Berry Nuvo Drops.

how to,handmade card,Stamps,Christmas Foiled Basics Collection by Yana Smakula,Guest Designer,ilovedoingallthingscrafty,Elegant Foiled Christmas Cards,stamping,Spellbinders,Die cutting,card making,

This last nontraditional card was also fun to create.

I used both the scene plates from the Glimmer Winter Village set that I foiled and embossed onto separate black cardstock panels using the Skybright Glimmer Foil. I then fussy cut the top parts of the scenes off. 

Next, I Silver foiled the Season's Greetings from Yana's Christmas Sentiments onto a light blue piece of cardstock. I then added snow using the falling snow plate from the Glimmer Winter Village on the top half of the blue panel.

how to,handmade card,Stamps,Christmas Foiled Basics Collection by Yana Smakula,Guest Designer,ilovedoingallthingscrafty,Elegant Foiled Christmas Cards,stamping,Spellbinders,Die cutting,card making,

On the bottom of the black scene panel, I also Silver Foiled the sentiment "Our Home to Yours" again from Yana's Christmas Sentiment set.

To assemble this card, I just added foam tape between each layer and then finished it off by adding some more snow details using the White Crystal Nuvo Drops.

how to,handmade card,Stamps,Christmas Foiled Basics Collection by Yana Smakula,Guest Designer,ilovedoingallthingscrafty,Elegant Foiled Christmas Cards,stamping,Spellbinders,Die cutting,card making,

I had so much fun creating these cards for you today and I hope I have inspired you to add some Glimmer Foil Christmas Elements into your Holiday Cards this year.

Thank you for stopping by and until next time... Happy Crafting 👋


SUPPLIES
YANA'S CHRISTMAS SENTIMENTS Glimmer Hot Foil Plate and Dies
Shop at:
SSS | SB
YANA'S CHRISTMAS SENTIMENTS Glimmer Hot Foil Plate and Dies
Shop at:
SSS | SB
CHRISTMAS FOLIAGE BACKGROUND Glimmer Hot Foil Plate
Shop at:
SSS | SB
CHRISTMAS FOLIAGE CIRCLE BORDER Glimmer Hot Foil Plate
Shop at:
SSS | SB
GLIMMER WINTER VILLAGE Glimmer Hot Foil Plate
Shop at:
SSS | SB
GLIMMER RECTANGLE GLIMMER PLATES
Shop at:
SSS | SBC | SB
HOT FOIL SYSTEM
HOT FOIL SYSTEM
Shop at:
SSS | SBC | SB
PLATINUM 6 DIE CUTTING PLATFORM
Shop at:
SSS | SBC | SB
SILVER Glimmer Foil
SILVER Glimmer Foil
Shop at:
SSS | SBC | SB
POLISHED BRASS - Glimmer Foil
Shop at:
SSS | SBC | SB
SKYBRIGHT Glimmer Foil
Shop at:
SSS | SBC | SB
FOAM TAPE - WHITE
FOAM TAPE - WHITE
Shop at:
SSS | SK
FOAM TAPE - BLACK
FOAM TAPE - BLACK
Shop at:
SSS | SK
RED BERRY GLOSS Nuvo Crystal Drops
Shop at:
SSS
White Gloss Nuvo Crystal Drops
Shop at:
SSS | AMZ
CLEAR ACETATE SHEETS
Shop at:
SSS | SK
ICY SPARKLE CRYSTALS
Shop at:
SSS | SK
MAJESTIC FUSION
MAJESTIC FUSION
Shop at:
SSS | SK
To make supplies easy for you to find, I have linked them above. If something is no longer available I will link to a similar product. Affiliate links may be used depending on the product linked. Please help support my blog by using these links while shopping at no additional cost to you. For more information about the affiliates I use, please visit my disclaimer here. Thanks so much for all your support!