Tuesday, October 9, 2018

Dancing Deer Die for Simon Says Stamp Fun and Festive Release | Partial Spinner Card


Hello Friends and thanks for joining me today! 

 I can finally share the card I made for Simon Says Stamp Fun and Festive Release 😄


My card features the new Dancing Deer Die. The idea I had for this card was to make it look like the Deer, lets call him Rudolf because he has a red nose 😉 was flying over the moon across a night sky. If you know me, you'll know I love interactive cards... so for this card I made it so that the moon spun from one side to another without letting the deer spin all the way around.

Dancing Deer Die for Simon Says Stamp Fun and Festive Release | Partial Spinner Card by ilovedoingallthingscrafty.com

I have been wanting to make a tall and skinny card for the longest time so I thought this card would work perfectly. 
  • To begin, I painted my night sky using Mijello Mission Gold Watercolors using a mix of Persian Blue and Ivory Black. 
  • To the background I added white splatters using a copic white pigment. Set it aside to dry.
  • Next I did all my die cutting. A white layer of the deer, a brown one and then a lighter brown for the antlers. I then pieced the deer together and added a red crystal to the nose.
  • I then die cut the pieces for the moon, 2 large circles for the moon, and 2 smaller circles to make the spinner element. 
  • I glued the 2 large circles together, then blended some Hickory Smoke Distress Oxide Ink to the outer edge of the circle. Sprayed some water drops and picked it up with a paper towel.
  • Next, I worked on the spinner mechanism by gluing a flat button onto one of the smaller circles I had cut out. Set it aside to dry.
  • I then die cut a small circle on the upper half of the night sky background, slightly larger than the button. 
  • Next I placed the button through opening of the die cut circle and glued the other small die cut circle to the top. 
  • Once the spinner was dry and in place I added foam tape behind the background panel to pop it up and allow the spinner to move freely. Avoiding foam around the spinner area. Here is a link of a video to a previous spinner I created if you want a better idea of a similar process.
  • Before attaching the moon to the spinner, added a couple of pieces of foam tape around the mechanism to act as movement stoppers. One at the the 4 o'clock mark and another at the 9 o'clock mark. Do not remove the protective tape.
  • I then glued the deer onto the moon. Right about the middle part of the deer's body I added another piece of foam tape so that that piece would catch on the pieces that were already glued down on the panel. I then carefully placed and glued the moon onto the center of the spinning mechanism.


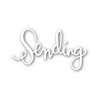
  • Next I die cut 3 layers of the Sending Die using white cardstock, stacked and glued them together and then added a silver glitter layer of cardstock to the top. 
  • Repeated the same thing with the Christmas Blessing Die.

Dancing Deer Die for Simon Says Stamp Fun and Festive Release | Partial Spinner Card by ilovedoingallthingscrafty.com
  • Finished off the card by adding some white gel pen details and crystals.

Dancing Deer Die for Simon Says Stamp Fun and Festive Release | Partial Spinner Card by ilovedoingallthingscrafty.com

The completed card measures 4 x 8.5 inches.

Here is a peak of the card in action.


I hope this partial spinning Christmas Blessings Deer card inspired you today.

Don't forget to check out all the new Fun and Festive Release Goodies!

Thank you for stopping by 😊
Until next time... Happy Crafting 👋

SUPPLIES
To make supplies easy to find, I have linked them below. If something I used is no longer available I will link to a similar product.
Affiliate links may be used depending on the product. Your purchases help keep my blog running, so thanks in advance for the support!
Supplies marked with an asterisk (*) were generously sent to me.
Dancing Deer Die
*Dancing Deer Die
Shop at:
SSS
SENDING Wafer Die
SENDING Wafer Die
Shop at:
SSS
Christmas Blessing Dies
Shop at:
SSS
Nested Circle Dies
Nested Circle Dies
Shop at:
SSS
Mijello Mission Gold Water Color Palette Set
Shop at:
SSS | AMZ
Oxide Ink Pad HICKORY SMOKE
Shop at:
SSS
Copic Opaque White Pigment
Shop at:
AMZ
April Crystals
April Crystals
Shop at:
SSS | SK
SILVER | CRYSTALS
SILVER | CRYSTALS
Shop at:
SK
Uni-Ball Impact Gel Pen
Shop at:
SSS | AMZ

Friday, October 5, 2018

Chin Up Buttercup Bunny | No Line Coloring | Encouragement Card

Yay it's Friday!!! 

So if you are feeling down like my little Bunny Buttercup here, it's time you cheered up 😊cause it's the weekend Baby!

Chin Up Buttercup Bunny | No Line Coloring | Encouragement Card by ilovedoingallthingscrafty.com

To create this card:

  • Began by stamping out the Bunny from the Blah Humbunny set using Fadeout Ink. 
  • I stamped and cut out a mask to cover the bunny up so that I could stamp the flowers from the Chin Up Buttercup set out to build my scene. 
  • I then colored the images in using Copic markers and added detail using a coordinating prismacolor pencil. (Copics Used: Colorless Blender, RV10, Y02, Y08, Y17, YG17, B00, YG67, N0, N2, N4, N6, N8)
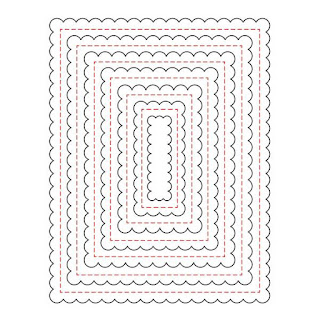
  • Once my scene was colored, I die cut the panel using the second largest frame from the Scallop A2 Frame dies.  
  • Next, I stamped the Chin Up on the top right hand side of the scalloped frame using Blackout Ink, and also stamped out Buttercup onto a another piece of paper so that I could die cut it out using the coordinating Buttercup die.
  • I also stamped out the little buzzing bee friend from the Bee Hive set, no line colored it and die cut it using the coordinating Bee Hive Dies.
  • Now that all the pieces were cut and colored I assembled the card, popping up the little bee and the Buttercup sentiment with foam tape and then attaching the scalloped panel to a bright yellow piece of cardstock cut to 4.25 by 5.5 inches, which was then mounted onto an A2 size card base.
  • I then added some Summer Sun confetti around the Buttercup greeting in the front panel and added some white detailing with a gel pen.

Chin Up Buttercup Bunny | No Line Coloring | Encouragement Card by ilovedoingallthingscrafty.com 
  • To the inside of the card I used a couple of stamps from the With Sympathy stamp set to stamp out the encouragement greeting. 

Chin Up Buttercup Bunny | No Line Coloring | Encouragement Card by ilovedoingallthingscrafty.com


Hope you think of this Chin Up Buttercup Bunny card the next time you need an idea to brighten someone's day! For more inspiration using Honey Bee goodies check out the HB Blog!

Thank you for stopping by 😊
Until next time... Happy Crafting 👋

SUPPLIES
To make supplies easy to find, I have linked them below. If something I used is no longer available I will link to a similar product.
Affiliate links may be used depending on the product. Your purchases help keep my blog running, so thanks in advance for the support!

Chin Up Buttercup
Chin Up Buttercup
Shop at:
SSS | HBS
Chin Up Buttercup Dies
Shop at:
SSS | HBS
Blah Humbunny
Blah Humbunny
Shop at:
SSS | HBS
Bee Hive
Bee Hive
Shop at:
SSS | HBS
Bee Hive Dies
Bee Hive Dies
Shop at:
SSS | HBS
With Sympathy
With Sympathy
Shop at:
SSS | HBS
Scallop A2 Frames Dies
Shop at:
HBS | SSS
Summer Sun Confetti Mix
Shop at:
HBS
Neenah  80 LB SOLAR WHITE
Neenah 80 LB SOLAR WHITE
Shop at:
SSS | AMZ
Tim Holtz Stamp Platform
Shop at:
SSS | AMZ
Fadeout No Line Ink
Fadeout No Line Ink
Shop at:
SSS | IO3
Blackout Hybrid Detail Ink
Shop at:
SSS | IO3
Prismacolor Colored Pencils 48 Pack
Shop at:
SSS | AMZ
Sizzix Big Shot
Sizzix Big Shot
Shop at:
SSS | AMZ
STANDARD CUTTING PADS
Shop at:
SSS | AMZ
Magnetic Platform
Magnetic Platform
Shop at:
SSS | AMZ
Uni-Ball Impact Gel Pen
Shop at:
SSS | AMZ
MULTI MEDIUM MATTE Glue
Shop at:
SSS | AMZ
Double Ended Jewel Picker
Shop at:
SSS | AMZ | HBS
Double-Sided Foam Tape
Shop at:
SSS | AMZ

Thursday, October 4, 2018

Thinking Of You Card | Coloring With Distress Oxide Inks


Hey everybody 👋

Today I’m sharing a water coloured card using distress oxide inks, and featuring some of the older stamps sets from Ink On 3. I hadn't water colored for a while and I was missing it, happy I did because I am super happy with the bright and colorful results I got!

Thinking Of You Card | Coloring With Distress Oxide Inks by ilovedoingallthingscrafty.com

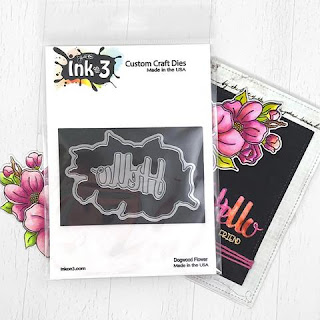
To create this card I did some ink smooshing onto the card panel using three different distress oxide inks to create the rainbow like background. Once the panel was completely dry I stamped out the images using Juicy Ink and then heat set it with  Arctic White embossing powder. Next, I took the same colors that I smooshed onto my surface and used them to color in the details of the vase from the Posies Set and the flowers from the Roses in Bloom set by adding multiple layers of oxide pigment. I then flicked some splatters of paint for some added splashes of color onto the panel and then die cut it using a stitched scallop rectangle die. For the sentiments I used the Hello stand alone die from the Dogwood Flower set and die cut 3 pieces and stacked them together. I then added Juicy Ink to the top of the Hello and added a coat of Crystal Clear Powder to emboss it. Next, I stamped out the thinking of you sentiment from the Posies stamp set using Salty Ocean distress ink and again used the Crystal Clear powder to heat set the ink. Finished off the card by adding some sparkling sequins.

Thinking Of You Card | Coloring With Distress Oxide Inks by ilovedoingallthingscrafty.com
Hope this very loosely colored water colored card has inspired you today! For more inspiration using Ink On 3 supplies and products visit the Ink On 3 Blog.

Thank you for stopping by 😊
Until next time... Happy Crafting 👋

SUPPLIES
To make supplies easy to find, I have linked them below. If something I used is no longer available I will link to a similar product.
Affiliate links may be used depending on the product. Your purchases help keep my blog running, so thanks in advance for the support!

Roses In Bloom Stamp Set
Shop at:
SSS | IO3
Posies Stamp Set
Posies Stamp Set
Shop at:
IO3
Dogwood Flower Coordinating Die Cuts
Shop at:
SSS | IO3
Juicy  Ink
Juicy Ink
Shop at:
SSS | IO3
Arctic White Ultra Powder
Shop at:
SSS | IO3
Crystal Clear Ultra  Powder
Crystal Clear Ultra Powder
Shop at:
SSS | IO3
Oxide Ink Pad PICKED RASPBERRY
Shop at:
SSS
Oxide Ink Pad SQUEEZED LEMONADE
Shop at:
SSS
Oxide Ink Pad SALTY OCEAN
Shop at:
SSS | AMZ
MFT STITCHED MINI SCALLOP RECTANGLE Die-Namics
Shop at:
SSS
Pretty Pink Posh SPARKLING CLEAR MIX
Shop at:
SSS