Thursday, March 21, 2019

Simple Easter Shaker Card Using Small Stamps to Create a Background | Ink On 3


Hello, my sweet friends 👋 

YAY! Finally, it actually feels like Spring has arrived here in our city of Edmonton.  All the snow is melting, there are water puddles everywhere and we have even enjoyed a few muddy bike rides! 

Now that Spring has arrived, Easter is just around the corner. So today I have a simple Easter Shaker card to share with you all and I even filmed the process video for you to watch. It's been so long that I really had to relearn the process of making, editing and just uploading it to YouTube all over again. I'm hoping I will be a little more regular with sharing videos so that I don't forget the process again.

Simple Easter Shaker Card Using Small Stamps to Create a Background for Ink On 3 by ilovedoingallthingscrafty.com

So for those of you that would rather watch the process, this is for you and don't forget to →Subscribe for future inspiration!


CARD DETAILS

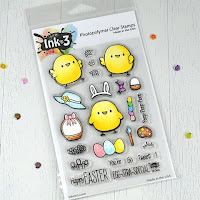
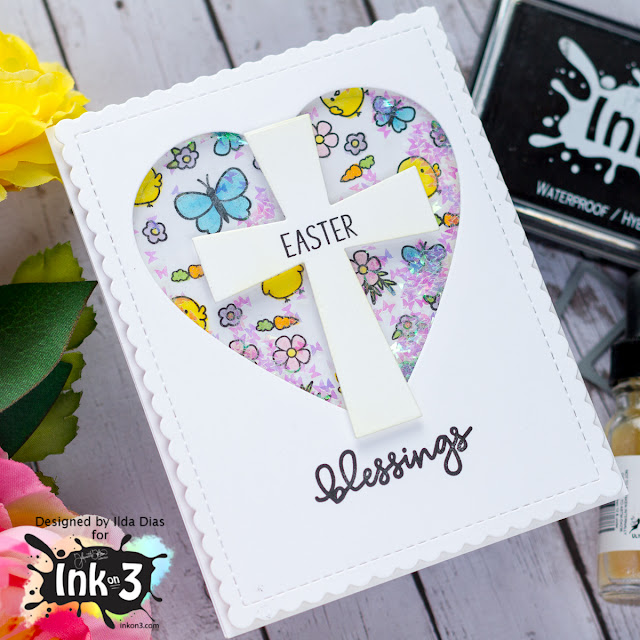
For this card today I began by die cutting the top panel to create the heart-shaped window and the Cross from the Blessing Coordinating Die set. I then took a bunch of Spring/Easter small stamps from a variety of Ink On 3 sets and stamped out using Blackout Ink to create the background on to the front of the card base and colored them in using Copic Markers. (All the Ink On 3 Sets I used will be listed below in the thumbnail links below).

Simple Easter Shaker Card Using Small Stamps to Create a Background for Ink On 3 by ilovedoingallthingscrafty.com

Next, I glued the acetate to the back of the heart panel opening and added the foam tape along the heart to create the well for the shaker pieces and also added foam to the edges of the card.

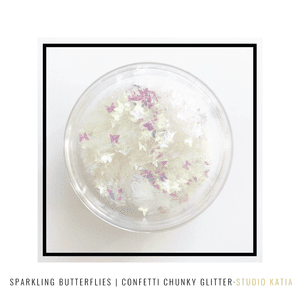
On the card base, where the middle of the shaker window will be, I added a little pile of the butterfly glitter and then closed up the shaker by adhering the top panel to the card base. 

Simple Easter Shaker Card Using Small Stamps to Create a Background for Ink On 3 by ilovedoingallthingscrafty.com

To finish I stamped the Easter and Blessing on the card front pieces and glued the cross onto the heart. To the cross, I added some color by blending on some squeezed lemonade distress oxide ink. And that is pretty much it for this simple shaker card.

SUPPLIES
To make supplies easy to find, I have linked them below. If something I used is no longer available I will link to a similar product.
Affiliate links may be used depending on the product. Your purchases help keep my blog running at no extra cost to you, so thanks in advance for the support!
Bunny Hugs
Bunny Hugs
Shop at:
IO3
Magical Unicorn
Magical Unicorn
Shop at:
SSS | IO3
Biker Bunnies
Biker Bunnies
Shop at:
SSS | IO3
Lil Chicks
Lil Chicks
Shop at:
SSS | IO3
Hollyhocks
Hollyhocks
Shop at:
SSS | IO3
Blessings
Blessings
Shop at:
SSS | IO3
Blessings Coordinating Die
Shop at:
IO3
Liquid Pixie Dust
Liquid Pixie Dust
Shop at:
SSS | IO3
Blackout Ink
Blackout Ink
Shop at:
SSS | IO3
Mini Misti Tool
Mini Misti Tool
Shop at:
SSS | AMZ | SB | SK
Neenah  80 LB SOLAR WHITE
Neenah 80 LB SOLAR WHITE
Shop at:
SSS | AMZ
Inkadinkado Embossing Magic
Shop at:
SSS | AMZ
Grafix Acetate 9x12-Inch, 25 Sheets, 003 Clear
Shop at:
AMZ
Oxide Ink Pad SQUEEZED LEMONADE
Shop at:
SSS
BLENDER BRUSH Set
BLENDER BRUSH Set
Shop at:
SSS | AMZ | PF
Sparkling Butterflies | Confetti Glitter
Shop at:
SSS | SK
STUDIO KATIA GLUE
STUDIO KATIA GLUE
Shop at:
SSS | SK
Stacking Hearts Dies
Shop at:
HBS
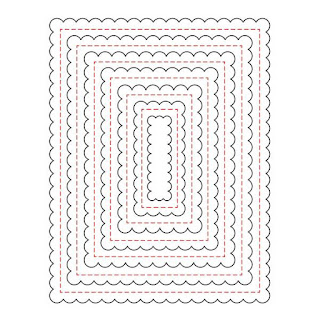
SCALLOP A2 FRAME HONEY CUTS
Shop at:
SSS | SB | HBS
Double-Sided Foam Tape
Shop at:
SSS | AMZ

For more inspiration using Ink On 3 supplies visit Inkon3.com

Thank you all for stopping by 😊
Until next time... Happy Crafting 👋

Monday, March 18, 2019

Honey Bee Spring Scene | Pop-Up Shadow Box Card | Honey Bee Stamps


Hello friends and Happy Monday!

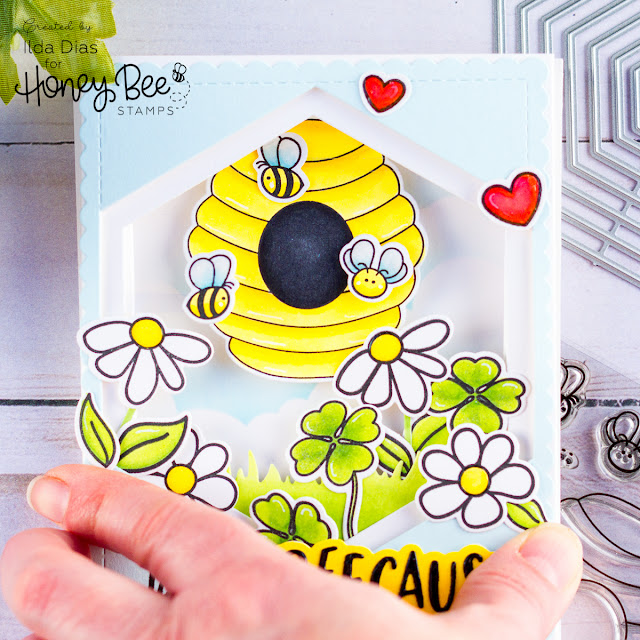
Today I have a Spring-inspired Pop-Up Shadow Box Card mixing and matching a bunch of Honey Bee Stamp products that I am also sharing over on the Honey Bee Stamps Blog. If you are a Jennifer McGuire fan, you may have seen her share how to create these amazing pop-up cards on a recent tutorial of hers. So, of course, I was dying to try this card technique out!

Honey Bee Spring Scene Pop-Up Shadow Box Card for Honey Bee Stamps by ilovedoingallthingscrafty.com
CARD DETAILS

I began this card by cutting out the top and bottom panels at 6 1/4" x 5 1/2".  To create the pop-up mechanism you will need to score both panels, on each side at 1/2" and at the 1" mark. Then fold the pieces in to create a zig-zag fold on each side on the panels. 

To the top panel, I die cut a hexagon window. I also die cut the same window using the same hexagon die onto a piece of blue cardstock that I had previously die cut using the Scalloped Frame die.
To add another layer of dimension I used the next smaller Stacked Hexagon die to die cut another window to add beneath the card front. 

Now that all the pieces for the card were made I then set them aside to plan out the scene.

Honey Bee Spring Scene Pop-Up Shadow Box Card for Honey Bee Stamps by ilovedoingallthingscrafty.com

I began by creating a background for the card. On a piece of Bristol paper, I blended out some clouds using the Outdoor Scene Builder Stencils

Next, I stamped out all the images I was planning on using on to Neenah cardstock and colored them in using Copic Markers. I then die cut each image using their coordinating dies. 
Below is a list of the stamps and coordinating dies I used.

Flowers and Hearts - Busy Bee Stamp Set | Busy Bee Honey Cuts

To the back piece of the card that I had initially scored, I glued down the background cloud piece. Next, I glued the hive down by popping it up with foam tape. I also added the floating bees by gluing them to thin strips of acetate and attaching them to the side flaps on the bottom panel. 

To the top piece, I began by gluing the top blue scalloped piece to the card front. I then attached the smaller hexagon panel to the inside of the card using foam tape. Before gluing down the colored images, I die cut a grass border piece colored it with Copics and glued it along the bottom of the hexagon to build the scene from. Once I was happy with the arrangement of the flowers I glued them in place. To finish the card, I added glue to the side zigzag tabs and adhered them together. 

The card when finished will measure 4 1/4″ x 5 1/2″ when flattened and will fit nicely into an envelope.


Honey Bee Spring Scene Pop-Up Shadow Box Card for Honey Bee Stamps by ilovedoingallthingscrafty.com

Here is a top view of the card as it stands up without any problems. Check out all those layers of dimension!

Honey Bee Spring Scene Pop-Up Shadow Box Card for Honey Bee Stamps by ilovedoingallthingscrafty.com


For sparkle, I added some Liquid Pixie Dust and a layer of glossy accents. The sentiment was created by stamping out the just from the Hi Honey stamp set and then I pieced together the Beecause from the Hi Honey Cuts set.

Honey Bee Spring Scene Pop-Up Shadow Box Card for Honey Bee Stamps by ilovedoingallthingscrafty.com
SUPPLIES
To make supplies easy to find, I have linked them below. If something I used is no longer available I will link to a similar product.
Affiliate links may be used depending on the product. Your purchases help keep my blog running at no extra cost to you, so thanks in advance for the support!
HEXAGON SOLID STACK CUTS
Shop at:
SSS | SB | HBS
SCALLOP A2 FRAME HONEY CUTS
Shop at:
SSS | SB | HBS
Bee Hive
Bee Hive
Shop at:
SSS | SB | HBS
Bee Hive Dies
Bee Hive Dies
Shop at:
SSS | SB | HBS
Busy Bee Stamp Set
Busy Bee Stamp Set
Shop at:
SSS | SB | HBS
Busy Bees | Honey Cuts
Shop at:
SSS | SB | HBS
MAE THE MOUSE
MAE THE MOUSE
Shop at:
SSS | SB | HBS
MAE THE MOUSE HONEY CUTS
Shop at:
SSS | SB | HBS
HI HONEY
HI HONEY
Shop at:
SSS | SB | HBS
 Hi Honey Dies
Hi Honey Dies
Shop at:
SSS | SB | HBS
Outdoor Scene Builder Stencils
Shop at:
SSS | SB | HBS
Grass Border Dies
Grass Border Dies
Shop at:
SSS | SB | HBS
Neenah  80 LB SOLAR WHITE
Neenah 80 LB SOLAR WHITE
Shop at:
SSS | AMZ
Sizzix Big Shot
Sizzix Big Shot
Shop at:
SSS | AMZ | SB
Magnetic Platform
Magnetic Platform
Shop at:
SSS | AMZ
STANDARD CUTTING PADS
Shop at:
SSS | AMZ
Strathmore Bristol Pad
Shop at:
SSS | AMZ
Oxide Ink Pad BROKEN CHINA
Shop at:
SSS | SB
Tumbled Glass Oxide Ink
Shop at:
SSS | SB
BLENDER BRUSH Set
BLENDER BRUSH Set
Shop at:
SSS | AMZ | IO3
Grafix Acetate 9x12-Inch, 25 Sheets, 003 Clear
Shop at:
AMZ
SSS Card Stock 24 Colors
Shop at:
SSS
Mini Misti Tool
Mini Misti Tool
Shop at:
SSS | AMZ | SB | SK
Blackout Ink
Blackout Ink
Shop at:
SSS | IO3
Liquid Pixie Dust
Liquid Pixie Dust
Shop at:
SSS | IO3
Glossy Accents
Glossy Accents
Shop at:
SSS | AMZ | SB
Sakura 6 WHITE Gelly Roll Classic Medium Point Pens Set
WHITE Gelly Roll Pens Set
Shop at:
SSS | AMZ
Double-Sided Foam Tape
Shop at:
SSS | AMZ


I hope you were inspired by this creation. I had so much fun making this Honey Bee Spring Scene Pop-Up Shadow Box Card. It may look and sound complicated to do but it is actually super easy to make and the dimension you get is pretty amazing! 

Thank you for stopping by 😊
Until next time... Happy Crafting 👋