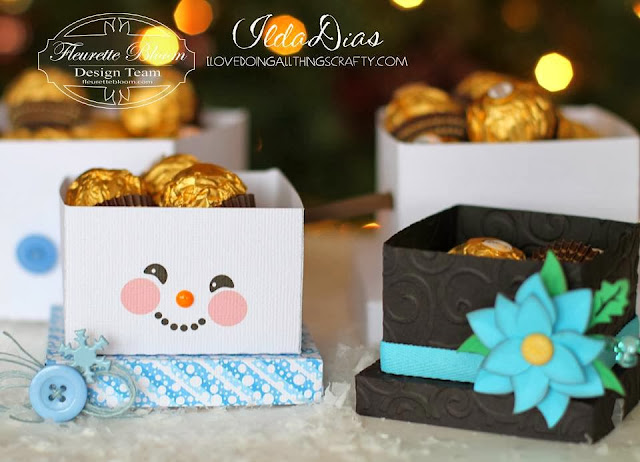
Showing posts with label Fleurette Bloom files. Show all posts

Friday, October 3, 2014

21st Birthday Box Card


Hi Guys!

So this week my baby sister Catarina celebrated her 21st Birthday! I can't believe it. Feels like it was yesterday I was in the delivery room with my mom!!! Yes I was, and was also the first person to see her... I was 17 when she was born and that experience was the reason I went into Nursing school! 

So today I want to share with you the cute birthday box card I made her. The files come from Fleurette Bloom's Celebrations SVG Kit. I love that the kit includes various elements that you can use and play with.


Instead of adding a cake, I thought it would be cute to make the 21 as a candle.


The stamp comes from Craftin Desert Divas - Happy Celebrations.
The bright paper I used comes from Doodlebug Designs Springtime paper pad.
Love this collection!


Here is a pic of me and my baby sister. 
This photo was taken a few weeks ago at our cousin's wedding. 
Happy Birthday Cat! Love you :)


Hope you enjoyed my post today and got to know me a little more!

Thanks for stopping by!
Happy Crafting  :)


Friday, March 28, 2014

Butterfly Shadow Box for Fleurette Bloom-LoveBug Creations Co-Hop!


Welcome to the Fleurette Bloom-LoveBug Creations Co-Hop!


If you've flown over from Katie's Blog, then you've joined the parade, but if you've stumbled on this hop and want to begin with the first stop, soar over to Fleurette!

The pairing of LBC's fantastic rumple ribbon and other trimmings with Fleurette Bloom's outstanding SVG's and digital delights is a great way to jazz up your projects - who wants to be ho-hum? Not us gals.........so grab your favorite beverage and settle back for some crafting inspiration for just the right touch of class!

For my project, I chose to create a Spring inspired Butterfly Shadow Box!

Isn't it pretty?!?


To create this, I altered the large nesting box SVG file from Fleurette Bloom's Nesting Gift Box SVG Collection by cutting the side panels of the box to measure 2" wide. The front of the frame, was simply created by cutting out a square from the box lid, leaving approximately a 1" border around it.

If you want to hang the frame like I did, use a hole punch to cut the holes on each side of the lid. Using a pencil, mark those spots on the bottom of the box once the lid is in place, then punch the holes out. This will align the holes properly. Feed the ribbon ends through each side and create a knot to keep the ribbon in place. This will also keep the lid from falling off as well!


To hang the butterfly through the opening of the frame, I used some hot glue and glued the back of the butterfly to a fishing line. Next, take a pin and puncture the center top and the bottom of the outside frame of the box. Feed the line through the top and the bottom holes, centering the butterfly in the middle of your opening. Secure the ends of the line onto the outside of the box with a little piece of tape. To the inside of the box, where the line runs through I added some hot glue to ensure that the line doesn't slip out. Once the glue is dry, you may remove the tape and trim the line. NOTE: You may like to do this step before putting the ribbon through the lid as I mentioned above.


To the outside of the box I embellished it with some beautiful Cherry Blossom Branches, added some gorgeous pink panther rumple ribbon, and rose bloom button!
Hope this has inspired you to create your own Spring Creations ;)

Now, how about some blog candy??


Fleurette Bloom is offering a $10 gift certificate to her Store  


 AND

LoveBug Creations is offering a $10 gift certificate to their Online Store!

LoveBug Creations
  
So what do you have to do to be in the running???
1.  Become a follower of each crafter (if you're not already)
2. Leave a love note at each blog spot with your contact info
3. For extra chances to win like our Facebook Pages and leave a comment on
 Fleurette Blooms FB Page -> Fleurette Bloom Designs and
LoveBug's FB Page and LoveBug Creations
4. Check back on Wednesday for the announcement of the winners!


For your next touch of class, please visit Tanya!


Just in case you've lost your way here is the co-hop line up again!

Thanks for stopping by!
Happy Hopping Everyone :)


Saturday, December 28, 2013

Snowman Gift Box | Ink On 3 Files

Hi Everyone!

Today I have the cutest Snowman gift box to share with you. The files all come from Fleurette Bloom Designs.

Isn't he SOOOO cute? "HELLO" he says :)

Snowman Gift Box | Ink On 3 Files

To recreate this, here are the files you will need:

This project was all cut and created on the Silhouette Cameo using SSDE.


Is that not the most adorable face? Those cheeks look so pinch-able!

Snowman Gift Box | Ink On 3 Files

This box is perfect for holding a lot of great little surprises. Also, would make a great box for a Winter Birthday or just to cheer someone up... that face would make anyone smile and melt their heart!  

When opened all up,  it kinda looks like the snowman is all melting... Awww  :(  poor thing, LOL!

Snowman Gift Box | Ink On 3 Files

Here he is again... sharing HUGS with you all!

Snowman Gift Box | Ink On 3 Files

I had so much fun creating this little Snowman Gift Box, hopefully it has inspired you to create one too! If you do make sure you share it on Fleurette Bloom's Facebook Page. Would love to see your take on it :)


Thanks for stopping by!
Happy Crafting  :)

Monday, December 16, 2013

DIY Christmas Labels on the Silhouette with Fleurette Bloom Designs | Ink On 3 Files

My favorite projects are quick and useful! Today I want to walk you through how to make your own Christmas labels using Fleurette Bloom files. Once you know-how, you'll be making labels for everything :) 


DIY Christmas Labels on the Silhouette with Fleurette Bloom Designs | Ink On 3 Files

For this project I used:

Avery Sticker Project Paper (Silhouette Brand Printable Sticker paper is also available, but did not have any on hand)
Silhouette Cameo with SSDE

Instructions:
  1. The first thing you will need to do is select the PNG images and the SVG files you want to use.
  2. Open them up onto your workspace.
  3. With the SVG's you have selected to use as labels, click on each SVG and change the cut style to "cut". 
  4. Group one PNG design with one SVG file. (Play with the PNG sizes until you like the look and placement on each label). 
  5. I chose to include "to: and a from:" If you do that ensure you change the cut style setting on the font to "no cut". Copy and paste it into each label and group them.
  6. I don't like to waste paper, so once my labels were created I tried to fit as many as possible on to one sheet. You will notice I changed some of them in size to fit more! Variety in sizes is good to have because all gifts come in different sizes too ;)

Since I had set my line color to transparent, it was hard to visually see the labels when working on the white workspace. To solve for this I just worked on the side of my workspace (see image below) You could also in the Page setting, set it to reveal your cutting mat.

DIY Christmas Labels on the Silhouette with Fleurette Bloom Designs | Ink On 3 Files
  • Slide the labels back onto your workspace. Turn on the cut line setting and align your shapes within your registration marks. Make sure that the only cut lines you see are only on the edges of the labels. 
DIY Christmas Labels on the Silhouette with Fleurette Bloom Designs | Ink On 3 Files
  • Now you are ready to send it to the printer.
  • Before cutting out your shapes, change the pressure setting on your cutting machine, I set my pressure setting to 2. This is just enough to cut through the top layer leaving the backing intact. 
That's it! Easy right!?

Here is a little treat box I made with one of the labels I cut out! Since you already know who the gift is from you could also have the names already printed on there too :)

DIY Christmas Labels on the Silhouette with Fleurette Bloom Designs | Ink On 3 Files

I hope you find this tutorial useful! This was so easy and quick to do on the Silhouette, that I have so many ideas for other labels I want to make now! If you have any questions I'd be happy to answer them for you :)

Also check out Fleurette's latest release!
Perfect for any occasion "Nesting Gift Box" SVG Collection.

Thanks so much for stopping by!
Happy Crafting  :)

Tuesday, October 29, 2013

Spiderweb Pillow Treat Boxes | Ink On 3 Files


Need some last-minute quick Halloween treat boxes for the kiddos? 

I have the perfect Spiderweb Pillow Boxes for you, just released today by Fleurette Bloom! On SALE for $0.49. These will take you around 5 minutes to cut out and assemble!

Spiderweb Pillow Treat Boxes | Ink On 3 Files

I enlarged the file to 8x10 inches. This way I could fit lots of goodies inside!

Spiderweb Pillow Treat Boxes | Ink On 3 Files

Recipe for my boxes:
This fun paper comes from and Company Spooktacular Collection
Trendy Twine - Lime Grapesicle and Limeade
Epiphany Shape Round 25 Tool and bubble caps
Black Ink Pad
Ribbon

Cut on the Silhouette Cameo using the Silhouette Studio Designer Edition

Embellish these however you like, or not! They look good as they are!

Spiderweb Pillow Treat Boxes | Ink On 3 Files

Make sure you stop by Fleurette Bloom's Facebook Page and give her some love! Like her Page, if you haven't already and leave her a comment to win her latest "Anytime Pillow Box" Collection! These boxes are gorgeous and they are perfect for so many occasions!


Thanks so much for stopping by! 
Happy Crafting :)

Thursday, June 13, 2013

"Lifesaving" Wine Box for Dad | Wine Bottle Treat Box | SVGCuts


With Father's Day coming up quickly, I thought I'd better get a few gifts ready for the Day. Both of the Grand Dads and of course Daddy deserve a little treat!

Here is a super quick Print n Cut project I made. This box is so easy to do, I'm sure it would make any man happy!

"Lifesaving" Wine Box for Dad | Wine Bottle Treat Box | SVGCuts


I didn't have any stamps to coordinate with the theme so I made a digital one with fonts using the Silhouette SDE. Love how it turned out! 

For those that LOVE wine, I'm sure some days it is a lifesaver! (Shhhh, don't tell anyone I have never drank the stuff... weird right? I know... I'm Portuguese and my Dad makes his own wine... but my stomach actually turns at the smell of it, LOL!)

"Lifesaving" Wine Box for Dad | Wine Bottle Treat Box | SVGCuts

Here is what I used to create this project...

Wine Box File from SVG Cuts Classic Gift Boxes
Digital Paper and files from Fleurette Bloom's Ships Ahoy Collection. Check out this entire Element and Paper Collection! 


Cut on the Silhouette Cameo
To make my digital stamp I had to learn how to text to path. Click here for the link to a video that was very helpful!


If you are still looking for other ideas for Father's Day. here are some of my previous "Manly" projects to inspire your creativity!


Thanks so much for stopping by, hopefully, I've inspired some "Manly" creativity in you, lol! Happy Father's Day to all of the Dad's in your life! 

Happy Crafting :)

Wednesday, May 22, 2013

Lily Pad Shape Card | Ink On 3

HELLO!!! I am so excited to share with you my first Fleurette Bloom Design Team project today!

Here is a very quick card I made using some elements from Fleurette Bloom's latest Swan Lake Element Collection. The coolest part was making the coordinating envelope with the Swan Lake Digital Paper Collection. Love how turned out, so elegant... if a card can be that, lol!


I have owned my Silhouette Cameo for over a year now but had not really been using the machine to it's fullest potential! For some reason, I was always intimidated to use the fill pattern option of the program... well not anymore! All it took was one time and I am hooked! I will be using a lot more digital papers now!!! SO easy, can't believe it took me this long! Just look at how pretty the envelope is! I think it adds so much and, makes the card just that much more special! Don't forget to stop by Fluerette Bloom's Shop and check out all of her beautiful digital coordinating papers!  

Here it is again from a different angle. Isn't it SO pretty? It looks so much like the real thing! 


Take a look inside. I added a white inset layer... this adds a little extra strength and stability to the card... also makes it easier to see what is written when a darker color is used.


Here is a screenshot of how I turned the lily pad element into a shape card. If you are a visual person (like me) you'll appreciate this! It's true... a picture IS worth a thousand words!


To make this simple, I placed all my steps in one screenshot. I'll start of with the top left image of the lily pad and work clockwise.

  1. Import your lily pad base, this will then become the bottom part of the front of your card.
  2. To create the back of my card, first I copied and pasted the lily pad. Next, I drew a straight line down the side of the card and then changed the style of the line to a dash. Group them together. 
  3. Copy and paste image 2. Take your knife tool and cut the piece off just after the dash line you just created. Delete the piece with the dash line. 
  4. To create the piece that lines the inside of the card, click on the image you created in step 3, and select the internal offset option. I set my offset at 0.1 inches.

And that is how easy it is to create a shape card! Now all that is left to do is cut out all your pieces and assemble. 

Dimensions:
  • Envelope - 9.910" H x 6.380" W
  • Lily Pad - 4.425" H x 4.620" W 
  • Lily Pad top layer - 4.355" H x 4.555" W
  • Large Flower layer - 4.080" H x 4.270" W (highlight all flower layers when adjusting the measurements to keep them all proportional)
  • Sentiment Base - 0.940" H x 2.895" W
NOTE:
  • You could stop after step 2,  if you don't want to create the liner for the inside of your card. If you do, simply just cut the pieces out and place glue to the left of the dash line. Line up with the front piece of the card and press together! 
  • Don't forget you can also use the print and cut option to create the lily pad and flower if you decided not to make it 3 dimensional! 

I hope you liked my Lily Pad shape card, and have learned how to make your own... at least the way I do. I'm sure there are so many other ways! Make sure you stop by Fleurette's Blog or Facebook page today because she has got some exciting news to share with her fans!


Thanks for stopping by, leave me a comment... love to hear from you!