Showing posts with label girl. Show all posts

Monday, March 6, 2017

First Holy Communion Box Card | SVGCuts

I'm always on the lookout for cute religious card ideas and as soon as I saw SVGCuts latest Easter Box Cards SVG Kit I immediately had to get it!

This past weekend, we celebrate my youngest God Daughter's Communion Day and I thought this card would be perfect for the occasion.

Easter,bible,#SVGCuts,church,ilovedoingallthingscrafty,you tube,cross,First Holy Communion,girl,Card,Religious,process video,handmade,Box card,SVGCuts,

Isn't it beautiful?!


Here is what the backside looks like.
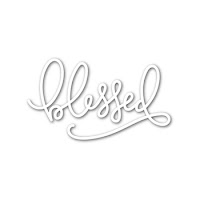
Love that blessed SSS die.


Just in case you were wondering... yes, it does fold flat and slide into an envelope!


For those of you wanting to know which files I used, here is my list:
Easter Sunday Box Card - Easter Box Cards SVG Kit
Bible - Christian Elements SVG Collection
Girl (Free file) - Praying Girl (altered, removed chest and foot)
I will have links to the supplies I used below.


And for those that want to watch it come together, here is the assembly video.
Click -> HERE to watch in HD

Hope this First Holy Communion Box Card has inspired you to create something similar for the next time you need a card for a religious event. The recipient will never receive anything like it 😉

Thanks for stopping by!
Happy Crafting 👋

SUPPLIES
To make supplies easy to find, I have linked them below. If something I used is no longer available I will link to a similar product. Affiliate links may be used depending on the product. Your purchases help keep my blog running, so thanks in advance for the support!


Easter Box Cards SVG Kit
Shop at:
SVGCuts
Christian Elements SVG Collection
Shop at:
SVGCuts
Silhouette Cameo 3
Silhouette Cameo 3
Shop at:
AMZ
Simon Says Clear Stamps YOU MATTER
Shop at:
SSS
Simon Says Stamp Premium Ink Pad INTENSE BLACK
Shop at:
SSS
EK Success Craft Tweezers
Shop at:
SSS | AMZ
Adhesive Technologies 0449M Precision Pro Glue Gun
Shop at:
AMZ
Dealglad Teflon High Temperature Resistant Non-stick Mat
Shop at:
AMZ
Ranger Mini Ink Blending Tool 1
Ranger Mini Ink Blending Tool 1"
Shop at:
SSS | AMZ
Recollections White Heavyweight Cardstock 110bs
Shop at:
AMZ
Sizzix Multipurpose Platform Extended
Shop at:
AMZ
Sizzix Big Shot
Sizzix Big Shot
Shop at:
SSS | AMZ
Simon Says Stamp BLESSED Wafer Die
Shop at:
SSS
Scotch Quick-Drying Tacky Glue 4Oz
Shop at:
SSS | AMZ
Sizzix Big Shot Kick STANDARD CUTTING PADS
Shop at:
SSS
Tim Holtz Distress Mini Ink Pad BLACK SOOT Ranger
Shop at:
SSS
Tim Holtz Distress Mini Ink Pad MOWED LAWN
Shop at:
SSS
Tim Holtz Distress Mini Ink Pad MUSTARD SEED
Shop at:
SSS
Cuttlebug Embossing Folders, Plum Blossom
Shop at:
AMZ
Tulle Fabric Spool
Tulle Fabric Spool
Shop at:
AMZ
Tulle Fabric Spool
Tulle Fabric Spool
Shop at:
AMZ
METALLICS Spectrum Noir Sparkle Pens
Shop at:
SSS | AMZ

Tuesday, March 3, 2015

Growing Up Too Fast - Mixed Media Painting


For the longest time I have been wanting to paint a mixed media painting. After spending many hours watching how to You Tube videos, and much encouragement from my friend and artist Kathy Helton, I finally got the courage to try it out!  I can already tell you that I am addicted and can't wait to create my next painting! 

What started off as a blank canvas and scrap pieces of paper, eventually morphed into a painting of my daughter, well her futuristic self I would say. The face I drew to use on my painting reminded me of her and so I let it guide the rest of my painting. My daughter Maia is 8 years old but sometimes she acts like shes 18, where has my baby gone?... this is happening way too fast for me! I guess this painting became a reflection of my feelings. 

Well what do you think?!?
 I'll tell you what I think.... I'm in LOVE with it and so is my daughter! I am SO happy with how the painting turned out :)

Hidden in the painting are the letters of my daughter's name. She hasn't found them yet and I'm not going to tell her either... one day she will realize that they are there and hopefully feel surprised.


Take a look at how the painting came together.


For those interested in the supplies I used, here is my list:
1, 9x9 canvas, scrap paper, modge podge, paint brushes, acrylic paints, scissors, stamps, ink pads, copic markers, gel pens, buttons, rhinestones, sequins, blow dryer (if you're impatient like me). Oh, and really dirty hands!

The picture below shows you what the finished painting looks like up on the wall.
I love how a really inexpensive IKEA frame completes the painting! Want to know how to do the same? Here is my secret... Take the glass off the front of the shadow box frame and place the glass behind the mat, this way you can keep the glass together with the frame if you ever what to change the picture out. Then all I did was hot glue the painting to the center of the mat. Voila, now you have a gallery like painting!


Thanks for stopping by!
Happy Crafting  :)


Friday, August 9, 2013

Rock Star Birthday Party | DIY Party

This past weekend our family celebrated my daughter's 7th Birthday.  Hard to believe my little girl is 7 already! For her party, she wanted to go with a rock star theme. She's really into karaoke these days and likes to act like a rock star... DIVA and all! I can hardly wait for those teenage years! If you've been following my blog you'll know she already had an early birthday party about a month ago with all her little girlfriends from school. Click HERE for her Paint themed Party!

Here is our little DIVA!


Other than the ceiling decor, I didn't do too much to decorate for the party. I had seen this done somewhere on Pinterest and thought about doing something similar for her party. Such a simple and inexpensive decoration too.

The only things I did purchase from Party City that were Rock Star themed were the balloons, 1 table cloth, hanging coils, and loot bags.

Here's what I used to make the ceiling decoration: 
  • 2 black plastic tablecloths 
  • 1 blue plastic tablecloth
  • 1 pink plastic tablecloth
  • 12 pink tissue paper sheets for the tissue pompom. Click HERE for directions.
(All supplies listed above were bought at a Dollar Store (for less than $5) why spend more when it goes right into the garbage when you are done!)
    All I did was cut each table cloth in half lengthwise. Then I chose my center point on the ceiling. I then took one end of the plastic pieces of table cloth gathered it together and with a thumbtack pierced it into the ceiling. Then I stretched out the same piece and secured each end of that piece with another tack. (For extra strength and to prevent it from ripping, I rolled the end of the cloth first and then pierce through two layers. This also hid the tack from view). Repeat the process with as many pieces as you like!

    Don't worry too much about the holes left behind on the ceiling, they are barely noticeable. Especially if you have a textured ceiling like I do.


    I also created this table back drop by covering 2 foam board pieces with pink wrapping paper and then used another black table to create the curtains of a stage. The stars were created with my Silhouette Cameo.


    Finally, here is the cake I made for my little Rock Star! The bottom layer was a chocolate flavored 10 inch cake and the top a vanilla flavored 6 inch cake. All covered with vanilla butter cream and finished with fondant.  I used rice crispy treats to create the guitar shape and covered it with fondant, and the guitar strings.... SPAGHETTI!  Yup, just painted them silver. I was mostly excited about the bottom quilted layer. For my first try doing this technique it turned out pretty awesome! 


    Hope you like my take on the Rock Star themed Party! I know my little girl did :)
    Thanks so much for stopping by.

    Happy Party Planning :)

    Saturday, February 2, 2013

    Ombré Princess Cake | DIY Cake


    I hope everyone is enjoying the weekend! 

    This post was pre-scheduled... right now I should be enjoying the fabulous birthday party for a very special little princess named Annabella!  Today she is 5. Her mom, a very good friend of ours asked if I would make her a birthday cake... I knew exactly what I was going to make. Since she planning a princess theme, I thought an ombré cake would be perfect for the occasion. For those of you that haven't heard this term, it means having colors or tones that shade into each other. 

    Ombré Princess Cake | DIY Cake

     So what do you think? Isn't it fabulous?!? I LOVE how it turned out. SO happy, hope the birthday girl loves it as much as I do!

    Ombré Princess Cake | DIY Cake

    Very Girly! The tiara on top is the perfect keepsake for the birthday girl! 
    Happy Birthday, Annabella!

    Ombré Princess Cake | DIY Cake

    The cake is about 10 inches high and 7 inches wide. The top layers are butter pecan and the bottom layers are chocolate cake. All covered with a vanilla buttercream icing and finished with fondant.  To get the ombré look I started with six equal pieces of white fondant and kept adding more pink to each layer, then gradually introducing more and more purple. 

    Thanks for stopping by, I have a feeling this won't be my last ombré cake!

    Have a great weekend :)