Hello and welcome back!
Today I have a fun little winter scene card to share with you featuring the new Holiday Village Stamp and Die set from the September Release. I'm a huge rainbow fan, so when I can I will go with rainbow colors in my creations :)
- To begin, I stamped out all the village images out and then colored them in using Copic Markers and then die cut them out using the coordinating dies.
- Next, I used the large frame from the Dotted Patterns Set 2 to start building the frame for the scene. I then ran that die cut piece along with the largest rectangle from the Darling Ribbons and Frames die to add the dotted stitching to the outer edge. I then stamped out the greeting from the Holiday Village. Under the frame, I added foam and popped that onto the card base. To the smaller rectangle die that resulted from the Dotted Patterns Set 2 I used the Light Ray Stencil to add some rays of glimmer paste to the top part of the rectangle. Set that piece aside to dry.
- I then began working on the inside of the framed area. I wanted to create some hills for the houses to sit on, so I used the new Trimming Borders die as it is wavy and has the same dotted detail to cut out some hill-like shapes. Then using the largest frame again from the Dotted Patterns Set 2 I die cut the hills to the same width of the rectangle frame.
- Now that the piece I added the glimmer paste rays was dry, I used it as the base to build up the scene. I first played around with the layout of the houses and hills and then once I was happy with it I glued everything in place using foam tape to pop up some pieces. I used double foam tape on the bottom hill to make that my highest piece, which allowed me to be able to add dimension throughout the scene behind that point. Finally, once the pieces were all glued down in place I added the little colorful holiday village to the inside of the frame on the card front.
For some final details:
- I added some white gel pen marks to the windows and added some silver dots to the trees.
- I also added some footprints to the snow with a light grey Copic marker.
- Glossy accents were added to all the windows and hanging Christmas lights.
- And of course, had to add some of the Iridescent Ice Flakes for more sparkle!
Here is a close up of this fun winter scene and all it's little details.
Hope this card has inspired you today, and thank you all for joining me! For more inspiration using Studio Katia products click → HERE
Until next time... Happy Crafting 👋
SUPPLIES
To make supplies easy to find, I have linked them below. If something I used is no longer available I will link to a similar product.
Affiliate links may be used depending on the product. Your purchases help keep my blog running, so thanks in advance for the support!
 HOLIDAY VILLAGE | STAMP SET Shop at: SSS | SK |
 HOLIDAY VILLAGE DIES Shop at: SSS | SK |
 Dotted Patterns - Set 2 Dies Shop at: SSS | SK |
 Dotted Patterns: Darling Ribbon Dies Shop at: SSS | SK |
 TRIMMINGS BORDERS | CREATIVE DIE Shop at: SSS | SK |
 LIGHT RAY | CREATIVE STENCIL Shop at: SSS | SK |
 IRIDESCENT ICE FLAKES Shop at: SSS | SK |
 STUDIO KATIA GLUE Shop at: SSS | SK |
 Neenah 110 LB SOLAR WHITE Shop at: SSS | AMZ | HBS |
 Tim Holtz Stamp Platform Shop at: SSS | AMZ |
 Blackout Hybrid Detail Ink Shop at: SSS | IO3 |
 Sizzix Big Shot Shop at: SSS | AMZ |
 STANDARD CUTTING PADS Shop at: SSS | AMZ |
 Magnetic Platform Shop at: SSS | AMZ |
 Glimmer Paste | Moonstone Shop at: SSS | AMZ | HBS |
 Double Ended Jewel Picker Shop at: SSS | AMZ | HBS |
 Uni-Ball Impact Gel Pen Shop at: SSS | AMZ |
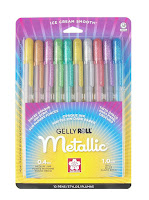
 Gelly Roll Metallic Gel Ink Pen Set Shop at: AMZ |
 Glossy Accents Shop at: SSS | AMZ |


