Yes, I am back again today with another post, and this time it's all about rainbows. 🌈 Not sure about you but whenever I see a rainbow in the sky it makes me feel happy! So that is probably why I love to use the rainbow as inspiration for many of my card creations.
Today's post and video are part of a collaboration to Celebrate It's Me JD's 50K YouTube Subscribers but at this point, she is closer to 60K! Make sure you watch the video as there is a great GIVEAWAY involved which I tell you all about over on my YT channel.
Don't forget to SUBSCRIBE to my YT Channel for Future Inspiration.
Below I am sharing pictures of the Rainbow creations you will see in today's video. I will show you various ways on how to incorporate the colors of the rainbow into your cards using various methods, different media, and techniques. Most of them are super simple. I'll try my best to summarize each card below. I used lots of products from a variety of companies, so if you are curious about anything I used I will have them all linked below and in the video description of the video.
CARD DETAILS
Stenciled Rainbow Card
For this first card, I used the MANDALA STENCIL from Studio Katia and blended Distress Oxide Inks starting with Candied Apple, Carved Pumpkin, Mustard Seed, Lucky Clover, Mermaid Lagoon, and finished with Wilted Violet. I then cut the card panel in half and the used the SIMPLE BORDERS to add a dotted stitched edge and glued them to the top and bottom of the card base. I then stamped the sentiments in the middle of the opening that comes from the ALOHA and the JAPANESE PEONY stamp sets and finished off the card by adding some IRIDESCENT BUBBLES.
Blended Rainbow Background Card
For this next card, I blended out the rainbow using only 3 colors of Distress Oxide Inks. I began with blending out Mustard Seed to the middle of the panel, and then the Picked Raspberry to add the pink and the orange color and then on the other side I blended out the Salty Ocean to create the blue and the green and then I brought back the Picked Raspberry to blend out the purple color. To add some sparkle to the background I applied a layer of Moonstone glimmer paste using the large POLKA DOT BACKGROUND STENCIL from Honey Bee Stamps. The sentiment comes from the RAINBOW WISHES set and then I finished off the card with a few Clear Iridescent sequins.
Ink Smooshed Background Card
Using the ink that was on my craft mat from the previous card, I sprayed it with some water and then picked up by pressing the paper into the puddles of ink to create the smooshed soft rainbow colored background. Each time I picked up ink I would dry paper before picking up the next layer of color. It's difficult to see but this balloon is filled with a thin layer of confetti glitter that I sandwiched and glued between the paper and vellum layer. The belated birthday sentiment comes from the Studio Katia BIRTHDAY GREETINGS set.
Paper Pieced Card
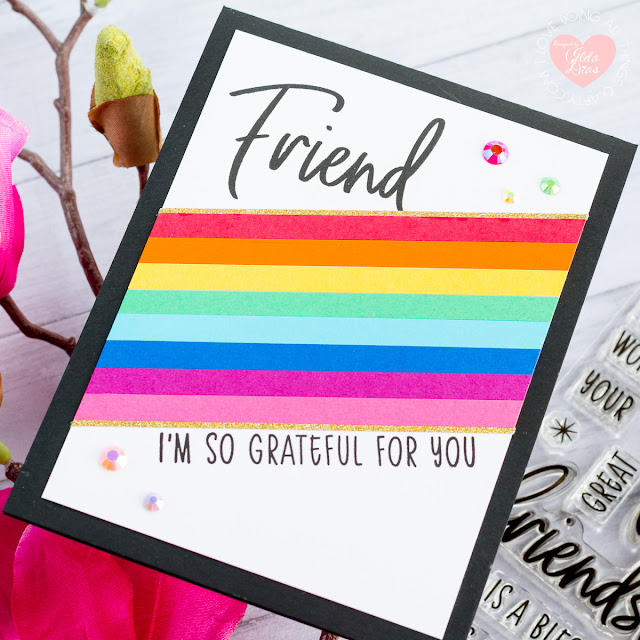
This next rainbow card was probably the easiest to make. I used paper scraps to cut my pieces into 1/4 inch strips of paper. I then just glued them to the card panel in rainbow order and then trimmed off whatever hung off the panel. The stamps I used here comes from the FRIENDSHIP set from Honey Bee Stamps.
Colored Rainbow Backgrounds
The next couple of cards I used a few different media to add rainbow colors to the backgrounds. In the first card, I colored the Circles of Faith from Picket Fence Studios in using Zig Clean Color Brushes. I then also colored the cute little images from I am a Hugger in rainbow colors using Copic Markers.
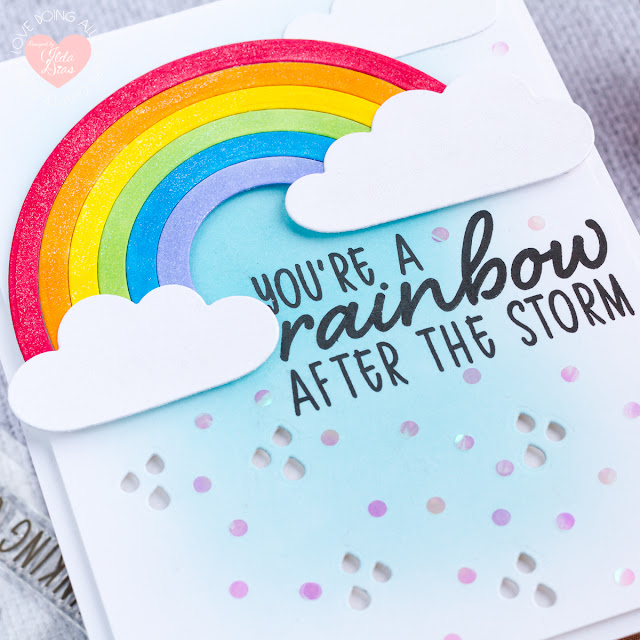
This was the only actual Rainbow card I created. Here I die cut the Rainbow pieces from the RAINBOW WISHES dies set using white cardstock. I then used Copic Markers to color in each arc. Using markers to color in the rainbow is probably quicker than die cutting each piece out from colored cardstock. I then die cut the little drops from the card panel, blended out Salty Ocean DO ink to the background and then stamped out the greeting from the RAINBOW WISHES stamp set. To make this card shine, I added a layer of Liquid Pixie Dust to the Rainbow and the Clouds and then added some JUST CHUNKY CONFETTI GLITTER as raindrops.
Stamped Rainbow Cards
For the next couple of cards, I used 3 stamp pads to create the Rainbow colors on the stamped images. I used the HERE FOR YOU stamp from Honey Bee Stamps and began by inking it with Mustard Seed Distress Oxide Ink in the center and then added the Picked Raspberry and the Salty Ocean to the outer edge. Where I added an overlap of color toward the center, the two colors blended together leaving behind an Orange and Green color. It is best to use a stamp positioner for this technique as you will need to stamp the image multiple times to blend out the ink. I then heat set the entire stamped image using clear embossing powder as theses inks take a while to dry. For the top card (in the image below) I fussy cut and popped it up with foam onto the card base and finished it some WHITE GEM STICKERS.
The card behind it was done by misting the ink left behind on the stamp with water and stamping it off onto Bristol paper. This is a great way to use up all of the ink and get a second card by doing some second generation stamping.
Alcohol Ink Rainbow Background
This next card turned out to be my favorite. A little messy to do, but the results were so worth it. For this one, I began with a piece of Yupo Paper, added way too much Alcohol Blending solution and then dropped in my colors in rainbow order. I used Red Pepper, Sunshine Yellow, Meadow Prairie, Pool and Wild Plum alcohol inks from Tim Holtz/Ranger. To add the gold foiling all I did was apply some Gold deco foil to the top of the panel while the ink was still tacky and then burnished it into the areas with my fingers which left behind this gorgeous texture and shine. All I did then was cut the panel at a diagonal and added a sentiment to space in between. The sentiment I used comes from Ink On 3's Magical Unicorn set.
Rainbow Crystal Card
This next card is also pretty cool! As you can see the colors come from the crystals that I have glued to the area below the die cut STAR. To make this pretty card, I traced out the top die cut star onto the card base and then added the crystals in rainbow order from the bottom left toward the top right, adding a couple of rows of the same color. Once the crystals were all glued in place I then lined up the top card panel with the star as best as I could and glued it in place using a layer of foam tape. To finish off the card I stamped out the sentiments from the WISH set and added a stacked WISH die cut across the star. To make the shine, I added Liquid Pixie Dust. I also used vellum as a shadow layer to let more color pop through the opening.
Adding a to Rainbow Embossing Paste
For this last card, in the video, I show you how easy it is to add color to embossing paste without mess or a lot of work. I won't go into too many details on explaining this card as I have recently shared the process video for it. But in it, I share with you how to create this Rain Maker Shaker Interactive card using products from Studio Katia and their dies in ways other then they were intended for. Click → HERE for the YT video or → HERE for the Blog Post.
I hope you have found today's blog post and video informative and are inspired to add Rainbows to your Cards. Don't forget to Hop along on the Video Hop for more inspiration from some of your favorite YouTubers and enter the Giveaway over on my YT Channel.
A special thanks to JD once again for inviting me to participate in this Video Hop Celebrating her 50K Subscribers. For more information on the Hop please visit It’s Me JD’s Blog
Thank you for stopping by 😊
Until next time... Happy Crafting 👋
SUPPLIES
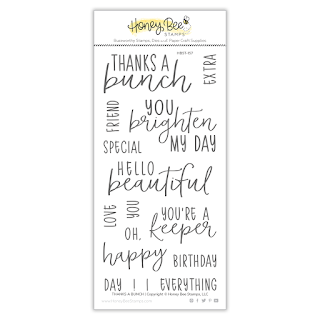 THANKS A BUNCH SET Shop at: SSS | SB | HBS |
 RAINBOW WISHES SET Shop at: SSS | HBS |
 FRIENDSHIP Shop at: SSS | SB | HBS |
 HERE FOR YOU Shop at: HBS |
 WISH Shop at: SSS | HBS |
 POLKA DOT BACKGROUND STENCILS Shop at: SSS | SB | HBS |
 RADIANT | BACKGROUND STENCIL Shop at: HBS |
 SSS BALLOONS Craft Dies Shop at: SSS |
 WISH | HONEY CUTS Shop at: SSS | SB | HBS |
 RAINBOW WISHES HONEY CUTS Shop at: SSS | HBS |
 Stacking Stars Dies Shop at: SSS | SB | HBS |
 FRIENDSHIP HONEY CUTS Shop at: SSS | SB | HBS |
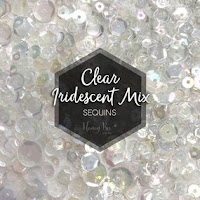 Raw Honey Mix Sequins Shop at: HBS |
 WHITE GEM STICKERS Shop at: HBS |
 CRYSTAL PRISM GEM STICKERS Shop at: HBS |
 MANDALA STENCIL Shop at: SSS | SK |
 LARGE POLKA Shop at: SSS | SK |
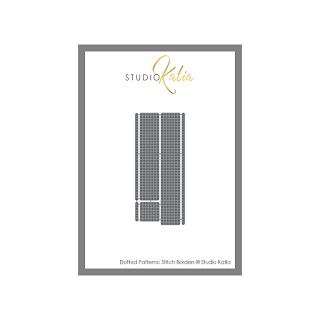 STITCH BORDERS Shop at: SSS | SK |
 FANCY CIRCLE DIES Shop at: SSS | SK |
 SKY SET DOTTED BORDERS Shop at: SSS | SK |
 YOU'RE SO RANUNCULUS DIES Shop at: SSS | SK |
 SIMPLE BORDERS | CREATIVE DIES Shop at: SSS | SK |
 JAPANESE PEONY Shop at: SSS | SK |
 A CUP OF THANKS Shop at: SSS | SK |
 ALOHA Shop at: SSS | SK |
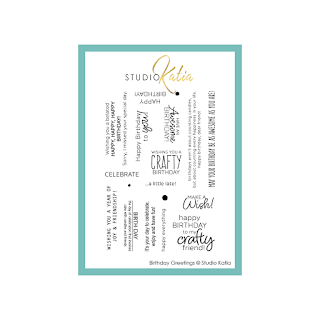 BIRTHDAY GREETINGS Shop at: SSS | SK |
 IRIDESCENT BUBBLES Shop at: SSS | SK |
 JULY | CRYSTALS Shop at: SSS | SK |
 SUNNY TOPAZ CRYSTALS Shop at: SSS | SK |
 AUGUST (SOUR APPLE) CRYSTALS Shop at: SSS | SK |
 MARCH CRYSTALS Shop at: SSS | SK |
 SEPTEMBER (SAPPHIRE) CRYSTALS Shop at: SSS | SK |
 JUNE CRYSTALS Shop at: SSS | SK |
 OCTOBER CRYSTALS Shop at: SSS | SK |
 APRIL CRYSTALS Shop at: SSS | SK |
 JUST CHUNKY CONFETTI GLITTER Shop at: SSS | SK |
 SILVER DUST | SEED BEADS Shop at: SSS | SK |
 STUDIO KATIA GLUE Shop at: SSS | SK |
 TRIANGLE TRAY Shop at: SSS | SK |
 Magical Unicorn Shop at: SSS | IO3 |
 Blackout Ink Shop at: SSS | IO3 |
 Juicy Ink Shop at: SSS | IO3 |
 Crystal Clear Ultra Powder Shop at: SSS | IO3 |
 Arctic White Ultra Powder Shop at: SSS | IO3 |
 Liquid Pixie Dust Shop at: SSS | IO3 |
 Oxide Ink Pad CANDIED APPLE Shop at: SSS |
 Oxide Ink Pad MUSTARD SEED Shop at: SSS | HBS |
 FOSSILIZED AMBER Shop at: SSS |
 Oxide Ink Pad CARVED PUMPKIN Shop at: SSS | HBS |
 LUCKY CLOVER Shop at: SSS |
 Oxide Ink Pad SALTY OCEAN Shop at: SSS | AMZ |
 MERMAID LAGOON Shop at: SSS | AMZ |
 PICKED RASPBERRY Shop at: SSS | SB |
 WILTED VIOLET Shop at: SSS |
 BLENDER BRUSH Set Shop at: SSS | AMZ | PF |
 CIRCLES OF FAITH Shop at: PF |
 I AM A HUGGER Shop at: SSS | PF |
 I AM A HUGGER DIES Shop at: PF |
 Tim Holtz WHITE ALCOHOL INK YUPO PAPER Shop at: SSS | AMZ |
 WHITE Gelly Roll Pens Set Shop at: SSS | AMZ |
 Scotch Thermal Laminator Shop at: AMZ |
 Gold Deco Foil Shop at: SSS | AMZ |
 Therm O Web RAINBOW VALUE PACK Deco Foil Shop at: SSS | AMZ |
 TRANSFER GEL Shop at: SSS | AMZ |
 Double Ended Jewel Picker Shop at: SSS | AMZ | HBS |
 Silhouette Pick Me Up Tool Shop at: SSS | AMZ |
 Embossing Paste Shop at: SSS | IO3 |
 Double-Sided Foam Tape Shop at: SSS | AMZ |
 Sakura Quickie Glue Pen Shop at: SSS | AMZ | SK |
 Zig CLEAN COLOR 60+ 80 SET Shop at: SSS | AMZ |
 PRISMA GLITTER Shop at: SSS |
 Glimmer Paste | Moonstone Shop at: SSS | AMZ | HBS |
 Clear Nylon Invisible Thread Shop at: AMZ |
 Beadalon Big Eye Curved Needles Shop at: AMZ |
 DISTRESS SPRAYER Ranger Shop at: SSS |
 Tim Holtz Stamp Platform Shop at: SSS | AMZ |
 Mini Misti Tool Shop at: SSS | AMZ | SB | SK |
 Tsukineko VersaFine ONYX BLACK Ink Pad Shop at: SSS | AMZ | SB | HBS |
 GUILLOTINE PAPER TRIMMER Shop at: SSS | AMZ | SB |
 Gold Glitter Cardstock Shop at: AMZ |
 SSS Card Stock 24 Colors Shop at: SSS |
 Neenah 80 LB SOLAR WHITE Shop at: SSS | AMZ |
 Strathmore Bristol Pad Shop at: SSS | AMZ |
 Vellum Value Pack Shop at: SSS | AMZ |
 Black Cardstock 110bs Shop at: AMZ |
To make supplies easy for you to find, I have linked them above. If something is no longer available I will link to a similar product. Affiliate links may be used depending on the product linked. By shopping through my links you help keep my blog running at no extra cost to you. So thank you in advance for supporting my creations!





Fabulous assortment of rainbow happiness! Love all your techniques and tips!
ReplyDeleteThanks so much Sue! So happy you love them :)
DeleteWhat stunning cards! I love rainbows too. They always make me smile! I love your tips on how to get second cards using leftover ink from a previous one.
ReplyDeleteThanks so much for stopping by Beth! Can't let any of that good ink go to waste ;)
Delete