Thursday, October 4, 2018

Thinking Of You Card | Coloring With Distress Oxide Inks


Hey everybody 👋

Today I’m sharing a water coloured card using distress oxide inks, and featuring some of the older stamps sets from Ink On 3. I hadn't water colored for a while and I was missing it, happy I did because I am super happy with the bright and colorful results I got!

Thinking Of You Card | Coloring With Distress Oxide Inks by ilovedoingallthingscrafty.com

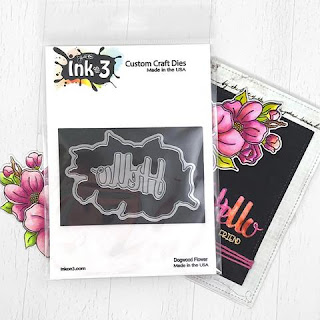
To create this card I did some ink smooshing onto the card panel using three different distress oxide inks to create the rainbow like background. Once the panel was completely dry I stamped out the images using Juicy Ink and then heat set it with  Arctic White embossing powder. Next, I took the same colors that I smooshed onto my surface and used them to color in the details of the vase from the Posies Set and the flowers from the Roses in Bloom set by adding multiple layers of oxide pigment. I then flicked some splatters of paint for some added splashes of color onto the panel and then die cut it using a stitched scallop rectangle die. For the sentiments I used the Hello stand alone die from the Dogwood Flower set and die cut 3 pieces and stacked them together. I then added Juicy Ink to the top of the Hello and added a coat of Crystal Clear Powder to emboss it. Next, I stamped out the thinking of you sentiment from the Posies stamp set using Salty Ocean distress ink and again used the Crystal Clear powder to heat set the ink. Finished off the card by adding some sparkling sequins.

Thinking Of You Card | Coloring With Distress Oxide Inks by ilovedoingallthingscrafty.com
Hope this very loosely colored water colored card has inspired you today! For more inspiration using Ink On 3 supplies and products visit the Ink On 3 Blog.

Thank you for stopping by 😊
Until next time... Happy Crafting 👋

SUPPLIES
To make supplies easy to find, I have linked them below. If something I used is no longer available I will link to a similar product.
Affiliate links may be used depending on the product. Your purchases help keep my blog running, so thanks in advance for the support!

Roses In Bloom Stamp Set
Shop at:
SSS | IO3
Posies Stamp Set
Posies Stamp Set
Shop at:
IO3
Dogwood Flower Coordinating Die Cuts
Shop at:
SSS | IO3
Juicy  Ink
Juicy Ink
Shop at:
SSS | IO3
Arctic White Ultra Powder
Shop at:
SSS | IO3
Crystal Clear Ultra  Powder
Crystal Clear Ultra Powder
Shop at:
SSS | IO3
Oxide Ink Pad PICKED RASPBERRY
Shop at:
SSS
Oxide Ink Pad SQUEEZED LEMONADE
Shop at:
SSS
Oxide Ink Pad SALTY OCEAN
Shop at:
SSS | AMZ
MFT STITCHED MINI SCALLOP RECTANGLE Die-Namics
Shop at:
SSS
Pretty Pink Posh SPARKLING CLEAR MIX
Shop at:
SSS

Friday, September 28, 2018

Colorful Holiday Village Scene Card


Hello and welcome back! 

Today I have a fun little winter scene card to share with you featuring the new Holiday Village Stamp and Die set from the September Release. I'm a huge rainbow fan, so when I can I will go with rainbow colors in my creations :)

Colorful Holiday Village Scene Card by ilovedoingallthingscrafty.com


  • To begin, I stamped out all the village images out and then colored them in using Copic Markers and then die cut them out using the coordinating dies
  • Next, I used the large frame from the Dotted Patterns Set 2 to start building the frame for the scene. I then ran that die cut piece along with the largest rectangle from the Darling Ribbons and Frames die to add the dotted stitching to the outer edge. I then stamped out the greeting from the Holiday Village. Under the frame, I added foam and popped that onto the card base. To the smaller rectangle die that resulted from the Dotted Patterns Set 2 I used the Light Ray Stencil to add some rays of glimmer paste to the top part of the rectangle. Set that piece aside to dry.
  • I then began working on the inside of the framed area. I wanted to create some hills for the houses to sit on, so I used the new Trimming Borders die as it is wavy and has the same dotted detail to cut out some hill-like shapes. Then using the largest frame again from the Dotted Patterns Set 2 I die cut the hills to the same width of the rectangle frame.
  • Now that the piece I added the glimmer paste rays was dry, I used it as the base to build up the scene. I first played around with the layout of the houses and hills and then once I was happy with it I glued everything in place using foam tape to pop up some pieces. I used double foam tape on the bottom hill to make that my highest piece, which allowed me to be able to add dimension throughout the scene behind that point. Finally, once the pieces were all glued down in place I added the little colorful holiday village to the inside of the frame on the card front. 

Colorful Holiday Village Scene Card by ilovedoingallthingscrafty.com
 For some final details:

  •  I added some white gel pen marks to the windows and added some silver dots to the trees.
  •  I also added some footprints to the snow with a light grey Copic marker.
  • Glossy accents were added to all the windows and hanging Christmas lights.
  • And of course, had to add some of the Iridescent Ice Flakes for more sparkle!

Here is a close up of this fun winter scene and all it's little details.


Colorful Holiday Village Scene Card by ilovedoingallthingscrafty.com
Hope this card has inspired you today, and thank you all for joining me! For more inspiration using Studio Katia products click → HERE

Until next time... Happy Crafting 👋

SUPPLIES
To make supplies easy to find, I have linked them below. If something I used is no longer available I will link to a similar product.
Affiliate links may be used depending on the product. Your purchases help keep my blog running, so thanks in advance for the support!
HOLIDAY VILLAGE | STAMP SET
Shop at:
SSS | SK
HOLIDAY VILLAGE DIES
Shop at:
SSS | SK
Dotted Patterns - Set 2 Dies
Shop at:
SSS | SK
Dotted Patterns: Darling Ribbon Dies
Shop at:
SSS | SK
TRIMMINGS BORDERS | CREATIVE DIE
Shop at:
SSS | SK
LIGHT RAY | CREATIVE STENCIL
Shop at:
SSS | SK
IRIDESCENT ICE FLAKES
Shop at:
SSS | SK
STUDIO KATIA GLUE
STUDIO KATIA GLUE
Shop at:
SSS | SK
Neenah 110 LB SOLAR WHITE
Shop at:
SSS | AMZ | HBS
Tim Holtz Stamp Platform
Shop at:
SSS | AMZ
Blackout Hybrid Detail Ink
Shop at:
SSS | IO3
Sizzix Big Shot
Sizzix Big Shot
Shop at:
SSS | AMZ
STANDARD CUTTING PADS
Shop at:
SSS | AMZ
Magnetic Platform
Magnetic Platform
Shop at:
SSS | AMZ
Glimmer Paste | Moonstone
Shop at:
SSS | AMZ | HBS
Double Ended Jewel Picker
Shop at:
SSS | AMZ | HBS
Uni-Ball Impact Gel Pen
Shop at:
SSS | AMZ
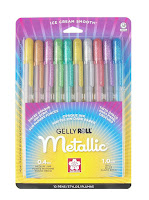
Gelly Roll Metallic Gel Ink Pen Set
Shop at:
AMZ
Glossy Accents
Glossy Accents
Shop at:
SSS | AMZ

Thursday, September 27, 2018

Sugar Plum Shaker Card | Ink On 3


Hey all! 

Today I am sharing another creation for Ink On 3. This cute little shaker card features the little mouse from the Dance and Twirl Stamp set

I began by stamping out the mouse using Blackout ink. I then colored it in with Copic markers. 
(I will list all the Copics I used at the bottom of this post.)

Sugar Plum Shaker Card by ilovedoingallthingscrafty.com

Next, I worked on the background panel. I used Fadeout Ink to stamp out the little bell cluster from the Fairy Christmas Set all over the background. I created holly clusters instead by coloring the bells in red.

To the shaker window frame, I stamped out the sentiment by using Juicy Ink and then embossing it with the Chrome Ultra Fine Embossing Powder.

Sugar Plum Shaker Card by ilovedoingallthingscrafty.com

Here is how I finished the inside of the card.

Sugar Plum Shaker Card by ilovedoingallthingscrafty.com

Hope this Sugar Plum Shaker Card inspired you today!

Thank you for stopping by 😊
Until next time... Happy Crafting 👋

SUPPLIES
To make supplies easy to find, I have linked them below. If something I used is no longer available I will link to a similar product.
Affiliate links may be used depending on the product. Your purchases help keep my blog running, so thanks in advance for the support!

COPICS USED: Colorless Blender, N0, N2, N4, N6, G28, YG67, R27, R46, R59, E93

Dance and Twirl Stamp Set
Shop at:
SSS | IO3
Fairy Christmas
Fairy Christmas
Shop at:
SSS | IO3
Fadeout No Line coloring Detail Ink
Shop at:
SSS | IO3
Blackout Hybrid Detail Ink
Shop at:
SSS | IO3
Juicy Clear Embossing and Watermark Ink
Shop at:
SSS | IO3
Chrome Ultra Fine Embossing Powder
Shop at:
SSS | IO3
Black & Decker  Heat Gun
Black & Decker Heat Gun
Shop at:
AMZ
Neenah  80 LB SMOOTH SOLAR WHITE
Neenah 80 LB SMOOTH SOLAR WHITE
Shop at:
SSS | AMZ
HEAT RESISTANT ACETATE 5 Sheets
Shop at:
SSS | AMZ
STITCHED RECTANGLES Dies
Shop at:
SSS
PIERCED CIRCLES ETCHED DIES
Shop at:
SSS | AMZ | SB
Sizzix Big Shot
Sizzix Big Shot
Shop at:
SSS | AMZ
Sizzix Big Shot Magnetic Platform
Shop at:
SSS | AMZ
STANDARD CUTTING PADS
Shop at:
SSS | AMZ
Misti Stamp Tool Original Size
Shop at:
SSS | AMZ
Recollections Black Heavyweight Cardstock 110bs
Shop at:
AMZ
Heidi Swapp CHRISTMAS Glitter Paper Pad
Shop at:
AMZ
3M Scotch 1/2-Inch Double-Sided Foam Tape
Shop at:
SSS | AMZ