Monday, October 11, 2021

Vintage Holiday Release Day 1 Sneak Peeks | Honey Bee Stamps

Vintage Holiday, Release, ,Honey Bee Stamps, Sneak Peeks, Snowman, Scene Builder Card Base, Card Making, Stamping, Die Cutting, handmade card, ilovedoingallthingscrafty, Stamps, how to,

Hello, my friends, and Happy Monday!

It's time again for another Honey Bee Stamps Release, and today the Design Team is showcasing Day 1 Sneak Peeks for their Vintage Holiday Release.

This Snowman Winter Shaker Shadow Box is jam-packed with all-new goodies. Can you spot all the new stamps and dies? Don't worry I give you the complete recipe for this card down below. What I am really excited about is the A2 Scene Builder Card Base Dies. The possibilities are endless for shadow box creations with these Dies.


Make sure you stop by the Honey Bee Stamps Blog for more inspiration from the Design Team featuring more day 1 product reveals! Please note that  links will not be active until the Release goes live on October 14th, 2021 @9pm CST.

CARD RECIPE

Here is a breakdown of what I used.


Stamps: 

Dies:

Paper: 

Ink for Blending:

Ink:

Emb. Powder:

Die Cut Machine:

Adhesives:

Embellishments:

Other Tools:

For an added layer of fun, I thought it would be cool to add a shaker element to this winter scene. To create that I simply created a shaker pocket using a cello bag that I filled with some Bokeh Lights Confetti. I sealed the edges of the pocket with a thin double-sided tape and then secured it behind the front window opening of the card base.

Vintage Holiday, Release, ,Honey Bee Stamps, Sneak Peeks, Snowman, Scene Builder Card Base, Card Making, Stamping, Die Cutting, handmade card, ilovedoingallthingscrafty, Stamps, how to,

The coolest thing about these shadow boxes is that they fold flat and fit perfectly inside an A2 Envelope. This card when flat has a little bulge in it because I can't help myself and add way too many elements but I am still able to seal the envelope without any problems.

Vintage Holiday, Release, ,Honey Bee Stamps, Sneak Peeks, Snowman, Scene Builder Card Base, Card Making, Stamping, Die Cutting, handmade card, ilovedoingallthingscrafty, Stamps, how to,

Also, check out the snowflakes I used in the background aren't they gorgeous! I love them!!! They were made with the Pierced Fancy Flakes A2 Cover Plate Die and the Fancy Flakes A2 Cover Plate Die that I trimmed down to create the background.

Vintage Holiday, Release, ,Honey Bee Stamps, Sneak Peeks, Snowman, Scene Builder Card Base, Card Making, Stamping, Die Cutting, handmade card, ilovedoingallthingscrafty, Stamps, how to,

And how sweet is the little snowman? You guys are going to love the Build A Snowman Dies. There are so many different ways you can dress him up. I see a lot of snowmen in my future, lol!

Well, that wraps it up for Day 1 sneak peeks from me. Thank you for stopping by and I will see you back here tomorrow for day 2 sneak peeks... Happy Crafting!

Monday, October 4, 2021

Framed White Sunflower Shadow Box | Honey Bee Stamps

Frame, White Sunflowers, Shadow Box, Honey Bee Stamps,Lovely Layers, how to, gift idea, die cut flowers,ilovedoingallthingscrafty,cardmaker,handmade art

Hello and happy Monday crafty friends!

First of all, I would like to thank all of you that left me the sweetest comments and messages over on my Instagram in regards to the last Framed Lovely Layers Floral Bouquet I made. This beauty is now in Jennifer McGuire's craft room and I could not be happier about that! 

Frame, White Sunflowers, Shadow Box, Honey Bee Stamps,Lovely Layers, how to, gift idea, die cut flowers,ilovedoingallthingscrafty,cardmaker,handmade art

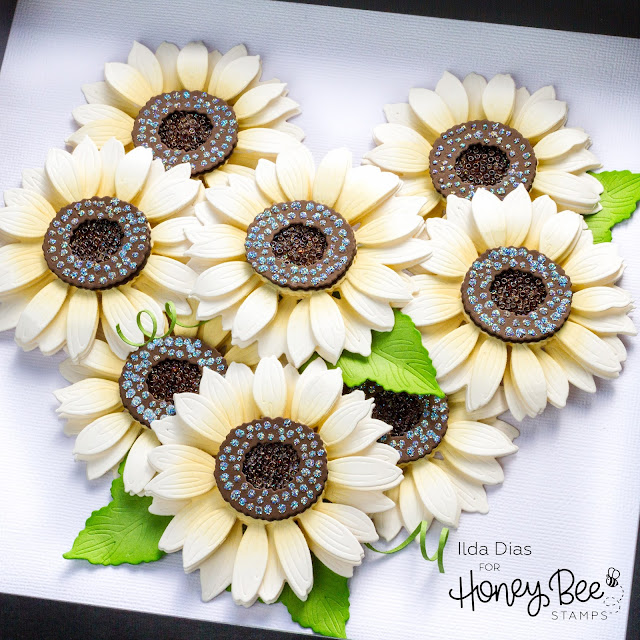
Today's project was made for a friend and colleague of mine (hi Tomina👋) who asked me to make a White Sunflower shadow box for her after she saw the White Sunflower Slimline card I made. 

Here is how this beautiful frame came together.

FRAME RECIPE


Dies:
Paper: 
  • Cream, green and brown heavyweight Colored Cardstock
Frame:
  • Square 9 ¾ " Shadow Frame from IKEA (The frame I used has been discontinued, the one I linked is very similar)
Ink:

Die Cut Machine:

Adhesives:

Embellishments:

Other Tools:

Once you have put one of these flowers together, then the rest is simple. It is just a repetitive process.

Frame, White Sunflowers, Shadow Box, Honey Bee Stamps,Lovely Layers, how to, gift idea, die cut flowers,ilovedoingallthingscrafty,cardmaker,handmade art
  1. The first thing I did was cut all the layers for the 8 sunflowers I needed to form the shape of a heart. 
  2. I then ink blended up the centers of the flowers. 
  3. Curled the flower petals.
  4. Added foam to each layer of the flower to build up the petals and create dimension.
  5. To the centers, add a layer of glue to the bottom layer. 
  6. Drop the seed beads into the glue (I tried having the hole of the beads face up). Once the glue dried, I used a brown Copic Marker to color the center brown.
  7. To the top of the center, add small drops of glossy accents. While still wet sprinkle with Sparkle Glitter and piece the centers together.
  8. Glue centers to the flower petals.
Frame, White Sunflowers, Shadow Box, Honey Bee Stamps,Lovely Layers, how to, gift idea, die cut flowers,ilovedoingallthingscrafty,cardmaker,handmade art

Arrange the flowers how you like. Once you have that figured out, glue it to the paper background of the frame. Use foam to pop up some of the flowers in place. Finish by gluing the leaves in place.

Frame, White Sunflowers, Shadow Box, Honey Bee Stamps,Lovely Layers, how to, gift idea, die cut flowers,ilovedoingallthingscrafty,cardmaker,handmade art

I love how this White Sunflower Shadow Box frame turned out, and I hope you can see from this example that you do not need all the flowers to create something beautiful! 

Want to watch a quick video of how this came together. 
Ilda 🌻

SUPPLIES
Lovely Layers: Sunflower Dies
Shop at:
SSS | SB | HBS
DETAIL BLENDER BRUSHES
Shop at:
SSS | HBS
BEE CREATIVE GLUE
BEE CREATIVE GLUE
Shop at:
SSS | SB | HBS
GEMINI JR. DIE CUTTER
Shop at:
SSS | AMZ | SB
Oxide Ink Pad ANTIQUE LINEN
Shop at:
SSS | SB | HBS
SILVER DUST | SEED BEADS
Shop at:
SSS | SK
EMBELLISHMENT WAND
EMBELLISHMENT WAND
Shop at:
SSS | SK
GLOSSY ACCENTS
GLOSSY ACCENTS
Shop at:
SSS | AMZ | SB | HBS
SPARKLE GLITTER
SPARKLE GLITTER
Shop at:
SSS | SK
Foam Squares
Foam Squares
Shop at:
SSS | HBS
To make supplies easy for you to find, I have linked them above. If something is no longer available I will link to a similar product. Affiliate links may be used depending on the product linked. Please help support my blog by using these links while shopping at no additional cost to you. For more information about the affiliates I use, please visit my disclaimer here. Thanks so much for all your support!

Friday, October 1, 2021

Rainbow Butterflies Slimline Card | Studio Katia

ink blending,Butterflies,card,copic markers,rainbow,DOTTED SLIMLINE SET 3,Studio Katia,Card Making, Stamping, Die Cutting, handmade card, ilovedoingallthingscrafty, Stamps, how to,

Hello sweet friends!

Today I have a rainbow-inspired slimline Butterfly card to share with you. As you may already know by now, my favorite color is rainbow because I love all of them, lol! So if you can't decide like me, always chose rainbow... they just make for the happiest of cards. 🌈😊

My cards today feature some of the newest products from Studio Katia. 

CARD RECIPE

Here is a breakdown of what I used and where.


Let me explain some parts.

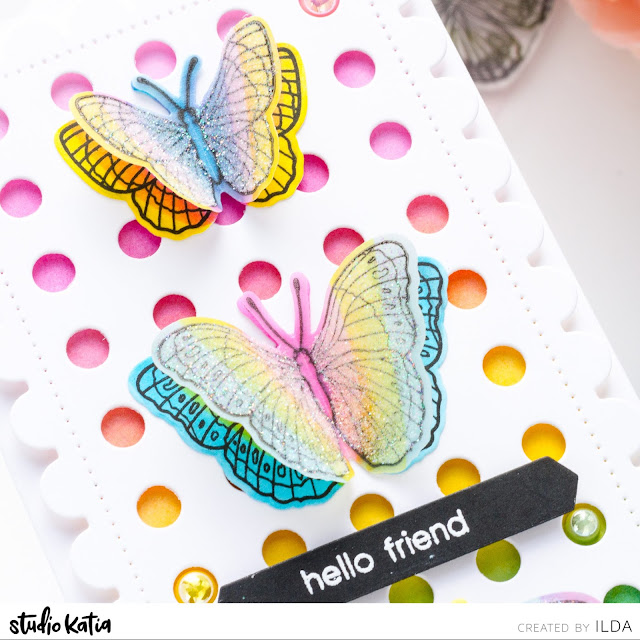
For the background, I used three colors of ink to blend out the rainbow. I then trimmed the panel and popped it behind the new DOTTED SLIMLINE SET 3 die.

vink blending,Butterflies,card,copic markers,rainbow,DOTTED SLIMLINE SET 3,Studio Katia,Card Making, Stamping, Die Cutting, handmade card, ilovedoingallthingscrafty, Stamps, how to,

For the butterflies, I stamped the butterflies using Blackout Ink on both white cardstock and vellum. I then used 3 colors of Copic markers (pink, yellow, and blue) to blend out the rainbow colors over the entire butterfly image. As you can see I was not careful to stay in the lines. It really was about adding a quick color. For each butterfly, I just moved the markers in different directions overlapping the colors in between to give create the rainbow blend. I repeated the same thing to the vellum butterflies only this time I colored the underside of the vellum making sure I colored them in the same pattern as the coordinating paper layer.

ink blending,Butterflies,card,copic markers,rainbow,DOTTED SLIMLINE SET 3,Studio Katia,Card Making, Stamping, Die Cutting, handmade card, ilovedoingallthingscrafty, Stamps, how to,

Once the butterflies were colored I then added a thin layer of glue using a glue pen (sorry forgot to link below) to the top of the vellum wings. Once they were dry I then bent and curled the wings and glued the bodies together and added them to the card front.

ink blending,Butterflies,card,copic markers,rainbow,DOTTED SLIMLINE SET 3,Studio Katia,Card Making, Stamping, Die Cutting, handmade card, ilovedoingallthingscrafty, Stamps, how to,

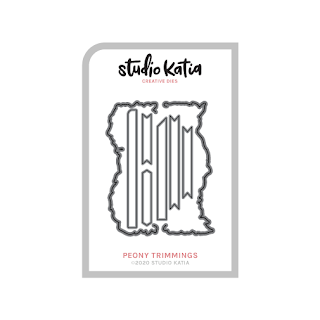
The sentiment was stamped and heat-embossed onto a banner from the PEONY TRIMMINGS DIES.

ink blending,Butterflies,card,copic markers,rainbow,DOTTED SLIMLINE SET 3,Studio Katia,Card Making, Stamping, Die Cutting, handmade card, ilovedoingallthingscrafty, Stamps, how to,

Here is a closer look at the gorgeous sparkle on the wings. I am a bit obsessed with SPARKLE GLITTER!

ink blending,Butterflies,card,copic markers,rainbow,DOTTED SLIMLINE SET 3,Studio Katia,Card Making, Stamping, Die Cutting, handmade card, ilovedoingallthingscrafty, Stamps, how to,

I then just finished this Rainbow Butterflies Slimline card by dropping some coordinating pearls into the die-cut holes of the card panel.

I hope this rainbow creation inspired you. Thank you for stopping by and until next time... Happy Crafting!
Ilda 🌈💗

SUPPLIES
BUTTERFLIES
BUTTERFLIES
Shop at:
SSS | SK
BUTTERFLIES DIES
BUTTERFLIES DIES
Shop at:
SSS | SK
DOTTED SLIMLINE SET 3
Shop at:
SSS | SK
PEONY TRIMMINGS DIES
Shop at:
SK
INK BLENDER BRUSHES
INK BLENDER BRUSHES
Shop at:
SSS | SK
BUBBLEGUM PEARLS
BUBBLEGUM PEARLS
Shop at:
SSS | SK
LEMON BURST PEARLS
LEMON BURST PEARLS
Shop at:
SSS | SK
SEAFOAM PEARLS
SEAFOAM PEARLS
Shop at:
SSS | SK
PRISMATIC SKY PEARLS
Shop at:
SSS | SK
AMETHYST PEARLS
AMETHYST PEARLS
Shop at:
SSS | SK
EMBELLISHMENT WAND
EMBELLISHMENT WAND
Shop at:
SSS | SK
SPARKLE GLITTER
SPARKLE GLITTER
Shop at:
SSS | SK
FOAM TAPE
FOAM TAPE
Shop at:
SSS | SK
STUDIO KATIA GLUE
STUDIO KATIA GLUE
Shop at:
SSS | SK
BLACKOUT INK
BLACKOUT INK
Shop at:
SSS | HBS | IO3
New Mini Misti
New Mini Misti
Shop at:
SSS | SB
NEENAH SOLAR WHITE 110
Shop at:
SSS | AMZ | HBS
Vellum Value Pack
Vellum Value Pack
Shop at:
SSS | AMZ
COPIC SKETCH
COPIC SKETCH
Shop at:
SSS | AMZ
GEMINI JR. DIE CUTTER
Shop at:
SSS | AMZ | SB
ATELIER BEE STING YELLOW
Shop at:
SSS | HBS | IO3
ATELIER SWEET PETUNIA
Shop at:
SSS | IO3
ATELIER PEACOCK BLUE
Shop at:
SSS | HBS | IO3
ATELIER SHARK TOOTH
ATELIER SHARK TOOTH
Shop at:
SSS | IO3
ARCTIC WHITE POWDER
ARCTIC WHITE POWDER
Shop at:
SSS | IO3
To make supplies easy for you to find, I have linked them above. If something is no longer available I will link to a similar product. Affiliate links may be used depending on the product linked. Please help support my blog by using these links while shopping at no additional cost to you. For more information about the affiliates I use, please visit my disclaimer here. Thanks so much for all your support!