Thursday, September 24, 2020

Elegant Foiled Christmas Cards | Christmas Foiled Basics Collection by Yana Smakula | Spellbinders


Hello Friends!

I am so excited to have been a guest over on the Spellbinders Blog last week. In case you missed it over there, I am posting my cards again here today.

My cards feature the Christmas Foiled Basics Collection by Yana Smakula. These Foil Plates and Dies are perfect for creating your own elegant handmade Christmas cards that will wow your friends and family for many years to come.

how to,handmade card,Stamps,Christmas Foiled Basics Collection by Yana Smakula,Guest Designer,ilovedoingallthingscrafty,Elegant Foiled Christmas Cards,stamping,Spellbinders,Die cutting,card making,

CARD DETAILS

This first card I created is a very simple, yet elegant Happy Holiday card.  I began this card by using the Christmas Foliage Background Plate to foil and emboss the red cardstock background with Polished Brass Glimmer Foil.

I then foiled the circle in the center using the circle plate from the Christmas Foliage Circle Border set.

how to,handmade card,Stamps,Christmas Foiled Basics Collection by Yana Smakula,Guest Designer,ilovedoingallthingscrafty,Elegant Foiled Christmas Cards,stamping,Spellbinders,Die cutting,card making,

On white cardstock, I foiled and die-cut pieces from the Christmas Foliage Circle Border, the Christmas Organic Foliage, and Yana's Christmas Sentiments set to create the sentiment in the center and to add the pop of white to the card. To the flowers, I used a Red Copic Marker to color the centers in.

I then finished off this beauty by adding drops of white Nuvo Crystal Drops.

how to,handmade card,Stamps,Christmas Foiled Basics Collection by Yana Smakula,Guest Designer,ilovedoingallthingscrafty,Elegant Foiled Christmas Cards,stamping,Spellbinders,Die cutting,card making,

This next card may be my favorite!

I began this card by creating the background. I used the Polished Brass Glimmer Foil to repeat foil the entire panel using the snowfall plate from the Glimmer Winter Village. To add extra detail, I used a gold foiled washi tape from my stash to create a present-like design.

how to,handmade card,Stamps,Christmas Foiled Basics Collection by Yana Smakula,Guest Designer,ilovedoingallthingscrafty,Elegant Foiled Christmas Cards,stamping,Spellbinders,Die cutting,card making,

For the sentiment on this "present", I first die cut the circle using the Christmas Foliage Circle Border Die. Since the die is not a complete circle I just did some partial die-cutting of the circle stopping before the foliage part, then flipped the die, lined it up with the cut already made by the die, and then ran it through the die-cut machine again to cut the bottom of the circle.

On the circle, I lined up and foiled the "Merry Christmas from all of us" using plates from Yana's Christmas Sentiments. Right behind the circle die, I glued 3 pieces that I had foiled, cut and pieced in the shape of a wreath using plates and dies from the Christmas Foliage Circle Border set.

how to,handmade card,Stamps,Christmas Foiled Basics Collection by Yana Smakula,Guest Designer,ilovedoingallthingscrafty,Elegant Foiled Christmas Cards,stamping,Spellbinders,Die cutting,card making,

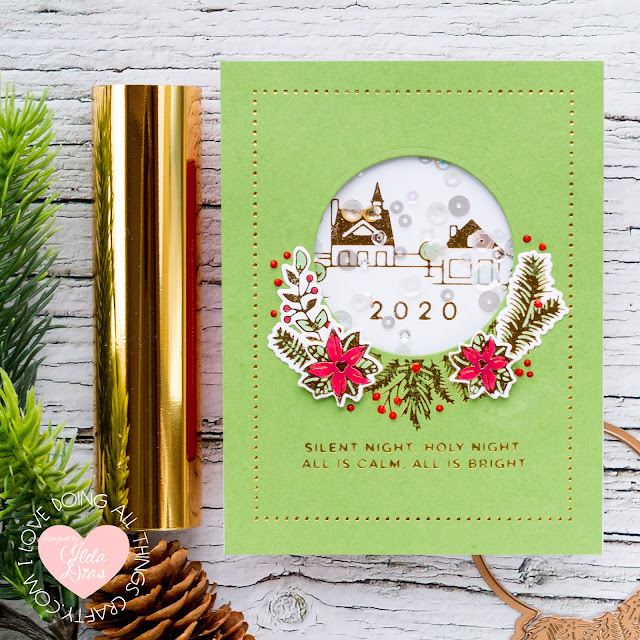
Who doesn't love a shaker card!?

This next card I started by creating die cutting the circle in the center using the partial die cutting technique I mentioned above in the previous card, only this time I am using the negative of the die.

The card front was then foiled with:


how to,handmade card,Stamps,Christmas Foiled Basics Collection by Yana Smakula,Guest Designer,ilovedoingallthingscrafty,Elegant Foiled Christmas Cards,stamping,Spellbinders,Die cutting,card making,

Inside the shaker, I had foiled the scene using a plate from the Glimmer Winter Village and 2020 which comes from Yana's Christmas Sentiment Set.

The shaker elements I used are from Studio Katia and the red details were done in Red Berry Nuvo Drops.

how to,handmade card,Stamps,Christmas Foiled Basics Collection by Yana Smakula,Guest Designer,ilovedoingallthingscrafty,Elegant Foiled Christmas Cards,stamping,Spellbinders,Die cutting,card making,

This last nontraditional card was also fun to create.

I used both the scene plates from the Glimmer Winter Village set that I foiled and embossed onto separate black cardstock panels using the Skybright Glimmer Foil. I then fussy cut the top parts of the scenes off. 

Next, I Silver foiled the Season's Greetings from Yana's Christmas Sentiments onto a light blue piece of cardstock. I then added snow using the falling snow plate from the Glimmer Winter Village on the top half of the blue panel.

how to,handmade card,Stamps,Christmas Foiled Basics Collection by Yana Smakula,Guest Designer,ilovedoingallthingscrafty,Elegant Foiled Christmas Cards,stamping,Spellbinders,Die cutting,card making,

On the bottom of the black scene panel, I also Silver Foiled the sentiment "Our Home to Yours" again from Yana's Christmas Sentiment set.

To assemble this card, I just added foam tape between each layer and then finished it off by adding some more snow details using the White Crystal Nuvo Drops.

how to,handmade card,Stamps,Christmas Foiled Basics Collection by Yana Smakula,Guest Designer,ilovedoingallthingscrafty,Elegant Foiled Christmas Cards,stamping,Spellbinders,Die cutting,card making,

I had so much fun creating these cards for you today and I hope I have inspired you to add some Glimmer Foil Christmas Elements into your Holiday Cards this year.

Thank you for stopping by and until next time... Happy Crafting 👋


SUPPLIES
YANA'S CHRISTMAS SENTIMENTS Glimmer Hot Foil Plate and Dies
Shop at:
SSS | SB
YANA'S CHRISTMAS SENTIMENTS Glimmer Hot Foil Plate and Dies
Shop at:
SSS | SB
CHRISTMAS FOLIAGE BACKGROUND Glimmer Hot Foil Plate
Shop at:
SSS | SB
CHRISTMAS FOLIAGE CIRCLE BORDER Glimmer Hot Foil Plate
Shop at:
SSS | SB
GLIMMER WINTER VILLAGE Glimmer Hot Foil Plate
Shop at:
SSS | SB
GLIMMER RECTANGLE GLIMMER PLATES
Shop at:
SSS | SBC | SB
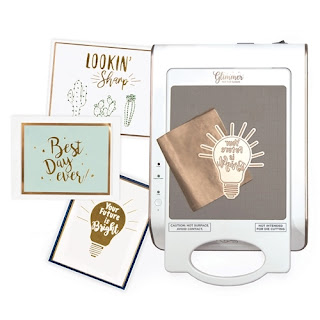
HOT FOIL SYSTEM
HOT FOIL SYSTEM
Shop at:
SSS | SBC | SB
PLATINUM 6 DIE CUTTING PLATFORM
Shop at:
SSS | SBC | SB
SILVER Glimmer Foil
SILVER Glimmer Foil
Shop at:
SSS | SBC | SB
POLISHED BRASS - Glimmer Foil
Shop at:
SSS | SBC | SB
SKYBRIGHT Glimmer Foil
Shop at:
SSS | SBC | SB
FOAM TAPE - WHITE
FOAM TAPE - WHITE
Shop at:
SSS | SK
FOAM TAPE - BLACK
FOAM TAPE - BLACK
Shop at:
SSS | SK
RED BERRY GLOSS Nuvo Crystal Drops
Shop at:
SSS
White Gloss Nuvo Crystal Drops
Shop at:
SSS | AMZ
CLEAR ACETATE SHEETS
Shop at:
SSS | SK
ICY SPARKLE CRYSTALS
Shop at:
SSS | SK
MAJESTIC FUSION
MAJESTIC FUSION
Shop at:
SSS | SK
To make supplies easy for you to find, I have linked them above. If something is no longer available I will link to a similar product. Affiliate links may be used depending on the product linked. Please help support my blog by using these links while shopping at no additional cost to you. For more information about the affiliates I use, please visit my disclaimer here. Thanks so much for all your support!

Wednesday, September 23, 2020

Penguin Palace - September Blog Hop - Encouragement Rainbow Cards

Stencils 360°™, Starter Kit, Penguin Palace,Encouragement Rainbow Cards,Blog Hop,Card Making,Stamping, Die Cutting,handmade card, ilovedoingallthingscrafty, Stamps,distress oxide inks,Ink Blending,

Welcome to Penguin Palace's first ever Blog Hop.  I'm thrilled to be joining a group of talented artists featuring Penguin Palace's latest Fall 2020 Release. If you have already begun the Hop you would have arrived from the amazing Wanda Guess's Blog. I will let you know where to Hop next at the end of this post.

Hopefully, by now, you have heard about the Stencils 360°™ created by Penguin Palace, but if you haven't make sure you check out this VIDEO. All my cards today feature the revolutionary stencils, that I used with the I used the Stencils 360°™ Starter Kit. Those of you that know me, know I love rainbows. So of course, I had to create some Rainbow Cards to share today.

CARD DETAILS

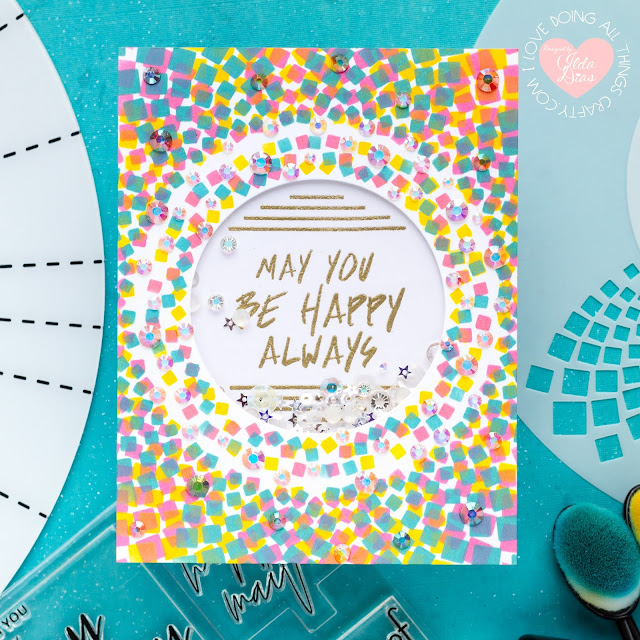
For this first card, I used both the stencil from the Mega Summer Blossom Stencils 360°™ set onto a piece of paper cut to fit the A2 sized template. I also used only 3 colors of Distress Oxide Inks but when overlapped it end up with a rainbow blend. 

Stencils 360°™, Starter Kit, Penguin Palace,Encouragement Rainbow Cards,Blog Hop,Card Making,Stamping, Die Cutting,handmade card, ilovedoingallthingscrafty, Stamps,distress oxide inks,Ink Blending,Mega Summer Blossom Stencils 360°™

Once the blending was done, I die cut the circle opening using the circle die from the Words From The Heart (Chapters 1 & 2) Coordinating Cuts. I then used the circle to figure out where to stamp the sentiment onto the card base, which I then heat embossed in gold. The sentiment comes from the Words From The Heart (Chapter 2)

Stencils 360°™, Starter Kit, Penguin Palace,Encouragement Rainbow Cards,Blog Hop,Card Making,Stamping, Die Cutting,handmade card, ilovedoingallthingscrafty, Stamps,distress oxide inks,Ink Blending,Mega Summer Blossom Stencils 360°™

I then glued a piece of acetate to the back of the card panel, added foam tape around the window and edges, and adhered the panel to the card base securing all the shaker bits in the center. For added detail and interest I glued a bunch out crystal jewels to the card front!

Stencils 360°™, Starter Kit, Penguin Palace,Encouragement Rainbow Cards,Blog Hop,Card Making,Stamping, Die Cutting,handmade card, ilovedoingallthingscrafty, Stamps,distress oxide inks,Ink Blending,Mega Summer Blossom Stencils 360°™

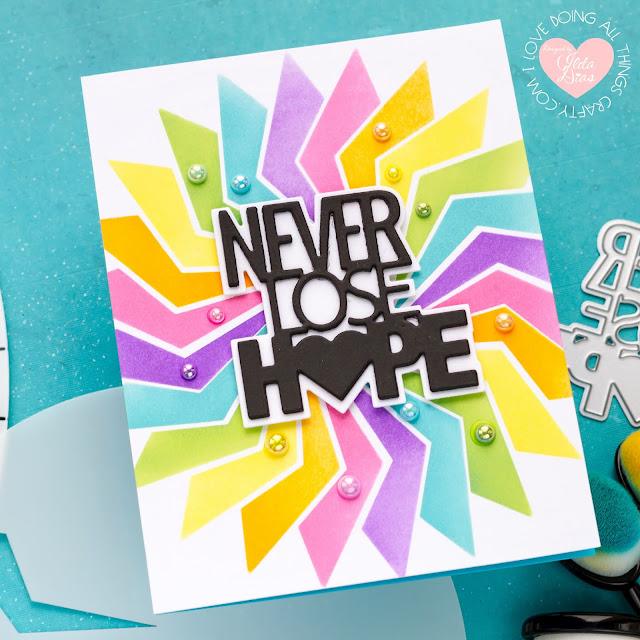
This next card was so fun to blend out. I used the Origami Shuriken Stencil 360°™. I chose 6 different rainbow colors, blended each color out 4 times, before wiping the stencil clean and moving on to the next color.

Origami Shuriken Stencils 360°™,Stencils 360°™, Starter Kit, Penguin Palace,Encouragement Rainbow Cards,Blog Hop,Card Making,Stamping, Die Cutting,handmade card, ilovedoingallthingscrafty, Stamps,distress oxide inks,Ink Blending,

I then die cut the Never Lose Hope Shadow Dies, stacked and glued 3 layers of the words together, and glued them onto a white shadow layer.

Origami Shuriken Stencils 360°™,Stencils 360°™, Starter Kit, Penguin Palace,Encouragement Rainbow Cards,Blog Hop,Card Making,Stamping, Die Cutting,handmade card, ilovedoingallthingscrafty, Stamps,distress oxide inks,Ink Blending,

I then popped the sentiment onto the center of the card panel and added some more pops of color using a variety of colored pearls.

Origami Shuriken Stencils 360°™,Stencils 360°™, Starter Kit, Penguin Palace,Encouragement Rainbow Cards,Blog Hop,Card Making,Stamping, Die Cutting,handmade card, ilovedoingallthingscrafty, Stamps,distress oxide inks,Ink Blending,

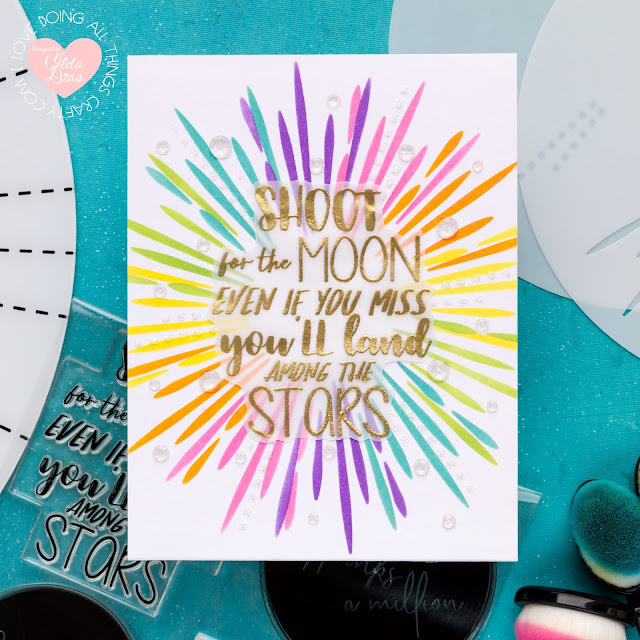
I must say this next stencil was my favorite. I repeated the same colors as the previous card. This time using the Magical Fireworks Stencils 360°™. I began with the Barrel 2 stencil, rotating and blending each color twice before wiping and moving on to the next color. 

Magical Fireworks Stencils 360°™,Stencils 360°™, Starter Kit, Penguin Palace,Encouragement Rainbow Cards,Blog Hop,Card Making,Stamping, Die Cutting,handmade card, ilovedoingallthingscrafty, Stamps,distress oxide inks,Ink Blending,

I then used the Barrel 1 to add the dotted square details using glimmer paste. Please note, I allowed the paste to dry before rotating the stencil to avoid a sticky sparkly mess. Luckily this paste dried fairly quickly.

Magical Fireworks Stencils 360°™,Stencils 360°™, Starter Kit, Penguin Palace,Encouragement Rainbow Cards,Blog Hop,Card Making,Stamping, Die Cutting,handmade card, ilovedoingallthingscrafty, Stamps,distress oxide inks,Ink Blending,

On a piece of vellum, I stamped and heat embossed the sentiment from the Words From The Heart (Chapter 1). I then fussy cut and glued onto the center of the card panel.

Magical Fireworks Stencils 360°™,Stencils 360°™, Starter Kit, Penguin Palace,Encouragement Rainbow Cards,Blog Hop,Card Making,Stamping, Die Cutting,handmade card, ilovedoingallthingscrafty, Stamps,distress oxide inks,Ink Blending,

I then finished off the card by adding some more sparkly goodness. No card is complete unless it shines one way or another, lol!

BLOG HOP


GIVEAWAY
Hop along to each blog and leave a comment.  A winner, chosen at random, who comments on each stop on the hop will win a prize of a $40 CAD Gift Certificate to the Penguin Palace store!  Comments for prize close at 11:30pm PST on 7 Oct 20.  The lucky winner will be announced on 8 Oct 2020 on the Penguin Palace Blog.

SHOP now👉 New Release

I had so much fun playing with these stencils today. If you love to use stencils and like ink blending these new Stencils 360°™ are made for you! I hope were inspired by these fun rainbow cards. Thank you for stopping by and until next time... Happy Hopping!

SUPPLIES
Stencils 360°™ Starter Kit
Shop at:
PBP
Mega Summer Blossom Stencils 360°™
Shop at:
PBP
Words From The Heart Coordinating Cuts
Shop at:
PBP
Words From The Heart (Chapter 2)
Shop at:
PBP
Origami Shuriken Stencils 360°™
Shop at:
PBP
Never Lose Hope Shadow Dies
Shop at:
PBP
Magical Fireworks Stencils 360°™
Shop at:
PBP
Words From The Heart (Chapter 1)
Shop at:
PBP
NEENAH SOLAR WHITE 110
Shop at:
SSS | AMZ | HBS
INK BLENDER BRUSHES
INK BLENDER BRUSHES
Shop at:
SSS | SK
Oxide Ink Pad FOSSILIZED AMBER
Shop at:
SSS | SB | HBS
PICKED RASPBERRY DISTRESS OXIDE
Shop at:
SSS | SB | HBS
PEACOCK FEATHERS DISTRESS OXIDE
Shop at:
SSS | AMZ | SB | HBS
CARVED PUMPKIN Oxide Ink
Shop at:
SSS | SB | HBS
SQUEEZED LEMONADE DISTRESS OXIDE
Shop at:
SSS | SB | HBS
MOWED LAWN DISTRESS OXIDE
Shop at:
SSS | SB | HBS
BROKEN CHINA Oxide Ink
Shop at:
SSS | SB | HBS
WILTED VIOLET DISTRESS OXIDE
Shop at:
SSS | SB | HBS
CLEAR ACETATE SHEETS
Shop at:
SSS | SK
GEMINI JR. DIE CUTTER
Shop at:
SSS | AMZ | SB
ORIGINAL MISTI
ORIGINAL MISTI
Shop at:
SSS | SB | HBS
Vellum Value Pack
Vellum Value Pack
Shop at:
SSS | AMZ
JUICY INK
JUICY INK
Shop at:
SSS | HBS | IO3
GOLD RUSH EMB. PWD.
GOLD RUSH EMB. PWD.
Shop at:
SSS | IO3
IRIDESCENT CRYSTALS
IRIDESCENT CRYSTALS
Shop at:
SSS | SK
WEDDING BELL MIX
WEDDING BELL MIX
Shop at:
SSS | SK
CRYSTAL STARS
CRYSTAL STARS
Shop at:
SSS | SK
BUBBLEGUM PEARLS
BUBBLEGUM PEARLS
Shop at:
SSS | SK
RIPE PERSIMMON PEARLS
Shop at:
SSS | SK
LEMON BURST PEARLS
LEMON BURST PEARLS
Shop at:
SSS | SK
SEAFOAM PEARLS
SEAFOAM PEARLS
Shop at:
SSS | SK
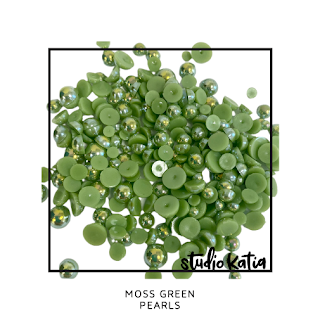
MOSS GREEN PEARLS
MOSS GREEN PEARLS
Shop at:
SSS | SK
PRISMATIC SKY PEARLS
Shop at:
SSS | SK
AMETHYST PEARLS
AMETHYST PEARLS
Shop at:
SSS | SK
ICY SPARKLE CRYSTALS
Shop at:
SSS | SK
EMBELLISHMENT WAND
EMBELLISHMENT WAND
Shop at:
SSS | SK
FOAM TAPE - WHITE
FOAM TAPE - WHITE
Shop at:
SSS | SK
STUDIO KATIA GLUE
STUDIO KATIA GLUE
Shop at:
SSS | SK
MOONSTONE GLIMMER PASTE
Shop at:
SSS | HBS | TS US 
MEDIA SPATULAS
MEDIA SPATULAS
Shop at:
SSS | HBS | TS US 
To make supplies easy for you to find, I have linked them above. If something is no longer available I will link to a similar product. Affiliate links may be used depending on the product linked. Please help support my blog by using these links while shopping at no additional cost to you. For more information about the affiliates I use, please visit my disclaimer here. Thanks so much for all your support!