Friday, November 27, 2020

Warm Winter Wishes Holiday Card | Ink On 3

Warm Winter Wishes, Holiday Card,Ink On 3,Little Birdie Stamp Set, Christmas Card, Blackout ink, Card Making, Stamping, Die Cutting, handmade card, ilovedoingallthingscrafty, Stamps, how to,

Hey Friends and Happy Friday!

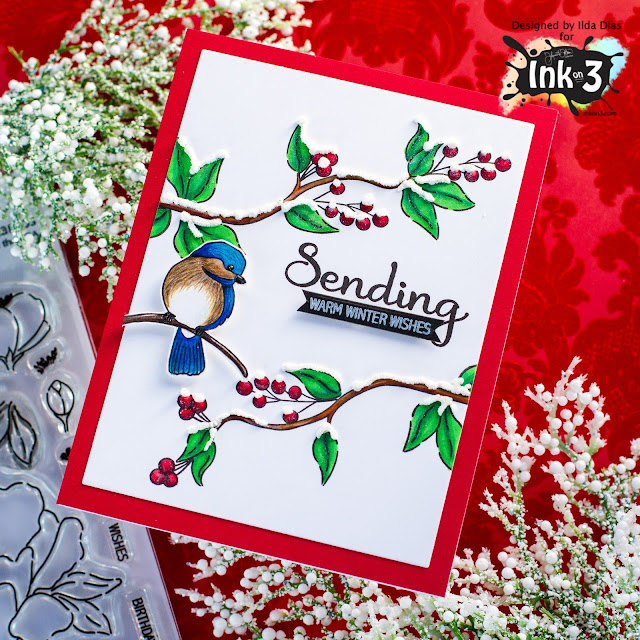
I am so excited to share this Warm Winter Wishes Holiday Card with you today. I absolutely love how it all came together. The design, the colors, the sparkle, and the texture..., it just may be one of my all-time favorite cards! The stamps I used come from Ink On 3's LITTLE BIRDIE Set. The images in this set are so pretty and perfect for so many occasions but I wanted to show you how it could be used for the Holidays.

CARD DETAILS

To begin, I stamped the Birdie using BLACKOUT INK and then colored it in using Prismacolor Pencils and fussy cut the image out. I actually had colored him for the first day of Kathy Raccosins latest coloring Coloring Challenge so that saved me some time when it came to putting this card together.

Warm Winter Wishes, Holiday Card,Ink On 3,Little Birdie Stamp Set, Christmas Card, Blackout ink, Card Making, Stamping, Die Cutting, handmade card, ilovedoingallthingscrafty, Stamps, how to,

The next thing I did was plan out the design using the branch stamp. Once I had it somewhat figured out, I then placed the panel in the MISTI and stamped the branch using BLACKOUT INK. I then rotated the panel 90 degrees and placed it back in the MISTI stamped the branch again to create the same design on the opposite side in reverse. I repeated the same steps for each of the leaves and then I freehand stamped the berries and extra leaves to create subtle differences. 

Warm Winter Wishes, Holiday Card,Ink On 3,Little Birdie Stamp Set, Christmas Card, Blackout ink, Card Making, Stamping, Die Cutting, handmade card, ilovedoingallthingscrafty, Stamps, how to,

The images were then colored in using Copic Markers and then to add a touch of sparkle I added a layer of LIQUID PIXIE DUST. I then trimmed down the panel that would then later be glued onto a red piece of cardstock.

Warm Winter Wishes, Holiday Card,Ink On 3,Little Birdie Stamp Set, Christmas Card, Blackout ink, Card Making, Stamping, Die Cutting, handmade card, ilovedoingallthingscrafty, Stamps, how to,

Next, I stamped out the Sending stamp on the right side of the card panel and also stamped out the warm winter wishes onto black cardstock using ATELIER SHARK TOOTH WHITE INK, to which I then trimmed down and glued in place with a bit of foam.

Warm Winter Wishes, Holiday Card,Ink On 3,Little Birdie Stamp Set, Christmas Card, Blackout ink, Card Making, Stamping, Die Cutting, handmade card, ilovedoingallthingscrafty, Stamps, how to,

To create the snow-like appearance on the branches and berries, I used Liquid Applique and puffed it up with the heat tool. Once it cooled off I added some glue on top of it and sprinkled some glitter on it for an added touch of sparkle. 

The last thing I did was to glue the Birdie in place using foam tape. 

I hope you have inspired by this Warm Winter Wishes Holiday Card of mine and I pray you and yours are staying warm and safe this Holiday season.

Thank you for stopping by and until next time... Happy Crafting!


SUPPLIES
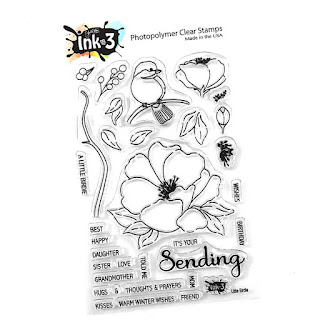
LITTLE BIRDIE
LITTLE BIRDIE
Shop at:
SSS | IO3
BLACKOUT INK
BLACKOUT
INK

Shop at:
SSS | HBS | IO3
ATELIER SHARK TOOTH
ATELIER SHARK TOOTH
Shop at:
SSS | IO3
LIQUID PIXIE DUST
LIQUID PIXIE DUST
Shop at:
SSS | IO3
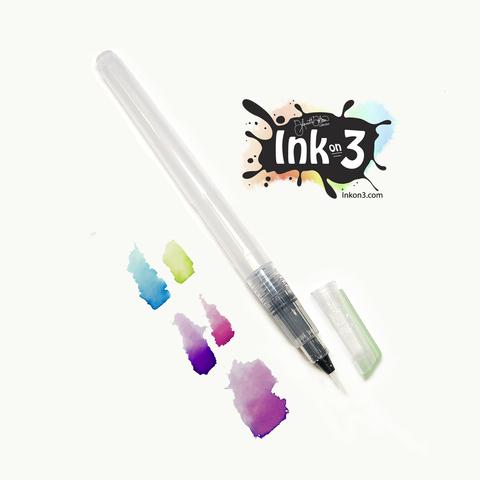
SMALL TIP WATER BRUSH PEN
SMALL TIP
WATER BRUSH PEN

Shop at:
SSS | IO3
INK OFF STAMP CLEANER
Shop at:
SSS | IO3
NEENAH SOLAR WHITE 110
Shop at:
SSS | AMZ | HBS
ORIGINAL MISTI
ORIGINAL MISTI
Shop at:
SSS | AMZ | SB | HBS
PRISMACOLOR PENCILS
PRISMACOLOR PENCILS
Shop at:
SSS | AMZ
COPIC SKETCH
COPIC SKETCH
Shop at:
AMZ
LIQUID APPLIQUE
LIQUID APPLIQUE
Shop at:
SSS | AMZ
STUDIO KATIA GLUE
STUDIO KATIA GLUE
Shop at:
SSS | SK
SPARKLE GLITTER
SPARKLE GLITTER
Shop at:
SSS | SK
FOAM TAPE - WHITE
FOAM TAPE - WHITE
Shop at:
SSS | SK
GLOSSY ACCENTS
GLOSSY ACCENTS
Shop at:
SSS | AMZ | SB | HBS
To make supplies easy for you to find, I have linked them above. If something is no longer available I will link to a similar product. Affiliate links may be used depending on the product linked. Please help support my blog by using these links while shopping at no additional cost to you. For more information about the affiliates I use, please visit my disclaimer here. Thanks so much for all your support!

Monday, November 23, 2020

A Sparkly and Bright Merry Christmas Slimline Card | Studio Katia

Sparkly, Bright, Merry Christmas, Slimline Card, Studio Katia, Snowman,Copic Markers, rainbow, Distress Oxide blending,Card Making, Stamping, Die Cutting, handmade card, ilovedoingallthingscrafty, Stamps, how to,

Happy Monday Friends.

How fun would it be if the snow was all the colors of the rainbow? What a magical place it would be. A rainbow lover's dream for sure!

Anywho, let's get on with how this pretty Sparkly card came together. 

CARD DETAILS

To begin, I die cut the background panel using the larger frame from the DOTTED SLIMLINE - SET 1. I then used the INK BLENDER BRUSHES to blend out the rainbow colors using the CONFETTI STENCIL and Distress Oxide Inks. It's difficult to see from the pictures but I also stamped out a large SNOWFLAKE on the panel that I heat embossed in white.

Sparkly, Bright, Merry Christmas, Slimline Card, Studio Katia, Snowman,Copic Markers, rainbow, Distress Oxide blending,Card Making, Stamping, Die Cutting, handmade card, ilovedoingallthingscrafty, Stamps, how to,

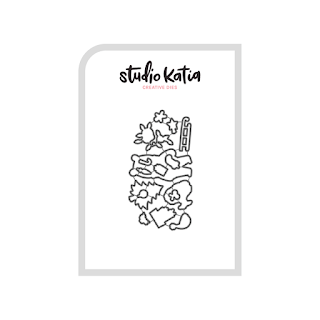
The cute snowman comes from the HAPPY SNOWMEN that was colored using Copics and then die cut with the coordinating HAPPY SNOWMEN DIES. The Trees in the scene come from the WINTER KOBI set that I also colored with Copics and die cut with the coordinating WINTER KOBI DIES.

Sparkly, Bright, Merry Christmas, Slimline Card, Studio Katia, Snowman,Copic Markers, rainbow, Distress Oxide blending,Card Making, Stamping, Die Cutting, handmade card, ilovedoingallthingscrafty, Stamps, how to,

To create the sparkly hills, I used the TRIMMINGS BORDERS CREATIVE DIES and just extended the wave by lining up the end of the cut with the die again to fit the slimline format. I then die cut the hill piece with the DOTTED SLIMLINE - SET 1 to create the same finished edge along the bottom of the panel. To add the sparkly detail, I used an old paintbrush and loaded it with STUDIO KATIA GLUE and then painted the hills with it. I then poured the CHUNKY SPARKLE GLITTER over the wet glue and pressed it in place with a piece of scrap paper. Once it was dry I glued it onto the background panel.

Sparkly, Bright, Merry Christmas, Slimline Card, Studio Katia, Snowman,Copic Markers, rainbow, Distress Oxide blending,Card Making, Stamping, Die Cutting, handmade card, ilovedoingallthingscrafty, Stamps, how to,

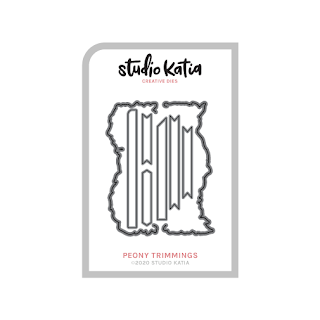
For the sentiment, I stamped the Merry from the POINSETTIA BORDER on the top right-hand side of the panel and then stamped the Christmas in white onto black cardstock. I then used a small banner die from the PEONY TRIMMINGS DIES to layer on to the Merry.

Sparkly, Bright, Merry Christmas, Slimline Card, Studio Katia, Snowman,Copic Markers, rainbow, Distress Oxide blending,Card Making, Stamping, Die Cutting, handmade card, ilovedoingallthingscrafty, Stamps, how to,

For a finishing touch of more sparkle, I added some IRIDESCENT STARS to the rainbow sky.

I hope this Sparkly and Bright Christmas Card inspired you today. Thank you for stopping by and until next time... Happy Crafting!

SUPPLIES
HAPPY SNOWMEN
HAPPY SNOWMEN
Shop at:
SSS | SK
HAPPY SNOWMEN DIES
HAPPY SNOWMEN DIES
Shop at:
SSS | SK
WINTER KOBI
WINTER KOBI
Shop at:
SK
WINTER KOBI DIES
WINTER KOBI DIES
Shop at:
SK
SNOWFLAKES
SNOWFLAKES
Shop at:
SSS | SK
POINSETTIA BORDER
POINSETTIA BORDER
Shop at:
SSS | SK
CONFETTI STENCIL
CONFETTI STENCIL
Shop at:
SSS | SK
DOTTED SLIMLINE - SET 1
Shop at:
SSS | SK
TRIMMINGS BORDERS CREATIVE DIES
Shop at:
SSS | SK
PEONY TRIMMINGS DIES
Shop at:
SSS | SK
INK BLENDER BRUSHES
INK BLENDER BRUSHES
Shop at:
SSS | SK
CHUNKY SPARKLE GLITTER
Shop at:
SK
IRIDESCENT STARS
IRIDESCENT STARS
Shop at:
SSS | SK
EMBELLISHMENT WAND
EMBELLISHMENT WAND
Shop at:
SSS | SK
STUDIO KATIA GLUE
STUDIO KATIA GLUE
Shop at:
SSS | SK
TRIANGLE TRAY
TRIANGLE TRAY
Shop at:
SSS | SK
FOAM TAPE - WHITE
FOAM TAPE - WHITE
Shop at:
SSS | SK
NEENAH SOLAR WHITE 110
Shop at:
SSS | AMZ | HBS
BLACKOUT INK
BLACKOUT INK
Shop at:
SSS | HBS | IO3
ORIGINAL MISTI
ORIGINAL MISTI
Shop at:
SSS | AMZ | SB | HBS
COPIC SKETCH
COPIC SKETCH
Shop at:
AMZ
GEMINI JR. DIE CUTTER
Shop at:
SSS | AMZ | SB
Oxide Ink Pad PICKED RASPBERRY
Shop at:
SSS | SB | HBS
RIPE PERSIMMON DISTRESS OXIDE
Shop at:
SSS | SB | HBS
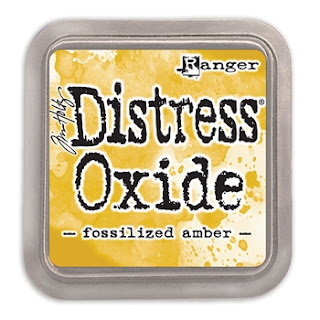
Oxide Ink Pad FOSSILIZED AMBER
Shop at:
SSS | SB | HBS
Oxide Ink Pad MOWED LAWN
Shop at:
SSS | SB | HBS
Oxide Ink Pad SALTY OCEAN
Shop at:
SSS | AMZ | HBS
Oxide Ink Pad WILTED VIOLET
Shop at:
SSS | SB | HBS
VersaFine ONYX BLACK Ink
Shop at:
SSS | AMZ | SB | HBS
ATELIER SHARK TOOTH
ATELIER SHARK TOOTH
Shop at:
SSS | IO3
ARCTIC WHITE POWDER
ARCTIC WHITE POWDER
Shop at:
SSS | IO3
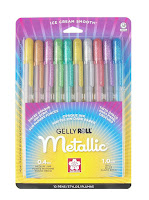
Gelly Roll Metallic Gel Ink Pen Set
Shop at:
AMZ
To make supplies easy for you to find, I have linked them above. If something is no longer available I will link to a similar product. Affiliate links may be used depending on the product linked. Please help support my blog by using these links while shopping at no additional cost to you. For more information about the affiliates I use, please visit my disclaimer here. Thanks so much for all your support!

Saturday, November 21, 2020

Christmas Gift Card Tag | 25 Days of Christmas Tags 2020 - Day 21 | Studio Katia

Card Making, Stamping, Die Cutting, handmade tag, ilovedoingallthingscrafty, Stamps, how to,  Tag, Christmas, Gift Card Holder Tag, 25 Days of Christmas Tags 2020, Studio Katia

Hello friends and Happy Saturday.

Welcome to Day 21 of Tracey McNeely's 25 Days of Christmas Tags 2020 For those of you that love to make tags this event is for you so make sure you check it out over on Tracey's Blog. There are lots of prizes and giveaways from all the Sponsors.


Today I will be sharing a Christmas Gift Tag featuring products from Studio Katia which happens to be today's Sponsor for the event.

TAG DETAILS

To begin, I die cut two of the tags from the DOTTED PATTERNS SET 1, one for the front of the tag and one for the backside.

To the front tag, I stamped a random pattern using the SNOWFLAKES stamps and then heat embossed them in Silver. 

Card Making, Stamping, Die Cutting, handmade tag, ilovedoingallthingscrafty, Stamps, how to,  Tag, Christmas, Gift Card Holder Tag, 25 Days of Christmas Tags 2020, Studio Katia

Next, I stamped out this cute snowman from the HAPPY SNOWMEN set, colored it in using Copics, and then die-cut him using the coordinating HAPPY SNOWMEN DIES.

I then stamped out the sentiment from the GIFT TAG GREETINGS: WINTER onto black cardstock using my new favorite white ink and then heat set it using white emb. pwd. 

To finish off the front of the tag I then embellished it using some ARCTIC BREEZE PEARLS. At this point, you could stop as the front is complete, but I wanted to take this one step further and turn the tag into a gift card holder as well.

Card Making, Stamping, Die Cutting, handmade tag, ilovedoingallthingscrafty, Stamps, how to,  Tag, Christmas, Gift Card Holder Tag, 25 Days of Christmas Tags 2020, Studio Katia

Now for the back part of the tag... using the other panel I previously die-cut from the DOTTED PATTERNS SET 1 I ran the die-cut again through the die machine this time to create an opening to slide the gift card through with the coordinating dotted die. 

Next, I stamped out the to and the from with the lines using the GIFT TAG GREETINGS: WINTER stamp set. 

Card Making, Stamping, Die Cutting, handmade tag, ilovedoingallthingscrafty, Stamps, how to,  Tag, Christmas, Gift Card Holder Tag, 25 Days of Christmas Tags 2020, Studio Katia

The last step is to glue both layers of the tag together, ensuring no adhesive gets into any area that the gift card is to slide through. 

Make sure to stop by Tracey's Blog for all the details on her 25 Days of Christmas Tags 2020 Event. Here is a list of all the Sponsors from this year. 


I hope you got some inspiration from this simple Christmas Gift Card Tag.  
Thank you for stopping by and until next time... Happy Crafting!


SUPPLIES
DOTTED PATTERNS SET 1
Shop at:
SSS | SK
SNOWFLAKES
SNOWFLAKES
Shop at:
SSS | SK
HAPPY SNOWMEN
HAPPY SNOWMEN
Shop at:
SSS | SK
HAPPY SNOWMEN DIES
HAPPY SNOWMEN DIES
Shop at:
SSS | SK
GIFT TAG GREETINGS: WINTER
Shop at:
SSS | SK
ARCTIC BREEZE PEARLS
Shop at:
SSS | SK
TRIANGLE TRAY
TRIANGLE TRAY
Shop at:
SSS | SK
EMBELLISHMENT WAND
EMBELLISHMENT WAND
Shop at:
SSS | SK
FOAM TAPE - WHITE
FOAM TAPE - WHITE
Shop at:
SSS | SK
NEENAH SOLAR WHITE 110
Shop at:
SSS | AMZ | HBS
MINI MISTI
MINI MISTI
Shop at:
SSS | AMZ | SB | SK | HBS
GEMINI JR. DIE CUTTER
Shop at:
SSS | AMZ | SB
BLACKOUT INK
BLACKOUT INK
Shop at:
SSS | HBS | IO3
COPIC SKETCH
COPIC SKETCH
Shop at:
AMZ
Embossing Magic Bag
Embossing Magic Bag
Shop at:
SSS | AMZ
JUICY INK
JUICY INK
Shop at:
SSS | HBS | IO3
CHROME EMB PWD
CHROME EMB PWD
Shop at:
SSS | IO3
ATELIER SHARK TOOTH
ATELIER SHARK TOOTH
Shop at:
SSS | IO3
ARCTIC WHITE POWDER
ARCTIC WHITE POWDER
Shop at:
SSS | IO3
WHITE GELLY ROLLER PEN SET
Shop at:
SSS | AMZ | SB
To make supplies easy for you to find, I have linked them above. If something is no longer available I will link to a similar product. Affiliate links may be used depending on the product linked. Please help support my blog by using these links while shopping at no additional cost to you. For more information about the affiliates I use, please visit my disclaimer here. Thanks so much for all your support!