Saturday, June 13, 2020

Rainbow Foiled Friendship Cards | Spellbinders


Rainbow Foiled Friendship Cards | Spellbinders

Hey Friends, Happy Weekend! 

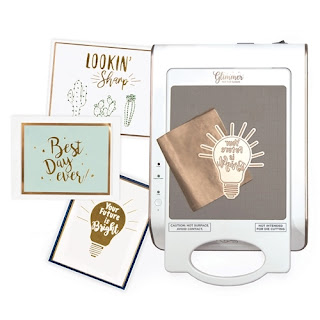
Today I have some fun Rainbow Foiled Friendship Cards featuring the MODERN LINES GLIMMER PLATE from Spellbinders GLIMMER BACKGROUND COLLECTION. If you know me, you know I love to rainbow everything, so I was really excited to play with the RAINBOW GLIMMER FOIL. Such a fun way to add a lot of color without a lot of work!

CARD DETAILS

As I mentioned all these cards are done using the MODERN LINES GLIMMER PLATE as well as the RAINBOW GLIMMER FOIL with the HOT FOIL SYSTEM.

For this first card, I foiled half of the card panel and then added a sentiment from this month's GLIMMER HOT FOIL KIT. I then added some colorful crystals to finish off this simple card.

Rainbow Foiled Friendship Cards | Spellbinders

This card was done the exact same way using the same supplies but in a different orientation.

Rainbow Foiled Friendship Cards | Spellbinders

This next card, I used the MODERN LINES GLIMMER PLATE vertically and horizontally to create this grid-like rainbow background. I then foiled a black piece of cardstock with another sentiment from the GLIMMER HOT FOIL KIT using POLISHED BRASS - Glimmer Foil.

Rainbow Foiled Friendship Cards | Spellbinders

For this last card, I used the negative pieces of the RAINBOW GLIMMER FOIL. I used the backside of the MODERN LINES GLIMMER PLATE to foil press the pieces onto the black cardstock as it is a smooth metal surface.

The sentiment comes from the HELLO DEAR FRIEND FOIL AND DIE SET using that I then die cut using one of the RECTANGLE ETCHED DIES.

Rainbow Foiled Friendship Cards | Spellbinders

I hope you were inspired by these simple Rainbow Foiled Friendship Cards. Wishing you all a wonderful weekend!

Thank you for stopping by and until next time... Happy Crafting 👋


SUPPLIES

MODERN LINES GLIMMER PLATE
Shop at:
SSS | SB
GLIMMER RECTANGLE GLIMMER PLATES
Shop at:
SSS | SB
JUNE GLIMMER HOT FOIL KIT
Shop at:
SB
HELLO DEAR FRIEND FOIL AND DIE SET
Shop at:
SSS | SB
RAINBOW - Glimmer Foil
Shop at:
SSS | SB
POLISHED BRASS - Glimmer Foil
Shop at:
SSS | SB
BLACK GLIMMER FOIL
BLACK GLIMMER FOIL
Shop at:
SB | SB
HOT FOIL SYSTEM
HOT FOIL SYSTEM
Shop at:
SSS | SB | SB
PLATINUM 6 DIE CUTTING PLATFORM
Shop at:
SSS | SB | SB
RECTANGLE ETCHED DIES
Shop at:
SSS | SB

To make supplies easy for you to find, I have linked them above. If something is no longer available I will link to a similar product. Affiliate links may be used depending on the product linked. Please help support my blog by using these links while shopping at no additional cost to you. For more information about the affiliates I use, please visit my disclaimer here. Thanks so much for all your support!

Friday, June 12, 2020

Superheros Wear Scrubs Thank You Cards and DIY Nurse Key Chains | Erin Lee Creative


Superheros Wear Scrubs Thank You Cards and DIY Key Chains | Erin Lee Creative

Happy Friday my friends!

Here in Edmonton, we are starting phase 2 of the COVID Relaunch. Personally, I think it may be too soon and I fear that the numbers of cases will start to spike. I hope I'm wrong. Thankfully our city has had really low numbers, but that could change really fast.

Anyways, the point of this post today is to share some fabulous cards that I made for my colleagues at work featuring the Superhero Scrubs Stamp Set from Erin Lee Creative. Erin kindly sent me this set when she found out I was a nurse and I now want to thank all the awesome Oncology Nurses I work with as they really are superheroes!

CARD DETAILS

As mentioned above I used the Superhero Scrubs Stamp Set to stamp out all the images using Blackout Ink and then colored them in using Copic markers. For the images that are popped up I fussy cut them out. Each card was done the same way using different sentiments and designs. I then just finished them with some Iridescent Crystals from Studio Katia. The scallop frame I used comes from Honey Bee Stamps.

I also created 3 keychains to go along with each card. To create the key chain I stamped the image onto shrink plastic and then colored the opposite side that was stamped using Copic markers. I then punched a hole above the image and then fussy cut the plastic and used my heat gun to Shrink it. I will have a video on Instagram to show you how that was done.

LOVE how these turned out. Scroll through to see the differences in each card.

Superheros Wear Scrubs Thank You Cards and DIY Key Chains | Erin Lee Creative

Superheros Wear Scrubs Thank You Cards and DIY Key Chains | Erin Lee Creative

Superheros Wear Scrubs Thank You Cards and DIY Key Chains | Erin Lee Creative

Superheros Wear Scrubs Thank You Cards and DIY Key Chains | Erin Lee Creative

Superheros Wear Scrubs Thank You Cards and DIY Key Chains | Erin Lee Creative

Superheros Wear Scrubs Thank You Cards and DIY Key Chains | Erin Lee Creative

Superheros Wear Scrubs Thank You Cards and DIY Key Chains | Erin Lee Creative


I hope you were inspired by these Superheros Wear Scrubs Thank You Cards and DIY Key Chains.

Have a wonderful day!

Thank you for stopping by 😊
Until next time... Happy Crafting 👋


Monday, June 8, 2020

Simple Happy BEE-Day Shaker Card | Studio Katia

Clean and Simple, Honey Bee, Studio Katia, Card Making, Stamping, Die Cutting, handmade card, ilovedoingallthingscrafty, Birthday, Stamps, how to,

Hello, my Friends. 

Today I am sharing a super simple shaker card that could be used for any occasion depending on the sentiment you chose, this one will be for someone's BEE-day!

CARD DETAILS


To begin, I stamped out the cute little bee from the HONEY BEES stamp set, colored it using Copic Markers, and then die cut it using the HONEY BEES coordinating dies.


Next, I stamped out the yellow pattern on the background using yellow ink and the ZIG ZAG STRIPES background stamp. I then die cut the panel using the outer frame from the SCALLOP HONEYCOMB COVER and I also die cut the window for the shaker area using the HONEYCOMB SHAKER. To the back of the panel, I glued a piece of ACETATE

Clean and Simple, Honey Bee, Studio Katia, Card Making, Stamping, Die Cutting, handmade card, ilovedoingallthingscrafty, Birthday, Stamps, how to,

I then ran a piece of black cardstock through the die cut machine using the HONEYCOMB SHAKER and used the honeycomb shape to glue on the top of the acetate window.

With the background panel flipped onto its front, I added FOAM TAPE around the perimeter of the shaker window and then sprinkled my shaker bits which included GOLD FEVER  CONFETTI and SPARKLING HEARTS CONF. GLITTER inside the well. To close in the shaker area I used a piece of yellow cardstock and then attached the finished panel to an A2 top fold card front.

Clean and Simple, Honey Bee, Studio Katia, Card Making, Stamping, Die Cutting, handmade card, ilovedoingallthingscrafty, Birthday, Stamps, how to,

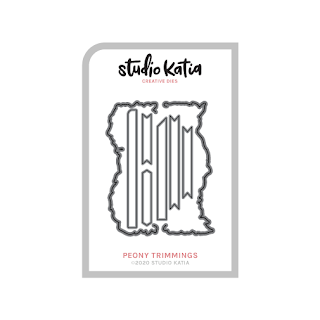
To finish the card off, I added a sentiment strip from the PEONY TRIMMINGS DIES that I stamped with a sentiment from the HONEY BEE stamp set and then popped up the cute be in the corner. 

Thank you for stopping by 😊
Until next time... Happy Crafting 👋

SUPPLIES
HONEY BEES
HONEY BEES
Shop at:
SSS | SK
HONEY BEES DIES
HONEY BEES DIES
Shop at:
SSS | SK
ZIG ZAG STRIPES
ZIG ZAG STRIPES
Shop at:
SSS | SK
HONEYCOMB SHAKER
HONEYCOMB SHAKER
Shop at:
SSS | SK
SCALLOP HONEYCOMB COVER
Shop at:
SSS | SK
PEONY TRIMMINGS DIES
Shop at:
SSS | SK
CLEAR ACETATE SHEETS
Shop at:
SSS | SK
GOLD FEVER CONFETTI
GOLD FEVER CONFETTI
Shop at:
SSS | SK
SPARKLING HEARTS CONF. GLITTER
Shop at:
SSS | SK
FOAM TAPE - WHITE
FOAM TAPE - WHITE
Shop at:
SSS | SK
STUDIO KATIA GLUE
STUDIO KATIA GLUE
Shop at:
SSS | SK
MISTI TOOL - ORIGINAL SIZE
Shop at:
SSS | AMZ | SB | HBS
GEMINI JR. DIE CUTTER
Shop at:
SSS | AMZ | SB
BLACKOUT INK
BLACKOUT INK
Shop at:
SSS | IO3
ATELIER BEE STING YELLOW
Shop at:
SSS | IO3
NEENAH SOLAR WHITE 110
Shop at:
SSS | AMZ | HBS
COPIC SKETCH
COPIC SKETCH
Shop at:
AMZ
To make supplies easy for you to find, I have linked them above. If something is no longer available I will link to a similar product. Affiliate links may be used depending on the product linked. Please help support my blog by using these links while shopping at no additional cost to you. For more information about the affiliates I use, please visit my disclaimer here. Thanks so much for all your support!


Friday, June 5, 2020

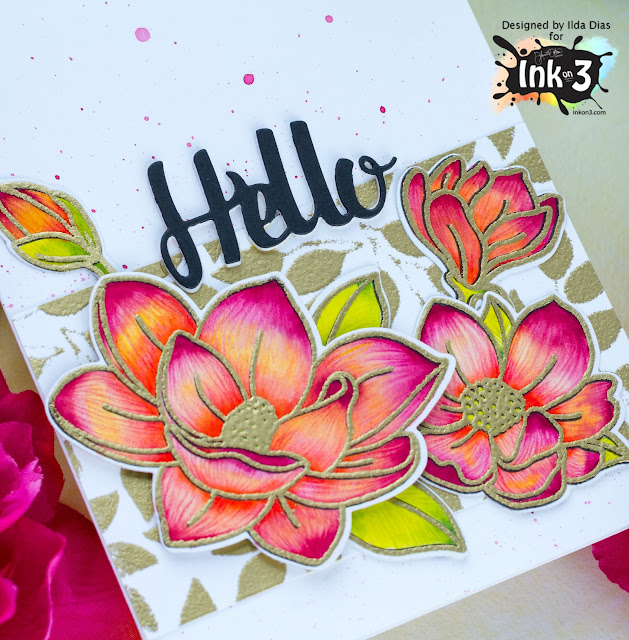
Hello Magnolia Friendship Card | Ink On 3


Hello Magnolia Friendship Card | Ink On 3

Hello Friends and happy Friday!

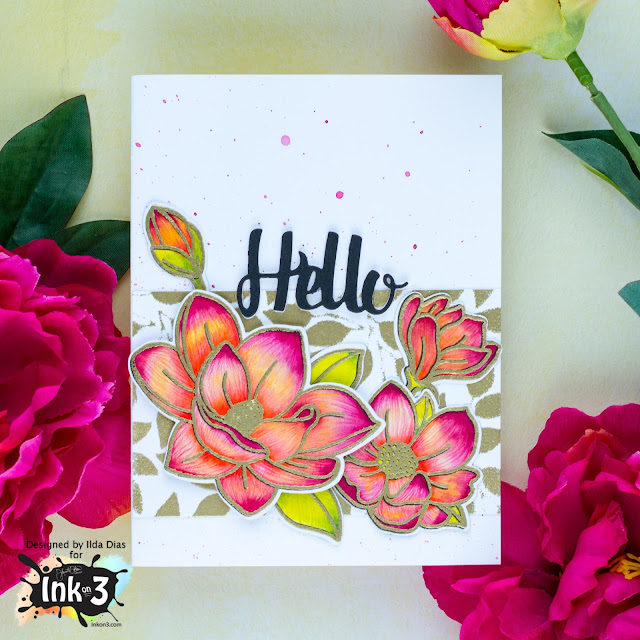
Today I am sharing a card featuring the BIG BOLD MAGNOLIAS Stamp set, that I previously had colored for the last Kathy Raccosin's coloring challenge. I love participating in her challenges because I end up with a ton of colored pieces ready to go on a card.

CARD DETAILS

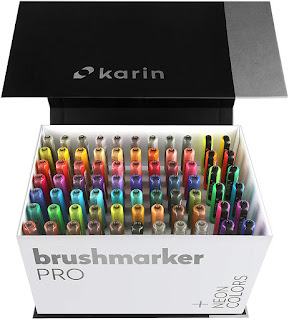
So to begin, I stamped out the images first onto Bristol paper using BLACKOUT INK. I then colored the images in with Karin Brush Marker Pro Brushpens that were new to me and I wanted to test them out. Once the water coloring was dry I went back to add some pencil detailing. I then place the colored images back into the stamp positioner and re-inked the images using JUICY INK this time. 

Hello Magnolia Friendship Card | Ink On 3

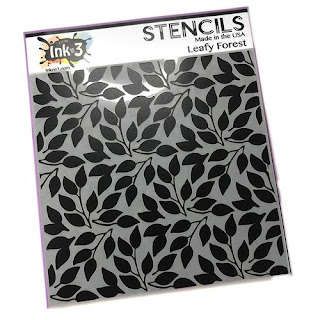
Next, I sprinkled GOLD RUSH EMB. PWD. over the panel and then heat set the lines in. As you can see some of the BLACKOUT INK is still showing through some areas, but that didn't bother me as it looks like a shadow line. Please note, when you watercolors the paper will warp a little so linning it back may not be perfect unless you use non-waterbased media. I then die cut each flower up using the BIG BOLD MAGNOLIAS coordinating dies and glued them on to a strip of cardstock that I had added the same gold embossing using the LEAFY FOREST STENCIL.

Hello Magnolia Friendship Card | Ink On 3

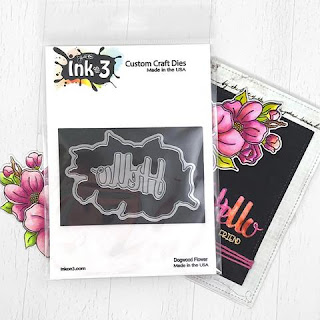
To finish, I die cut, stacked and glued together the Hello from the DOGWOOD coordinating die set. Before adhering it all to the card base I diluted some of the red I used on the flower and added splatters onto the card front.

I hope you have been inspired by this Magnolia Friendship Card. 

Thank you for stopping by 😊
Until next time... Happy Crafting 👋


SUPPLIES
BIG BOLD MAGNOLIAS
BIG BOLD MAGNOLIAS
Shop at:
SSS | IO3
BIG BOLD MAGNOLIAS DIES
Shop at:
SSS | IO3
DOGWOOD FLOWER DIES
DOGWOOD FLOWER DIES
Shop at:
SSS | IO3
LEAFY FOREST STENCIL
Shop at:
IO3
BLACKOUT INK
BLACKOUT INK
Shop at:
SSS | IO3
JUICY INK
JUICY INK
Shop at:
SSS | IO3
GOLD RUSH EMB. PWD.
GOLD RUSH EMB. PWD.
Shop at:
SSS | IO3
MED. WATER BRUSH
MED. WATER BRUSH
Shop at:
IO3
MISTI TOOL - ORIGINAL SIZE
Shop at:
SSS | AMZ | SB | HBS
NEENAH SOLAR WHITE 110
Shop at:
SSS | AMZ | HBS
KARIN BRUSHMARKER PRO
KARIN BRUSH MARKER PRO
Shop at:
SSS | AMZ
PRISMACOLOR PENCILS
PRISMACOLOR PENCILS
Shop at:
SSS | AMZ
GEMINI JR. DIE CUTTER
Shop at:
SSS | AMZ | SB
STUDIO KATIA GLUE
STUDIO KATIA GLUE
Shop at:
SSS | SK
FOAM TAPE - WHITE
FOAM TAPE - WHITE
Shop at:
SSS | SK

To make supplies easy for you to find, I have linked them above. If something is no longer available I will link to a similar product. Affiliate links may be used depending on the product linked. 
Please help support my blog by using these links while shopping at no additional cost to you. For more information about the affiliates I use, please visit my disclaimer here. Thanks so much for all your support!