Monday, January 7, 2019

The Ton's 4th Anniversary Blog Hop | Day 3

Hello Crafty friends! Today I am uber excited to be Guest Designing for Day 3 of The Ton's 4th Anniversary Blog Hop. This time Effie has introduced 9 new designs for this release. There are some free gifts with purchase promotions ongoing. Head over to The Ton Stamps' blog for more details. 

For my projects, I have created two super cute cards to showcase a few of the new sets from this release. Make sure you read the end of the post to check out the Giveaway details and where to get started on the Hop! Here is my first card featuring the Coming Up Peonies Stamp set.


CARD DETAILS
To start, I stamped out the large peony stamp onto watercolor paper using a watermark ink and then heat set it with white embossing powder. I then used Mijello Mission Gold watercolors to loosely watercolor the flowers in the finished off by adding some tine color splashes.


Next, I die cut the panel using a stitched rectangle die and then glued it onto an A2 card base. I then stamped out the sentiment onto a piece of paper that I had die cut with the same rectangle die to add the stitching to the ends. The Hello, Fabulous stamp comes from the Power Pumps set that I will be sharing in the next card. I then just added some sequins to the card front and finished off the center of the large flower with Stickles glitter and some tiny yellow Nuvo Crystal drops.


Now, what girl would love a pair of these Power Pumps?!?๐Ÿ˜ Of course, I had to make them look like Christian Louboutin Patent Glossy Pumps. If I didn't have terrible nurse feet I would love a pair of these LOL... But sadly I have to wear orthotics, so I'll stick to the Stamped kind. It's a lot safer for my health and for my wallet!


To make this card, I began by stamping out the jewels onto a piece of Neenah cardstock using a couple of the grey color inks from the Pewter Mini sets to create the patterned background. I then stamped out the pumps on another piece of paper starting with the grey stamped ink pieces on the pumps. I then used Black Versafine Onyx Ink to add the black layer since I wanted to give these heels a high gloss finish and heat set them with clear embossing powder. Rather than stamping out the red of the sole I used the R46 Copic marker. I then fussy cut the pumps leaving a white edge around the shoes.


Next, I stamped a sentiment from the Power Pumps set onto a strip of white cardstock. I then glued it onto a red strip that I trimmed to the size of the background panel and glued that onto an A2 size black card base.  I then popped the pumps up with foam tape and glued them in place. For an added touch of Bling, I glued on some bows to the heels and added some jewels to the centers. I also finished off the card with some crystals and added glossy accents to the larger jewels on the stamped background. I think this card could be used for so many occasions. I absolutely love how this card turned out and want to make some more for my girlfriends! 

SUPPLIES
To make supplies easy to find, I have linked them below. If something I used is no longer available I will link to a similar product. Affiliate links may be used depending on the product. Your purchases help keep my blog running, so thanks in advance for the support! Supplies marked with an asterisk (*) were generously sent to me.

Power Pumps
*Power Pumps
Shop at:
ton
Peony Close Up
*Peony Close Up
Shop at:
ton
Pewter Minis
*Pewter Minis
Shop at:
ton
Strathmore 400 Series Watercolor Pad
Shop at:
AMZ
Tim Holtz Stamp Platform
Shop at:
SSS | AMZ
Inkadinkado Embossing Magic
Shop at:
SSS | AMZ
Juicy  Ink
Juicy Ink
Shop at:
SSS | IO3
Arctic White Ultra Powder
Shop at:
SSS | IO3
Mijello Mission Gold Water Color Palette Set
Shop at:
SSS | AMZ
Majestic Royal and Langnickel Brush Set
Shop at:
AMZ
Sizzix Big Shot
Sizzix Big Shot
Shop at:
SSS | AMZ
Magnetic Platform
Magnetic Platform
Shop at:
SSS | AMZ
STANDARD CUTTING PADS
Shop at:
SSS | AMZ
Neenah  80 LB SOLAR WHITE
Neenah 80 LB SOLAR WHITE
Shop at:
SSS | AMZ
SSS Card Stock 24 Colors
Shop at:
SSS
Tsukineko VersaFine ONYX BLACK Ink Pad
VersaFine ONYX BLACK Ink Pad
Shop at:
SSS | AMZ
Blackout Ink
Blackout Ink
Shop at:
SSS | IO3
SILVER | CRYSTALS
SILVER | CRYSTALS
Shop at:
SSS | SK
MAJESTIC FUSION
MAJESTIC FUSION
Shop at:
SSS | SK
April Crystals
April Crystals
Shop at:
SSS | SK
TRIANGLE TRAY
TRIANGLE TRAY
Shop at:
SSS | SK
Double Ended Jewel Picker
Double Ended 
Jewel Picker
Shop at:
SSS | AMZ | HBS
STUDIO KATIA GLUE
STUDIO KATIA GLUE
Shop at:
SSS | SK
Recollections Black Heavyweight Cardstock 110bs
Shop at:
AMZ
Double-Sided Foam Tape
Shop at:
SSS | AMZ
Glossy Accents
Glossy Accents
Shop at:
SSS | AMZ
Tonic DANDELION YELLOW GLOSS Nuvo Crystal DropsDandelion Yellow Nuvo Crystal Drops
Shop at:
SSS | AMZ
Stickles Glitter Glue, Icicle
Stickles Glitter 
Glue, Icicle
Shop at:
SSS | AMZ | HBS


HOP DETAILS
Start → The Ton (Heba Alsibai)
Tazhiana Gordon
Marsha Farris
Kira Ness
Susan B.
Olga Matyushevskaya
Ilda Dias ←You are Here!!!

GIVEAWAY
Win a stamp of choice from The Ton's new release. To enter, leave a comment on each blog each day.  Effie will choose one winner per day (4 winners total) and announce the winners on The Ton's blog by January 12. The comment period for these giveaways will close on January 11 at 7pm EST. 

Thank you for stopping by ๐Ÿ˜Š
Until next time... Happy Hopping๐Ÿ‘‹

Brie My Valentines Day Card | Honey Bee Stamps


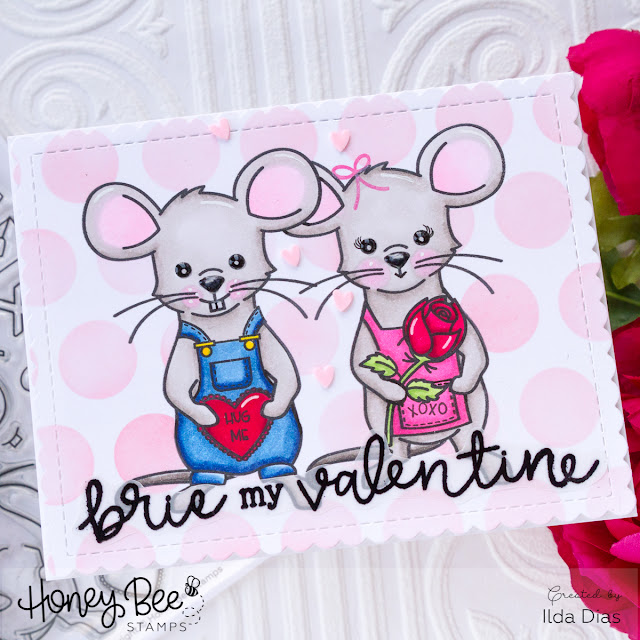
Now that the Holidays are over I am excited to start working on Valentines Day cards. The new Mae the Mouse stamp from the Brie Mine Release is packed with so many Valentine/Love type stamps that I had to make a Valentines Day card with it. 

So say hello to Moe and Mae Mouse, don't they make the cutest little couple!?! 

Brie My Valentines Day Card for Honey Bee Stamps by ilovedoingallthingscrafty.com

Before working on the final card I stamped out the idea I had onto a scratch piece of paper as I wanted to make this a one layer card. This helped me figure out what to stamp first and what I had to make masks for. I then used the rough stamped piece of paper to place my stamps in the correct position and then used a stamp positioning tool to stamp each layer out. Sometimes I had to cut spots out in the masks I created to allow the next stamp to stamp onto the paper. For example, on Mae the Mouse, I started with the rose. I then added a mask to the rose but cut a piece off the stem to ensure the hand stamped out in the correct spot. Sometimes the lines didn't connect all the way so I drew them in afterward.  

Once the images were all stamped out, I colored them in using Copic markers and then covered the mice up again with masking paper before working on the background. To blend out the dots, I used Worn Lipstick Oxide ink and a blending brush to add the large circle dots using the Polka Dot Background Stencils.

Brie My Valentines Day Card for Honey Bee Stamps by ilovedoingallthingscrafty.com

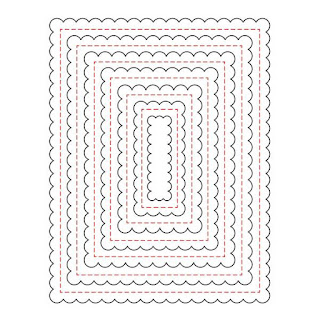
Next, I die cut the card front using the largest Scalloped A2 Frame Die. For the sentiment, I used a few stamps from the Brie Mine set and stamped them onto vellum paper which I then heat embossed fussy cut, and glued in place. 

As finishing details, I added some Hug Me Clay Hearts between the mice, added some white pen highlights, and glossy accents to their eyes and nose. I also stamped out the bow on Mae's head using Picked Raspberry Oxide Ink and drew in her mouth and eyelashes. 

Brie My Valentines Day Card for Honey Bee Stamps by ilovedoingallthingscrafty.com

SUPPLIES
To make supplies easy to find, I have linked them below. If something I used is no longer available I will link to a similar product. Affiliate links may be used depending on the product. Your purchases help keep my blog running, so thanks in advance for the support!

MAE THE MOUSE
MAE THE MOUSE
Shop at:
SSS | SB | HBS
BRIE MINE
BRIE MINE
Shop at:
SSS | SB
Scallop A2 Frames Dies
Shop at:
SSS | SB | HBS
POLKA DOT BACKGROUND STENCILS
Shop at:
SSS | SB | HBS
Hug Me Candy Hearts
Hug Me Candy Hearts
Shop at:
HBS
Neenah  80 LB SOLAR WHITE
Neenah 80 LB SOLAR WHITE
Shop at:
SSS | AMZ
Mini Misti Tool
Mini Misti Tool
Shop at:
SSS | AMZ | SB | SK
Blackout Ink
Blackout Ink
Shop at:
SSS | IO3
Vellum Value Pack
Vellum Value Pack
Shop at:
AMZ
Inkadinkado Embossing Magic
Shop at:
SSS | AMZ
Tsukineko VersaFine ONYX BLACK Ink Pad
Shop at:
SSS | AMZ | SB
Black and Decker  Heat Gun
Black and Decker Heat Gun
Shop at:
AMZ
Sizzix Big Shot
Sizzix Big Shot
Shop at:
SSS | AMZ | SB
Magnetic Platform
Magnetic Platform
Shop at:
SSS | AMZ
STANDARD CUTTING PADS
Shop at:
SSS | AMZ
BLENDER BRUSH Set
BLENDER BRUSH Set
Shop at:
SSS | AMZ
Oxide Ink Pad PICKED RASPBERRY
Shop at:
SSS | SB
Oxide Ink Pad WORN LIPSTICK
Shop at:
SSS | SB
Glossy Accents
Glossy Accents
Shop at:
SSS | AMZ | SB
Uni-Ball Impact Gel Pen
Shop at:
SSS | AMZ | SB


If you have the coordinating dies for Mae the Mouse this card would be a lot quicker and easier to make. Unfortunately, for me at the time I did not  :(  but that didn't stop me from creating my vision. I love how this Valentines Day card turned out and hope you did as well!

Thank you for stopping by ๐Ÿ˜Š
Until next time... Happy Crafting ๐Ÿ‘‹

Wednesday, January 2, 2019

Spellbinders Card Kit of the Month for January | 7 Quick and Easy Valentine Day Cards


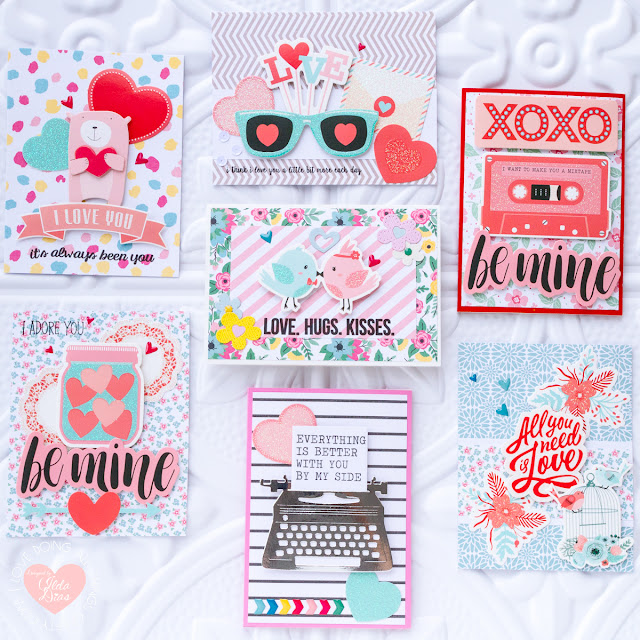
Hello! Today I am sharing 7 Valentine Cards using Spellbinders Card Kit of the Month for January I love how these supplies all coordinated with each other to make cardmaking quick and easy. Just look at all the goodies included in this kit!
Card Kit of the Month Membership
I have to say the dies and the patterned paper stack are my favorite part of the kit. I used almost everything included in the kit at least once. The only products I used that were not included was a stamp positioner, black ink, some silver foil cardstock and the die cutting machine. For those of you looking to make your own handmade Valentines Day cards, I would recommend this kit for you!  Just look of all the cards I whipped up in a few hours. 

Spellbinders Card Kit of the Month

CARD DETAILS

These large premade dies make cardmaking so quick and easy, definitely a time saver. For my first card, I just popped 3 of them up with foam and glued them on to a trimmed piece of patterned paper that I had glued onto the prescored red card base.

7 Quick and Easy Valentine Day Cards using Spellbinders Card Kit of the Month for January by ilovedoingallthingscrafty.com

For card #2, once again I used the premade die cuts as the focal point. Stamped a sentiment from the stamp set included in the kit underneath the dies onto this trimmed piece of patterned paper that I had glued onto a card base and voila, all done card number 2!

7 Quick and Easy Valentine Day Cards using Spellbinders Card Kit of the Month for January by ilovedoingallthingscrafty.com

For this next card, I used a couple of different pieces of patterned and solid cardstock to create some layers for the background. I then simply added the die cut pieces and finished it off with a few enamel hearts.

7 Quick and Easy Valentine Day Cards using Spellbinders Card Kit of the Month for January by ilovedoingallthingscrafty.com

Again here I used a piece of patterned paper for the background of the card and added the premade dies as the focal point. I also stamped the sentiment on the top left corner using one of the stamps from the included stamp set. Finished off the card once again with the enamel hearts.

7 Quick and Easy Valentine Day Cards using Spellbinders Card Kit of the Month for January by ilovedoingallthingscrafty.com

For card #5, I first die cut the typewriter using the dies from the kit and then on the paper I stamped the sentiment from the included stamp set.  Popped the typewriter onto some diecut hearts that I had glued directly onto the striped paper and then finished the card with the enamel arrow stickers along the bottom edge.

7 Quick and Easy Valentine Day Cards using Spellbinders Card Kit of the Month for January by ilovedoingallthingscrafty.com

On this next card, I used the die cut sunglasses as a focal point and then built around them with the other die cuts that I had glued onto the white cardstock strip to break up the patterned paper. I finished off the card by stamping the sentiment below the grouping which I thought made a great play on words for "eyes".

7 Quick and Easy Valentine Day Cards using Spellbinders Card Kit of the Month for January by ilovedoingallthingscrafty.com

And for my final love birds card,  I began with stacking a few of the patterned papers together to create somewhat of a frame around the lovebirds and then used the flower dies to cut out flowers using coordinating cardstock to add around the corners of the frame. I then finished up the card once again by stamping out the sentiment and adding the enamel dots and hearts.

7 Quick and Easy Valentine Day Cards using Spellbinders Card Kit of the Month for January by ilovedoingallthingscrafty.com

As you can see from my card examples they are all super simple designs, making them quick and easy to put together. It is so hard to mess them things up when everything is preselected for you to coordinate together.

Thank you, Spellbinders, for sending me the January Card kit to play and create with. For more inspiration using Spellbinder's Kits check out all the inspiration shared on the Club Community. Also make sure you check out all the rest of the Monthly Membership Clubs offered by Spellbinders.

Thank you for stopping by ๐Ÿ˜Š
Until next time... Happy Crafting ๐Ÿ‘‹