Tuesday, February 4, 2014

Valentine Classroom Treats | Ink On 3 Files

Hey All!

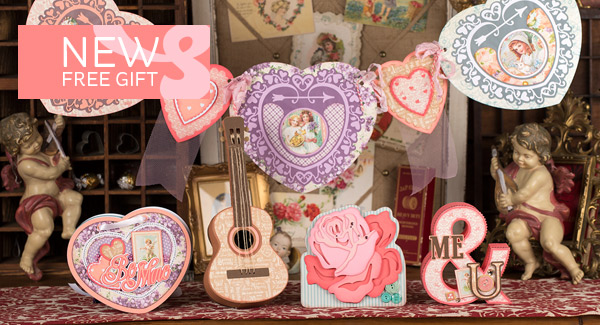
Today I want to share with you a few Valentine classroom treats that I made for my kiddos friends and teachers. The files for this project come from Fleurette Blooms Valentine Be Mine SVG Kit and digital papers from Hearts a Flutter Paper Pack

Really easy to make and so easy to put together! I hope they are all gonna love it :)

Valentine Classroom Treats | Ink On 3 Files

I created this Valentine's sentiment using the Print n Cut feature of the Silhouette. Used a font I liked and just layered it on top of the digital paper before I printed it.

Valentine Classroom Treats | Ink On 3 Files

I also personalized the label on the coffee cup using the same technique.
I love this coffee cup! Perfect for filling with treats or storing a gift card to their favorite coffee shop.

Valentine Classroom Treats | Ink On 3 Files

Valentine Classroom Treats | Ink On 3 Files

I think the boys are going to love these little pencil arrows. I can see them poking each other with these already, lol!

Valentine Classroom Treats | Ink On 3 Files

I hope you have been inspired to create some of your own Valentine's Classroom Treats. Now back to making a bunch more of these for the rest of the class.

Thanks for stopping by!
Happy Crafting  :)

Saturday, January 25, 2014

3D Paper Guitar Gift Box | SVGCuts

Have you seen the latest Vintage Valentine SVG Cuts Kit? If you haven't, you must... it is awesome!!! I couldn't wait to make the guitar that Mary created! Super cute and so easy to put together :)

3D Paper Guitar Gift Box | SVGCuts Files

This guitar makes the perfect gift box for the music lover in your life.. a great Valentine's treat too!

3D Paper Guitar Gift Box | SVGCuts Files

Instead of twine, I used 22 gauge metal wire for my guitar strings. It took a little effort but I am really happy with the results :)

3D Paper Guitar Gift Box | SVGCuts Files

To create this project you will need:

Card stock
Wire
Embellishments
Silhouette Cameo with the SSDE

I used the Print and Cut feature of the Silhouette Cameo to add the roses to the front panel of my guitar.

3D Paper Guitar Gift Box | SVGCuts Files

Hope my guitar has inspired you to create your own musical Masterpiece :) 

Thanks for stopping by!
Happy Crafting  :)

Tuesday, January 21, 2014

3D Paper Floral Centerpiece | Ink On 3 Files

Today I want to share with you my latest Fleurette Bloom Design Team Project "3D Paper Floral Centerpiece."  Aren't those flowers GORGEOUS?! Hard to believe that they are made out of paper!

Have you ever thought of paper floral arrangements as centerpieces for your next event? Why not!?! Yes, they are a little more work but so worth it! They are less expensive to make than buying real flowers, they will last you forever, and are just as beautiful! Plus, your guests will be amazed that you made them too :)

3D Paper Floral Centerpiece | Ink On 3 Files

To make this beautiful 3D Paper Floral Centerpiece you will need SVG files from Fleurette Bloom's Valentine Be Mine 3D SVG Kit and Lush Flowers 3D SVG Collection

Other supplies I used to create this include:

Card stock
Inks
Hot glue and a glue gun
Scotch Quick Dry Adhesive
Decorative Burlap Ribbon
Toothpicks
2" Styrofoam ball 
Decorative green moss

Cut on the Silhouette Cameo with SSDE

3D Paper Floral Centerpiece | Ink On 3 Files

The coolest part is that the Flower Pot (modified coffee mug) opens up to reveal a little surprise! 

 This arrangement would also make a great gift for someone. Think Valentine's Day, Mothers's Day, and upcoming Friend's Birthday... the possibilities go on and on! Also, the treats you fill the base with will act as a weight, keeping it from tipping over! If you chose to make it for yourself just fill the base with stones, beans, whatever you have handy will work ;)

3D Paper Floral Centerpiece | Ink On 3 Files

I absolutely LOVE how this 3D Paper Floral Centerpiece turned out!!! I hope you love it too! If you do make this project make sure you share it on Fleurette Blooms Facebook Page :)

Thanks for stopping by!
Happy Crafting  :)

Monday, January 20, 2014

Harley Davidson / Ferrari 40th Birthday Cake | DIY Cakes

This weekend I had the privilege to make a Harley Davidson/Ferrari 40th birthday cake for a really close friend of ours. Happy Birthday Victor!

Anyone who knows Victor knows he loves his Harley and loves Ferrari! 
I actually wasn't too sure how they were going to come together, but I have to say it is one of my favorite cakes. So happy with how it turned out!

Harley Davidson / Ferrari 40th Birthday Cake | DIY Cakes


Top layer - Vanilla flavored - baked in two 6 inch round

Bottom layer - Chocolate flavored - baked in a 10 inch round pan
The entire cake was frosted with vanilla buttercream icing and covered with fondant.


Harley Davidson / Ferrari 40th Birthday Cake | DIY Cakes

The hardest part of this cake was hand cutting out the Harley and Ferrari logos. So challenging, learned so much but so pleased with the results :)

Harley Davidson / Ferrari 40th Birthday Cake | DIY Cakes

Here's a side view.

Harley Davidson / Ferrari 40th Birthday Cake | DIY Cakes

I hope you like this cake as much as I enjoyed making and eating some of it!

Thanks for stopping by!
Happy Crafting  :)

Wednesday, January 15, 2014

Foxy Valentine's Day Paper Mailbox | SVGCuts

Are you all in Valentine's mood yet? I sure am ;)

Today I want to share with you a really quick and super cute Foxy Mailbox I made using the fox from Hugs and Kisses SVG Cuts Kit! Quick, simple, and useful are my favorite kinds of projects! I know my daughter will love this and it will be the perfect place for her to store all her Valentine's day cards! Now I have to make one for my son, a not so girly fox... I don't think he would appreciate pink too much :) 

Foxy Valentine's Day Paper Mailbox | SVGCuts Files

Just LOVE her! This is one Foxy Fox!!!

Foxy Valentine's Day Paper Mailbox | SVGCuts Files

The sentiment on her heart-shaped belly was created on the Silhouette Cameo with the Print n Cut feature. I love how you can create your own phrases on the Silhouette! I thought I'd incorporate "Fox Say" from the popular hit song "What does a Fox Say?" in my phrase. Arhhhh, now I have that song stuck in my head, lol!

Foxy Valentine's Day Paper Mailbox | SVGCuts Files

Look at her, with her head down... ready for a nap, too CUTE ;)

Foxy Valentine's Day Paper Mailbox | SVGCuts Files

Here are the SVG files you will need for the project:

Fox (modified by using the knife tool in the SSDE) and Hearts - Hugs And Kisses SVG Kit 

I hope this has inspired you to create some of your own cute Mailboxes. The box is also big enough to fill with treats and give as a gift! I think it would make a great Valentine's Day Teachers gift too!


Check out this week's SVG Cuts FREEGIFT with a $9.98 purchase.


vintage-valentines-hero

Thanks for stopping by!
 Happy Crafting  :)

Wednesday, January 8, 2014

Joining the SVGCuts Design Team Announcement

Many of you that have been following my blog know that I am a HUGE fan SVGCuts! So you all can imagine my excitement when I was asked to join their Design Team!!! Are you kidding, little ol' me... what an honor and privilege this. Thank you so much, Mary and Leo!!! If you are new here, or curious about this company that started my paper crafting addictions, make sure you check them out and you soon find out why :)

Below is a screenshot of the SVGCuts blog.
Click HERE to see some more.

That's me... pinch me, please!


I love all the inspiration I get from each and every one of the SVGCuts designers and all the SVG Cuts Facebook Fans that post their amazing creations. I hope that I can continue to inspire others like they all have inspired me!

Thanks for stopping by!
Happy Crafting  :)


Saturday, January 4, 2014

Something Blue Bridal Shower Card and Tag | SVGCuts

So excited to share with you my latest SVGCuts guest post!

Today I have a Bridal Shower Card and Tag I made to complete a gift ensemble. The gift wrap and bow inspired my "Something Blue" creations! For complete instructions on how to recreate your own stop by the SVG Cuts Blog.

Something Blue Bridal Shower Card and Tag | SVGCuts Files

Here are the SVG Cuts Collections I used:


Cut and created on the Silhouette Cameo using SSDE

 This elegant gift tag is SO pretty that it could easily become an ornamental keepsake for the Bride!

Something Blue Bridal Shower Card and Tag | SVGCuts Files

Really LOVE how this card came together... the tulle on the Brides Dress and veil, and the umbrella are my favorites :)

Something Blue Bridal Shower Card and Tag | SVGCuts Files

I used the Print n Cut on the Silhouette Cameo to create the banner and the Sentiment on the inside of the card. With Print n Cut you can make your cards as personal as you like! No more worrying about messy writing or making mistakes. All you really have to do is sign your name!

Something Blue Bridal Shower Card and Tag | SVGCuts Files

Next time you attend a shower, surprise the Bride with your own handmade gifts, they will truly be unforgettable!

Don't forget to check out this week's FREE gift from SVG Cuts Winter Gazebo SVG Kit! Just look at that Gazebo!!! What a perfect wedding creation that would make!


Thanks for stopping by!
Happy Crafting  :)

Wednesday, January 1, 2014

Noah 3D Paper Letters | SVGCuts

Happy New Year Everyone!!! I hope 2014 is going to be a great year for all of us! May it bring health, happiness, and many crafty inspirations! 

I have a quick project to share with you today that I had made for my cousin to give as a Christmas gift! Welcome to the world Baby Noah! 


I was asked to do the letters in grey and yellow to coordinate with the baby's room. Well, what do you think???   I think CUTENESS!!!


Letters come from SVGCuts 3D Letters SVG Kit
Cut out on the Silhouette Cameo

LOVE how they turned out! Hope you did too :)

Thanks for stopping by!
Happy Crafting  :)

Saturday, December 28, 2013

Snowman Gift Box | Ink On 3 Files

Hi Everyone!

Today I have the cutest Snowman gift box to share with you. The files all come from Fleurette Bloom Designs.

Isn't he SOOOO cute? "HELLO" he says :)

Snowman Gift Box | Ink On 3 Files

To recreate this, here are the files you will need:

This project was all cut and created on the Silhouette Cameo using SSDE.


Is that not the most adorable face? Those cheeks look so pinch-able!

Snowman Gift Box | Ink On 3 Files

This box is perfect for holding a lot of great little surprises. Also, would make a great box for a Winter Birthday or just to cheer someone up... that face would make anyone smile and melt their heart!  

When opened all up,  it kinda looks like the snowman is all melting... Awww  :(  poor thing, LOL!

Snowman Gift Box | Ink On 3 Files

Here he is again... sharing HUGS with you all!

Snowman Gift Box | Ink On 3 Files

I had so much fun creating this little Snowman Gift Box, hopefully it has inspired you to create one too! If you do make sure you share it on Fleurette Bloom's Facebook Page. Would love to see your take on it :)


Thanks for stopping by!
Happy Crafting  :)

Thursday, December 26, 2013

Framed Paper Christmas Wreaths | SVGCuts Files


Happy Boxing Day to all that celebrate the Holiday today! For us Canadians, it's kinda like the US Black Friday, lots of crazy shopping and SALES ;) I hope you all had a very Merry Christmas and enjoyed some time with your friends and family! 

Today I want to share with you these awesome framed Paper Christmas Wreaths I created. I purposely didn't share this post sooner as I didn't want to spoil the surprise as they were given as gifts.

Back in the Fall, I had created something similar but on a much smaller scale as a Wedding gift for Mary and Leo of SVG Cuts. The post was titled Autumn "love". Since then, I had thought of making a similar project, only this time as a Christmas gift.

Here is my "White and Gold" Framed Wreath. Isn't it beautiful?!


To add some gold touches, I inked the edges of the flowers with a gold stamp pad and added a little gold glitter to the tips.


A little time-consuming and messy when working with the glitter, but so worth the end results! LOVE how they came together. The picture doesn't do the glitter justice... it is so vibrant and sparkly in person!


For those interested here is how I planned it out on the SSDE.
  1. First I grouped all the layers of my flowers together. 
  2. Next, I created a circle (not shown as covered up by the flowers below) the size I wanted my wreath to be. (As you can see the wreath is larger than the cutting mat)
  3. Resize the flowers as you like and arrange them on top of the circle you created (this will give you an idea of what the finished project will look like and how many flowers you will need to cut out).
  4. Ungroup each flower and cut. 

Here is the list of supplies and files I used to create both frames:

poinsettias - 3D Wintergreens SVG Kit
RIBBA Shadow Box Frame from IKEA - 19 ¾x19 ¾x1 ¾"
Embellished with glitter, gemstones, beads, buttons, pearls, and Ribbon
Brown and gold ink
 Hot glue and a glue gun
Scotch Quick Dry glue
White poster board 
Cut and created on the Silhouette Cameo using SSDE.

Here is a more traditional colored Christmas Wreath. I don't know which one I LOVE more!?
I guess it all depends on the rest of your Christmas decor and what would look best in your home! Don't the poinsettias look SO realistic?


By far the poinsettias from the 3D Wintergreens SVG Kit have been my most used file this Holiday Season! I LOVE how easy and beautiful they turn out each time! They are so stunning!!! I'm always amazed as to what we can make out of plain old paper these days!


For these photos, I have removed the glass from the frames. I wanted to get great pictures and avoid all the glare you get when taking pictures of a reflective surface. With the glass on, these frames look just as amazing!

Another option if you chose to do so, is to etch something across the middle of the glass. If etching intimidates you, use vinyl! Click here for an example.


I hope you enjoyed my Framed Christmas Wreaths. My Family LOVED them by the way!

It is a little late to create this as a gift for someone this year... but you can sure get an early start for next year, or why not make one for yourself  ;)

Enjoy your holidays everyone! EAT, DRINK, and stay SAFE!

Thanks for stopping by!
Happy Crafting  :)