Showing posts with label SVGCuts Files. Show all posts

Tuesday, February 11, 2014

Illuminated 3D Paper I Love U Sign | SVGCuts

I just realized that two years ago today was my first blog post EVER! Hard to believe how far I've come... for someone technically challenged it makes me excited about all that I have learned and done these last few years! Yay me!!! Anyways, enough about me lets get to the post ;)

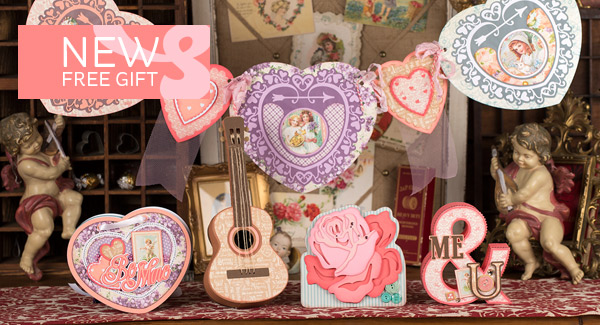
I'm really excited to share with you my latest SVGCuts DT creation! Inspired by the recent marquee craze, I thought I would try my hand at creating a Valentine "I Love U" sign! This project makes a great Valentine decor piece or a unique gift idea!

For complete instruction on how I created this project make sure you click HERE.

Illuminated 3D Paper I Love U Sign | SVGCuts Files

I love it when something I had envisioned actually turned out as I planned. It was actually quite easy and quick to put together too :)

Illuminated 3D Paper I Love U Sign | SVGCuts Files

Here is what it looks like when the room lights are turned off, and the LED lights are turned on.
 Love how it looks in the dark. Ooooo, Aaahhhh!

Illuminated 3D Paper I Love U Sign | SVGCuts Files

To create this look, I used a battery-operated string of LED lights and added a hole to the back panel, and strung them through! Clever right?! The coolest part is that this battery pack has a built-in timer that turns on every 24 hours and stays lit for 6 hours! I don't even have to touch it!!! A pleasant bonus as I found them at the dollar store...  Amazeballs, right?!

If you want to, the battery pack could easily be attached to the back and then the sign could be hung on the wall!

Illuminated 3D Paper I Love U Sign | SVGCuts Files

 For those interested here are the SVGCuts Kits you will need:


I hope you've enjoyed this project, maybe even inspired you to create your own LOVE or any other WORD sign for that matter!

Thanks for stopping by,
Happy Crafting  :)

Wednesday, January 15, 2014

Foxy Valentine's Day Paper Mailbox | SVGCuts

Are you all in Valentine's mood yet? I sure am ;)

Today I want to share with you a really quick and super cute Foxy Mailbox I made using the fox from Hugs and Kisses SVG Cuts Kit! Quick, simple, and useful are my favorite kinds of projects! I know my daughter will love this and it will be the perfect place for her to store all her Valentine's day cards! Now I have to make one for my son, a not so girly fox... I don't think he would appreciate pink too much :) 

Foxy Valentine's Day Paper Mailbox | SVGCuts Files

Just LOVE her! This is one Foxy Fox!!!

Foxy Valentine's Day Paper Mailbox | SVGCuts Files

The sentiment on her heart-shaped belly was created on the Silhouette Cameo with the Print n Cut feature. I love how you can create your own phrases on the Silhouette! I thought I'd incorporate "Fox Say" from the popular hit song "What does a Fox Say?" in my phrase. Arhhhh, now I have that song stuck in my head, lol!

Foxy Valentine's Day Paper Mailbox | SVGCuts Files

Look at her, with her head down... ready for a nap, too CUTE ;)

Foxy Valentine's Day Paper Mailbox | SVGCuts Files

Here are the SVG files you will need for the project:

Fox (modified by using the knife tool in the SSDE) and Hearts - Hugs And Kisses SVG Kit 

I hope this has inspired you to create some of your own cute Mailboxes. The box is also big enough to fill with treats and give as a gift! I think it would make a great Valentine's Day Teachers gift too!


Check out this week's SVG Cuts FREEGIFT with a $9.98 purchase.


vintage-valentines-hero

Thanks for stopping by!
 Happy Crafting  :)

Saturday, January 4, 2014

Something Blue Bridal Shower Card and Tag | SVGCuts

So excited to share with you my latest SVGCuts guest post!

Today I have a Bridal Shower Card and Tag I made to complete a gift ensemble. The gift wrap and bow inspired my "Something Blue" creations! For complete instructions on how to recreate your own stop by the SVG Cuts Blog.

Something Blue Bridal Shower Card and Tag | SVGCuts Files

Here are the SVG Cuts Collections I used:


Cut and created on the Silhouette Cameo using SSDE

 This elegant gift tag is SO pretty that it could easily become an ornamental keepsake for the Bride!

Something Blue Bridal Shower Card and Tag | SVGCuts Files

Really LOVE how this card came together... the tulle on the Brides Dress and veil, and the umbrella are my favorites :)

Something Blue Bridal Shower Card and Tag | SVGCuts Files

I used the Print n Cut on the Silhouette Cameo to create the banner and the Sentiment on the inside of the card. With Print n Cut you can make your cards as personal as you like! No more worrying about messy writing or making mistakes. All you really have to do is sign your name!

Something Blue Bridal Shower Card and Tag | SVGCuts Files

Next time you attend a shower, surprise the Bride with your own handmade gifts, they will truly be unforgettable!

Don't forget to check out this week's FREE gift from SVG Cuts Winter Gazebo SVG Kit! Just look at that Gazebo!!! What a perfect wedding creation that would make!


Thanks for stopping by!
Happy Crafting  :)

Thursday, December 26, 2013

Framed Paper Christmas Wreaths | SVGCuts Files


Happy Boxing Day to all that celebrate the Holiday today! For us Canadians, it's kinda like the US Black Friday, lots of crazy shopping and SALES ;) I hope you all had a very Merry Christmas and enjoyed some time with your friends and family! 

Today I want to share with you these awesome framed Paper Christmas Wreaths I created. I purposely didn't share this post sooner as I didn't want to spoil the surprise as they were given as gifts.

Back in the Fall, I had created something similar but on a much smaller scale as a Wedding gift for Mary and Leo of SVG Cuts. The post was titled Autumn "love". Since then, I had thought of making a similar project, only this time as a Christmas gift.

Here is my "White and Gold" Framed Wreath. Isn't it beautiful?!


To add some gold touches, I inked the edges of the flowers with a gold stamp pad and added a little gold glitter to the tips.


A little time-consuming and messy when working with the glitter, but so worth the end results! LOVE how they came together. The picture doesn't do the glitter justice... it is so vibrant and sparkly in person!


For those interested here is how I planned it out on the SSDE.
  1. First I grouped all the layers of my flowers together. 
  2. Next, I created a circle (not shown as covered up by the flowers below) the size I wanted my wreath to be. (As you can see the wreath is larger than the cutting mat)
  3. Resize the flowers as you like and arrange them on top of the circle you created (this will give you an idea of what the finished project will look like and how many flowers you will need to cut out).
  4. Ungroup each flower and cut. 

Here is the list of supplies and files I used to create both frames:

poinsettias - 3D Wintergreens SVG Kit
RIBBA Shadow Box Frame from IKEA - 19 ¾x19 ¾x1 ¾"
Embellished with glitter, gemstones, beads, buttons, pearls, and Ribbon
Brown and gold ink
 Hot glue and a glue gun
Scotch Quick Dry glue
White poster board 
Cut and created on the Silhouette Cameo using SSDE.

Here is a more traditional colored Christmas Wreath. I don't know which one I LOVE more!?
I guess it all depends on the rest of your Christmas decor and what would look best in your home! Don't the poinsettias look SO realistic?


By far the poinsettias from the 3D Wintergreens SVG Kit have been my most used file this Holiday Season! I LOVE how easy and beautiful they turn out each time! They are so stunning!!! I'm always amazed as to what we can make out of plain old paper these days!


For these photos, I have removed the glass from the frames. I wanted to get great pictures and avoid all the glare you get when taking pictures of a reflective surface. With the glass on, these frames look just as amazing!

Another option if you chose to do so, is to etch something across the middle of the glass. If etching intimidates you, use vinyl! Click here for an example.


I hope you enjoyed my Framed Christmas Wreaths. My Family LOVED them by the way!

It is a little late to create this as a gift for someone this year... but you can sure get an early start for next year, or why not make one for yourself  ;)

Enjoy your holidays everyone! EAT, DRINK, and stay SAFE!

Thanks for stopping by!
Happy Crafting  :)

Wednesday, December 11, 2013

Christmas Paper Cake Floral Toppers | Cake a la SVGCuts | DIY Cakes

I am SOOOOO super excited today to be sharing with you my first guest post for SVGCuts, WHOOP, WHOOP! If I could do a backflip I would, lol ;) 

If you didn't know it before, you should know now that I LOVE SVG Cuts and have been a huge fan since finding them back in 2011! In fact they were one of the reasons I started blogging. I have always loved to craft and after making some of the coolest things out of paper with their files, I was hooked and I knew I had to share it with others!

So for this project I thought it would be awesome to mash up two of my favorite crafts... Paper and cake decorating! Well, what do you think of my Christmas Cake a la SVG Cuts? It almost looks too good to eat doesn't it?!

Please check out my guest post on the SVGCuts blog for complete instructions :)

Christmas Paper Cake Floral Toppers | Cake a la SVGCuts | DIY Cakes

Christmas Paper Cake Floral Toppers | Cake a la SVGCuts | DIY Cakes
I would have never been able to create these gorgeous flowers out of fondant, but paper... piece of cake, haha!

When I was a little girl, the kids in the family would always fight over the sugar flowers on the cake. Did anyone else do that? Maybe we were just weird?

I'm sure if you make some like these out of paper, the moms might have to fight the kids for them, lol!

If any of you have ever made a fondant flower, you will know how time-consuming and difficult it can be. Even when they are done they can be quite fragile. That's why you pay cake decorators the big bucks! But why pay them when you can do it yourself?! If you already are a paper crafter all you need now is a cake! If you can't make a fondant cake, don't worry bake your favorite cake and sprinkle some icing sugar over it, or even easier buy one and just embellish it!

Just think of the cakes you could make using paper toppers, the possibilities are endless!

Christmas Paper Cake Floral Toppers | Cake a la SVGCuts | DIY Cakes

Make the flowers like you would for any other project. Then all you have to do is hot glue them to the end of a toothpick or a skewer. By doing this, you elevate the flowers and protect the papers from any grease absorption that may happen when using paper. See the image below.

Christmas Paper Cake Floral Toppers | Cake a la SVGCuts | DIY Cakes

Here's what the cake looks like from the side...

Christmas Paper Cake Floral Toppers | Cake a la SVGCuts | DIY Cakes

Christmas Paper Cake Floral Toppers | Cake a la SVGCuts | DIY Cakes


and here's a peek inside the cake! Add some food coloring to the cake batter and you'll end up with a fun and festive Christmas Cake! Yummy!!!


If you are interested in making this project, here are the SVGCuts files you will need:

Make sure you stop by the SVGCuts blog for more tips and all the instructions on how to make your own Cake a la SVGCuts! I hope you loved this project as much as I enjoyed creating it... Oh, and eating it too!

Don't forget to check out SVGCut's 12 Days of Christmas Giveaway on Facebook! SO many amazing prizes to be won!

Thanks for stopping by!
Happy Crafting  :)

Friday, December 6, 2013

Print and Cut Nativity Scene Tri-fold Card | SVGCuts

Are you ready for Christmas yet? I just looked at the calendar and swear I felt some heart palpitations... Eeeeek! So much I still want to do and hopefully enough time to get it all done!!!

Today I want to share a Nativity Scene Card I made using only the Print and Cut feature on the Silhouette Cameo. When you are making more than one card, Print and Cut can save you many hours of piecing all the cut-outs together!


Print and Cut Nativity Scene Tri-fold Card | SVGCuts Files


Well what you think of my super cute Nativity tri-fold Card? Sweet and simple, just how I like it! Reminds me of the cards my parents would receive when I was a little girl, except those where pop up cards... I did love those! I'll stick to tri-fold for now... pop up cards are way over my head!

To make this card you will need:

SVG Cuts files from O Holy Night SVG Collection
White Card stock to print on
Silhouette Cameo with DSE software
Adhesive

Here is a screenshot of my images before I printed them.
Before this step, I had ungrouped then regrouped all the individual layers together, then I moved them around to create the folds for each layer of the card. (This step is a little time-consuming but will save you more time in the long run!)
 To make my images more visible, I chose to line each piece with a black outline.
Also, below you see the base of the card I created...  pretty simple!

 I made this card to fit in a standard 5 X 7 envelope.

Print and Cut Nativity Scene Tri-fold Card | SVGCuts Files

The inside opens to reveal your message! Plus there is enough space to handwrite a personal note.

Print and Cut Nativity Scene Tri-fold Card | SVGCuts Files

Hopefully, you liked my Nativity Scene Trifold Card and saw how easy it was to create a complete Print and Cut Project. If you have any questions I would be happy to help :) 

Thanks for stopping by!
Happy Crafting  :)

Friday, November 29, 2013

Winter Wonderland - A 3D Lit Winter Wall Decoration | SVGCuts

Did you have your first snowfall yet? Here in Edmonton we've had it for about a month now! Last week it came down pretty hard. Even though we all complain about the cold weather, Winter is actually quite beautiful! It was also the inspiration for my latest project... A 3D Lit Winter Wall Decoration. 

Isn't it "Cool"?!?

Winter Wonderland - A 3D Lit Winter Wall Decoration | SVGCuts Files


In order to make it a Wall Decoration, I added a hole to the backside from which to hang it from. Also on the bottom of the back panel, I created a cut out that folds open to allow you to insert some battery operated tea lights. This frame looks just as good as a tabletop decoration if you chose not to hang it. 
This is what it looks like with a soft glow during the day. 

Winter Wonderland - A 3D Lit Winter Wall Decoration | SVGCuts Files

Here is the list of files you will need to recreate this project:

Letter O (altered, and used to make the frame) - SVG Cuts - 3D Letters SVG Kit
Snowflakes - SVGCuts 
Winter Wonderland - SVG Cuts - Free Designs

To create the Frame - I enlarged the letter O from the 3D Letters and altered the front and back pieces of it. (see the second image)

For the Front - I selected random snowflakes and if they didn't have an offset to them I created one. I then centered the "Winter Wonderland" within the center of the "O". Next, I placed snowflakes all around the empty spaces. Once I was happy with their placement, I welded only the offset of my snowflakes with the outside "O" frame. I then cut out all the pieces and decorated each of them with glitter and rhinestones. Each snowflake was glued onto its offset. For embellishments, I added a ribbon and sequin trim to finish it up. 

This frame measures 11.25" W x 10.5" H
All cut on the Silhouette Cameo

 TIP: Go easy on the glue when adding glitter to your snowflakes. Paper tends to curl when wet. To avoid the curl, you can also use the Xyron sticker maker to add a layer of tackiness, then glitter!

And now in complete darkness! COOL right?
I love to make things light up :)

Winter Wonderland - A 3D Lit Winter Wall Decoration | SVGCuts Files

I hope you enjoyed my Winter Wonderland Wall Decoration!

If you like this idea but want to make it more personal,  it's easy to change the Word Art in the center. It could say, "Merry Christmas" "Happy Holidays" in English or a different language. Make it personal, with your Family's Last name or as a gift for someone else... the possibilities are endless!

Thanks for stopping by!
Happy Crafting  :)

Tuesday, November 19, 2013

Parisian Armoire - DIY Paper Jewelry Display Stand and Storage | SVGCuts

Today I want to share with you a project I made for the July/August issue of the Cutting Edge Magazine.

Parisian Armoire - DIY Paper Jewelry Display Stand and Storage | SVGCuts Files

Isn't it pretty?! One would never guess this beautiful armoire is completely made out of paper! Who wouldn’t love their jewelry displayed this way? This would make the perfect gift for a friend this Christmas or maybe even yourself ;)  I love when paper can be decorative and functional at the same time!

Parisian Armoire - DIY Paper Jewelry Display Stand and Storage | SVGCuts Files

Here is what I used:

The files for this project all come from SVG Cuts Amelie's Accessories SVG Kit
AC Cardstock 
Me and My Big Ideas Black and White Paper Pad
Alphabet stamps by Studio G
White Inkpad
Epiphany Crafts Shape Studio Tool (Round 25)

Cut on the Silhouette Cameo using the Silhouette Studio Designer Edition.


Follow PDF assembly instructions on how to create the Armoire and Flower. SVG Cuts also provides great video assembly tutorials!


Parisian Armoire - DIY Paper Jewelry Display Stand and Storage | SVGCuts Files

I modified the Eiffel Tower file that is provided in the SVG Kit in order to hang the jewelry. To do this requires a bit of work. I have provided a screenshot to explain what and how I got to the end results.


Parisian Armoire - DIY Paper Jewelry Display Stand and Storage | SVGCuts Files


  1. The first thing I did was import the image that I was going to modify. Then I highlighted the image and made it a compound path and then released the compound path. The image shows you one of four sides of the Eiffel tower. The original image is solid. There are no cutouts in the image. So, the next thing I did was create little shapes inside the tower by using the draw rectangle tool. (You might want to zoom in on your image at this point, much easier to see.) To modify your shapes, and angle the squares and triangles you will need to use the point editing tool. (See the above two arrows). Once you are satisfied with your shapes move on to step 2.
  2. Grab the outside outline of the Eiffel Tower from image one, copy and paste it. Highlight your copied image, select the point editing tool again and delete all the points until you are left with an image that has no tabs (like the outline of image 3).
  3. Group all the little squares and triangles created in the first step, copy them. (The easiest way is to hold the shift key and click on all the images you want to group.) Drag your grouped copied images and center them onto the image you created in step 2. Group them all together. You should be left with the image in step 3 at this point. This creates the top layer to the Eiffel tower that will add strength and reinforcement. (You will need to cut 4 of these out, one for each side)
  4. Next, with the other copied squares and triangles you grouped in the above step, drag them into the original cut file that you imported. 
  5. Group those together. This will make up the bottom layer of your Eiffel tower.


Two of the sides of the Eiffel tower are slightly different. The same technique above was used to create the other two sides. There is no need to change the top layer piece. I know it seems like a lot of steps, but is less complicated than it sounds. Let me know if you have any further questions, I'd be glad to answer them :)

Once all pieces of the tower are cut it is easier to glue the top layer on first before assembling the tower. I used Scotch quick dry adhesive and with a paintbrush sealed the entire tower. This not only adds protection to the piece it also strengthens it.

Thanks so much for stopping by! I hope you have enjoyed this functional and yet very decorative project as much as I enjoyed making it!

Happy Crafting :)

Friday, November 15, 2013

Sympathy Card | SVGCuts


Death and dying are part of my work life.  It's hard to run from it as an Oncology nurse. I hope, in the very least, to provide comfort to those I do care for as they pass and console those that are left behind. 

A very good friend of mine recently lost a loved one, so I thought I would make her a card just to let her know I was thinking of her.


For this project, I used a few SVG Cuts files that I have altered to come up with this card. Click on the links below to see which kits the files came from.

Dove FREE DESIGNS
Flag from Toil and Trouble SVG Kit
Card from Everyday Winter Cards SVG Kit

Nobody likes to lose someone they've loved. A handmade card like this, may put a smile on their face or at least let them know how much you care for them.

Thanks so much for stopping by,

Friday, October 25, 2013

Halloween Owl Witch Treat Box | SVGCuts

Hi Everyone!

Today I want to share with you another Halloween project of mine. It's a Treat Box I made for my Daughter Maia. For now, until Halloween comes it looks like a nice decoration piece! Selfish, I know... Shhhh don't tell her!

Halloween Owl Witch Treat Box | SVGCuts Files

Who says only humans get dressed up for Halloween? Whoooo you!!! 
Whooo called her a Witch?!?! Boy she looks mad now, even her Bat Wings are up, LOL!

Halloween Owl Witch Treat Box | SVGCuts Files

Here in Edmonton, they are calling for snow this weekend... Nooooooo! I hope those weather people are wrong, at least until Halloween has passed! It's no fun Trick or Treating with snow boots on :( 
Since snow is coming I thought it would be cute to make my Owl a Snowy-looking one!

I used a few SVG Cuts Kits for this project:
Witch's hat - Catacomb Manor SVG Kit

Cut using the Silhouette Cameo

Halloween Owl Witch Treat Box | SVGCuts Files

The pretty patterned paper I used on the hat comes from Fleurette Bloom's Howlin Halloween Digital Paper Collection. The tag was also made on my Silhouette Cameo with the Print and Cut feature.

Halloween Owl Witch Treat Box | SVGCuts Files

Look!!! She REALLY is a Witch! Her head just came flew off, Muhahaha! 
As you can see lots of room to fill up with candy maybe even a little gift :)

Don't forget to stop by SVGCuts for their Halloween sale!

I had a Hoot making this one... I can't help myself with the Owl puns! Thanks so much for stopping by today, hope you've enjoyed this unusual Halloween Treat Box!

Happy Crafting :)