Sunday, December 23, 2012

Merry Macaroons | Christmas Baking

Hello everyone! Welcome to all my new followers :) Can't believe I hit the 200 mark, whoop, whoop! Thanks, everyone for your support!

Well with Christmas at our doorstep, I probably will not have any time for posts until the new year. So today I just wanted to wish you all a Merry Christmas and a very Happy New Year! Hope you all are enjoying this time of year :) 

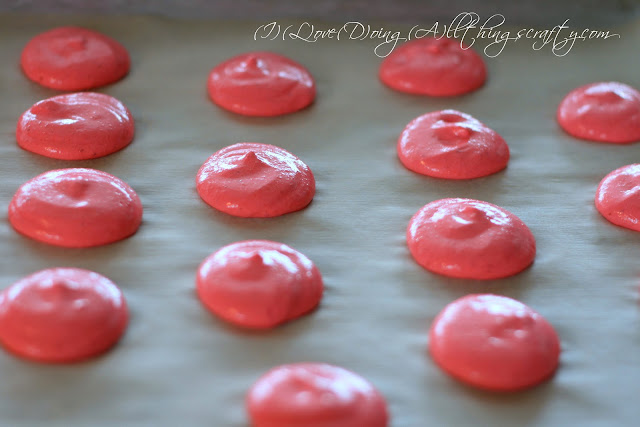
So for my last post of the year, I wanted to share some macaroons that I just finished making to take to my parent's house for Christmas Eve. This was my first attempt at making them and I was surprised at how well they turned out for me (other than color.) I really wanted to make red macaroons and fill them with green icing (Christmas colors)... but since they turned out pink I just used a white filling. Not worried cause I'm sure they will taste just as yummy!

Here are a few pics of how they looked along the way...

Merry Macaroons | Christmas Baking

Merry Macaroons | Christmas Baking

Merry Macaroons | Christmas Baking

Don't they look yummy?!? They are! I know, cause I had to try... I think I will have to go on a diet after the holidays are over, lol! If you are interested in the recipe I used, click here. Ann walks you through every step of the way and even has troubleshooting tips and a video to help you. You will also love her accent!

Thanks again everyone for following me on my wildcrafting journey through life. See you all soon... until next year!

Tuesday, December 18, 2012

Cake Pop Christmas Tree and Treats for School

Christmas is just around the corner and I think I'm finally ready! Everything I wanted to get done is done.... thank goodness! Now all I have to do is wait for Santa! 

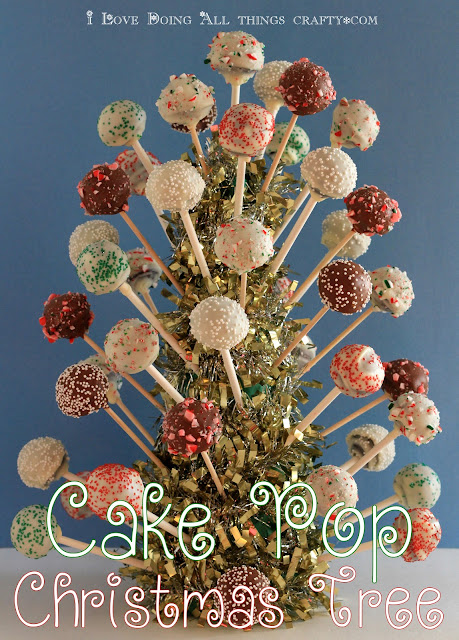
Later this week my hubby is having a Christmas potluck at work. He asked me if I could make a dessert. Initially, I had planned on making cupcakes, but since I had already planned on making cake pops for the kids at school I thought I would just make a few more. Well, 92 to be exact!

Cake Pop Christmas Tree and Treats for School

Since edible arrangements are so popular, I thought I'd take that idea and make my own and make a Christmas tree using all the cake pops. 

Cake Pop Christmas Tree and Treats for School

To make the tree I used a Styrofoam cone. First I covered it in a green tissue paper and then wrapped it with tinsel. Then just randomly stuck the cake pops all around the tree. Isn't it pretty??? and don't they just look sooooo yummy! Well, they are... I just had to try one, OK maybe two, LOL!!!


Cake Pop Christmas Tree and Treats for School

Remember those personalized clay ornaments I made a few weeks ago? Here they are again. I used them as tags on the cake pops, to give each student in my children's class. I think they are going to love this treat!

Cake Pop Christmas Tree and Treats for School

See, here is the second cake pop I ate... totally for photo purposes, hehe! Makes my mouth drool just looking at it! For tips on how I make my cake pops, click here. FYI, one cake box recipe made 92 cake pops using the Babycakes Cake Pop maker.

Thanks for stopping by and Happy Holidays!
I hope your mouth didn't water too much! ;)

Sunday, December 16, 2012

DIY Duct Tape Credit Card Wallets


Can you believe Christmas is only one week away? Are you ready???? I sure don't feel like I am... 

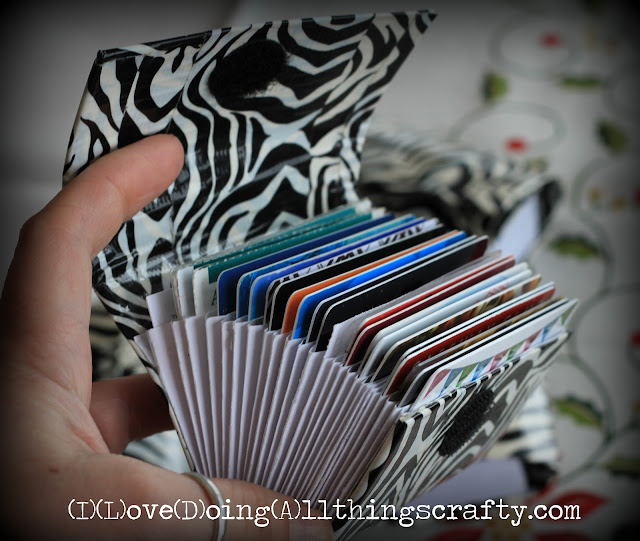
If you are looking for a great little stocking stuffer you should definitely try making one of my credit card wallets. I absolutely LOVE mine! It's a great place for all my extra loyalty cards that I don't need in my everyday wallet. It has also been my most popular posts since I started this whole blogging journey!

DIY Duct Tape Credit Card Wallets

So easy to make and so useful too! Click here for directions on how to make your own! You won't regret it, and your overstuffed wallet will thank you :)

DIY Duct Tape Credit Card Wallets

Who knew Duct tape could look so cool! I have a thing for the zebra pattern, can you tell? I'm not kidding... in our last house, I painted our bathroom's ceiling in a zebra pattern, lol!

DIY Duct Tape Credit Card Wallets

And here is the wallet I made for myself back in June... It still looks and works great! I always get so many compliments when I pull it out of my purse and ladies see it... Every lady needs one especially if you love to shop and have way too many cards! 

DIY Duct Tape Credit Card Wallets

If you haven't made one yet, you should... a Christmas gift to yourself or for a friend. I promise you'll all love it!

Happy crafting :)


UPDATE
February 10, 2017
Check out VERSION 3 of the DIY Credit/Loyalty Card Duct Tape Wallet
or watch me make it on YouTube!


Wednesday, December 12, 2012

King Cake - Bolo Rei | Portuguese Traditional Christmas Cake


Christmas would not be the same for me if there wasn't a "Bolo Rei" in the house, which literally translated it means King Cake. My mom makes them every year and gives them to our friends and family. So this past weekend she asked if I could help. Well, my life kind of got in the way and by the time I made it over to her place she was pretty much done! She is so amazing, I really do look up to her... in a few hours she had whipped up 8 cakes all on her own! I'm so happy that her energy rubbed off on me a little, LOL!


King Cake - Bolo Rei | Portuguese Traditional Christmas Cake

For those of you that don't know I was born in Portugal and moved to Canada with my parents when I was two. So for many years of my sheltered life, all that I knew was very heavily influenced by my parent's culture and their upbringing.  And so, the King Cake at Christmas was always a must! I have to be honest though, the cake was never appealing to me mostly because of all the dried crystallized fruits. So, after many years of hearing everyone praise my mom and her cakes, a few years ago I tried it... Maybe it's an age thing! I actually didn't mind it too much, initially, I was picking out all the fruit and just leaving the nuts. Now I eat it all... great I must be getting old... my taste buds are changing, oh no!


King Cake - Bolo Rei | Portuguese Traditional Christmas Cake

Taken from Wikipedia Bolo rei is a traditional Portuguese cake that is usually eaten around Christmas, from December 25 until the Dia de Reis (literally Day of Kings, a reference to the three kings) on January 6. The cake itself is round with a large hole in the center, resembling a crown covered with crystallized and dried fruit. The bolo rei is baked from a soft, white dough, with raisins, various nuts, and crystallized fruit. Also included is the characteristic "fava", and tradition dictates that whoever finds the fava has to pay for the bolo rei next year. Initially, a small prize was also included within the cake, but now that can be hazardous!

King Cake - Bolo Rei | Portuguese Traditional Christmas Cake

For those of you that are interested in the recipe, click here. My mom said this link shows you pretty much how she made hers, even includes a video... The only thing it is in Portuguese, so you might have to use your translate options on your computer. 

King Cake - Bolo Rei | Portuguese Traditional Christmas Cake

Thanks for stopping by, hope you've enjoyed learning a little more about our holiday traditions!

Tuesday, December 11, 2012

Homemade Personalized Clay Ornaments using Stamps | Christmas Craft


Homemade Personalized Clay Ornaments using Stamps | Christmas Craft


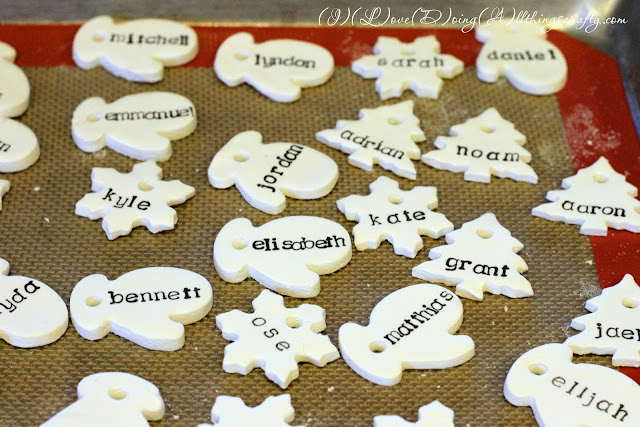
A few weeks ago I saw the cutest ornaments on Pinterest! What caught my attention was the recipe. It wasn't a salt dough recipe like all the others I had seen. So I pinned it! I thought they would make great little gifts for the kids at school. Click here for the recipe and instructions!

Update: The link above no longer works sorry folks! I did find a similar recipe here so I will copy it out and include a link to it as well for the rest of the instructions! 

Recipe:
1 cup of corn starch 
2 cups baking soda 
1.25 cups cold water


Here are a few photos and tips on how I made mine...

Homemade Personalized Clay Ornaments using Stamps | Christmas Craft

I found that the dough was very pliable, so when I first started cutting out my shapes they were getting stretched and started losing their shape when I transferred them to the baking sheet. So I decided to roll them out directly on to the Silpat, which also keeps them from sticking during the baking process. I then just removed the excess dough. This way the shapes were perfect, they didn't even crack! 

Homemade Personalized Clay Ornaments using Stamps | Christmas Craft

To make the whole, I just used the end of a straw!

Homemade Personalized Clay Ornaments using Stamps | Christmas Craft

To personalize each one of them I used a black ink pad and these great little alphabet stamps I found a Micheal's in their Dollar bins!

Homemade Personalized Clay Ornaments using Stamps | Christmas Craft

Aren't they so cute?... The cookie cutters I used were very small which makes them the perfect size for gift tags too! I had so much fun making these with my daughter, she wants to make more... maybe colored ones next time!

Thanks for stopping by!

Monday, December 10, 2012

DIY Recycled Snowman Lanterns | Christmas Decorations


Good morning!
Today I wanted to share with you a really quick and fun project I made with my daughter this weekend! So fun and all done with supplies I had around the house...

Here's what you will need:
Glass jars
white glue or Modge Podge
paint or foam brush
coarse and fine salt
toothpick (for the nose)
felt or fabric
hot glue gun 
buttons

So here they are... aren't they adorable!?!

DIY Recycled Snowman Lanterns | Christmas Decorations

Here is a picture collage of how we did it...

DIY Recycled Snowman Lanterns | Christmas Decorations

The Nescafe jars were the perfect shape for these snowmen, but any shape would work.

DIY Recycled Snowman Lanterns | Christmas Decorations

Throw in a battery operated tea light and voila, it was that simple! Make one, make two or make a whole family! Just have fun :)

Happy crafting!

Saturday, December 1, 2012

Santa's Flying Ferris Wheel | Interactive Christmas Decoration | SVGCuts Challenge Entry


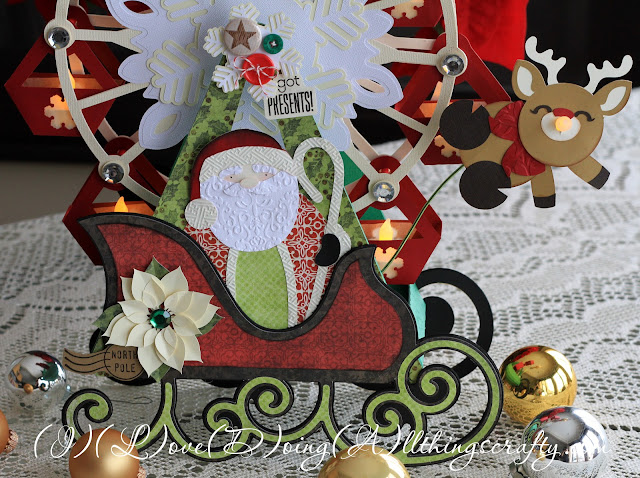
 I've been so crazy busy lately, I almost forgot about the SVG Cuts Christmas Facebook Challenge! I'm always up for the challenge and the prizes are amazing! So here is my entry... Santa's Flying Ferris Wheel! 

I absolutely love how it turned out and it makes such a great tabletop decoration. It approximately stands 16 inches high!

Santa's Flying Ferris Wheel | Interactive Christmas Decoration | SVGCuts Challenge Entry

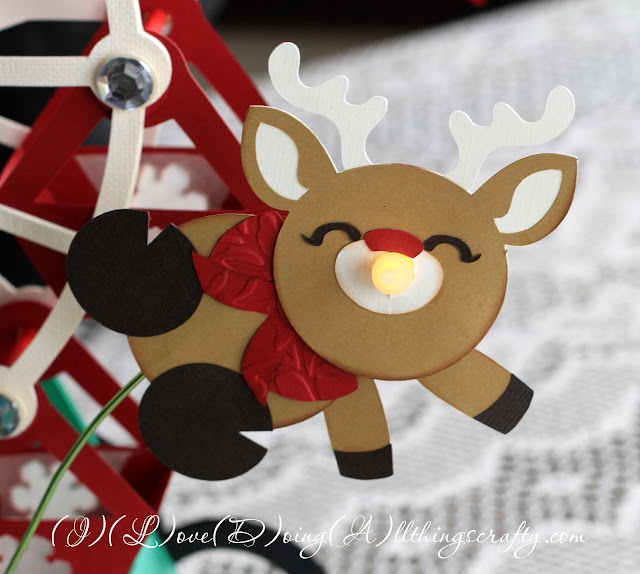
Look at Rudolf with his nose so bright! Isn't he adorable ;)
 Click here to see where I got my inspiration! Thanks, Brigit!

Santa's Flying Ferris Wheel | Interactive Christmas Decoration | SVGCuts Challenge Entry

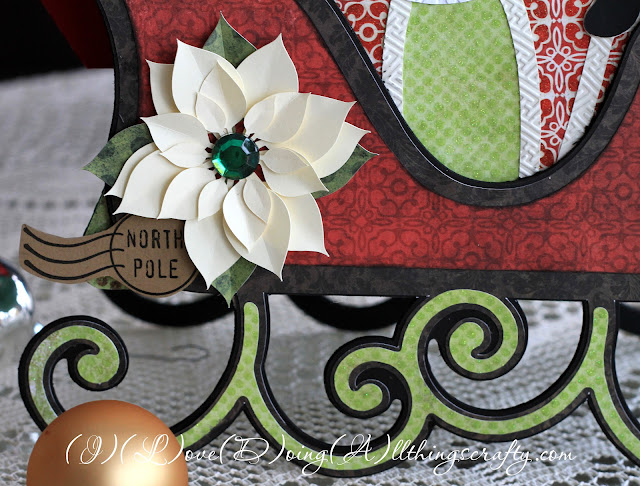
Here are some more close-up shots! To make the sled sturdy, I cut out 10 layers for each side and glued them back to back.

Santa's Flying Ferris Wheel | Interactive Christmas Decoration | SVGCuts Challenge Entry

Snowflake center... The Star button comes from Paper Play Studio! Those little flair buttons are so cute!

Santa's Flying Ferris Wheel | Interactive Christmas Decoration | SVGCuts Challenge Entry

The Ferris wheel baskets are the perfect fit for tea lights! On the front of the basket I took the image of the snowflake and cut it out of the center Shhhhh, don't tell anyone... I then used parchment paper instead of vellum, only because it was so late at night and I had no velum left. Hey, it did the trick didn't it?! The only thing is I had to use hot glue with it.... cause nothing sticks to the parchment paper as I found out, lol! 

Santa's Flying Ferris Wheel | Interactive Christmas Decoration | SVGCuts Challenge Entry

And isn't Santa so CUTE? Just want to squeeze his cheeks :)

Santa's Flying Ferris Wheel | Interactive Christmas Decoration | SVGCuts Challenge Entry

Here is the Flying Ferris Wheel at night. It looks awesome!!! The kids love it too, especially all lit up!

Santa's Flying Ferris Wheel | Interactive Christmas Decoration | SVGCuts Challenge Entry

The paper stack I used comes from Recollections Naughty or Nice Paper stack Collection. The files were all cut out using the Silhouette Cameo.

And here are the SVG Cuts kits I used:

Thanks, SVGCuts for such great files to work with!

Wish me luck.... again!
Happy Crafting :)

Angry Bird Fondant Cake for a 60 Year Old


Today is mom's best friend's birthday. Aida, who also happens to be my God Mother and is truly a very special lady! She helped raise us and I love her very much. I wish her a very special 60th Birthday today!

A few weeks ago her daughter told me she was secretly addicted to the Angry Birds Game... So she asked if I would make her an Angry Birds Themed Cake. Ooops, I guess she has now been outed, I hope she's not ANGRY! Hehehehe, Oink, snort!

So here it is... I'm pretty happy with how it turned out!!!

Angry Bird Fondant Cake for a 60 Year Old

Here are more pictures of the cake from different angles :)

Angry Bird Fondant Cake for a 60 Year Old

Angry Bird Fondant Cake for a 60 Year Old

For those of you that are curious about how I made it, here are a few pictures I took of the cake along the way. I'll just briefly explain them.
  • The first thing I started with was modeling chocolate. Click here for the recipe. Once the chocolate was ready I rolled out some different sized balls. At this point, I also made my wood logs. (Leave all your pieces to air dry overnight)
  • Once the chocolate had hardened, I covered the balls with different colors of fondant. (I didn't by all these different colors, I just started with white fondant and mixed it with icing colors until I achieved the color I wanted)   
  • Then all that is left are the details on the birds. (I referred to a picture I had printed to that I could look at) 
  • Bake, ice and cover your cake with a crumb coat.
  • Cover the cake with the fondant and have fun assembling!
That's pretty much it! These kinds of cakes can be time-consuming. This one took me about 6 hours to make, but it's so worth the end result! Hope she is going to like it!


I hope you like my take on the Angry Birds Cake!
Have a great weekend :)

Monday, November 26, 2012

DIY Wall/Staircase of Lights | Christmas Decor

Wow! Christmas is just less than a month away! Can you believe it?!?  

I hate to admit this but I have had my house all decorated a week after Halloween was over. I just think it comes and goes too quickly and if I'm going to put all this effort into transforming my house... I would like to enjoy it as long as possible!

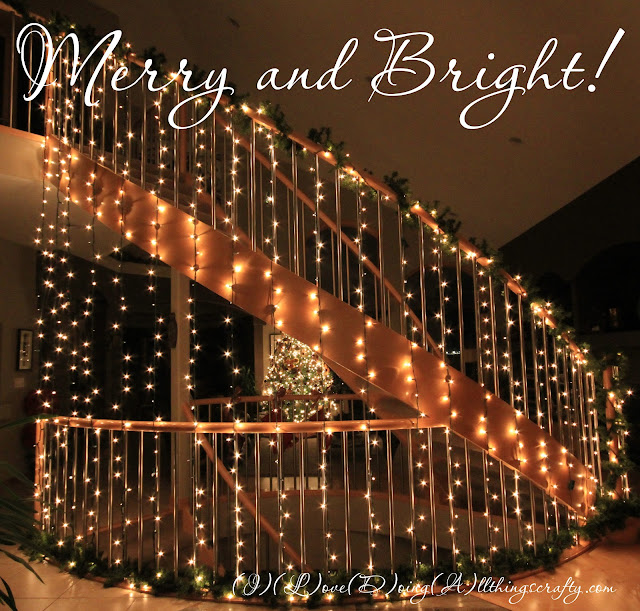
Today I want to share with you all one of my favorite Christmas traditions... Ok, well I only started doing it last year, but I loved it so much I had to do it again this year. Check out my staircase, all lit up... isn't it gorgeous!

DIY Wall/Staircase of Lights | Christmas Decor

A few years ago we bought one of those pre-lit trees... so then I was left with all these ropes of mini lights that just sat in a box from our old tree. Then one day while I was doing some Christmas shopping (about 2 years ago) I saw a wall of these Christmas lights in the mall and that's when I thought about doing this idea on my staircase. What a simple way to brighten up any space in your home for the holidays! The impact it makes is stunning... I absolutely love it!

So easy to do to, here is how I did it...

  • First, you need to figure out where your power source will come from. Since I didn't want it at the bottom of my stairs where people might trip over the cords, I began upstairs. I have a plug on my upstairs wall that I attached an extension cord to and just pulled it to the railing. 
  • Then I secured the extension cord and wrapped it until the connector was right at the corner of the staircase. 
  • Starting at the top of my staircase I slowly dropped the rope of lights until it reached the bottom. 
  • Ensuring that the lights were straight, I then secured the wire to the banister with some twist ties.
  • I then stretched the wire over the bottom of the floor railing and tied the wire to the next banister, skipping one in between. 
  • Then just continued this process up and down the stairs, attaching the next set of lights when the cord got to the end. I used about 6 sets of mini lights. 
  • To cover up the wiring I then used garland on the top part of the railing and at the bottom along the floor. 
  • So that I never have to worry about turning it on and off I simply just put it on a wall timer! 
Easy right?

DIY Wall/Staircase of Lights | Christmas Decor

Here is a view from the other side. It totally lights up the whole front of our house! And there are our stocking... we have a flat front fireplace, kind of hard hanging our stockings on there, so here is where they hang!

DIY Wall/Staircase of Lights | Christmas Decor

Finally here is our tree all lit up... Can you tell I love brown? Not very traditional... it's all decorated in brown and gold. I just love it! 

I hope you liked my wall (staircase) of lights and maybe it has inspired you to make your own! What is your favorite Christmas house decoration?

Happy Holidays and Happy Crafting!

Sharing with...
christmas-linky-parade-button-songbird
and here

Wednesday, November 21, 2012

DIY Christmas Trees | Easy Holiday Decor Craft

Last week while I was out shopping with my mom, we kept seeing the most beautiful Christmas trees in the stores. There was a particular tree that caught my mom's eye. It was covered in gold glitter and beads. So I told her that I could probably make her one.

Fast forward a week and voila... not only did I make her one, but I also made a forest! Aren't they so pretty? I love the feathered ones, can you tell? LOL

DIY Christmas Trees | Easy Holiday Decor Craft

Here are a few pictures I took along the way. 

DIY Christmas Trees | Easy Holiday Decor Craft

  1. Using a poster-size cardboard, make a tight cone. Start by rolling a small cone in the corner and continue rolling the paper until you achieve the cone width and height you like. 
  2. Hot glue the edge.
  3. Cut off the excess paper until the cone is sitting nice and level.
  4. For the feathered tree, start gluing the feathers on the bottom and work your way up the cone.
  5. For the glittered tree, I first made a shaving cream and glue mix to add texture to my glitter tree. (one part shaving cream to one part glue. I first saw this technique done here. Thanks, Brigit!
  6. I then painted on this mixture covering the entire surface. 
  7. Sprinkle on the glitter. It helps to have your glitter in a bottle, much easier to control. FYI this tree took about 24 hours to completely dry!
  8. Styrofoam bead tree, I found this package at the dollar store. Emptied it in a bowl.
  9. Using a paintbrush, I painted on my glue and then palmed and pushed the beads on the wet surface with my hand, until the whole cone was completely covered. (let's just say making this one was kind of a nightmare. The Styrofoam static made the beads stick to everything... I had Styrofoam everywhere! But so worth it. I love the results!

So here is my little forest! LOVE the white with touches of gold. Also, I don't think I spent more than $10 on supplies to make these trees... I think my mom is going to love her new trees as much as I do!


DIY Christmas Trees | Easy Holiday Decor Craft

Here is a closer look at the "snowball" tree. Don't they look like little snowballs?

DIY Christmas Trees | Easy Holiday Decor Craft

Take a look at the "glittered" tree. Love the texture that the shaving cream mix created!

DIY Christmas Trees | Easy Holiday Decor Craft

My favorite,  the "feathered" tree! Looks so elegant and yet the easiest tree I made. To tie them all together I topped them all with the same gold bead.

DIY Christmas Trees | Easy Holiday Decor Craft

My "wrapped" tree... Again super easy and cute!


And here are the trees I kept for myself... I just love how they look in my little wall alcove.

DIY Christmas Trees | Easy Holiday Decor Craft

I hope you've enjoyed my tutorial today! The possibilities are endless... now go have fun and make your own. I'm sure they won't be the last I make!

Happy crafting and for all my American friends...
Happy Thanksgiving!

Sharing this with:
christmas-linky-parade-button-songbird

Scrap it Girls - November "Tree" Challenge and with these great blogs!