Showing posts with label how to. Show all posts

Wednesday, April 17, 2024

Hidden Inlaid Find Me By the Sea Shaker Card | Picket Fence Studios

Hidden Inlaid, Find Me By the Sea, Shaker Card, Picket Fence Studios, DIY,Frameless Shaker Card, how to, hand made card, Stamps, stamping, die cutting, card making, ilovedoingallthingscrafty, more space, A Sea Turtle's Journey

Hello friends, 

I am back again today with this Hidden Inlaid Find Me By the Sea Shaker Card featuring new Picket Fence Ocean Odyssey April Release products. I will also share how to create extra shaker space in your DIY shaker pockets.

CARD RECIPE

Background Pattern Paper - A2 Card Fronts - Beachcombing

Turtle - A Sea Turtle's Journey Stamps & Coordinating Dies

Sentiments - Find Me by the Sea Word Die

DIY Shaker Pocket - Shaker Sheets

Shaker Bits - Sequin Mix Island Blues

Glaze on black cardstock - Sea Glass Blue Paper Glaze 


Hidden Inlaid, Find Me By the Sea, Shaker Card, Picket Fence Studios, DIY,Frameless Shaker Card, how to, hand made card, Stamps, stamping, die cutting, card making, ilovedoingallthingscrafty, more space, A Sea Turtle's Journey
  • Start by stamping the turtle onto one of the Beachcombing A2 Card Fronts using black pigment ink and heat set it with clear embossing powder.
  • Die cut the turtle using the A Sea Turtle's Journey Dies.
  • Glue the die-cut card background to a black paper panel. 
  • Die cut the "Find Me by the" from the Find Me by the Sea Word Die and glue the sentiment onto the Beachcombing pattern paper.
  • Add two thicker foam dots where the turtle body outline is. Place them far enough from each other to support the turtle die cut. 
  • Remove the adhesive liner from the foam dots, center a cut piece of the Shaker Sheets, and create the shaker pocket. 
  • Fill the pocket with the Sequin Mix Island Blues. NOTE: some of the sequins will get caught on the foam dots as it doesn't allow unrestricted movement in the pocket. Allow enough space between foam dots to allow the shaker bits to flow through. NOTE: Using foam dots will allow more space in the pocket, and the ability to use thicker shaker bits. This sequin mix has chunky iridescent bubbles, which normally would not fit well in a flat shaker pocket. 
  • Seal the last flap of the pocket and adhere it to an A2-sized card base.
Hidden Inlaid, Find Me By the Sea, Shaker Card, Picket Fence Studios, DIY,Frameless Shaker Card, how to, hand made card, Stamps, stamping, die cutting, card making, ilovedoingallthingscrafty, more space, A Sea Turtle's Journey
  • Glue the turtle onto the die-cut opening, on top of the plastic sheet. If using a liquid glue, set aside to dry.
  • Apply a thin layer of the Sea Glass Blue Paper Glaze onto black cardstock and allow it to dry. 
  • Once dry, die-cut the "Sea" from the Find Me by the Sea Word Die and glue it onto the shaker front.
  • For some sparkle and to create wave-like foam on the letters, I added some glue to the Sea Word Die and sprinkled some chunky glitter while the glue was still wet.
  • Finally, I added an enamel dot on the turtle's eye to give it extra life.
Hidden Inlaid, Find Me By the Sea, Shaker Card, Picket Fence Studios, DIY,Frameless Shaker Card, how to, hand made card, Stamps, stamping, die cutting, card making, ilovedoingallthingscrafty, more space, A Sea Turtle's Journey

And that my friends is how to create a Hidden Inlaid Shaker Card with a little extra shaker space. Hope you found this helpful!

Thank you for stopping by and until next time... Happy Crafting!
Ilda 🐢

SUPPLIES
A2 Card Fronts - Beachcombing
Shop at:
SSS | PFS
A Sea Turtle's Journey
Shop at:
SSS | SB | PFS
A Sea Turtle's Journey Dies
Shop at:
SSS | SB | PFS
Shaker Sheets
Shaker Sheets
Shop at:
SSS | SB | PFS
Find Me by the Sea Word Die
Shop at:
SSS | PFS
Sequin Mix Island Blues
Shop at:
SB | PFS
Sea Glass Blue Paper Glaze
Shop at:
SSS | SB | PFS
Mixed Media Spatulas
Shop at:
PFS
Stamp Pressure Tool
Stamp Pressure Tool
Shop at:
SSS | SB | PFS
The Stamp Scrubber
The Stamp Scrubber
Shop at:
SSS | SB | PFS
Black Foam Dots 1/4
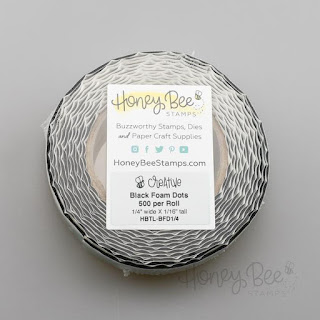
Black Foam Dots 1/4"
Shop at:
HBS
New Mini Misti
New Mini Misti
Shop at:
SSS | SB | HBS
VersaFine ONYX BLACK Ink
Shop at:
SSS | AMZ | SB | HBS
CRYSTAL CLEAR Emb Pwd
Shop at:
SSS | IO3
Heat Gun
Heat Gun
Shop at:
AMZ
Platinum 6 Die Cutting Platform
Shop at:
SSS | SB | HBS
Bearly Art Precision Glue
Shop at:
SSS | AMZ | HBS
Lawn Fawn Chunky Glitter
Shop at:
SSS | SB
To make supplies easy for you to find, I have linked them above. If something is no longer available I will link to a similar product. Affiliate links may be used depending on the product linked. Please help support my blog by using these links while shopping at no additional cost to you. For more information about the affiliates I use, please visit my disclaimer here. Thanks so much for all your support!

Enjoyed this post? Never miss out on future posts by Following this Blog

Monday, April 15, 2024

Shaker Pocket Tips and Tricks - Ice Cream Sundae Shaker | Honey Bee Stamps

Shaker Pockets, birthday, Tips and Tricks, Ice Cream Sundae, Honey Bee Stamps, how to, hand made card, Stamps, stamping, die cutting, card making, frameless shaker, ilovedoingallthingscrafty,

Happy Monday crafty friends!

Today's post is all about sharing my TIPs and TRICKs for creating the perfect shaker using a Shaker Pockets. If you have played with them before, you may already know not all shaker pockets are made the same way, as they are all manufactured differently for various companies. Even though the original idea for these pockets was mine, I had no part in manufacturing them, but I have perfected ways to make them all work. 

This yummy Ice Cream Sundae Shaker is very straightforward to make so I will skip the how-to's today and focus on the tips and tricks.

SHAKER TIPS & TRICKS when using Shaker Pockets

  • TRY NOT to remove the protective film until it is glued to the card base, this will prevent scratches and keep the front clean. If you do remove it, place it lightly onto the front until you need to glue or add elements to it.
  • USE and bone folder to crease the tabs down as flat as possible.
  • TRIM insert/background panel 1/8th inch from the top and the side (2 sides only)
  • DO NOT overfill the pocket with shaker pieces. I fill about 1 inch height from the bottom.
  • USE strong adhesive to secure the finished pocket to the card base. Recommend Redline tape.
  • PLACE tape along the entire perimeter of the pocket, as close to the edge of the tab as possible. Include at least one piece down the middle, more for larger pockets.
  • When attaching the card base to the Shaker Pocket, ALIGN the bottom edges with each other before pressing them together. This ensures perfect alignment of all components. Ensure the card base is the same size before attaching them together.
  • USE strong adhesive to attach elements to the front of the acetate. If using liquid glue, place a weight on top and allow for drying time.
  • IF there is glue smudging or accidents, USE a baby wipe to wipe off excess glue and gently wipe it with a clean microfiber dry cloth to remove streaks while still wet. 
  • IF mailing the shaker, AVOID adding extra bulk to the front of the panel. Instead, stamp on the background panel and add die-cut pieces to the inside of the pocket or directly onto the acetate without using extra foam or dimension.
  • AVOID using small glitter and microelements with these shaker pockets. These shaker pockets have tiny openings at each corner to allow for air compression. Using small glitter or microelements may result in them escaping through these openings, potentially causing a mess and reducing the effectiveness of the shaker pocket.

Shaker Pockets, Tips and Tricks, Ice Cream Sundae, Honey Bee Stamps, how to, hand made card, Stamps, stamping, die cutting, card making, frameless shaker, ilovedoingallthingscrafty,

PHOTOGRAPHY TIPs
  • I take my photos in natural light, in front of large windows. It is difficult to take pictures of these reflective cards when sunny and there is direct light as you will end up with glare on the reflective surfaces. I will wait until the sun is not shining directly into the window or when it is cloudy. 
  • If I can't wait, I have also used tissue paper on the window to diffuse the light when it is too sunny. 
  • Use foam boards to block the reflections that you may see when looking through the camera lens. 
Shaker Pockets, Tips and Tricks, Ice Cream Sundae, Honey Bee Stamps, how to, hand made card, Stamps, stamping, die cutting, card making, frameless shaker, ilovedoingallthingscrafty,

Check out another fun way to photograph your cards. Display them using the new Ornate Card Stand 😍

Shaker Pockets, Tips and Tricks, Ice Cream Sundae, Honey Bee Stamps, how to, hand made card, Stamps, stamping, die cutting, card making, frameless shaker, ilovedoingallthingscrafty,

I used coordinating papers and double-sided it to make it sturdier. Fold the stand and tuck it into your card for the recipient to display. 


Shaker Pockets, Tips and Tricks, Ice Cream Sundae, Honey Bee Stamps, how to, hand made card, Stamps, stamping, die cutting, card making, frameless shaker, ilovedoingallthingscrafty,

I hope you will save this post and refer to it the next time you create a shaker card using these pockets, especially if you haven't had the best results in the past. Make sure to watch my latest Reel to see how I use all these tips and tricks to create this yummy card.


Thank you for stopping by and until next time... Happy Crafting!
Ilda 🍨

SUPPLIES
Bee Creative A2 Shaker Pockets
Shop at:
HBS
Let's Party Paper Pad
Shop at:
SSS | SB | HBS
3D Rosette Die
3D Rosette Die
Shop at:
SSS | SB | HBS
Lovely Layers: Cupcakes & More
Shop at:
SSS | SB | HBS
You're So Extra
You're So Extra
Shop at:
SSS | SB | HBS
You're So Extra - Honey Cuts
Shop at:
SSS | SB | HBS
Ornate Card Stand - Honey Cuts
Shop at:
SSS | SB | HBS
Golden Afternoon - Sequin Mix
Shop at:
HBS
Sticky Red Tape 1/4
Sticky Red Tape 1/4"
Shop at:
HBS
Bee Creative Glue
Bee Creative Glue
Shop at:
SSS | SB | HBS
Bee Shimmery Liquid
Bee Shimmery Liquid
Shop at:
SSS | SB | HBS
Honey Bee Reverse Tweezers
Shop at:
HBS
Bee Creative Bitty Buzz Cutter
Shop at:
HBS
Platinum 6 Die Cutting Platform
Shop at:
SSS | SB | HBS
New Mini Misti
New Mini Misti
Shop at:
SSS | SB | HBS
Glossy Accents
Glossy Accents
Shop at:
SSS | AMZ | SB | HBS
To make supplies easy for you to find, I have linked them above. If something is no longer available I will link to a similar product. Affiliate links may be used depending on the product linked. Please help support my blog by using these links while shopping at no additional cost to you. For more information about the affiliates I use, please visit my disclaimer here. Thanks so much for all your support!

Enjoyed this post? Never miss out on future posts by Following this Blog

Sunday, April 14, 2024

Rainbow Seahorse Card on Bokeh Background | Picket Fence Studios

Rainbow, Seahorse, Bokeh Background, Picket Fence Studios, how to, hand made card, Stamps, stamping, die cutting, card making, ilovedoingallthingscrafty, Ocean Odyssey,Paper Pouncers,

Hello, my friends and Happy Sunday!

Today you are all invited to join the Ocean Odyssey Instagram Hop to celebrate the Picket Fence Studios new release for a chance at winning $50 GC to the shop. If you love the ocean, this release will take you there!


CARD RECIPE & SUPPLIES

Picket Fence Studios - New 
Seahorse - Seahorses of the Sea Stamps - colored using Karin Brush Pro markers, heat set in white EP.
Background waves - Ocean Wave Stencil
Iridescent Bubbles and Clay Shell - Seashells Sequin Mix Plus
Tool for Bokeh Background Ocean Green Paper Pouncer - Using Inks listed below
Essentials
Paper Pouncers - White - for white ink on Bokeh Background
Black Hybrid Ink Pad - for sentiment

Seahorses of the Sea Stamps Seahorses of the Sea Dies Ocean Wave Stencil Sea Glass Blue Paper Glaze  Seashells Sequin Mix Plus Ocean Green Paper Pouncer Ocean Breeze Fabulous Foiling Card Stock

Other supplies used
Shark Tooth White Atelier Ink - Stamping/background
Karin BRUSHMARKER PRO - Seahorse colors
Prisma Glitter - glitter edge
Sakura Quickie Glue Pen - for gluing the glitter edge

Seahorses of the Sea Stamps Seahorses of the Sea Dies Ocean Wave Stencil Sea Glass Blue Paper Glaze  Seashells Sequin Mix Plus Ocean Green Paper Pouncer Ocean Breeze Fabulous Foiling Card Stock

Here is a closer look at all the details! 

Seahorses of the Sea Stamps Seahorses of the Sea Dies Ocean Wave Stencil Sea Glass Blue Paper Glaze  Seashells Sequin Mix Plus Ocean Green Paper Pouncer Ocean Breeze Fabulous Foiling Card Stock

I hope you have been inspired by this Rainbow Seahorse Card, I will share a 👉Reel for those who want to watch how this card came together. Don't forget to join the hop and good luck!


Thank you for stopping by and until next time... Happy Crafting!
Ilda🐠

To make supplies easy for you to find, I have linked them above. If something is no longer available I will link to a similar product. Affiliate links may be used depending on the product linked. Please help support my blog by using these links while shopping at no additional cost to you. For more information about the affiliates I use, please visit my disclaimer here. Thanks so much for all your support!

Enjoyed this post? Never miss out on future posts by Following this Blog

Tuesday, April 9, 2024

Pretty Pawsome Shaker Card - Heffy Doodle

Paws, Shaker Card, Heffy Doodle, how to, hand made card, Stamps, stamping, die cutting, card making, ilovedoingallthingscrafty, pets, sympathy,

Hello Crafty Friends! 

I am super excited to be a guest designer this month for Heffy Doodle. I love their adorable designs and am always happy to collaborate with them.

Ever since we got our puppy, Ruby (our COVID baby), I have become more aware of what pets mean to us humans. Sadly, I wasn't raised with animals and I must admit I had no clue about the bond we share with them. So today, I thought it would be fun to make some generic pawsome cards that could be used for any occasion celebrating a pet in your life. I purposely have left the inside blank to customize the card in the future.

CARD RECIPE


I wanted to make this shaker card as clean and simple as possible and still give it an interactive element.


Paws, Shaker Card, Heffy Doodle, how to, hand made card, Stamps, stamping, die cutting, card making, ilovedoingallthingscrafty, pets, sympathy,
  • Die-cut the paw die from the Pretty Pawsome Dies from a card panel.
  • Die-cut the panel now using the largest frame from the Scalloped Imperial Frames Dies you will use the negative of the die, not the scallop piece. 
  • On another piece of paper, ink blend a yellow, pink, and blue ink to result in a rainbow blend. 
  • Die cut the paw die from the Pretty Pawsome Dies again, this time using black card stock.
  • Line up the die-cut paw pieces and glue them to the rainbow background.
  • To the top layer, attach acetate to the back of the panel, and line the edges with foam tape to create space for the shaker pieces.
  • Die cut the bone strip from the Pretty Pawsome Dies using white paper. Place the little bones and any other shaker bits in the center of the paw. 
  • Remove the protective tape layer and secure the shaker window to the background that has been trimmed to the same size. 
  • Glue the shaker frame to an A2 card base.
  • Die cut the woof sentiment from the Pretty Pawsome Dies a few times and stack them. Line up the letters on the panel and glue them in place.
  • Finish the card by adding a die-cut heart from the Happily Ever Crafter Dies to the shaker window.
Paws, Shaker Card, Heffy Doodle, how to, hand made card, Stamps, stamping, die cutting, card making, ilovedoingallthingscrafty, pets, sympathy,

Thank you for stopping by and joining me here for this pretty pawesome card, and until next time... Happy Crafting!
Ilda 🐾

SUPPLIES
Pretty Pawsome Dies
Pretty Pawsome Dies
Shop at:
SB | HD
Scalloped Imperial Frames Dies
Shop at:
SSS | HD
Happily Ever Crafter Dies
Shop at:
SSS | SB | HD
Acetate Card Panels
Acetate Card Panels
Shop at:
SSS | SB | HA
Foam Tape 1/2 inch
Foam Tape 1/2 inch
Shop at:
AMZ
Assorted Moonshine Sequins
Shop at:
SSS
Atelier Ink Sweet Petunia
Shop at:
IO3
Atelier Ink Bee Sting Yellow
Shop at:
IO3
Atelier Ink Peacock Blue
Shop at:
IO3
To make supplies easy for you to find, I have linked them above. If something is no longer available I will link to a similar product. Affiliate links may be used depending on the product linked. Please help support my blog by using these links while shopping at no additional cost to you. For more information about the affiliates I use, please visit my disclaimer here. Thanks so much for all your support!

Enjoyed this post? Never miss out on future posts by Following this Blog

Friday, April 5, 2024

Big Birthday Celebration Shaker Card | Honey Bee Stamps


birthday,Big,how to,Infinity,Honey Bee Stamps,ilovedoingallthingscrafty,hand made card,pattern Paper,Flat,Celebration Shaker Card,Frameless,crafty Tips,Die cutting,card making,

Hello friends and Happy Friday!

Today's BIG Birthday Celebration Shaker Card is part of the Honey Bee Stamps Celebration Release Instagram Hop. This type of Shaker card holds a special place in my heart as they are not only fun to create but also brings immense joy when gifted, especially for celebrations. They embody the spirit of festivity all on their own! Who can resist the urge to give them a shake? Certainly not me! 


Plus, I'm filled with gratitude and excitement knowing that Honey Bee Stamps has brought to life these pockets, inspired by an idea I shared with the card-making community years ago! Explore the origins of the shaker pocket concept by clicking HERE.

"Look Mom I'm famous", lol!
 There's my card and my name on the packaging! 

CARD RECIPE
  
SHAKER POCKET
  • Start with one Bee Creative A7 Shaker Pocket. TIP: for best results, bend the flaps, use a bone folder, and press down the edges to make it as flat as possible. TIP: DO NOT remove the protective layer before doing this step as it will scratch the acetate!
  • Trim the background to fit inside the shaker panel. I used a paper from the new Let's Party Paper Pad. TIP: Trim the panel slightly smaller than the Shaker pocket front. I trimmed 1/8th inch off of the top and the side of this 5x7 panel.
  • Create the shaker pocket by gluing 3 of the 4 tabs down. 
  • Pour your shaker elements into the pocket. I used BOKEH LIGHTS Confetti and some coordinating clay circles that I found in my stash.
  • Glue down the last tab to close up the Shaker Pocket.
  • Peel off the protective layer. TIP: I like to just remove the layer over the tabs, while leaving the front still mostly covered with the protective layer. This will prevent any scratches or fingerprints until I am ready to add my die cuts to the front of it.
  • Attach the finished pocket to the card base. TIP: for best results make sure the tape you use is strong as the acetate will try to pop up if not glued down well. I use Sticky Red Tape 1/4" and apply it as close to the edge as possible.
Big, Birthday, Celebration Shaker Card, Honey Bee Stamps, flat,Frameless ,Infinity,how to, hand made card, die cutting, card making, ilovedoingallthingscrafty,pattern Paper, crafty Tips,

CARD FRONT
Big, Birthday, Celebration Shaker Card, Honey Bee Stamps, flat,Frameless ,Infinity,how to, hand made card, die cutting, card making, ilovedoingallthingscrafty,pattern Paper, crafty Tips,

SENTIMENT
  • For the sentiment, I wanted to use black glitter card stock but could not find it so decided to try something else. I used the Big Birthday - Honey Cuts, I die-cut the top layer using black card stock and then rubbed Bee Creative Watermark Ink, and then used WOW Embossing Glitter BLACK GLINT to heat set it. It is difficult to see the glitter in the photo but there is lots of shine IRL.
  • Add tiny glue dots to the back of the die-cut, I like to use liquid glue to allow for wiggle room, plus if there is some smudging it will dry clear. TIP: If there is lots of glue smugging or accidents, use a baby wipe to wipe off excess glue. While the area is still wet, gently wipe it with a clean microfiber dry cloth. This will take care of any streaks.
  • BONUS TIP: Place a stamp block over the sentiment and allow it to dry, this will ensure the die cut is flat and allow for good adhesion to the the acetate.
Big, Birthday, Celebration Shaker Card, Honey Bee Stamps, flat,Frameless ,Infinity,how to, hand made card, die cutting, card making, ilovedoingallthingscrafty,pattern Paper, crafty Tips,

Wow, not only is this the biggest shaker card I have made, but also the most ever TIPS I have shared in making one on a blog post.

Make sure you join us over on Instagram and hop along for a chance at winning $50 GC to shop the release! Click HERE to join the Hop!

I hope you like this Big Birthday Celebration Shaker Card. And if you have had any issues making these in the past you can try some of my tips to see if they help. Thank you for stopping by and until next time... Happy Crafting!

Ilda 💖🎂

SUPPLIES
Bee Creative A7 Shaker Pockets
Shop at:
HBS
Let's Party Paper Pad
Shop at:
SSS | HBS
Lovely Layers: Party Hat - Honey Cuts
Shop at:
SSS | HBS
Lovely Layers: Party Blower - Honey Cuts
Shop at:
SSS | HBS
Lovely Layers: Sweets - Honey Cuts
Shop at:
SSS | HBS
Big Birthday - Honey Cuts
Shop at:
SSS | HBS
Let's Party Gem Stickers
Shop at:
SSS | HBS
BOKEH LIGHTS Confetti
Shop at:
HBS
Sticky Red Tape 1/4
Sticky Red Tape 1/4"
Shop at:
HBS
Bee Creative Glue
Bee Creative Glue
Shop at:
SSS | SB | HBS
Bee Creative Bitty Buzz Cutter
Shop at:
HBS
Bee Creative Watermark Ink
Shop at:
HBS
WOW Embossing Glitter BLACK GLINT
Shop at:
HBS
Glitter Paper Basics
Shop at:
SB | HA
Glossy Accents
Glossy Accents
Shop at:
SSS | AMZ | SB | HBS
To make supplies easy for you to find, I have linked them above. If something is no longer available I will link to a similar product. Affiliate links may be used depending on the product linked. Please help support my blog by using these links while shopping at no additional cost to you. For more information about the affiliates I use, please visit my disclaimer here. Thanks so much for all your support!

Enjoyed this post? Never miss out on future posts by Following this Blog