Showing posts with label STAMPtember. Show all posts

Friday, September 9, 2022

Thankful for You Floral Arrangement Card | Studio Katia - STAMPtember Exclusive Stamp Set

Thankful for You, Floral Arrangement Card, Studio Katia, STAMPtember, Grateful Florals,Simon Says Stamp,Card Making, Stamping, Die Cutting, handmade card, ilovedoingallthingscrafty, Stamps, how to,Prismacolor pencils,

Hello, my friends! 

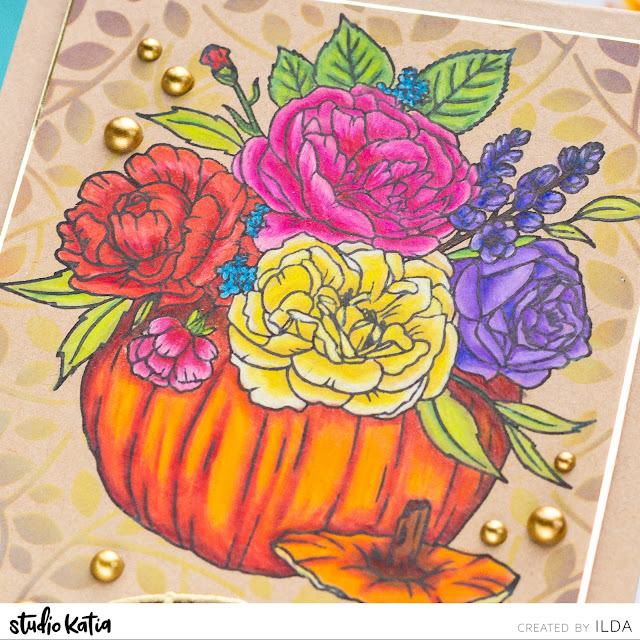
It is time to reveal the STAMPtember Studio Katia Exclusive set for Simon Says Stamp. It is a gorgeous Fall Floral arrangement set called Grateful Florals, you can buy the stamp set alone, or if you like get them with the coordinating dies!

CARD RECIPE


Here is how this card came together:

  • On Kraft cardstock, I stamped out the Grateful Florals using Blackout Ink. Leave the stamp in the Stamp positioner as you need it for re-stamping later.
  • Next, I colored in the floral arrangement using Prisma Colored pencils.
  • I then placed the finished colored image back into the Misti and restamped it with the Blackout Ink. Make sure the ink is completely dry before moving on to the next step. (Blackout ink dries quickly)
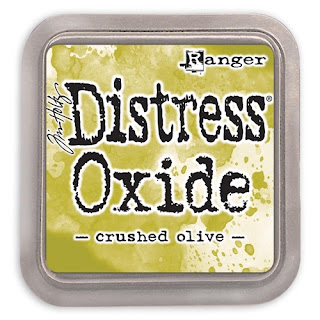
  • I then blended out a few distress Oxide Inks using the Autumn Leaves Stencil to the background. (see links below in the supply list below) 
  • OPTIONAL: Create a mask for the arrangement and or ink blend background first.  I didn't mask this as I could see where not to blend over through the stencil and I didn't want to risk pulling off or tearing anything with a mask.

Thankful for You, Floral Arrangement Card, Studio Katia, STAMPtember, Grateful Florals,Simon Says Stamp,Card Making, Stamping, Die Cutting, handmade card, ilovedoingallthingscrafty, Stamps, how to,Prismacolor pencils,

  • Once the stenciled background was dry I added the heat embossed sentiment using Gold Rush Emb. Powder. To make the sentiment stand out a bit more I added a shadow layer to the sentiment by slightly moving the position of the stamp. 
  • Next, I trimmed up the panel and added a gold shadow layer behind it before attaching it with foam tape to the kraft card base. 
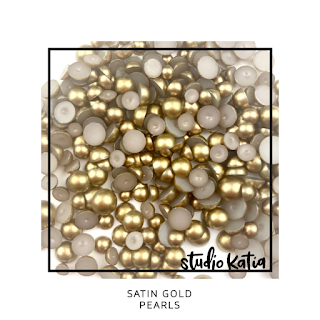
  • To finish off this beauty I added some Satin Gold Pearls.
Thankful for You, Floral Arrangement Card, Studio Katia, STAMPtember, Grateful Florals,Simon Says Stamp,Card Making, Stamping, Die Cutting, handmade card, ilovedoingallthingscrafty, Stamps, how to,Prismacolor pencils,

I'm thankful for you all and I hope you were inspired by this beautiful Fall Floral Arrangement CardπŸ’–

Thankful for You, Floral Arrangement Card, Studio Katia, STAMPtember, Grateful Florals,Simon Says Stamp,Card Making, Stamping, Die Cutting, handmade card, ilovedoingallthingscrafty, Stamps, how to,Prismacolor pencils,

Happy Crafting my friends and have a wonderful weekend!
Ilda πŸ‚

SUPPLIES
Grateful Florals
Grateful Florals
Shop at:
SSS
Grateful Florals Stamp and Die
Shop at:
SSS
Autumn Leaves Stencil
Shop at:
SK
Ink Blender Brushes
Ink Blender Brushes
Shop at:
SSS | SK
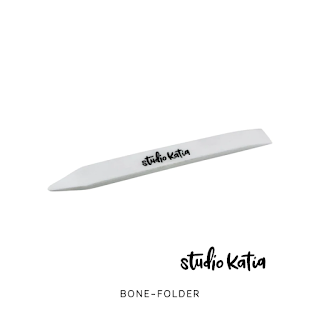
Bone Folder
Bone Folder
Shop at:
SSS | SK
Satin Gold Pearls
Satin Gold Pearls
Shop at:
SSS | SK
Black Triangle Tray
Black Triangle Tray
Shop at:
SSS | SK
Embellishment Wand
Embellishment Wand
Shop at:
SSS | SK
SK Glue
SK Glue
Shop at:
SSS | SK
SK Foam Tape
SK Foam Tape
Shop at:
SSS | SK
New Mini Misti
New Mini Misti
Shop at:
SSS | SB | HBS
Blackout Ink
Blackout Ink
Shop at:
SSS | HBS | IO3
Juicy Ink
Juicy Ink
Shop at:
SSS | HBS | IO3
Gold Rush Emb. Pwd.
Gold Rush Emb. Pwd.
Shop at:
SSS | IO3
Crushed Olive Distress Oxide Ink
Shop at:
SSS | HBS
Ground Expresso Distress Oxide Ink
Shop at:
SSS | HBS
Crackling Campfire Distress Oxide Ink
Shop at:
SSS | HBS
Gold Mirror Cardstock
Shop at:
SSS | TS US | HA
To make supplies easy for you to find, I have linked them above. If something is no longer available I will link to a similar product. Affiliate links may be used depending on the product linked. Please help support my blog by using these links while shopping at no additional cost to you. For more information about the affiliates I use, please visit my disclaimer here. Thanks so much for all your support!

Friday, September 2, 2022

Ink Swiping Technique Cards for Teachers | SSS STAMPtember Blog Party

Ink Swiping Technique, Cards for Teachers, Simon Says Stamp, STAMPtember, Card Making, Stamping, Die Cutting, handmade card, ilovedoingallthingscrafty, Stamps, how to, rainbow,Pawsitively Saturated Ink Pads

Hello Crafty Friends, it's STAMPtember!!!

Are you as EXCITED for STAMPtember as I am?!? Today's post is NOT part of a Blog Hop, it is a Blog Party and everyone is invited! Make sure you stop by the Simon Says Stamp Blog for all the Party Details!

My cards are for all the teachers out there. They don't receive enough praise and the new XL Teacher Greetings Sets should help with that 😁

CARD RECIPE


I'm not going to go into much detail with these cards as they are super simple one-layer cards and all done the same way. 


If you ever need a quick background, try Ink Swiping. It is literally taking your ink pad and swiping it across the paper. For that, I used various colors of SSS Pawsitively Saturated Ink Pads. Each card was then stamped using a sentiment from the XL Teacher Greetings Set and finished with enamel of coordinating colors. 


Let's take a closer look at this rainbow set for teachers.


Inks used Guava, Watermelon, and Cherry Positively Saturated Ink Trio and SSS Intense Black Ink.


Ink Swiping Technique, Cards for Teachers, Simon Says Stamp, STAMPtember, Card Making, Stamping, Die Cutting, handmade card, ilovedoingallthingscrafty, Stamps, how to, rainbow,Pawsitively Saturated Ink Pads

Ink Swiping Technique, Cards for Teachers, Simon Says Stamp, STAMPtember, Card Making, Stamping, Die Cutting, handmade card, ilovedoingallthingscrafty, Stamps, how to, rainbow,Pawsitively Saturated Ink Pads

For this orange card, I mixed up a couple of different orange ink trios. I used Cantaloupe, Sherbert and Mandarin Positively Saturated Ink and SSS Intense Black Ink.


Ink Swiping Technique, Cards for Teachers, Simon Says Stamp, STAMPtember, Card Making, Stamping, Die Cutting, handmade card, ilovedoingallthingscrafty, Stamps, how to, rainbow,Pawsitively Saturated Ink Pads

Ink Swiping Technique, Cards for Teachers, Simon Says Stamp, STAMPtember, Card Making, Stamping, Die Cutting, handmade card, ilovedoingallthingscrafty, Stamps, how to, rainbow,Pawsitively Saturated Ink Pads


Ink Swiping Technique, Cards for Teachers, Simon Says Stamp, STAMPtember, Card Making, Stamping, Die Cutting, handmade card, ilovedoingallthingscrafty, Stamps, how to, rainbow,Pawsitively Saturated Ink Pads

Ink Swiping Technique, Cards for Teachers, Simon Says Stamp, STAMPtember, Card Making, Stamping, Die Cutting, handmade card, ilovedoingallthingscrafty, Stamps, how to, rainbow,Pawsitively Saturated Ink Pads


Ink Swiping Technique, Cards for Teachers, Simon Says Stamp, STAMPtember, Card Making, Stamping, Die Cutting, handmade card, ilovedoingallthingscrafty, Stamps, how to, rainbow,Pawsitively Saturated Ink Pads

Ink Swiping Technique, Cards for Teachers, Simon Says Stamp, STAMPtember, Card Making, Stamping, Die Cutting, handmade card, ilovedoingallthingscrafty, Stamps, how to, rainbow,Pawsitively Saturated Ink Pads


Ink Swiping Technique, Cards for Teachers, Simon Says Stamp, STAMPtember, Card Making, Stamping, Die Cutting, handmade card, ilovedoingallthingscrafty, Stamps, how to, rainbow,Pawsitively Saturated Ink Pads

Ink Swiping Technique, Cards for Teachers, Simon Says Stamp, STAMPtember, Card Making, Stamping, Die Cutting, handmade card, ilovedoingallthingscrafty, Stamps, how to, rainbow,Pawsitively Saturated Ink Pads

This next card is my favorite with the googly eyes, it just makes me laugh! πŸ˜†


Ink Swiping Technique, Cards for Teachers, Simon Says Stamp, STAMPtember, Card Making, Stamping, Die Cutting, handmade card, ilovedoingallthingscrafty, Stamps, how to, rainbow,Pawsitively Saturated Ink Pads

Ink Swiping Technique, Cards for Teachers, Simon Says Stamp, STAMPtember, Card Making, Stamping, Die Cutting, handmade card, ilovedoingallthingscrafty, Stamps, how to, rainbow,Pawsitively Saturated Ink Pads

Click → HERE To SHOP the entire STAMPtember Release and don't forget to take advantage of the FREE with purchase codes like this one πŸ‘‡ valid now until September 4 at 11:59 EDT.


Make sure you are subscribed to the Simon Says Stamp Blog so you don't miss out on any details throughout STAMPtember as they will be celebrating every day and posting exclusive collaborations, contests, prizes, special promotions, announcements, and more surprises!


Thank YOU, Heidi, and the Simon Says Stamp Family for sending me this fun stamp set to create for today's event. And, thank YOU all for stopping by and for all the support and love you have shown me.


WATCH how these came togetherπŸ‘‡

Thank you for stopping by and until next time... Happy STAMPtember!
Ilda πŸ‘‹

Wednesday, September 2, 2020

Christmas Blessings Wreath Card | Simon Says STAMPtember | Etched Eucalyptus Wreath


Christmas Blessings, Wreath Card, Simon Says Stamp, STAMPtember, Etched Eucalyptus Wreath Die, Christmas Card, Card Making, Stamping, Die Cutting, handmade card, ilovedoingallthingscrafty, Stamps, how to,

Hello Crafty Friends!!!

Are you as EXCITED for STAMPtember as I am?!? Today's post is NOT part of a Blog Hop, it is a Blog Party and everyone is invited! Make sure you stop by the Simon Says Stamp Blog for all the Party Details!

CARD DETAILS

Well, I guess this will be my first official Christmas card of the year. I was resisting making one as long as possible as I didn't want to be reminded of our long cold winters, so I'm praying for a short one, lol!

My card features the new ETCHED EUCALYPTUS WREATH Die from the STAMPtember release.

Christmas Blessings, Wreath Card, Simon Says Stamp, STAMPtember, Etched Eucalyptus Wreath Die, Christmas Card, Card Making, Stamping, Die Cutting, handmade card, ilovedoingallthingscrafty, Stamps, how to,

Here's how this card was made:

Christmas Blessings, Wreath Card, Simon Says Stamp, STAMPtember, Etched Eucalyptus Wreath Die, Christmas Card, Card Making, Stamping, Die Cutting, handmade card, ilovedoingallthingscrafty, Stamps, how to,

  • Die-cut the CHRISTMAS BLESSINGS DIES three times using Black cardstock. Stack and glue together.
  • Position Die Sentiments on the card front, centered on the wreath and glue.

Christmas Blessings, Wreath Card, Simon Says Stamp, STAMPtember, Etched Eucalyptus Wreath Die, Christmas Card, Card Making, Stamping, Die Cutting, handmade card, ilovedoingallthingscrafty, Stamps, how to,

  • Finish embellishing the card with pearl details.
Well, I hope you were inspired by this simple design of mine today. I LOVE how my first Christmas card of the year turned out!

And for those of you who plan on doing a little shopping, Simon is giving away goodies with every purchase. All you need to do is enter the Promo code below!


Click → HERE
To SHOP the entire STAMPtember Release!

Make sure you are subscribed to the Simon Says Stamp Blog so you don't miss out on any details throughout STAMPtember as they will be celebrating every day and posting exclusive collaborations, contests, prizes, special promotions, announcements, and more surprises!

Thank you for stopping by 😊
Until next time... Happy Crafting πŸ‘‹

SUPPLIES

ETCHED EUCALYPTUS WREATH Die
Shop at:
SSS
CHRISTMAS BLESSINGS DIES
Shop at:
SSS
STITCHED RECTANGLES Dies
Shop at:
SSS
Cardstock SILVER GLITTER
Shop at:
SSS
Gina K Designs RED VELVET Cardstock
Shop at:
SSS
NEENAH SOLAR WHITE 110
Shop at:
SSS 
STUDIO KATIA GLUE
STUDIO KATIA GLUE
Shop at:
SSS 
FOAM TAPE - WHITE
FOAM TAPE - WHITE
Shop at:
SSS 
GEMINI JR. DIE CUTTER
Shop at:
SSS 
WINE BERRY PEARLS
WINE BERRY PEARLS
Shop at:
SSS 
EXOTIC ONYX PEARLS
EXOTIC ONYX PEARLS
Shop at:
SSS 

To make supplies easy for you to find, I have linked them above. If something is no longer available I will link to a similar product. Affiliate links may be used depending on the product linked. 
Please help support my blog by using these links while shopping at no additional cost to you. For more information about the affiliates I use, please visit my disclaimer here. Thanks so much for all your support!

Wednesday, September 26, 2018

Fresh Bunch | Thinking Of You Stitched Card


Hey Friends! 

I'm back again with another stitched card today and I hope you love it as much as I do 😍 This was the other card panel I completed on my vacation this summer and finally am using it! Click HERE to see the previous stitched card I made.

The stitched area was created by running the middle border die from the Stitched Borders Die Set three times on the top part of the panel and twice on the bottom half through the Sizzix, leaving a space for the sentiment in between. I then created an arrow like stitch by stitching diagonally one way on the top row and then by going the opposite way the next row. I then looped in and out through the middle to create the dash in the arrow. Repeated the same process with each color. Once the stitching was all done I added multi-medium glue to the back of the panel and glued it down onto a piece of cardstock trimmed a little smaller than the panel. I then stuck the panel under a heavy book to dry flat. 

Fresh Bunch | Thinking Of You Stitched Card by ilovedoingallthingscrafty.com
This gorgeous stamped image comes from the Fresh Bunch Stamp Set, the Studio Katia and Simon Says Stamp STAMPtember Collaboration. Hope you all got your set as once they sell out they are gone forever! 

I used Blackout ink to stamp out the image onto Neenah cardstock. Colored the florals in using a blue and green combination of Copics. (Colorless Blender, B00, B02, B05, B16, B29, B66, B69, G02, G12, YG13, YG17, YG67) Added highlights with a white Uniball Signo pen and a clear Wink of Stella was used on just the flowers (difficult to see in the photos). I then fussy cut the image as I didn't have the coordinating die.

Next, I stamped out the thinking of you onto the white space of the stitched panel and then added the floral piece to the left of the sentiment using foam tape. I then adhered a few of the August and September Crystals to it using the new Studio Katia glue, LOVE this glue!!! 

Fresh Bunch | Thinking Of You Stitched Card by ilovedoingallthingscrafty.com
Thanks so much for joining me today and hope this card inspired you!


SUPPLIES
To make supplies easy to find, I have linked them below. If something I used is no longer available I will link to a similar product.
Affiliate links may be used depending on the product. Your purchases help keep my blog running, so thanks in advance for the support!
Supplies marked with an asterisk (*) were generously sent to me.
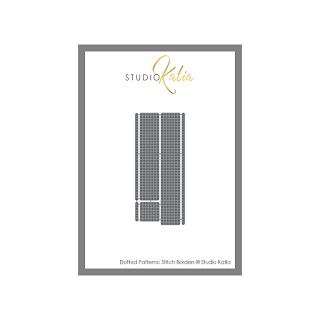
Stitch Borders
Stitch Borders
Shop at:
SSS | SK
FRESH BUNCH STAMPtember Exclusive
*FRESH BUNCH STAMPtember Exclusive
Shop at:
SSS
SEPTEMBER (SAPPHIRE) CRYSTALS
Shop at:
SSS | SK
AUGUST (SOUR APPLE) CRYSTALS
Shop at:
SSS | SK
STUDIO KATIA GLUE
STUDIO KATIA GLUE
Shop at:
SSS | SK
Triangle Tray
Triangle Tray
Shop at:
SSS | SK
Double Ended Jewel Picker
Shop at:
SSS | AMZ | HBS
Neenah Classic Crest 80 LB SMOOTH SOLAR WHITE Paper
Shop at:
SSS | AMZ
Sizzix Big Shot
Sizzix Big Shot
Shop at:
SSS | AMZ
Sizzix Big Shot Magnetic Platform
Shop at:
SSS | AMZ
STANDARD CUTTING PADS
Shop at:
SSS | AMZ
Misti Stamp Tool Original Size
Shop at:
SSS | AMZ
Blackout Hybrid Detail Ink
Shop at:
SSS | IO3
Ranger .5 Oz. MINI MULTI MEDIUM MATTE Glue
Shop at:
SSS | AMZ
 Wink of Stella GLITTER CLEAR
Wink of Stella GLITTER CLEAR
Shop at:
SSS | AMZ | HBS