Showing posts with label Frame. Show all posts

Monday, November 28, 2022

Christmas Cardinal Scene Pop-Up Frame Card | Honey Bee Stamps

Christmas, Cardinal, Scene, Pop-Up, Frame, Card,Honey Bee Stamps, Jingle Bells,Jennifer McGuire Inspired,Card Making, Stamping, Die Cutting, handmade card, ilovedoingallthingscrafty, Stamps, how to,

Hello, my friends, and happy Monday. To all my American friends, I hope you had a wonderful Thanksgiving weekend. I am thankful for YOU! 

Today I have a special card inspired by the amazing Jennifer McGuire. She shared this Pop-Up Frame technique a few months ago and I thought it was brilliant and had to give it a try with the gorgeous Make It Merry Release from Honey Bee Stamps.

CARD RECIPE

Christmas, Cardinal, Scene, Pop-Up, Frame, Card,Honey Bee Stamps, Jingle Bells,Jennifer McGuire Inspired,Card Making, Stamping, Die Cutting, handmade card, ilovedoingallthingscrafty, Stamps, how to,
  • To create the pop-up, I cut 2 pieces of paper that measured 5.5x1 inches and scored them at every 1/4 inch. Then accordion fold each piece and glue them to the sides of the back of the frame. These will create the springs for the pop-up card.
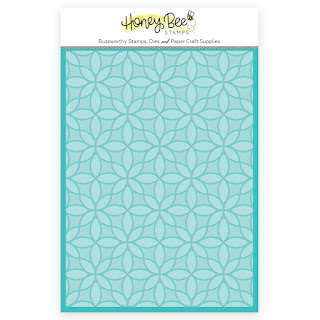
  • For the background, I used the Kaleidoscope 3D Embossing Folder and then added some splatters using the Bee Shimmery Liquid
Christmas, Cardinal, Scene, Pop-Up, Frame, Card,Honey Bee Stamps, Jingle Bells,Jennifer McGuire Inspired,Card Making, Stamping, Die Cutting, handmade card, ilovedoingallthingscrafty, Stamps, how to,
  • Glue the springs onto the background, and once dry add the background to a card base.
  • Stamp the greeting from the Home for the Holidays set in white ink and heat set it.
  • Pop it onto the card front.
Christmas, Cardinal, Scene, Pop-Up, Frame, Card,Honey Bee Stamps, Jingle Bells,Jennifer McGuire Inspired,Card Making, Stamping, Die Cutting, handmade card, ilovedoingallthingscrafty, Stamps, how to,

The cool thing about these pop-ups is that they do press down nicely and can be mailed. This one is a bit bulky so I am sure it will require extra postage. 

I hope you were inspired by my Christmas Cardinal Scene Pop-Up Frame Card. Thank you to my uber-talented friend Jennifer McGuire for this inspiration. I am sure I will be making more of these pop-ups in the future!

Thanks for stopping by and until next time... Happy Crafting!
Ilda 🐦

SUPPLIES
Layering Bells Dies
Layering Bells Dies
Shop at:
SSS | SB | HBS
Lovely Layers Winter Birds
Shop at:
SSS | SB | HBS
Lovely Layers Winter Greenery
Shop at:
SSS | SB | HBS
Layering Vintage Labels A2 Frame Dies
Shop at:
SSS | SB | HBS
Home for the Holidays
Shop at:
SSS | SB | HBS
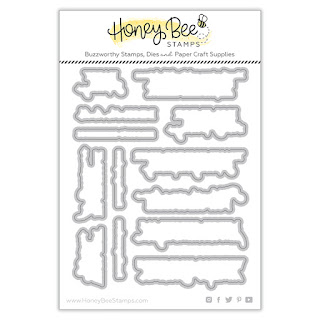
Home for the Holidays Dies
Shop at:
SSS | SB | HBS
Kaleidoscope 3D Embossing Folder
Shop at:
SSS | SB | HBS
Make it Merry Gems
Make it Merry Gems
Shop at:
SSS | SB | HBS
True Pearl Stickers
True Pearl Stickers
Shop at:
SSS | SB | HBS
Honey Bee Reverse Tweezers
Shop at:
SSS | HBS
Bee Shimmery Liquid
Bee Shimmery Liquid
Shop at:
SSS | SB | HBS
Bee Creative Brilliant White Ink Pad
Shop at:
SSS | SB | HBS
Stamping Pressure Tool
Shop at:
HBS
White Foam Dots With Tab
Shop at:
HBS
Bee Creative Bitty Buzz Cutter
Shop at:
HBS
Original Misti
Original Misti
Shop at:
SSS | AMZ | SB | HBS
Neenah Solar White 110lbs
Shop at:
SSS | AMZ | HBS
Arctic White Emb.Pwd.
Shop at:
SSS | IO3
White Gelly Roller Pen
Shop at:
SSS | AMZ | SB | HBS
Sakura Quickie Glue Pen
Shop at:
SSS | AMZ | SK
PRISMA GLITTER
PRISMA GLITTER
Shop at:
SSS
Black Triangle Tray
Black Triangle Tray
Shop at:
SSS | SK
Glossy Accents
Glossy Accents
Shop at:
SSS | AMZ | SB | HBS
To make supplies easy for you to find, I have linked them above. If something is no longer available I will link to a similar product. Affiliate links may be used depending on the product linked. Please help support my blog by using these links while shopping at no additional cost to you. For more information about the affiliates I use, please visit my disclaimer here. Thanks so much for all your support!

Watch this card come alive. Click to watch Reels below.

Monday, October 4, 2021

Framed White Sunflower Shadow Box | Honey Bee Stamps

Frame, White Sunflowers, Shadow Box, Honey Bee Stamps,Lovely Layers, how to, gift idea, die cut flowers,ilovedoingallthingscrafty,cardmaker,handmade art

Hello and happy Monday crafty friends!

First of all, I would like to thank all of you that left me the sweetest comments and messages over on my Instagram in regards to the last Framed Lovely Layers Floral Bouquet I made. This beauty is now in Jennifer McGuire's craft room and I could not be happier about that! 

Frame, White Sunflowers, Shadow Box, Honey Bee Stamps,Lovely Layers, how to, gift idea, die cut flowers,ilovedoingallthingscrafty,cardmaker,handmade art

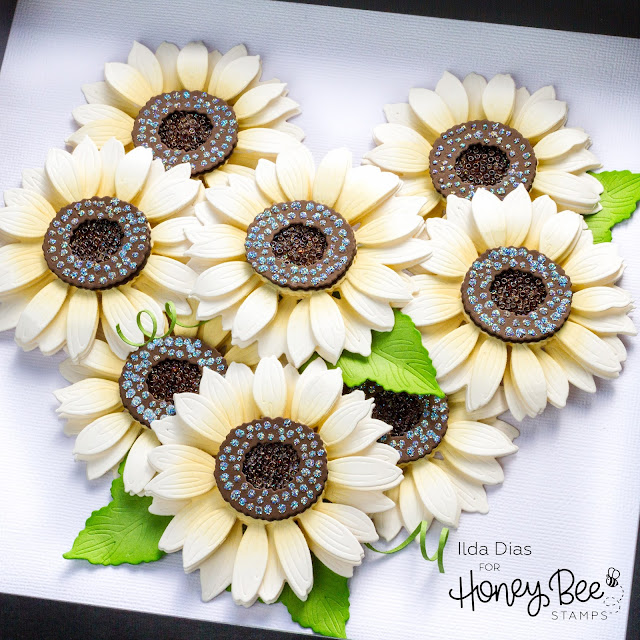
Today's project was made for a friend and colleague of mine (hi Tomina👋) who asked me to make a White Sunflower shadow box for her after she saw the White Sunflower Slimline card I made. 

Here is how this beautiful frame came together.

FRAME RECIPE


Dies:
Paper: 
  • Cream, green and brown heavyweight Colored Cardstock
Frame:
  • Square 9 ¾ " Shadow Frame from IKEA (The frame I used has been discontinued, the one I linked is very similar)
Ink:

Die Cut Machine:

Adhesives:

Embellishments:

Other Tools:

Once you have put one of these flowers together, then the rest is simple. It is just a repetitive process.

Frame, White Sunflowers, Shadow Box, Honey Bee Stamps,Lovely Layers, how to, gift idea, die cut flowers,ilovedoingallthingscrafty,cardmaker,handmade art
  1. The first thing I did was cut all the layers for the 8 sunflowers I needed to form the shape of a heart. 
  2. I then ink blended up the centers of the flowers. 
  3. Curled the flower petals.
  4. Added foam to each layer of the flower to build up the petals and create dimension.
  5. To the centers, add a layer of glue to the bottom layer. 
  6. Drop the seed beads into the glue (I tried having the hole of the beads face up). Once the glue dried, I used a brown Copic Marker to color the center brown.
  7. To the top of the center, add small drops of glossy accents. While still wet sprinkle with Sparkle Glitter and piece the centers together.
  8. Glue centers to the flower petals.
Frame, White Sunflowers, Shadow Box, Honey Bee Stamps,Lovely Layers, how to, gift idea, die cut flowers,ilovedoingallthingscrafty,cardmaker,handmade art

Arrange the flowers how you like. Once you have that figured out, glue it to the paper background of the frame. Use foam to pop up some of the flowers in place. Finish by gluing the leaves in place.

Frame, White Sunflowers, Shadow Box, Honey Bee Stamps,Lovely Layers, how to, gift idea, die cut flowers,ilovedoingallthingscrafty,cardmaker,handmade art

I love how this White Sunflower Shadow Box frame turned out, and I hope you can see from this example that you do not need all the flowers to create something beautiful! 

Want to watch a quick video of how this came together. 
Ilda 🌻

SUPPLIES
Lovely Layers: Sunflower Dies
Shop at:
SSS | SB | HBS
DETAIL BLENDER BRUSHES
Shop at:
SSS | HBS
BEE CREATIVE GLUE
BEE CREATIVE GLUE
Shop at:
SSS | SB | HBS
GEMINI JR. DIE CUTTER
Shop at:
SSS | AMZ | SB
Oxide Ink Pad ANTIQUE LINEN
Shop at:
SSS | SB | HBS
SILVER DUST | SEED BEADS
Shop at:
SSS | SK
EMBELLISHMENT WAND
EMBELLISHMENT WAND
Shop at:
SSS | SK
GLOSSY ACCENTS
GLOSSY ACCENTS
Shop at:
SSS | AMZ | SB | HBS
SPARKLE GLITTER
SPARKLE GLITTER
Shop at:
SSS | SK
Foam Squares
Foam Squares
Shop at:
SSS | HBS
To make supplies easy for you to find, I have linked them above. If something is no longer available I will link to a similar product. Affiliate links may be used depending on the product linked. Please help support my blog by using these links while shopping at no additional cost to you. For more information about the affiliates I use, please visit my disclaimer here. Thanks so much for all your support!

Monday, September 30, 2013

Baby Feet Shadow Box Keepsake - DIY Tutorial

Hi All! Today I want to share with you something that I have been meaning to show you for a while now. I'm talking about Baby Feet! I think Baby Baby Feet are the cutest things ever. Don't worry, it's not a foot fetish... I don't like all feet, only tiny ones ;)

So even before Pinterest was around I had made these shadow boxes of both my children's feet! The one on the left is my son Tomas' at 1 month old (2004) and the one on the right is my daughter Maia's feet also at one month old (2006). They are both soooo very different! The 8x10 frames I used below were bought at IKEA. Now that my kids are older they love to see how small they really were. Today I will share with you how to make your own. You may want to pin this if you have a baby in your life or on its way! Those little tiny feet eventually get huge and not so cute, so if you want to remember how they used to be you might want to give this craft a try!

Baby Feet Shadow Box Keepsake - DIY Tutorial

Very good friends of ours recently had a baby, we were so thrilled when they asked Us to be his God Parents! As a gift to them, I wanted to make little Cristiano his own Baby Feet Shadow Box. 

Baby Feet Shadow Box Keepsake - DIY Tutorial

Here is how you can make your own... 
You will need two people for this project. (Dad can hold baby, while mom gets crafty, lol!)
  1. You will need a 3D Mold Kit. The one I used was by Precious Impressions that I bought at Micheal's Craft Store. Follow the instructions as directed to create your 3D impression. 
  2. Once your impressions have dried, carefully remove the mold. It just peels right off. Because I wasn't too concerned about the top of the feet, those air bubbles don't really bother me. You can always go back and fill those air bubbles in with more plaster. 
  3. With a serrated knife I carefully shaved the top of the feet to the depth of my shadow box. You may at this point also sand an smooth down any imperfections that turned up from your molding process (bumps, air bubbles). Once I knew they would fit in the shadow box I brushed the excess dust off with a paintbrush.
  4. Next, I took some white acrylic paint and covered the entire surface of each foot. (Bottom first until dry and then the tops).  You may want to do two coats to ensure proper coverage. Paint will dry quickly because of the plaster being so porous.
  5. This step is optional but it will seal your feet forever... In a well-ventilated room, place your feet on some cardboard or newspaper. Spray your feet with a sealant Gloss Spray Sealant. If you don't like the gloss look there are mate sealants available. Let the feet completely dry. Once they are completely dry, you are ready to frame them! (I waited another 24 hours).

Here is a close up of the tiny foot! Not so tiny zoomed in, but you can see all his little creases and bumps on his feet. To mount them in the frame I used hot glue and adhered it to card stock.

Baby Feet Shadow Box Keepsake - DIY Tutorial

Before framing the feet I etched Cristiano's name into the glass. Click here for a tutorial of glass etching.

Baby Feet Shadow Box Keepsake - DIY Tutorial

Here is the finished Shadow Box. Love how it turned out! Aren't those little feet so precious? The possibilities are endless with these molds. Frame whatever you like, now that you know how!

Baby Feet Shadow Box Keepsake - DIY Tutorial

I hope this has inspired you to capture some of your own memories! A Keepsake that your child will treasure forever. If your kids are older, it's not too late! Make one of them now or do the whole family (Hands, feet whatever you want to frame)... years from now they will see how small they were at that point in time!

Thanks so much for stopping by!
Happy Crafting :)