Showing posts with label Clean and Simple. Show all posts

Monday, June 8, 2020

Simple Happy BEE-Day Shaker Card | Studio Katia

Clean and Simple, Honey Bee, Studio Katia, Card Making, Stamping, Die Cutting, handmade card, ilovedoingallthingscrafty, Birthday, Stamps, how to,

Hello, my Friends. 

Today I am sharing a super simple shaker card that could be used for any occasion depending on the sentiment you chose, this one will be for someone's BEE-day!

CARD DETAILS


To begin, I stamped out the cute little bee from the HONEY BEES stamp set, colored it using Copic Markers, and then die cut it using the HONEY BEES coordinating dies.


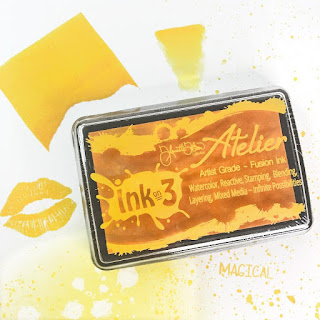
Next, I stamped out the yellow pattern on the background using yellow ink and the ZIG ZAG STRIPES background stamp. I then die cut the panel using the outer frame from the SCALLOP HONEYCOMB COVER and I also die cut the window for the shaker area using the HONEYCOMB SHAKER. To the back of the panel, I glued a piece of ACETATE

Clean and Simple, Honey Bee, Studio Katia, Card Making, Stamping, Die Cutting, handmade card, ilovedoingallthingscrafty, Birthday, Stamps, how to,

I then ran a piece of black cardstock through the die cut machine using the HONEYCOMB SHAKER and used the honeycomb shape to glue on the top of the acetate window.

With the background panel flipped onto its front, I added FOAM TAPE around the perimeter of the shaker window and then sprinkled my shaker bits which included GOLD FEVER  CONFETTI and SPARKLING HEARTS CONF. GLITTER inside the well. To close in the shaker area I used a piece of yellow cardstock and then attached the finished panel to an A2 top fold card front.

Clean and Simple, Honey Bee, Studio Katia, Card Making, Stamping, Die Cutting, handmade card, ilovedoingallthingscrafty, Birthday, Stamps, how to,

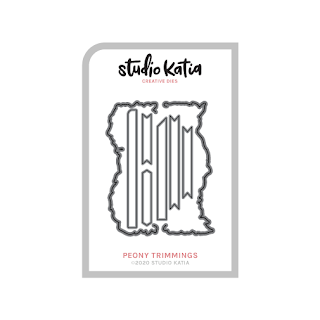
To finish the card off, I added a sentiment strip from the PEONY TRIMMINGS DIES that I stamped with a sentiment from the HONEY BEE stamp set and then popped up the cute be in the corner. 

Thank you for stopping by 😊
Until next time... Happy Crafting 👋

SUPPLIES
HONEY BEES
HONEY BEES
Shop at:
SSS | SK
HONEY BEES DIES
HONEY BEES DIES
Shop at:
SSS | SK
ZIG ZAG STRIPES
ZIG ZAG STRIPES
Shop at:
SSS | SK
HONEYCOMB SHAKER
HONEYCOMB SHAKER
Shop at:
SSS | SK
SCALLOP HONEYCOMB COVER
Shop at:
SSS | SK
PEONY TRIMMINGS DIES
Shop at:
SSS | SK
CLEAR ACETATE SHEETS
Shop at:
SSS | SK
GOLD FEVER CONFETTI
GOLD FEVER CONFETTI
Shop at:
SSS | SK
SPARKLING HEARTS CONF. GLITTER
Shop at:
SSS | SK
FOAM TAPE - WHITE
FOAM TAPE - WHITE
Shop at:
SSS | SK
STUDIO KATIA GLUE
STUDIO KATIA GLUE
Shop at:
SSS | SK
MISTI TOOL - ORIGINAL SIZE
Shop at:
SSS | AMZ | SB | HBS
GEMINI JR. DIE CUTTER
Shop at:
SSS | AMZ | SB
BLACKOUT INK
BLACKOUT INK
Shop at:
SSS | IO3
ATELIER BEE STING YELLOW
Shop at:
SSS | IO3
NEENAH SOLAR WHITE 110
Shop at:
SSS | AMZ | HBS
COPIC SKETCH
COPIC SKETCH
Shop at:
AMZ
To make supplies easy for you to find, I have linked them above. If something is no longer available I will link to a similar product. Affiliate links may be used depending on the product linked. Please help support my blog by using these links while shopping at no additional cost to you. For more information about the affiliates I use, please visit my disclaimer here. Thanks so much for all your support!


Monday, January 13, 2020

Cheeky Friendship Thank You Card | Honey Bee Stamps


Cheeky Friendship Thank You Card | Honey Bee Stamps by ilovedoingallthingscrafty.com

Happy Monday Friends!

I am back today with a super fun "cheeky" card, literally! 😂 This card is for that really great friend you have that you can joke around with, that lifts your spirits and of course is just awesome sauce. I have a few of those girls in my life and I'm sure you do too!

CARD DETAILS

This slimline card was actually quite simple to make as it is basically a one layer card with some paper piecing. The finished card measures 4 x 8.5 inches.

Cheeky Friendship Thank You Card | Honey Bee Stamps by ilovedoingallthingscrafty.com

To create the bottom, I used the largest heart die from the PIERCED XOXO HEART DIE set. For the pockets I used the STACKING POCKETS DIES. I then used a BACKGROUND BLENDER BRUSH to color in the pieces for the blue jeans using faded jeans Distress Oxide Ink.

Once everything was colored I pieced the pockets together and glued them in place. I also added the stitched details and the tiny heart buttons to the pockets using dies from the POCKET FULL OF LOVE DIE set.

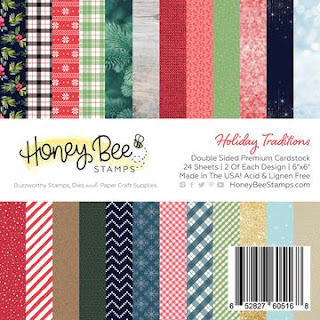
For the sweater I measured the width of the heart (derriere) at the point where I wanted the sweater to reach, I then cut the sweater pattern piece to that width and used the edge from the DECKLE EDGE A2 frames to die cut along the bottom of the sweater to give it a more realistic finish. The sweater pattern paper comes from the HOLIDAY TRADITIONS Paper Pad.

Cheeky Friendship Thank You Card | Honey Bee Stamps by ilovedoingallthingscrafty.com

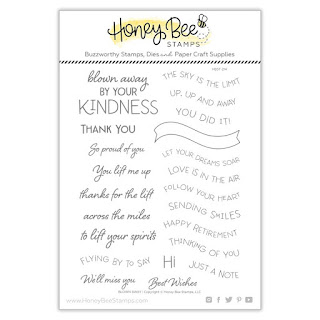
The greeting on the card comes from three different stamp sets that I stamped out using Versafine Onyx Ink and heat set it with clear embossing powder. The "Friend" stamp comes from the FRIENDSHIP stamp set, the "you are awesome sauce" comes from the AWESOME SAUCE stamp set and the "thanks for the lift" comes from the BLOWN AWAY stamp set.

Cheeky Friendship Thank You Card | Honey Bee Stamps by ilovedoingallthingscrafty.com

I had so much fun coming up with this punny card and I really hope you enjoyed this CAS "Cheeky" Friendship Thank You Card as much as I did!

Thanks so much for stopping by and until next time... Happy Crafting 👋


SUPPLIES
PIERCED XOXO HEART DIES
Shop at:
SSS | HBS
STACKING POCKETS DIES
Shop at:
SSS | HBS
POCKET FULL OF LOVE DIES
Shop at:
SSS | HBS
DECKLE EDGE A2 HONEY CUTS
DECKLE EDGE 
A2 DIES
Shop at:
SSS | SBC | HBS
FRIENDSHIP
FRIENDSHIP
Shop at:
SSS | SBC | HBS
AWESOME SAUCE SET
AWESOME SAUCE SET
Shop at:
SSS | HBS
BLOWN AWAY
BLOWN AWAY
Shop at:
SSS | HBS
HOLIDAY TRADITIONS Paper Pad
Shop at:
SSS | SBC | HBS
BACKGROUND BLENDER BRUSHES
Shop at:
SSS | HBS
Oxide Ink Pad FADED JEANS
Shop at:
SSS | SBC | HBS
Gemini Jr Die Cutting/Embossing Machine
Gemini Jr Die Machine
Shop at:
SSS | AMZ | SBC
MINI MISTI
MINI MISTI
Shop at:
SSS | AMZ | SBC | SK | HBS
Neenah  80 LB SOLAR WHITE
Neenah 80 LB SOLAR WHITE
Shop at:
SSS | AMZ
VersaFine ONYX BLACK Ink
Shop at:
SSS | AMZ | SBC | HBS
CRYSTAL CLEAR Emb Pwd
Shop at:
SSS | IO3
GUILLOTINE PAPER TRIMMER
GUILLOTINE TRIMMER
Shop at:
SSS | AMZ | SBC
STUDIO KATIA GLUE
STUDIO KATIA GLUE
Shop at:
SSS | SK
FOAM TAPE - WHITE
FOAM TAPE - WHITE
Shop at:
SSS | SK

To make supplies easy for you to find, I have linked them above. If something is no longer available I will link to a similar product. Affiliate links may be used depending on the product linked. 
Please help support my blog by using these links while shopping at no additional cost to you. For more information about the affiliates I use, please visit my disclaimer here. Thanks so much for all your support!

Friday, November 8, 2019

CAS Happy Holidays Card | Studio Katia

CAS Happy Holidays Card | Studio Katia by ilovedoingallthingscrafty.com


Well hello, again friends!

Today I have the perfect card to mass-produce for the Holidays! It was one of those cards that came together so easily and so quickly that I have to share with you my process.

CARD DETAILS

To start I die cut a piece of green and red cardstock out using the HALF STRIPED COVER. I then flipped over the die-cut green layer and glued it to the red layer. Because you will be seeing the underside of the die-cut piece, make sure your cutting plates are new or smooth, or you can use a piece of cardstock underneath to avoid the transfer of impressions onto the paper.

CAS Happy Holidays Card | Studio Katia by ilovedoingallthingscrafty.com

I then glued the panel onto the card base.

Next, I stamped out the Happy Holidays stamp from the GIFT TAG GREETINGS:WINTER onto black cardstock and then white heat embossed the letters, trimmed the piece out and then added to the center of the card front.

CAS Happy Holidays Card | Studio Katia by ilovedoingallthingscrafty.com

To finish off the card and to make it look like a present, I added the die-cut bow from the ELEGANT SCALLOP OVAL die set and glued an ICY SPARKLE CRYSTAL to the bow.

Thank you for stopping by, hope you enjoyed this quick and easy tutorial.

Until next time... Happy Crafting 👋


SUPPLIES
HALF STRIPED COVER
HALF STRIPED COVER
Shop at:
SSS | SK
ELEGANT SCALLOP OVAL
Shop at:
SSS | SK
GIFT TAG GREETINGS:WINTER
GIFT TAG GREETINGS: WINTER
Shop at:
SSS | SK
ICY SPARKLE CRYSTALS
Shop at:
SSS | SK
STUDIO KATIA GLUE
STUDIO KATIA GLUE
Shop at:
SSS | SK
NEENAH SOLAR WHITE 110
Shop at:
SSS | AMZ | HBS
MINI MISTI
MINI MISTI
Shop at:
SSS | AMZ | SBC | SK
Gemini Jr Die Cutting/Embossing Machine
Shop at:
SSS | AMZ | SBC
 UNICORN White Pigment Ink Pad
UNICORN White Pigment Ink Pad
Shop at:
SSS | AMZ
Arctic White Ultra Powder
Shop at:
SSS | IO3
Foam Tape 1/2 inch
Foam Tape 1/2 inch
Shop at:
AMZ
Double Ended Jewel Picker
Shop at:
SSS | AMZ | HBS

To make supplies easy for you to find, I have linked them above. If something is no longer available I will link to a similar product. Affiliate links may be used depending on the product linked. 
Please help support my blog by using these links while shopping at no additional cost to you. For more information about the affiliates I use, please visit my disclaimer here. Thanks so much for all your support!