Showing posts with label Christmas decoration. Show all posts

Thursday, December 3, 2015

SVG Cuts Merry Maple Manor | 3D Paper House/Gift Box | SVGCuts

Hey everyone!
Are you all ready for Christmas? I'm not even close... eeek! I have been so busy with these crafty projects that I'm starting to panic because I haven't started my Christmas shopping yet :(

Anyways, let me tell you a little about today's project... This house comes from SVGCuts Maple Manor SVG Kit. If you saw the last house I did (HERE) you may have noticed it was inspired by Thienly Azim's Home For Christmas Project.... same goes for this house! This particular house is now displayed on one of the hospital units I work on. Hopefully, it will bring some JOY and smiles to the patients, visitors, and the staff I work with! I really love how this one turned out and hope they do too :)

Christmas decoration,SVG Cuts "Merry" Maple Manor,#SVGCuts,Silhouette Cameo,ilovedoingallthingscrafty,3D House,Gift Box,

Once again, for those interested in all the files I used here is the long list!

House - Maple Manor SVG Kit
Patio fence - Country Market SVG Kit
Windows - Townhouse Windows SVG Mini Pack
 Fence - For My Valentine SVG Kit
 Chimney - December Gifts SVG Kit
Greens - 3D Wintergreens  &  Spirits of Christmas Past SVG Kit
Chandelier (modified candelabra) - Gothic Flourishes SVG Collection 


Here is a list of the alterations I made to the original house:

  • Windows (See Home For Christmas for instructions).
  • Added poke holes around the roofline to poke Christmas lights through.
  • Added all the files listed above to embellish the house and make it my own. You can do the same using any files you may have!
Cut out black Silhouettes and add them in front of the windows. When the house is lit up it will actually look like there are little people living inside it... Super cool!!!


Love the silhouette of this little girl with her present at the window... and how pretty is this wreath too! I'm always amazed when I am able to cut out small intricate pieces, check out these small leafy cuts, cut out perfectly on the Silhouette Cameo.


Here is a side shot of the Merry Maple Manor.

For the snow along the roofline, I used Snow-tex from DecoArt that I purchased at Micheal's. This stuff is great and dries in a few hours!


Thanks for stopping by, hope you liked my take on the Maple Manor turned Merry!
I still have a few more Christmas projects to make and post about! Hopefully, I will get to them soon :)


Happy Crafting Everyone :)


Thursday, November 26, 2015

SVG Cuts Mistletoe Manor | 3D Paper Christmas House | SVGCuts

Hello, my crafty Friends!

Today I have probably one of my largest projects to share with you! I'm so pleased with how it turned out, hopefully, the recipient will love it just as much! 

This house comes from SVG Cuts Mistletoe Manor SVG Kit, but of course, I had to add my own touches to it! I do have to give Thienly Azim lots of credit for my inspiration as well, as I have incorporated touches of her Home For Christmas project. (One of my all-time favorite SVG Cuts DT projects from her, if you haven't seen it it's definitely worth checking out!)

Well, what do you think? Isn't she a beauty!?
So realistic looking... I can't believe it's made out of paper!

Christmas decoration,Gift,3D,treat box,paper house,#SVGCuts,Silhouette Cameo,ilovedoingallthingscrafty,DIY Icicles,3D House,SVG Cuts Mistletoe Manor,

For those of you interested here are all the SVG Cuts kits I used:
(yup, there were lots!)

House - Mistletoe Manor SVG Kit
Patio Greens - Clara’s Christmas Strips SVG Collection
 Fence - For My Valentine SVG Kit
 Chimney - December Gifts SVG Kit
Porch Greens - 3D Wintergreens
Bows - SVG File 3D Bow 2/25/12
Silhouette Trees - Forest County SVG Collection

Some other alterations I made to the house was to create little holes in the roofline to poke my Christmas lights through. I also added siding panels to my copula, to match the middle floor siding. 


I wanted to create some realistic-looking icicles. Creating them was super simple!
Using a glue gun, simply apply the glue to a craft mat in a straight line as long as you need it. Then go back and attached the glue icicles to the line. If you don't have a craft mat you can also use parchment paper (any nonstick surface will work). Wait for the glue to dry completely and attach it to your project!


I also wanted to add some realistic-looking snow. I used Snow-tex from DecoArt, which I purchased at Micheal's. This stuff is awesome! It didn't seem to warp my paper at all, and was dry within a few hours!

For the little snowballs on the trees, I used Liquid Applique. This stuff is so much fun, it's almost magical. Goes on wet, but add your heat gun to it and watch it magically puff up!


One of my favorite touches is the Silhouette of a woman at the door. Looks like she is waving goodbye to someone!

Well, I guess that goes for me too!
Goodbye, everyone ;)
Hope you enjoyed and were inspired by my version of SVGCuts Mistletoe Manor!

Thanks for stopping by!
Happy Crafting  :)

Wednesday, November 19, 2014

Stacking Christmas Tree | Fleurette Bloom DT Project

Are you all getting into the Christmas Spirit yet? I can't wait!!!

Today I am sharing with you a super cute stacking Christmas Tree I made using Fleurette Bloom files. Love how it turned out and how functional it is too!

This will make one cute Christmas gift for sure... all I need to do is add some treats to the inside!


Here are the files you will need to recreate this tree and what I did...

(cut 5 and score down the center of each, glue them back to back)

Tree - Stacking Round Cake Box from Celebrations 3D SVG Kit 
(cut one extra box and enlarged it)

Tag - Party Hat Tag from Celebrations 3D SVG Kit 
(deleted cut lines, folded in half)

(cut smallest box and resized it)


How cute is that tag?
The stamp I used comes from Craftin Desert Divas Happy Celebrations Stamp Set


This gorgeous double sided paper has been sitting in my stash for a while!
It's from K&C Company.


Check out all the layers of boxes I have to fill up with goodies!

I think this would make a perfect teacher's gift, hostess gift or a great decoration for yourself! Hope this Stacking Christmas Tree has inspired you to be a little creative today :)

Thanks for stopping by!
Happy Crafting  :)

Thursday, December 26, 2013

Framed Paper Christmas Wreaths | SVGCuts Files


Happy Boxing Day to all that celebrate the Holiday today! For us Canadians, it's kinda like the US Black Friday, lots of crazy shopping and SALES ;) I hope you all had a very Merry Christmas and enjoyed some time with your friends and family! 

Today I want to share with you these awesome framed Paper Christmas Wreaths I created. I purposely didn't share this post sooner as I didn't want to spoil the surprise as they were given as gifts.

Back in the Fall, I had created something similar but on a much smaller scale as a Wedding gift for Mary and Leo of SVG Cuts. The post was titled Autumn "love". Since then, I had thought of making a similar project, only this time as a Christmas gift.

Here is my "White and Gold" Framed Wreath. Isn't it beautiful?!


To add some gold touches, I inked the edges of the flowers with a gold stamp pad and added a little gold glitter to the tips.


A little time-consuming and messy when working with the glitter, but so worth the end results! LOVE how they came together. The picture doesn't do the glitter justice... it is so vibrant and sparkly in person!


For those interested here is how I planned it out on the SSDE.
  1. First I grouped all the layers of my flowers together. 
  2. Next, I created a circle (not shown as covered up by the flowers below) the size I wanted my wreath to be. (As you can see the wreath is larger than the cutting mat)
  3. Resize the flowers as you like and arrange them on top of the circle you created (this will give you an idea of what the finished project will look like and how many flowers you will need to cut out).
  4. Ungroup each flower and cut. 

Here is the list of supplies and files I used to create both frames:

poinsettias - 3D Wintergreens SVG Kit
RIBBA Shadow Box Frame from IKEA - 19 ¾x19 ¾x1 ¾"
Embellished with glitter, gemstones, beads, buttons, pearls, and Ribbon
Brown and gold ink
 Hot glue and a glue gun
Scotch Quick Dry glue
White poster board 
Cut and created on the Silhouette Cameo using SSDE.

Here is a more traditional colored Christmas Wreath. I don't know which one I LOVE more!?
I guess it all depends on the rest of your Christmas decor and what would look best in your home! Don't the poinsettias look SO realistic?


By far the poinsettias from the 3D Wintergreens SVG Kit have been my most used file this Holiday Season! I LOVE how easy and beautiful they turn out each time! They are so stunning!!! I'm always amazed as to what we can make out of plain old paper these days!


For these photos, I have removed the glass from the frames. I wanted to get great pictures and avoid all the glare you get when taking pictures of a reflective surface. With the glass on, these frames look just as amazing!

Another option if you chose to do so, is to etch something across the middle of the glass. If etching intimidates you, use vinyl! Click here for an example.


I hope you enjoyed my Framed Christmas Wreaths. My Family LOVED them by the way!

It is a little late to create this as a gift for someone this year... but you can sure get an early start for next year, or why not make one for yourself  ;)

Enjoy your holidays everyone! EAT, DRINK, and stay SAFE!

Thanks for stopping by!
Happy Crafting  :)

Saturday, December 1, 2012

Santa's Flying Ferris Wheel | Interactive Christmas Decoration | SVGCuts Challenge Entry


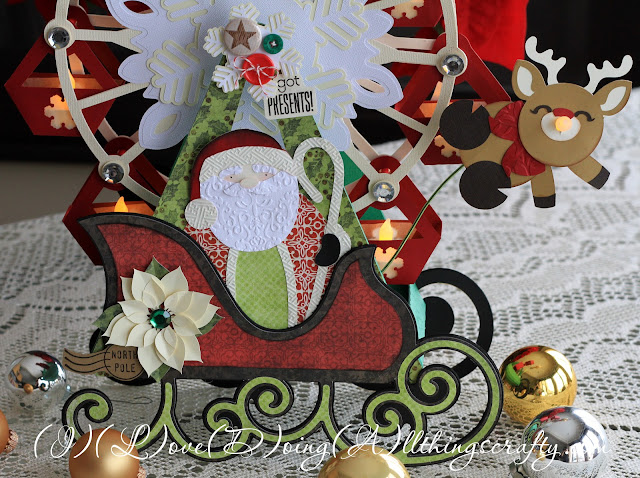
 I've been so crazy busy lately, I almost forgot about the SVG Cuts Christmas Facebook Challenge! I'm always up for the challenge and the prizes are amazing! So here is my entry... Santa's Flying Ferris Wheel! 

I absolutely love how it turned out and it makes such a great tabletop decoration. It approximately stands 16 inches high!

Santa's Flying Ferris Wheel | Interactive Christmas Decoration | SVGCuts Challenge Entry

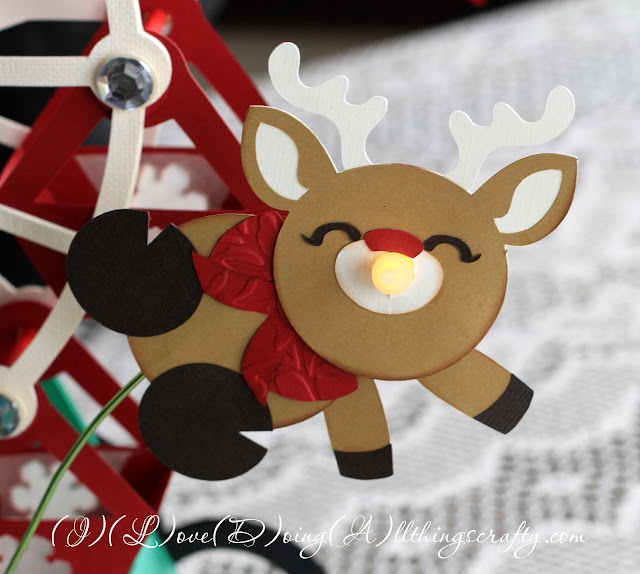
Look at Rudolf with his nose so bright! Isn't he adorable ;)
 Click here to see where I got my inspiration! Thanks, Brigit!

Santa's Flying Ferris Wheel | Interactive Christmas Decoration | SVGCuts Challenge Entry

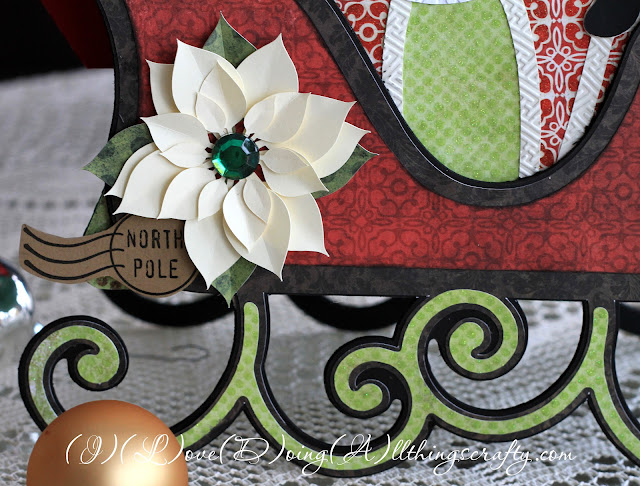
Here are some more close-up shots! To make the sled sturdy, I cut out 10 layers for each side and glued them back to back.

Santa's Flying Ferris Wheel | Interactive Christmas Decoration | SVGCuts Challenge Entry

Snowflake center... The Star button comes from Paper Play Studio! Those little flair buttons are so cute!

Santa's Flying Ferris Wheel | Interactive Christmas Decoration | SVGCuts Challenge Entry

The Ferris wheel baskets are the perfect fit for tea lights! On the front of the basket I took the image of the snowflake and cut it out of the center Shhhhh, don't tell anyone... I then used parchment paper instead of vellum, only because it was so late at night and I had no velum left. Hey, it did the trick didn't it?! The only thing is I had to use hot glue with it.... cause nothing sticks to the parchment paper as I found out, lol! 

Santa's Flying Ferris Wheel | Interactive Christmas Decoration | SVGCuts Challenge Entry

And isn't Santa so CUTE? Just want to squeeze his cheeks :)

Santa's Flying Ferris Wheel | Interactive Christmas Decoration | SVGCuts Challenge Entry

Here is the Flying Ferris Wheel at night. It looks awesome!!! The kids love it too, especially all lit up!

Santa's Flying Ferris Wheel | Interactive Christmas Decoration | SVGCuts Challenge Entry

The paper stack I used comes from Recollections Naughty or Nice Paper stack Collection. The files were all cut out using the Silhouette Cameo.

And here are the SVG Cuts kits I used:

Thanks, SVGCuts for such great files to work with!

Wish me luck.... again!
Happy Crafting :)