Wednesday, June 26, 2013

Thank you for the Music | Piano Gift Box | SVGCuts

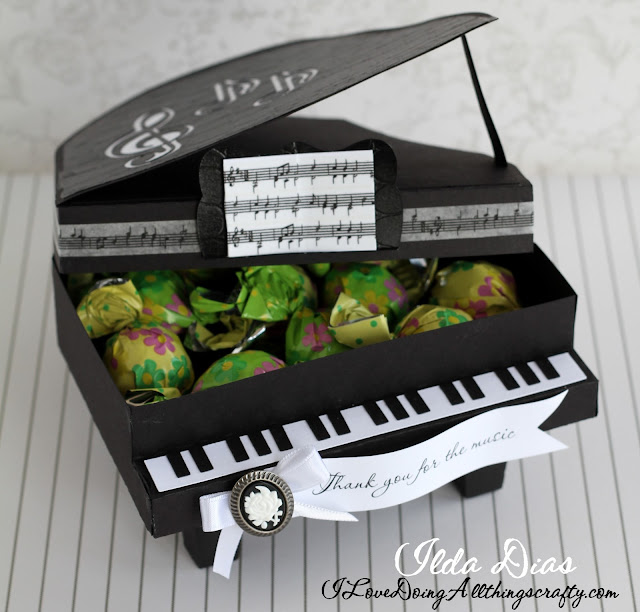
My daughter starts her summer break from piano lessons this week. So when SVGCuts came out with this piano from Thank You For the Music SVG Kit, I knew I had to make it for my daughter's piano teacher. 

Isn't it awesome?! I absolutely love how it turned out, classic and elegant!

Thank you for the Music | Piano Gift Box | SVGCuts by ilovedoingallthingscrafty.com

Thank you for the music... for giving it to me. Doesn't that remind you of the ABBA song??? I can't get it out of my head now (doesn't that drive you nuts when that happens?!?)

I didn't have a stamp to coordinate so I used the print n cut feature of the Silhouette to print and cut the tag. The font I used is called scriptina. On the lid of the box and book, I wrapped some musical note washi tape by Recollections. 


The best part of this piano is that it's functional... it has enough storage for treats or maybe even a little gift! LOVE it! So simple and elegant and surprisingly easy to put together :) 

Thank you for the Music | Piano Gift Box | SVGCuts by ilovedoingallthingscrafty.com

Thanks so much for stopping by, hope you like this little piano treat box. If you have a piano player in your life, surprise them with one of these beauties... I'm sure they'll love it!

Happy Crafting :)

Friday, June 21, 2013

DIY Custom Canvas Bags | Teacher Gifts

With the end of the school year quickly approaching, I thought I better get busy making some teacher appreciation gifts! The kids were very blessed to have amazing teachers once again this year. As a little thanks for all that they have done for my children, I always like to make something personal that will remind them of the kids. I hope they like them as much as I had fun making them!

This was my very first time creating something with the heat transfer material. I have to say I LOVE it! I want to create more with it! It was super easy!!!

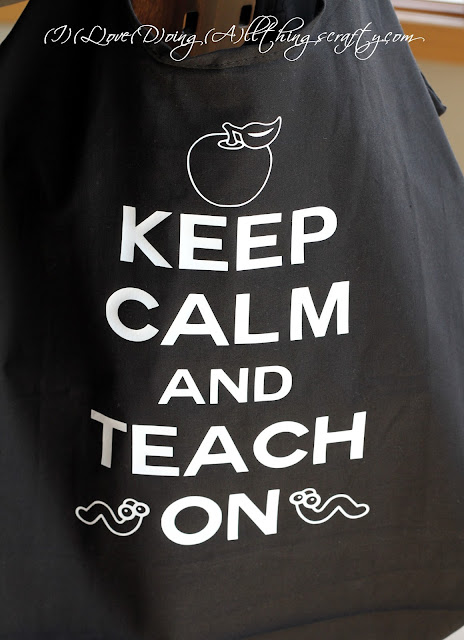
Here is the front side of the bag, I'm not sure if I will ever get tired of seeing variations of this phrase... for now, I still love it! I think the teachers will too! Click here to see another project I made using the "Craft On" version.  


DIY Custom Canvas Bags | Teacher Gifts

To the other side of the bag, I added the teacher's name. Mrs. Archer and Mrs. Attema are awesome!

DIY Custom Canvas Bags | Teacher Gifts

When they open look on the inside, they will see the kids' names... hopefully, when they see that, they will have only good memories of them... lol!

DIY Custom Canvas Bags | Teacher Gifts

The next few pics are of my daughter's bag for her teacher.

DIY Custom Canvas Bags | Teacher Gifts


DIY Custom Canvas Bags | Teacher Gifts

Here is a better look at the front design on the bag! Love those little book worms ;)

DIY Custom Canvas Bags | Teacher Gifts

Want to know how to make your own?

You will need...
Silhouette Machine and SDE software
Files (worm and apple) SVGCuts 
Silhouette Heat Transfer Material
Canvas bag (Tulip - Grab & Tote)
Iron


  • First, create the image you want to be cut on the Silhouette... here is how I did it...
    • For the image I created, I used a Couture font. Wrote the out phrase and lined it up as pictured above.
    • Next, I worked with the apple and worm file to create a border around the images by grouping different layers together and using the offset and modify functions. 
    • Once I was satisfied with the images, I resized them and positioned them next to the phrase, and made sure everything was lined up properly.
    • Group all your images together.

  • Now all that is left to do is follow the directions for the heat transfer material. Ensuring that you flip your image horizontally so that your image looks backward and setting blade depth is set correctly for the transfer material. I would advise you do a test cut first to make sure your settings are all correct. Iron on as directed. 
That is it... it's that easy! Hope you've enjoyed this DIY tutorial and project, let me know what you think and if you have any questions.

Thanks for stopping by!
Happy Crafting :)

Thursday, June 20, 2013

Pinkalicious 3D Paper Cupcake Treat Box | SVGCuts

Happy Birthday to me! Yes, today is my birthday... a few steps closer to 40! Bring it on 37... it's gonna be a great year! :) 

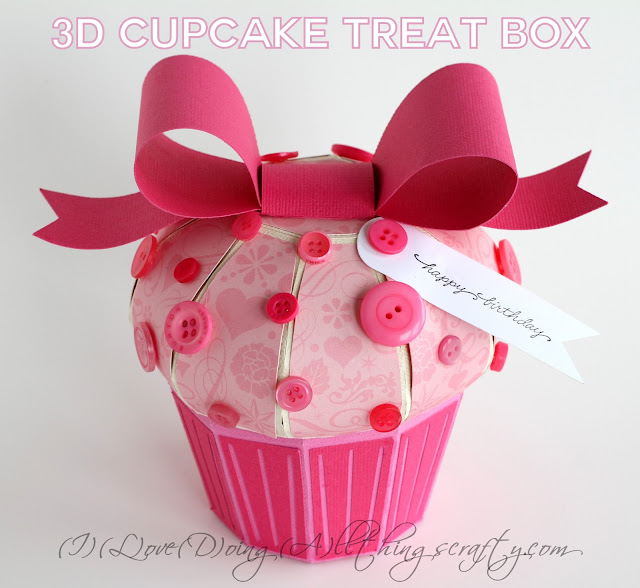
No, I didn't make this cupcake for me although I love how it turned out. I made it for a very dear friend of the family, who celebrated her Birthday this past weekend. Isn't it adorable?!

Pinkalicious 3D Paper Cupcake Treat Box | SVGCuts

Files: (bow) from SVG Cuts Gift Boxes SVG Kit
Paper: Bazzill cardstock 
Patterned Paper: Anna Griffin's Valentina Collection
Stamp: from Stampendous
Cut: with the Silhouette Cameo
I enlarged these files to fit on a 12x12 paper. I also cut little perforations to the cupcake wrap. 


This box was big enough to stuff full of chocolate treats! Want to see a few other cupcakes I've created? Click here and here :)

I hope you like this fun.... and as my daughter called it "pinkalicious" treat box as much as I enjoyed making and giving it away! 

Thanks for stopping by!
Happy Crafting :)

Sunday, June 16, 2013

Shirt Shaped Cards for Dad | SVGCuts

Happy Father's Day to all the Daddies in your lives! 


Shirt Shaped Cards for Dad by Ilovedoingallthingscrafty

Here are some fun cards I made for the men in my life. Aren't they super cute?! Love this fun paper collection. I'm sure I'll be making more of these cards... so easy and quick to put together. They would also be perfect for birthdays or summer vacations!

Shirt Shaped Cards for Dad by Ilovedoingallthingscrafty

Stamp: Bitty Regards from Unity Stamps
Paper: Carolyn Gavin Collection from K and Company 
Cut: on the Silhouette Cameo

Shirt Shaped Cards for Dad by Ilovedoingallthingscrafty

I hope today is a special day for you all! Thanks for stopping by... 


Happy Crafting :)

Thursday, June 13, 2013

"Lifesaving" Wine Box for Dad | Wine Bottle Treat Box | SVGCuts


With Father's Day coming up quickly, I thought I'd better get a few gifts ready for the Day. Both of the Grand Dads and of course Daddy deserve a little treat!

Here is a super quick Print n Cut project I made. This box is so easy to do, I'm sure it would make any man happy!

"Lifesaving" Wine Box for Dad | Wine Bottle Treat Box | SVGCuts


I didn't have any stamps to coordinate with the theme so I made a digital one with fonts using the Silhouette SDE. Love how it turned out! 

For those that LOVE wine, I'm sure some days it is a lifesaver! (Shhhh, don't tell anyone I have never drank the stuff... weird right? I know... I'm Portuguese and my Dad makes his own wine... but my stomach actually turns at the smell of it, LOL!)

"Lifesaving" Wine Box for Dad | Wine Bottle Treat Box | SVGCuts

Here is what I used to create this project...

Wine Box File from SVG Cuts Classic Gift Boxes
Digital Paper and files from Fleurette Bloom's Ships Ahoy Collection. Check out this entire Element and Paper Collection! 


Cut on the Silhouette Cameo
To make my digital stamp I had to learn how to text to path. Click here for the link to a video that was very helpful!


If you are still looking for other ideas for Father's Day. here are some of my previous "Manly" projects to inspire your creativity!


Thanks so much for stopping by, hopefully, I've inspired some "Manly" creativity in you, lol! Happy Father's Day to all of the Dad's in your life! 

Happy Crafting :)

Monday, June 10, 2013

Monster High Cake for Aleina

It has been a few weeks since my last post... crazy busy on this end. The fun never seems to stop... always something on the go! 

Since my last post, I've been working on my projects for the upcoming CEM Magazine issue, done a little traveling, worked at the hospital, done lots of yard work, housework, parented, wifed and made this awesome cake for my God Daughter Aleina that I'm sharing with you today!

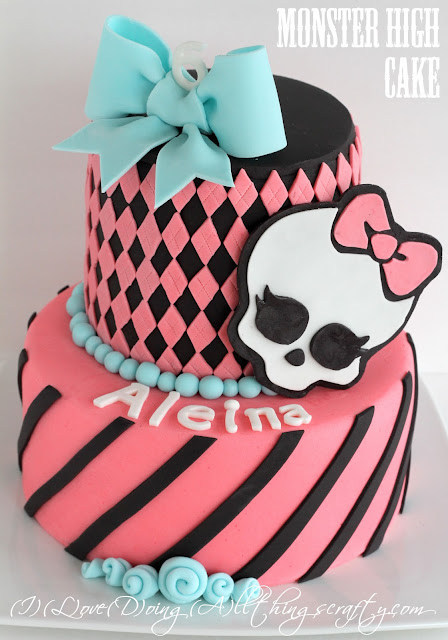
Isn't it pretty? Even if it is a little creepy and "gothy", I LOVE how it turned out :) 

Monster High Cake for Aleina

 This was a very large cake, standing at around 12 inches tall. The lower tier of the cake was 10 inches wide and was vanilla flavored. The top layer was a 6-inch chocolate cake. The entire cake was covered in a vanilla buttercream icing, covered and detailed with fondant. For those of you that are curious, this cake took approximately 7-8 hours to complete. Might make you understand and appreciate why these kinds of cakes have a higher price tag ;)

Monster High Cake for Aleina

I have to be honest I don't have any idea of what this "Monster High" is all about but that is what the Birthday girl wished for! Personally, I think if I was 6 years old, I would be freaked right out by those dolls... boy how times have changed, lol!

Monster High Cake for Aleina

I hope you liked my take on a Monster High cake. I know the birthday girl loved it and that was all that mattered! Happy Birthday, Aleina :) 

Happy Crafting :)